Linksys WRT160NL User Manual
Dewalt network router user manual
Hide thumbs
Also See for WRT160NL:
- User manual (68 pages) ,
- Quick installation manual (52 pages) ,
- Specifications (2 pages)
Table of Contents
Advertisement
Quick Links
Advertisement
Table of Contents

Related Manuals for Linksys WRT160NL


Summary of Contents for Linksys WRT160NL
- Page 1 USER GUIDE Wireless-N Broadband Router with Storage Link WRT160NL Model:...
-
Page 2: About This Guide
About This Guide Icon Descriptions While reading through the User Guide you may see various icons that call attention to specific items. Below is a description of these icons: NOTE: This check mark indicates that there is a note of interest and is something that you should pay special attention to while using the product. -
Page 3: Table Of Contents
Chapter 1: Product Overview Front Panel..........1 Back Panel . - Page 4 Appendix C: Specifications Appendix D: Warranty Information Limited Warranty ..........40 Appendix E: Regulatory Information FCC Statement .
-
Page 5: Chapter 1: Product Overview
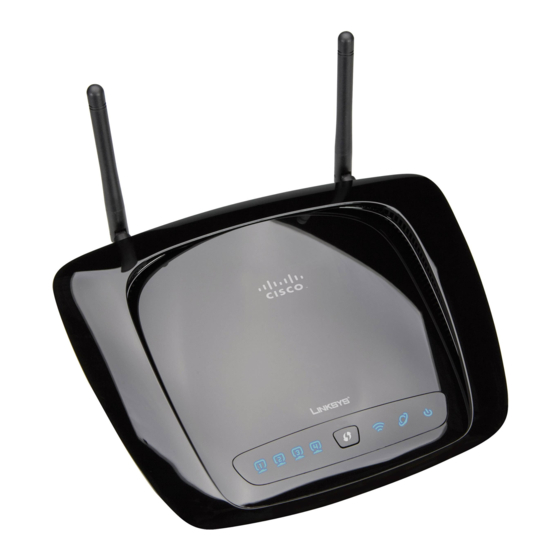
Chapter 1 Chapter 1: Product Overview Thank you for choosing the Linksys by Cisco Wireless-N Broadband Router with Storage Link. The Router lets you access the Internet via a wireless connection or through one of its four switched ports. You can also use the Router to share resources such as computers, printers and files. -
Page 6: Bottom Panel
Chapter 1 Bottom Panel Reset The Reset button is located on the right side of the product label. There are two ways to reset the Router to its factory defaults. Either press and hold the Reset button for approximately five seconds, or restore the defaults from the Administration >... -
Page 7: Chapter 2: Wireless Security Checklist
Chapter 2 Chapter 2: Wireless Security Checklist Wireless networks are convenient and easy to install, so homes with high-speed Internet access are adopting them at a rapid pace. Because wireless networking operates by sending information over radio waves, it can be more vulnerable to intruders than a traditional wired network. -
Page 8: Chapter 3: Advanced Configuration
Chapter 3 Chapter 3: Advanced Configuration After setting up the Router with the Setup Wizard (located on the CD-ROM), the Router will be ready for use. However, if you want to change its advanced settings, use the Router’s web-based utility. This chapter describes each web page of the utility and each page’s key functions. - Page 9 Chapter 3 Automatic Configuration - DHCP By default, the Router’s Internet Connection Type is set to Automatic Configuration - DHCP, which should be kept only if your ISP supports DHCP or you are connecting through a dynamic IP address. (This option usually applies to cable connections.) Internet Connection Type >...
- Page 10 Chapter 3 PPTP Server IP Address Your ISP will provide you with the IP address of the PPTP server. Username and Password Enter the Username and Password provided by your ISP. Connect on Demand: Max Idle Time the Router to cut the Internet connection after it has been inactive for a specified period of time (Max Idle Time).
- Page 11 Chapter 3 broadband Internet service has been configured with a host and domain name. In most cases, leaving these fields blank will work. MTU is the Maximum Transmission Unit. It specifies the largest packet size permitted for Internet transmission. Select Manual if you want to manually enter the largest packet size that is transmitted.
-
Page 12: Setup > Ddns
Chapter 3 amount of time, in minutes, that the user will be “leased” this dynamic IP address. After the time has expired, the user will be automatically assigned a new dynamic IP address. The default is 0 minutes, which means one day. Static DNS 1-3 The Domain Name System (DNS) is how the Internet translates domain or website names into... -
Page 13: Setup > Mac Address Clone
Chapter 3 TZO.com Setup > DDNS > TZO E-mail Address, TZO Key, and Domain Name settings of the account you set up with TZO. Internet IP Address The Router’s Internet IP address is displayed here. Because it is dynamic, it will change. Status The status of the DDNS service connection is displayed here. -
Page 14: Wireless > Basic Wireless Settings
Chapter 3 Route Entries To set up a static route between the Router and another network, select a number from the drop- down list. Click Delete This Entry to delete a static route. Enter Route Name Enter a name for the Route here, using a maximum of 25 alphanumeric characters. - Page 15 Chapter 3 Standard Channel If Standard - 20 MHz Channel is the Channel Width setting, then this setting will be available. Select the appropriate channel for your wireless network. If you are not sure which channel to select, then keep the default, Auto.
-
Page 16: Wireless > Wireless Security
Chapter 3 After the client device has been configured, click OK. Then refer back to your client device or its documentation for further instructions. Method #3 Use this method if your client device asks for the Router’s PIN number. Enter the PIN number listed on this screen. (It is also listed on the label on the bottom of the Router.) After the client device has been configured, click OK. - Page 17 Chapter 3 WPA Enterprise This option features WPA used with a RADIUS server. (This should only be used when a RADIUS server is connected to the Router.) Security Mode > WPA Enterprise Encryption WPA supports two encryption methods, TKIP and AES, with dynamic encryption keys. Select the type of algorithm, TKIP or AES.
-
Page 18: Wireless > Wireless Mac Filter
Chapter 3 WEP is a basic encryption method, which is not as secure as WPA. IMPORTANT: If you are using WEP encryption, then each device in your wireless network MUST use the same WEP encryption method and key, or else the network will not function properly. Security Mode >... -
Page 19: Wireless > Advanced Wireless Settings
Chapter 3 Wireless Client List Wireless Client List This screen shows computers and other devices on the wireless network. The list can be sorted by Client Name, Interface, IP Address, MAC Address, and Status. Select Save to MAC Address Filter List for any device you want to add to the MAC Address Filter List. -
Page 20: Security > Firewall
Chapter 3 frequency interval of the beacon. A beacon is a packet broadcast by the Router to synchronize the wireless network. The default is 100 milliseconds. DTIM Interval This value, between 1 and 255, indicates the interval of the Delivery Traffic Indication Message (DTIM). -
Page 21: Security > Vpn Passthrough
Chapter 3 Security > VPN Passthrough The VPN Passthrough screen allows you to enable VPN tunnels using IPSec, PPTP, or L2TP protocols to pass through the Router’s firewall. Security > VPN Passthrough VPN Passthrough IPSec Passthrough Internet Protocol Security (IPSec) is a suite of protocols used to implement secure exchange of packets at the IP layer. - Page 22 Chapter 3 Shared Folders Summary The Shared Folders Summary screen displays the following information: Display Name, Partition, Shared Folder, and Groups with Access. Summary To exit the Shared Folders Summary screen and return to the Disk Management screen, click Close. Format Disk Disk To format a disk and create a new partition, select...
- Page 23 Setup Server Name The default server name of the Router is WRT160NL. You can change this name on the Storage > Administration screen; refer to Storage > Administration, page 20. UPnP Media Server To use the Router’s media server...
-
Page 24: Storage > Administration
Enter the server name for the Router; it will be used for the disk and media server features. Use only alphanumeric characters (letters A to Z and numbers 0 to 9) in the server name. The default is WRT160NL. Workgroup Name Enter the workgroup name for the Router;... -
Page 25: Access Restrictions > Internet Access
Chapter 3 Create or Edit a User Account User Account User Account Name Create a name for the user. Full Name Enter the actual name of the user. Description Enter keywords to describe the user. Password Enter the password that the user will use for login Confirm Password Enter the password again to confirm. -
Page 26: Applications And Gaming > Single Port Forwarding
Chapter 3 Status Policies are disabled by default. To enable a policy, select the policy number from the drop-down menu, and select Enabled. To create a policy, follow steps 1-11. Repeat these steps to create additional policies, one at a time. Select a number from the Access Policy drop-down menu. -
Page 27: Applications And Gaming > Port Range Forwarding
Chapter 3 External Port Enter the external port number used by the server or Internet application. Check with the Internet application documentation for more information. Internal Port Enter the internal port number used by the server or Internet application. Check with the Internet application documentation for more information. -
Page 28: Applications And Gaming > Dmz
Chapter 3 Triggered Range For each application, enter the starting and ending port numbers of the triggered port number range. Check with the Internet application documentation for the port number(s) needed. Forwarded Range For each application, enter the starting and ending port numbers of the forwarded port number range. - Page 29 Chapter 3 No Acknowledgement If you want to disable the Router’s Acknowledgement feature, so the Router will not re-send data if an error occurs, then select Enabled. Otherwise, keep the default, Disabled. Internet Access Priority In this section, you can set the bandwidth priority for a variety of applications and devices.
-
Page 30: Administration > Management
Chapter 3 MAC Address QoS > MAC Address Enter a Name Enter a name for your device. MAC Address Enter the MAC address of your device. Priority Select the appropriate priority: High, Medium (Recommend), Normal, or Low. Click Add to save your changes. Your new entry will appear in the Summary list. -
Page 31: Administration > Log
Chapter 3 Access via Wireless If you are using the Router in a public domain where you are giving wireless access to your guests, you can disable wireless access to the Router’s web-based utility. You will only be able to access the utility via a wired connection if you disable the setting. -
Page 32: Administration > Diagnostics
Chapter 3 Type Select Incoming Log, Outgoing Log, Security • Log, or DHCP Client Log. <Type> Log The Incoming Log displays a temporary • log of the source IP addresses and destination port numbers for the incoming Internet traffic. The Outgoing Log displays a temporary log of the local IP addresses, destination URLs/IP addresses, and service/ port numbers for the outgoing Internet traffic. -
Page 33: Administration > Firmware Upgrade
Chapter 3 Administration > Firmware Upgrade The Firmware Upgrade screen allows you to upgrade the Router’s firmware. Do not upgrade the firmware unless you are experiencing problems with the Router or the new firmware has a feature you want to use. Administration >... -
Page 34: Status > Local Network
Chapter 3 Status > Local Network The Local Network screen displays information about the local, wired network. Status > Local Network Local Network Local MAC Address The MAC address of the Router’s local, wired interface is displayed. Router IP Address The Router’s IP address, as it appears on your local network, is displayed. -
Page 35: Appendix A: Troubleshooting
Appendix A Appendix A: Troubleshooting Your computer cannot connect to the Internet. Follow these instructions until your computer can connect to the Internet: Make sure that the Router is powered on. The Power • LED should be green and not flashing. If the Power LED is flashing, then power off all of •... - Page 36 Appendix A system settings. Click the Computer Name tab. The workgroup name is displayed.) If they differ, then change the workgroup name of the Router. Follow these instructions: Access the web-based utility of the Router. (Refer to Chapter 3: Advanced Configuration, page 4.) Storage tab.
-
Page 37: Appendix B: How To Install And Access Usb Storage
Router: \\<server_name_of_Router> Enter Server Name of Router The default server name of the Router is WRT160NL. You can change this name on the Storage > Administration screen; refer to Storage > Administration, page 20. Wireless-N Broadband Router with Storage Link... -
Page 38: Create A Shortcut To A Shared Folder
In the Router: \\<server_name_of_Router> The default server name of the Router is WRT160NL. You can change this name on the Storage > Administration screen; refer to Storage > Administration, page 20. Right-click the folder you want to share, and click Network Drive. - Page 39 Router: \\<server_name_of_Router> Computer icon. The default server name of the Router is WRT160NL. You can change this name on the Storage > Administration screen; refer to Storage > Administration, page 20. A login screen may appear. If prompted, enter your account user name and password.
-
Page 40: Advanced Configuration (Advanced Users Only)
Appendix B Right-click the folder you want to share, and click Network Drive. (The default shared folder is named Public.) Map Network Drive From the Drive drop-down menu, select an available drive letter. Select Drive Letter Finish. Click Access Mapped Drive On your desktop, double-click the icon. - Page 41 Appendix B Create a Shared Folder Storage tab. Click the Disk tab. Click the Storage > Disk Create Share. To create a shared folder, click Shared Folder In the Display Name field, create a name for the shared folder. If the shared folder should include the entire partition, select Share entire Partition and proceed to step 7.
- Page 42 Appendix B In the Group Name field, create a name for the group. In the Description field, enter keywords to describe the group. From the Access drop-down menu, select the appropriate level of access, read and write or read only. Create to apply your changes, or click Cancel to Click clear your changes.
-
Page 43: Appendix C: Specifications
Appendix C Appendix C: Specifications Model WRT160NL Standards 802.3, 802.3u, 802.11b, 802.11g, Draft 802.11n Ports Internet, Ethernet [1-4], USB, Power Buttons Wi-Fi Protected Setup, Reset LEDs LAN [1-4], Wi-Fi Protected Setup™, Wireless, Internet, Power Cabling Type CAT 5e # of Antennas... -
Page 44: Appendix D: Warranty Information
Appendix D Appendix D: Warranty Information Limited Warranty Linksys warrants this Linksys hardware product against defects in materials and workmanship under normal use for the Warranty Period, which begins on the date of purchase by the original end-user purchaser and lasts for the period specified below: One (1) year for new product •... - Page 45 Warranty Information Appendix D DATED PROOF OF ORIGINAL PURCHASE IS REQUIRED TO PROCESS WARRANTY CLAIMS. If you are requested to return your product, you will be given a Return Materials Authorization (RMA) number. You are responsible for properly packaging and shipping your product to Linksys at your cost and risk.
-
Page 46: Appendix E: Regulatory Information
Appendix E Appendix E: Regulatory Information FCC Statement This device complies with Part 15 of the FCC Rules. Operation is subject to the following two conditions: (1) This device may not cause harmful interference, and (2) this device must accept any interference received, including interference that may cause undesired operation. -
Page 47: Avis D'industrie Canada
Appendix E Avis d’Industrie Canada Cet appareil numérique de la classe B est conforme aux normes NMB-003 et RSS210 du Canada. L’utilisation de ce dispositif est autorisée seulement aux conditions suivantes : il ne doit pas produire de brouillage et il doit accepter tout brouillage radioélectrique reçu, même si ce brouillage est susceptible de compromettre le fonctionnement du dispositif. -
Page 48: User Information For Consumer Products Covered By Eu Directive 2002/96/Ec On Waste Electric And Electronic Equipment (Weee)
Appendix E User Information for Consumer Products Covered by EU Directive 2002/96/EC on Waste Electric and Electronic Equipment (WEEE) This document contains important information for users with regards to the proper disposal and recycling of Linksys products. Consumers are required to comply with this notice for all electronic products bearing the following symbol: English - Environmental Information for Customers in... - Page 49 Appendix E Eesti (Estonian) - Keskkonnaalane informatsioon Euroopa Liidus asuvatele klientidele Euroopa Liidu direktiivi 2002/96/EÜ nõuete kohaselt on seadmeid, millel on tootel või pakendil käesolev sümbol keelatud kõrvaldada koos sorteerimata olmejäätmetega. See sümbol näitab, et toode tuleks kõrvaldada eraldi tavalistest olmejäätmevoogudest.
- Page 50 Appendix E Lietuvškai (Lithuanian) - Aplinkosaugos informacija, skirta Europos Sąjungos vartotojams Europos direktyva 2002/96/EC numato, kad įrangos, kuri ir kurios pakuotė yra pažymėta šiuo simboliu (įveskite simbolį), negalima šalinti kartu su nerūšiuotomis komunalinėmis atliekomis. Šis simbolis rodo, kad gaminį reikia šalinti atskirai nuo bendro buitinių...
- Page 51 Appendix E Português (Portuguese) - Informação ambiental para clientes da União Europeia A Directiva Europeia 2002/96/CE exige que o equipamento que exibe este símbolo no produto e/ou na sua embalagem não seja eliminado junto com os resíduos municipais não separados. O símbolo indica que este produto deve ser eliminado separadamente dos resíduos domésticos regulares.
-
Page 52: Appendix F: Software End User License Agreement
Appendix F Appendix F: Software End User License Agreement Cisco Products This product from Cisco Systems, Inc. or its subsidiary licensing the Software instead of Cisco Systems, Inc. (“Cisco”) contains software (including firmware) originating from Cisco and its suppliers and may also contain software from the open source community. - Page 53 Appendix F of the Software or its related Documentation, or electronically transfer the Software or Documentation from one computer to another or over a network; (ii) alter, merge, modify, adapt, decrypt or translate the Software or related Documentation, or decompile, reverse engineer, disassemble, or otherwise reduce the Software to a human-perceivable form (except to the extent expressly permitted by law notwithstanding this provision);...
- Page 54 Appendix F In addition, Cisco may collect and store detailed information regarding your network configuration and usage for the purpose of providing you technical networking support. The information is associated with you only when you provide a unique ID number to the support representative while you are receiving help.
- Page 55 Appendix F either the Software or Documentation or both constitutes agreement by the Government that the Software and Documentation are “commercial computer software” and “commercial computer software documentation, ” and constitutes acceptance of the rights and restrictions herein. General Terms. This Agreement will be governed by and construed in accordance with the laws of the State of California, without reference to conflict of laws principles.
- Page 56 Appendix F freedom to share and change free software--to make sure the software is free for all its users. This General Public License applies to most of the Free Software Foundation’s software and to any other program whose authors commit to using it. (Some other Free Software Foundation software is covered by the GNU Lesser General Public License instead.) You can apply it to your programs, too.
- Page 57 Appendix F If the modified program normally reads commands interactively when run, you must cause it, when started running for such interactive use in the most ordinary way, to print or display an announcement including an appropriate copyright notice and a notice that there is no warranty (or else, saying that you provide a warranty) and that users may redistribute the program under these conditions,...
- Page 58 Appendix F If, as a consequence of a court judgment or allegation of patent infringement or for any other reason (not limited to patent issues), conditions are imposed on you (whether by court order, agreement or otherwise) that contradict the conditions of this License, they do not excuse you from the conditions of this License.
- Page 59 Appendix F GNU LESSER GENERAL PUBLIC LICENSE Version 2.1, February 1999 Copyright (C) 1991, 1999 Free Software Foundation, Inc. 51 Franklin Street, Fifth Floor, Boston, MA 02110-1301, Everyone is permitted to copy and distribute verbatim copies of this license document, but changing it is not allowed.
- Page 60 Appendix F freedom and the wherewithal to run that program using a modified version of the Library. The precise terms and conditions for copying, distribution and modification follow. Pay close attention to the difference between a “work based on the library” and a “work that uses the library”.
- Page 61 Appendix F Thus, it is not the intent of this section to claim rights or contest your rights to work written entirely by you; rather, the intent is to exercise the right to control the distribution of derivative or collective works based on the Library.
- Page 62 Appendix F Use a suitable shared library mechanism for linking with the Library. A suitable mechanism is one that (1) uses at run time a copy of the library already present on the user’s computer system, rather than copying library functions into the executable, and (2) will operate properly with a modified version of the library, if the user installs one, as long as the modified version is interface-compatible with the...
- Page 63 Appendix F software distributed through that system in reliance on consistent application of that system; it is up to the author/donor to decide if he or she is willing to distribute software through any other system and a licensee cannot impose that choice. This section is intended to make thoroughly clear what is believed to be a consequence of the rest of this License.
- Page 64 Appendix F The OpenSSL toolkit stays under a dual license, i.e. both the conditions of the OpenSSL License and the original SSLeay license apply to the toolkit. See below for the actual license texts. Actually both licenses are BSD-style Open Source licenses. In case of any license issues related to OpenSSL please contact openssl-core@openssl.org.
- Page 65 Software End User License Agreement Appendix F BUT NOT LIMITED TO, THE IMPLIED WARRANTIES OF MERCHANTABILITY AND FITNESS FOR A PARTICULAR PURPOSE ARE DISCLAIMED. IN NO EVENT SHALL THE AUTHOR OR CONTRIBUTORS BE LIABLE FOR ANY DIRECT, INDIRECT, INCIDENTAL, SPECIAL, EXEMPLARY, OR CONSEQUENTIAL DAMAGES (INCLUDING, BUT NOT LIMITED TO, PROCUREMENT OF SUBSTITUTE GOODS OR SERVICES;...
Need help?
Do you have a question about the WRT160NL and is the answer not in the manual?
Questions and answers