Table of Contents
Advertisement
Quick Links
Advertisement
Table of Contents

Related Manuals for Sharp 8M-B32C1


Summary of Contents for Sharp 8M-B32C1
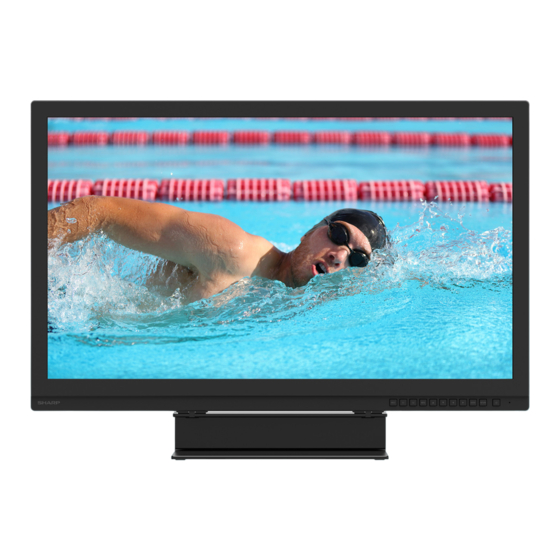
- Page 1 8M-B32C1 LCD MONITOR OPERATION MANUAL...
- Page 2 Batteries are collected at points of sale. Return is free of charge. If the equipment has been used for BUSINESS PURPOSES, please contact your SHARP dealer who will inform you about take-back. You might be charged for the costs arising from take-back. Small equipment (and small quantities) might be taken back by your local collection facility.
-
Page 3: Important Information
IMPORTANT INFORMATION WARNING: TO REDUCE THE RISK OF FIRE OR ELECTRIC SHOCK, DO NOT EXPOSE THIS PRODUCT TO RAIN OR MOISTURE. The lightning flash with arrowhead symbol, within CAUTION a triangle, is intended to alert the user to the presence of uninsulated “dangerous voltage” RISK OF ELECTRIC within the product’s enclosure that may be of sufficient magnitude to constitute a risk of electric... -
Page 4: Dear Sharp Customer
DEAR SHARP CUSTOMER Thank you for your purchase of a SHARP LCD product. To ensure safety and many years of trouble-free operation of your product, please read the Safety Precautions carefully before using this product. SAFETY PRECAUTIONS Electricity is used to perform many useful functions, but it can also cause personal injuries and property damage if improperly handled. - Page 5 SAFETY PRECAUTIONS (Continued) 19. Usage of the monitor must not be accompanied by fatal risks or dangers that, could lead directly to death, personal injury, severe physical damage or other loss, including nuclear reaction control in nuclear facility, medical life support system, and missile launch control in a weapon system.
-
Page 6: Tips And Safety Instructions
● The fan in this product has a limited lifetime. where there is likelihood of high temperature, as this may ● Please contact an authorized SHARP servicing dealer or lead to generation of excessive heat and outbreak of fire. service center for assistance with fan replacement. -
Page 7: Mounting Precautions
• Temperature condition may change when using the monitor together with the optional equipments recommended by SHARP. In such cases, please check the temperature condition specified by the optional equipments. • Do not block any ventilation openings. If the temperature inside the monitor rises, this could lead to a malfunction. - Page 8 MOUNTING PRECAUTIONS (Continued) nRemoving the stand 4. Install the provided stand mounting part covers to the holes where the stand was attached to. Install the covers so that their tabs are on the right side. Caution • If there are cables already connected, disconnect them all. 1.
-
Page 9: Table Of Contents
• Install SHARP Information Display Downloader. • Download SHARP Display Calibration Utility from SHARP Information Display Downloader. • When using SHARP Display Calibration Utility, connect the monitor to the computer in which SHARP Display Calibration Utility using a commercially available USB cable. -
Page 10: Part Names
Part Names nFront view 1. INPUT button 2. Custom button 1* 3. Custom button 2* 4. MENU button 5. Cursor control ( ) button 6. Cursor control ( ) button 7. Cursor control ( ) button 8. Cursor control ( ) button 9. -
Page 11: Connecting Peripheral Equipment
Connecting Peripheral Equipment 1. HDMI1 input terminal (8K) Caution • Use a commercially available HDMI cable (conforming to • Be sure to turn off the main power switch and disconnect the HDMI standard). the plug from the power outlet before connecting/ To input 4K video, a 4K-compliant cable is required. - Page 12 6. USB Type B port (USB2.0) • You can control the monitor from a computer. (See page 26.) • Connect to the computer with a commercially available USB cable (type A - type B). • Connect when using SHARP Display Calibration Utility.
-
Page 13: Connecting The Power Cord
Connecting the Power Cord Caution • Use only the power cord supplied with the monitor. 1. Turn off the main power switch. 2. Plug the power cord (supplied) into the AC input terminal. 3. Plug the power cord (supplied) into the power outlet. AC input Main power terminal... -
Page 14: Turning Power On/Off
Turning Power On/Off Turning power on/off Caution • Turn on the monitor first before turning on the computer or Press the POWER button to turn the power ON/OFF. playback device. Wait for 15 minutes or more before use to stabilize the image •... - Page 15 • screen appears when the power is turned on, the internal battery may be exhausted. Please contact an authorized SHARP servicing dealer or service center for assistance with battery replacement. Estimated service life of the internal battery: About 5 •...
-
Page 16: Menu Items
Menu Items Displaying the menu screen TIPS • The menu will differ depending on the input mode. Video adjustment and settings of various functions are • The menu screen will close automatically if no operation enabled. This section describes how to use the menu items. is performed for about 1 minute. -
Page 17: Menu Item Details
Menu Items Menu item details The menu will differ depending on the input mode. nPICTURE AUTO HDR DETECTION OFF ..Configure the color mode according to the signal. ON ..According to the input HDR signal (HLG or PQ), COLOR MODE automatically switches between HDR AUTO(HLG) and HDR AUTO(PQ). - Page 18 ON ..... Configures LUMINANCE, WHITE BALANCE, COLOR GAMUT, and GAMMA regarding CUSTOM1 and CUSTOM2 using SHARP Display Calibration Utility. CUSTOM SETTING can be configured in the following case: • When COLOR MODE is USER1 or USER2.
- Page 19 Menu Items ADVANCED UNIFORMITY Sets the LCD panel’s discoloration correction level. OFF ........Discoloration will not be corrected. ON ........Discoloration will be corrected. DYNAMIC RANGE EXPAND Configures local dimming control and peak brightness. MODE1 ......LOCAL DIMMING: OFF, LUMINANCE: 600cd/m MODE2 ......
- Page 20 Menu Items n EXTENSION (HDMI1/HDMI2) LUMINANCE CLIPPING* Clips area with luminance higher than the one specified in CLIP LUMINANCE according to the input HDR signal. When PQ signal is input .... Can be selected from OFF, ON, or TONE-MAPPING. In addition, luminance can be configured from CLIP LUMINANCE. According to the setting, video display is adjusted as follows.
- Page 21 SAFETY AREA (VARIABLE) Adjusts the size of safety area when SAFETY AREA is set to VARIABLE. PEAKING Highlights where the outline is sharp (i.e. where the focus is on) on the screen. ADVANCED OUTLINE ENHANCEMENT LEVEL Configures the outline enhancement level for PEAKING.
- Page 22 Menu Items FALSE COLOR Colorizes input video according to luminance. LEGEND Hides the legend of false color, or changes its location. Press the buttons while the legend is displayed to switch the legend display. MONO/BLUE ONLY Displays input video in monochrome or blue signal only. OFF ....Displays according to the input signal.
- Page 23 Menu Items nMONITOR PORTRAIT/LANDSCAPE INSTALL LANDSCAPE ..Landscape orientation PORTRAIT ..Portrait orientation VIDEO ROTATION If video is upside down when the monitor is installed in portrait orientation, you can rotate the video 180 degrees. Interlaced signals may not be displayed properly. OSD H-POSITION Adjusts the horizontal display position of menu screen.
- Page 24 Menu Items TIPS • Some items in the PICTURE menu may not be adjustable depending on settings in AUTO HDR DETECTION, COLOR MODE, and LUMINANCE PRIORITY. • When WHITE BALANCE is THRU, PRESET, USER, and COPY TO USER cannot be configured. •...
-
Page 25: Initialization (Reset)/Functional Restriction Setting (Function)
Initialization (Reset)/Functional Restriction Setting (FUNCTION) You can reset the settings to the factory default settings or STATUS ALERT restrict operations. Selects the notification method for a hardware error. OFF ....Do not notify about the error. 1. Press the MENU button and INPUT button at the same OSD &... -
Page 26: Controlling The Monitor With A Computer
Controlling the Monitor with a computer If the monitor is connected to a computer via commercially When inputting a negative value, specify a numerical value in available USB cable, the monitor can be controlled from the three digits. connected computer. Example: OFSR-127 Computer connection If a command has “R”... - Page 27 Controlling the Monitor with a computer nCommunication interval • After “OK” or “ERR” is returned, you must send the following commands. To set a timeout for the command response, specify 10 seconds or longer. • Provide an interval of 100 ms or more between the command response and the transmission of the next command.
-
Page 28: Command Table
Controlling the Monitor with a computer Command table How to read the command table Command: Command field (See page 26.) Direction: W When the “Parameter” is set in the parameter field (see page 26), the command functions as described under “Control/Response Contents”. R The returned value indicated under “Reply”... - Page 29 Controlling the Monitor with a computer Function Command Direction Parameter Reply Control/Response contents COLOR USER R-CONTRAST CRTR 0-256 0-256 “ERR” when WHBL is not set to 2. ADJUSTMENT G-CONTRAST CRTG 0-256 0-256 B-CONTRAST CRTB 0-256 0-256 R-OFFSET OFSR -127-127 -127-127 G-OFFSET OFSG -127-127...
- Page 30 Controlling the Monitor with a computer OTHERS menu Function Command Direction Parameter Reply Control/Response contents RESET ARST When COLOR MODE is set to USER X: Initialization of video adjustment settings including image quality adjustment data with Display Calibration Utility. When COLOR MODE is set to USER X: Initialization of video adjustment settings excluding image quality adjustment data with Display Calibration Utility.
-
Page 31: Troubleshooting
Remove dust if • Load noises from outside may be interfering with normal possible. Ask SHARP dealer about removing internal dust. operation. Turn off the main power and turn it on after waiting at least 5 seconds, and then check the operation. -
Page 32: Specifications
When NO SIGNAL AUTO INPUT SEL. is set to OFF. As a part of our policy of continuous improvement, SHARP reserves the right to make design and specification changes for product improvement without prior notice. The performance specification figures indicated are nominal values of production units. There may be some deviations from... - Page 33 Specifications nDimensional Drawings Note that the values shown are approximate values. Screw holes for mounting brackets Unit: inch [mm] 3-7/8 [99] 29-9/16 [751] 3-15/16 3-15/16 2-1/16 [100] [100] [52] 1 [26] 1 [26] 10-1/4 [260] 12-3/4 [324] • To attach a VESA-compliant mounting bracket, use M6 screws that are 5/16 inch (8 mm) to 3/8 inch (10 mm) longer than the thickness of the mounting bracket.
- Page 34 Specifications nCompatible signal timing (PC) Vertical Screen resolution frequency HDMI1 HDMI2 HDMI3 DisplayPort (Hz) VESA 640 × 480 800 × 600 1024 × 768 1152 × 864 1280 × 768 1280 × 800 1280 × 960 1280 × 1024 1360 × 768 1400 ×...
- Page 35 Specifications nCompatible signal timing (AV) Frequency Screen resolution HDMI1 HDMI2 HDMI3 (Hz) 7680 × 4320p Yes* 59.94 Yes* Yes* 4096 × 2160p 59.94 3840 × 2160p 59.94 1920 × 1080p 59.94 1920 × 1080i Yes* 59.94 Yes* Yes* 1280 × 720p 59.94 720 ×...
- Page 36 8M-B32C1 Me EN21J(1)