Table of Contents
Advertisement
Advertisement
Table of Contents

Related Manuals for Dell Alienware M17x-R2


Summary of Contents for Dell Alienware M17x-R2
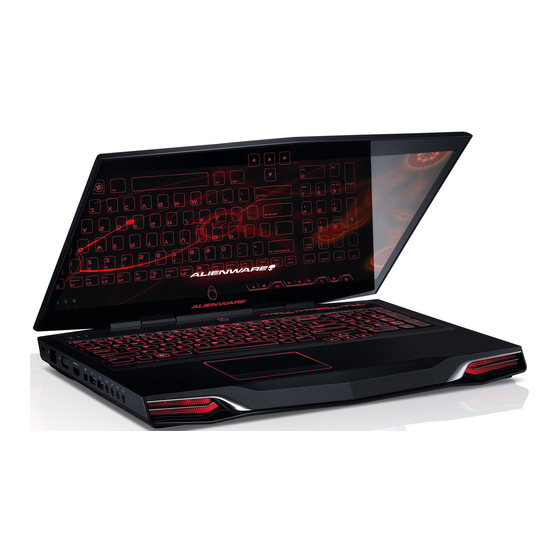
- Page 1 ALIENWARE M17x ® MOBILE MANUAL...
- Page 2 Other trademarks and trade names may be used in this manual to refer to either the entities claiming the marks and names or their products. Dell Inc. disclaims any proprietary interest in trademarks and trade names other than its own.
-
Page 3: Table Of Contents
CHAPTER 1: SETTING UP YOUR LAPTOP ........ - Page 4 My Dell Downloads . . . . . . . . . . . . . . . . . . .
-
Page 5: Introduction
Dear Valued Alienware Customer, Welcome to the Alienware family. We are thrilled to include you among the growing number of savvy high-performance computer users. The Alienware technicians who have crafted your computer have made certain that your high-performance computer is properly optimized and performs to its fullest potential. - Page 6 INTRODUCTION...
-
Page 7: Chapter 1: Setting Up Your Laptop
CHAPTER 1: SETTING UP YOUR LAPTOP CHAPTER 1: SETTING UP YOUR LAPTOP CHAPTER 1: SETTING UP YOUR LAPTOP... -
Page 8: Before Setting Up Your Laptop
M17x! ® answers to many of the questions that may arise as you explore your new laptop’ s capabilities. You may see the documentation for technical information or general use as needed to answer questions in the future, or aid you in finding answers and solutions. -
Page 9: Connect The Ac Adapter
Using an incompatible cable or improperly connecting the cable to a power strip or electrical outlet may cause fire or equipment damage. NOTE: The AC adapter should be connected to the laptop for maximum gaming performance. CHAPTER 1: SETTING UP YOUR LAPTOP... -
Page 10: Set Up Microsoft Windows
NOTE: For optimal performance of your computer, it is recommended that you download and install the latest BIOS and drivers for your computer available at support.dell.com. NOTE: For more information on the operating system and features, see support.dell.com/MyNewDell. - Page 11 NOTE: If you do not know which type of connection to select, click Help me choose or contact your ISP. 4. Follow the instructions on the screen and use the setup information provided by your ISP to complete the setup. → CHAPTER 1: SETTING UP YOUR LAPTOP...
- Page 12 CHAPTER 1: SETTING UP YOUR LAPTOP...
-
Page 13: Chapter 2: Getting To Know Your Laptop
CHAPTER 2: GETTING TO KNOW YOUR LAPTOP This chapter provides information about your new laptop to familiarize you with its various features, and get you up and running quickly. CHAPTER 2: GETTING TO KNOW YOUR LAPTOP CHAPTER 2: GETTING TO KNOW YOUR LAPTOP... -
Page 14: Front View Features
— Connects to devices using infrared. Right speaker — Combines with the left speaker to provide high quality stereo sound. CHAPTER 2: GETTING TO KNOW YOUR LAPTOP Back View Features AC adapter connector — Connects to the AC adapter to power the... -
Page 15: Left View Features
Connects your computer to external — Connects your computer to a network or — (2) Connect to USB devices, such as a mouse, — PowerShare Connects — connector Connects to high-speed serial — CHAPTER 2: GETTING TO KNOW YOUR LAPTOP... -
Page 16: Right View Features
Blu-ray Discs (optional). Ensure that the side with print or writing is facing upward when inserting discs. For more information, see “Using the Optical Drive“ on page 25. CHAPTER 2: GETTING TO KNOW YOUR LAPTOP USB connectors keyboard, printer, external drive, or MP3 player. -
Page 17: Display Features
— Combines with the right digital-array — Indicates if the camera is on or off. — Combines with the left digital-array CHAPTER 2: GETTING TO KNOW YOUR LAPTOP... -
Page 18: Computer Base And Keyboard Features
Computer Base and Keyboard Features CHAPTER 2: GETTING TO KNOW YOUR LAPTOP Status lights (3) — Indicate if the Scroll Lock, Caps Lock, or Number Lock lights are turned on or off. Keyboard — The backlit keyboard provides visibility in dark environments by illuminating all symbols on the keys. -
Page 19: Status Lights
(for more information, see “Alienware Command Center” on page 27) Fast Forward or Play Stealth Mode - Switch computer next track to low power state (for more information, see “Stealth Mode” on page 27) Decrease volume CHAPTER 2: GETTING TO KNOW YOUR LAPTOP... -
Page 20: Power Button
“Computer Base and Keyboard Features” on page 18. The color of the AlienHead rim indicates the power status. The color indicating the power status can be changed through the AlienFX CHAPTER 2: GETTING TO KNOW YOUR LAPTOP On AC adapter: Blue or custom AC-color... -
Page 21: Function Keys
Function Keys NOTE: Depending on the configuration of the laptop you purchased, some of the function keys may have no associated tasks. The <Fn> key is located near the bottom-left corner of the keyboard, and is used together with other keys to activate certain functions. Hold down the <Fn> key along with the key described below: FI –... - Page 22 CHAPTER 2: GETTING TO KNOW YOUR LAPTOP...
-
Page 23: Chapter 3: Using Your Laptop
CHAPTER 3: USING YOUR LAPTOP CHAPTER 3: USING YOUR LAPTOP CHAPTER 3: USING YOUR LAPTOP... -
Page 24: Connecting External Displays
6. Connect the other end of the power cable to a grounded three-prong power strip or wall outlet. Turn on your laptop, and then turn on your display. Display Extending the Desktop With the external display connected, right-click on the desktop and select Personalize. -
Page 25: Using Removable Media And Cards
Using the Optical Drive Your laptop has a slot load optical drive. Depending on the configuration ordered, your laptop may have one of the following drive types. These logos are used to indicate each drive’ s capabilities and media compatibility. -
Page 26: Using The Integrated Camera
Battery Pack Your laptop is equipped with a high-energy rechargeable lithium ion (Li-ion) battery pack. Battery life will vary depending on your laptop configuration, model, applications installed, power management settings, and features used. As with all batteries, the maximum capacity of this battery will decrease with time and usage. -
Page 27: Alienware Command Center
4. Select a power plan from the options shown. To customize specific settings, click Change plan settings next to the selected power plan. Reducing Power Consumption Although your laptop (together with the operating system) is capable of power conservation, there are measures you can take to reduce the power consumption: •... -
Page 28: Free Fall Sensor
Entering System Setup Turn on (or restart) your laptop. 2. While the laptop is booting, press <F2> immediately before the operating system logo appears to access the BIOS Setup Utility. If an error occurs during POST (Power On Self Test), you may also enter the BIOS Setup Utility by pressing <F2>... - Page 29 NOTE: Depending on your computer and installed devices, the items listed in this section may not appear, or may not appear exactly as listed. NOTE: For the updated system setup information, see the Service Manual at support.dell.com/manuals. Main Menu System Time Displays the system time.
- Page 30 Performance Allows you to configure fields in the Performance Options Options sub-menu (for more information, see “Performance Options Sub-Menu“ on page 31). CHAPTER 3: USING YOUR LAPTOP Advanced Menu SATA Allows you to configure the operating mode of the Operation integrated SATA hard drive controller.
- Page 31 Failsafe Allows you to enable or disable the Phoenix FailSafe security software to protect, track, and manage your laptop and your digital files if your laptop is lost or stolen. Asset Tag Displays the asset tag. CHAPTER 3: USING YOUR LAPTOP...
- Page 32 USB Storage • CD\DVD\BD • Removable Devices • Network CHAPTER 3: USING YOUR LAPTOP Exit Menu Exit Saving Allows you to exit System Setup and save your changes to Changes CMOS. Exit Allows you to exit utility without saving System Setup data Discarding to CMOS.
-
Page 33: Chapter 4: Installing Additional Or Replacement Components
You purchase components your computer www.alienware.com. NOTE: See the Service Manual at support.dell.com/manuals for installation instructions of all serviceable components. Parts purchased from Dell and Alienware will ship with specific replacement instructions. CHAPTER 4: INSTALLING ADDITIONAL OR REPLACEMENT COMPONENTS www.dell.com... -
Page 34: Before You Begin
Before You Begin This section provides procedures for removing and installing the components in your laptop. Unless otherwise noted, each procedure assumes that the following conditions exist: • You have performed the steps in “Turning Off Your Computer” and “Before Working Inside Your Computer”... - Page 35 CAUTION: Only a certified service technician should perform repairs on your computer. Damage due to servicing that is not authorized by Dell is not covered by your warranty.
-
Page 36: Replacing The Battery Pack
Replacing the Battery Pack This battery pack can easily be removed and replaced. Ensure that the laptop is properly shut down before changing the battery pack. CAUTION: To avoid damage to the laptop, use only the battery designed for this particular Alienware laptop. Do not use batteries designed for other Alienware or Dell laptops. -
Page 37: Upgrading Or Replacing Memory
Upgrading or Replacing Memory Your laptop is equipped with a configurable memory unit. The industry standard JEDEC DDR3 SODIMM memory module connectors are available for memory upgrade. The table below illustrates all the possible ways system memory can be configured. - Page 38 5. Loosen the captive screw that secures the memory-module door to the computer base. 6. Slide the memory-module door to release the tabs and lift the memory-module door out of the computer base. captive screw memory-module door Use your fingertips to carefully spread apart the memory-module connector’...
-
Page 39: Upgrading Or Replacing The Hard Drive(S)
Upgrading or Replacing the Hard Drive(s) Your laptop is equipped with two hard drive sockets. Removing the Hard Drive(s) Follow the instructions in “Before You Begin” on page 34. 2. Remove the battery pack (see “Replacing the Battery Pack“ on page 36). - Page 40 5. Loosen the four captive screws on the primary hard drive (HDD0). 6. Slide the primary hard drive (HDD0) towards the back using the pull tab and lift the primary hard drive out of the computer base. primary hard drive captive screws (4) 2 pull tab CHAPTER 4: INSTALLING ADDITIONAL OR REPLACEMENT COMPONENTS...
- Page 41 9. Remove the four screws that secure the hard drive to the hard-drive bracket. 10. Lift the hard drive out of the hard-drive bracket. hard drive screws (4) hard-drive bracket 11. Remove the interposer from the hard drive. interposer To replace the hard drive(s), perform the removal steps in reverse order. CHAPTER 4: INSTALLING ADDITIONAL OR REPLACEMENT COMPONENTS hard drive...
- Page 42 CHAPTER 4: INSTALLING ADDITIONAL OR REPLACEMENT COMPONENTS...
-
Page 43: Chapter 5: Troubleshooting
CHAPTER 5: TROUBLESHOOTING CHAPTER 5: TROUBLESHOOTING CHAPTER 5: TROUBLESHOOTING... -
Page 44: Basic Hints And Tips
• Display Choice: Press the key combination <Fn><F6> to ensure that the computer is not set to “External Only” display. • Use only the AC adapter that shipped with your laptop. CHAPTER 5: TROUBLESHOOTING Backup and General Maintenance • Always backup your important data on a regular basis and keep copies of your operating system and software safe. -
Page 45: Software Diagnostic Tools
When troubleshooting your computer, remember the following safety guidelines: • Before touching any of the computer’ s internal components, touch an unpainted portion of the chassis. Doing so will safely discharge any static electricity, which could damage your computer. • Turn off your computer and any connected peripherals. - Page 46 ® Alienware Diagnostics If you experience a problem with your Alienware laptop, run the Alienware Diagnostics before you contact Alienware for technical assistance. It is recommended that you print these procedures before you begin. NOTE: Back up all data before initiating a system recovery. It is recommended to backup critical files onto an external media before initiating recovery.
-
Page 47: Answers To Common Problems
Answers to Common Problems System The computer fails the POST The POST (Power On Self Test) tests the computer, ensuring that it meets the necessary system requirements and that all hardware is working properly before starting the remainder of the boot process. If the computer passes the POST, the computer will continue to start normally. - Page 48 Other software problems Back up your files immediately Use a virus-scanning program to check the hard drive, or CDs Save and close any open files or programs and shut down your computer through the Start menu Scan the computer for spyware: If you are experiencing slow computer performance, you frequently receive pop-up advertisements, or you are having problems connecting to the Internet, your computer might be infected with spyware.
- Page 49 Memory Memory errors detected on startup • Check memory modules for correct seating and orientation. Reseat the memory modules if applicable (see “Upgrading or Replacing Memory” on page 37). • Computers using a dual-channel memory configuration require that memory modules be installed in pairs. If you require assistance, contact Technical Support (see “CONTACTING ALIENWARE“...
- Page 50 CHAPTER 5: TROUBLESHOOTING...
-
Page 51: Chapter 6: System Recovery
AlienRespawn/DataSafe Local (see “AlienRespawn/DataSafe Local Backup” on page 52). • Dell DataSafe Online — Dell DataSafe Online is an online data backup service (see “Dell DataSafe Online Backup” on page 53). • System Drivers — You can download the latest drivers for your computer from support.dell.com. -
Page 52: Alienrespawn/Datasafe Local Backup
System Recovery Options menu and follow the instructions on the screen. NOTE: The restoration process may take an hour or more depending on the size of the data to be restored. NOTE: For more information on AlienRespawn, see knowledge base article 353560 at support.dell.com. -
Page 53: Datasafe Online Backup
NOTE: A broadband connection is recommended for fast upload/download speeds. Dell DataSafe Online is an automated backup and recovery service that helps protect your data and other important files from catastrophic incidents like theft, fire, or natural disasters. You can access the service on your computer using a password-protected account. -
Page 54: My Dell Downloads
My Dell Downloads NOTE: My Dell Downloads may not be available in all regions. Some of the software pre-installed on your new Dell computer do not include a backup CD or DVD. This software is available on the My Dell Downloads website. -
Page 55: Chapter 7: Basic Specifications
CHAPTER 7: BASIC SPECIFICATIONS This chapter provides the basic specifications of your computer. For more detailed specifications, see the Comprehensive Specifications at CHAPTER 7: BASIC SPECIFICATIONS support.dell.com/manuals. CHAPTER 7: BASIC SPECIFICATIONS... - Page 56 Computer Model Alienware M17x-R2 Dimensions Height 51.31 mm to 53.59 mm (2.02 inches to 2.11 inches) (Front to Back) Width 405.89 mm (15.98 inches) Depth 321.31 mm (12.65 inches) Weight with 9-cell battery 5.3 kg (11.8 lb) (starting at) NOTE: The weight of your laptop will vary depending on the configuration ordered and the manufacturing variability.
- Page 57 Ports and Connectors ExpressCard one ExpressCard/54 connector 8-in-1 Media Card Reader one combo connector Infrared one RC6 Consumer IR port AC Adapter Type 240 W/150 W NOTE: The 150 W AC adapter supports computers with a single graphics card and a non-Extreme Edition processor.
- Page 58 Display Type • 17.0 inch, dual-CCFL, WXGA+ (1440 x 900) • 17.0 inch, RGBLED, WUXGA (1920 x 1200) Keyboard (Backlit) Layouts U.S. and Canada; Europe; Japan Camera Pixel 2.0 megapixel Battery Type 9-cell “smart” lithium ion (86 Whr) Depth 52.3 mm (2.06 inches) Height 41.54 mm (1.63 inches) Width...
-
Page 59: Appendix A: General And Electrical Safety Precautions
APPENDIX A: GENERAL AND ELECTRICAL SAFETY PRECAUTIONS Computer Setup • Read all instructions marked on the product and in the documentation before operating your computer. • Retain all safety and operating instructions. • Never use this product near water or a heat source. •... - Page 60 General Safety Precautions • Mechanical Shock: Your computer should never be subjected to severe mechanical shocks. Careless handling of your computer may cause damage. Mechanical Shock is not covered by the warranty. • Electrical Shock: If you do not open up your computer, there is nothing to worry about.
-
Page 61: Appendix B: Contacting Alienware
2. Select your country or region. 3. Select the appropriate service or support link based on your need. 4. Choose the method of contacting Dell that is convenient for you. Websites You can learn about Alienware products and services on the following websites: •... - Page 62 Printed in China. 0W3D7VA01...
Need help?
Do you have a question about the Alienware M17x-R2 and is the answer not in the manual?
Questions and answers