Table of Contents
Advertisement
Available languages
Available languages
ATTACH YOUR RECEIPT HERE
_________________________
Serial Number
Questions, problems, missing parts? Before returning to your retailer, call our
customer service department at 1-866-439-9800, 8 a.m. - 8 p.m., EST, Monday - Sunday.
RR20192
Purchase Date
1
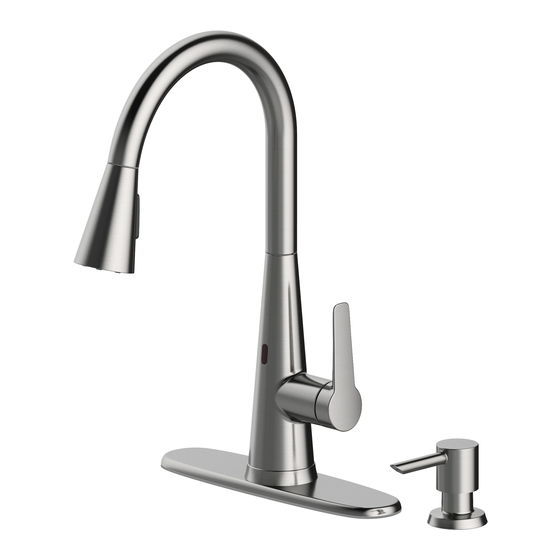
Pull-Down Sensor
Kitchen Faucet
MODEL # 67798W-120802
_________________________
ITEM # 2517130
Español p. 15
Advertisement
Table of Contents

Related Manuals for Allen + Roth 67798W-120802


Summary of Contents for Allen + Roth 67798W-120802
- Page 1 ITEM # 2517130 Pull-Down Sensor Kitchen Faucet MODEL # 67798W-120802 Español p. 15 ATTACH YOUR RECEIPT HERE _________________________ _________________________ Serial Number Purchase Date Questions, problems, missing parts? Before returning to your retailer, call our customer service department at 1-866-439-9800, 8 a.m. - 8 p.m., EST, Monday - Sunday.
-
Page 2: Package Contents
PACKAGE CONTENTS Sensor Control Box PART DESCRIPTION QUANTITY Faucet Quick install nut Quick connector (Preassembled to Faucet (A)) Deckplate Gasket Weight Weight clip Soap pump Soap assembly Soap dispenser quick install nut Soap bottle Sensor control box Battery pack "AA" Battery... -
Page 3: Safety Information
SAFETY INFORMATION Please read and understand this entire manual before attempting to assemble, operate, or install the product. WARNING • Follow the installation instructions carefully. Proper installation is the installer’s responsibility. • Failure to follow correct installation procedures can result in the faucet being loose, which can result in serious injury. - Page 4 ASSEMBLY INSTRUCTIONS 1b. Optional Deckplate Installation: Shut off the water supply. Remove the old faucet. Place the deckplate (D) and the gasket (E) on the bottom of the new faucet assembly (A). Insert the faucet assembly (A) through the hole in the deckplate (D).
- Page 5 ASSEMBLY INSTRUCTIONS 3. Install the data cable (1) to the control box connection (2). Ensure the arrows on the data cable and control box connection are aligned to one another to ensure proper installation. Ensure they are tightly connected by firmly pushing together. Secure the connection by hand tightening the nut (3) in a clockwise direction onto the threaded sensor cable.
- Page 6 ASSEMBLY INSTRUCTIONS 4b. OPTIONAL: If you want to use the faucet without the sensor feature or without power, you can attach the quick connector (1) to the receiving block (2). This bypasses the sensor feature and enables the faucet to work by operating the handle. 5.
- Page 7 ASSEMBLY INSTRUCTIONS 6. Drill a hole in the wall using a 6 mm (15/64 in.) diamater drill bit. Install the battery pack (M) using the molly anchor (1) and screw (2) provided. Insert the battery pack cable (3) into the control box connection (4). NOTE: After installing the battery pack, the light on the sensor will flash and the faucet control box will make a "click"...
- Page 8 ASSEMBLY INSTRUCTIONS 9. Making the water supply connections: Thread the nut (1) on the supply line onto the outlet of the water supply valve (2) and tighten with a wrench. Do not overtighten. NOTE: The hot side inlet tube is indicated by a label. Avoid twisting wires together or placing the wires close to each other and damaging.
-
Page 9: Care And Maintenance
OPERATION INSTRUCTIONS 2. If it is necessary to remove the quick connector (1), squeeze the tabs (2) on the quick connector and then pull down to disconnect. Squeeze Pull down CARE AND MAINTENANCE • Clean carefully by gently wiping with a grit-free damp cloth. •... - Page 10 TROUBLESHOOTING 1c. This indicates that the cartridge is damaged. Turn off the water supply, remove the handle and replace the cartridge (1). 2. The light on the sensor is flashing continuously. 2. If the handle is closed, turn the handle to the on position and move your hand in the sensor area.
- Page 11 TROUBLESHOOTING 3. The sensor is not activating the water flow. 3a. When you turn the handle to the full on position, the water will turn on. 3b. However, when you move your hand in front of the sensor, the water does not turn off as it should.
- Page 12 TROUBLESHOOTING 4. There is a low flow of water. 4a. There is a low flow of water or LED indicator in the spray head is not functioning. 4b. This could indicate that the washer in the "in" end of the control box is dirty or damaged. Remove the hose and unscrew the connector.
-
Page 13: Warranty
WARRANTY This faucet has been manufactured under the highest standard of workmanship. All parts of this faucet are warranted to be free from leaks or drips during domestic use for as long as the original purchaser owns this product. THIS EXCLUDES INDUSTRIAL, COMMERCIAL, OR BUSINESS USE. The manufacturer will replace FREE OF CHARGE, under the warranty conditions the entire unit or any part (at our option) which proves defective in material and/or workmanship under normal installation, use and service. -
Page 14: Replacement Parts List
REPLACEMENT PARTS LIST For replacement parts, call our customer service department at 1-866-439-9800, 8 a.m. - 8 p.m., EST, Monday - Sunday. PART DESCRIPTION PART # Spray head and Hose RP38508* Cartridge RP20090 Screw RP50229 Bonnet nut RP70766 Cap & O-ring RP80770* Handle RP13785*... - Page 15 ARTÍCULO # 2517130 Grifo extensible curvo para cocina con sensor MODELO # 67798W-120802 ADJUNTE SU RECIBO AQUÍ _________________________ _________________________ Número de serie Fecha de compra ¿Preguntas, problemas, piezas faltantes? Antes de volver a la tienda, llame a nuestro Departamento de Servicio al Cliente al 1-866-439-9800, de lunes a domingo de...
-
Page 16: Contenido Del Paquete
CONTENIDO DEL PAQUETE Caja de control del sensor PIEZA DESCRIPCIÓN CANTIDAD Grifo Tuerca de instalación rápida Conector rápido (preensamblado al grifo [A]) Placa de la cubierta Junta Pesa Sujetador con peso Bomba para jabón Ensamblaje para jabón Tuerca de instalación rápida del dispensador de jabón Botella de jabón Caja de control del sensor Paquete de baterías... -
Page 17: Información De Seguridad
INFORMACIÓN DE SEGURIDAD Lea y comprenda completamente este manual antes de intentar ensamblar, usar o instalar el producto. ADVERTENCIA • Siga atentamente las instrucciones de instalación. El instalador tiene la responsabilidad de realizar una instalación adecuada. • Si no sigue los procedimientos correctos de instalación el grifo puede soltarse y provocar lesiones graves. - Page 18 INSTRUCCIONES DE ENSAMBLAJE 1b. Instalación opcional con placa de cubierta: Cierre el suministro de agua. Retire el grifo viejo. Coloque la placa de la cubierta (D) y la junta (E) en la parte inferior del ensamblaje del grifo nuevo (A). Coloque el ensamblaje del grifo (A) en el orificio de la placa de la cubierta (D).
- Page 19 INSTRUCCIONES DE ENSAMBLAJE 3. Instala el cable de datos en la conexión de la caja de control (2). Asegúrese de que las flechas en el cable de datos y la conexión de la caja de control estén alineadas entre si para garantizar una instalación adecuada.
- Page 20 INSTRUCCIONES DE ENSAMBLAJE 4b. OPCIONAL: Si quiere usar el grifo sin la función del sensor o sin electricidad, puede fijar el conector rápido (1) en el bloque receptor (2). Esto elimina la función del sensor y permite que el grifo funcione moviendo la manija.
- Page 21 INSTRUCCIONES DE ENSAMBLAJE 6. Taladre un orificio en la pared con una broca de taladro de 6 mm (15/64 plg) de diámetro. Instale la batería (M) usando el anclaje molly (1) y tornillos (2) incluidos. Inserte el cable del paquete de las baterías (3) en la conexión de la caja de control (4).
-
Page 22: Instrucciones De Funcionamiento
INSTRUCCIONES DE ENSAMBLAJE 9. Cómo hacer las conexiones del suministro de agua: Enrosque la tuerca (1) de la línea de suministro en la salida de la válvula de suministro de agua (2) y apriete con una llave. No apriete demasiado. NOTA: el tubo de entrada del agua caliente se identifica con una etiqueta. -
Page 23: Cuidado Y Mantenimiento
INSTRUCCIONES DE FUNCIONAMIENTO 2. Si es necesario, retire el conector rápido (1), apriete las lengüetas (2) de la manguera y jale hacia abajo para desconectar. Apriete Jale hacia abajo CUIDADO Y MANTENIMIENTO • Limpie cuidadosa y suavemente con un paño limpio. •... - Page 24 SOLUCIÓN DE PROBLEMAS 1c. Esto indica que el cartucho está dañado. Cierre el suministro de agua, quite la manija y reemplace el cartucho (1). 2. La luz del sensor parpadea constantemente. 2. Si la manija está cerrada, muévala a la posición abierta y mueve la mano en el área del sensor.
- Page 25 SOLUCIÓN DE PROBLEMAS 3. El sensor no activa el flujo de agua. 3a. Cuando gira la manija a la posición abierta, se abre el flujo de agua. 3b. Sin embargo, cuando mueve la mano frente al sensor, el flujo de agua no se cierra como debería ser.
- Page 26 SOLUCIÓN DE PROBLEMAS 4. El caudal de agua es bajo. 4a. El caudal de agua es bajo o el indicador LED del cabezal rociador no funciona. 4b. Esto podría indicar que la arandela del extremo que dice “adentro” (“in”) de la caja de control está...
- Page 27 GARANTÍA Este grifo ha sido fabricado bajo los estándares de mano de obra más elevados. Todas las piezas de este grifo están garantizadas contra fugas o goteos durante el uso doméstico mientras lo posea el propietario original. ESTO EXCLUYE EL USO INDUSTRIAL, COMERCIAL O EN OFICINA. El fabricante reemplazará...
-
Page 28: Lista De Piezas De Repuesto
LISTA DE PIEZAS DE REPUESTO Para obtener piezas de repuesto, llame a nuestro Departamento de Servicio al Cliente al 1-866-439-9800, de lunes a domingo de 8 a.m. a 8 p.m., hora estándar del Este. PIEZA DESCRIPCIÓN PIEZA# Cabezal rociador y manguera RP38508* Cartucho RP20090 Tornillo...
Need help?
Do you have a question about the 67798W-120802 and is the answer not in the manual?
Questions and answers
Is there an override to the sensor feature temporarily (to drip water for freezing temps) or do I need to switch the hoses to bypass the sensor box?
Yes, the sensor feature on the Allen + Roth 67798W-120802 can be temporarily overridden, allowing the faucet to work by operating the handle.
This answer is automatically generated
Where can I purchase a replacement sensor box for the Allen + Roth 67798W-120802 Part number RP70708 Thanks
Call the customer service department at 1-866-439-9800 for a replacement sensor control box.
This answer is automatically generated