Garmin Fishfinder 140 Owner's Manual
Garmin fishfinder 140 marine-fishfinder: owners manual
Hide thumbs
Also See for Fishfinder 140:
- Owner's manual (32 pages) ,
- Manual (6 pages) ,
- Install manual (3 pages)
Table of Contents
Advertisement
Advertisement
Table of Contents

Related Manuals for Garmin Fishfinder 140


Summary of Contents for Garmin Fishfinder 140
- Page 1 Fishfinder 90/140 ® owner’s manual...
- Page 2 Information in this document is subject to change without notice. Garmin reserves the right to change or improve its products and to make changes in the content without obligation to notify any person or organization of such changes or improvements. Visit the Garmin Web site (www.garmin.com) for current updates and supplemental information concerning the use and operation of this and other Garmin products.
-
Page 3: Contact Garmin
Contact Garmin If you have difficulty while using your Fishfinder, or if ® you have any questions, in the U.S.A. contact Garmin Product Support by phone: 913/397.8200 or 800/800.1020, Monday–Friday, 8 AM–5 PM Central Time; or go to http://www.garmin.com/support/, and select Product Support. -
Page 4: Caring For The Fishfinder
The Fishfinder is waterproof to IEC Standard 60529 IPX7. It can withstand immersion in 1 meter of water for 30 minutes. Prolonged submersion can cause damage to the Fishfinder. After submersion, be certain to wipe and air dry the Fishfinder before reuse. Fishfinder 90/140 Owner’s Manual... -
Page 5: Table Of Contents
Using the Setup Menu ...14 Options and Settings ... 14 Appendix ... 17 Specifications ...17 Fishfinder 90 ... 17 Fishfinder 140 ... 17 Fishfinder 90 and Fishfinder 140 ... 17 Optional Accessories ...17 Software License Agreement ...18 Limited Warranty ...18 Index ... 20... -
Page 6: Warning
This product, its packaging, and its components contain chemicals known to the State of California to cause cancer, birth defects, or reproductive harm. This Notice is being provided in accordance with California’s Proposition 65. If you have any questions or would like additional information, please refer to our Web site at http://www.garmin.com/prop65. Fishfinder 90/140 Owner’s Manual... -
Page 7: Getting Started
first returned is the first on the screen. Fishfinder 90/140 Owner’s Manual Generally speaking, if the only thing between the transducer and the bottom is water, the first strong return comes from the bottom directly below the transducer, and this sets the bottom level. -
Page 8: Understanding Transducer Coverage
Wide Beam Depth �� �� ��� �� �� ���� Coverage �� �� ���� Diameter ���� ��� ��� ���� ��� ��� ���� ��� ��� ���� ��� ��� ���� ��� ��� ���� ��� ��� ���� ��� ��� Narrow Beam Fishfinder 90/140 Owner’s Manual... -
Page 9: Using Simulator Mode
Auto Gain options) just as if it were on the water. If no keys are pressed for two minutes, the Fishfinder automatically resets to default settings while in simulator mode. To exit simulator mode, turn off the Fishfinder. Fishfinder 90/140 Owner’s Manual Water depth Water temperature at the transducer You see fish... -
Page 10: Installing Your Fishfinder
Packing List (one of each, unless otherwise noted): A—Fishfinder sonar unit I—Trolling motor mount gasket B1—Swivel mount bracket J—5 mm Flat washers (2) (Fishfinder 140; optional for K—5 x 30 mm Screws (2) Fishfinder 90); or B2—Tilt mount L—10-32 Lock nut bracket (Fishfinder 90) M—4 x 12 mm Screws (4) -
Page 11: Installing The Transducer
Install the 10-32 lock nut (L) tight. You can tighten the transducer further after installation on the boat. Back of the transducer Fishfinder 90/140 Owner’s Manual Mounting the Transducer on a Trolling Motor 1. Slide the large cable tie (S) through the slot on the... -
Page 12: Mounting The Transducer On A Transom
• DO NOT mount the transducer in the path of the prop on single-drive boats. The transducer can cause cavitation that can degrade the boat’s performance and damage the prop. On twin-drive boats, mount the transducer between the drives, if possible. Fishfinder 90/140 Owner’s Manual... - Page 13 Apply marine sealant to all screw threads to prevent water from seeping into the transom. Fishfinder 90/140 Owner’s Manual To mount the transducer on a transom: Tool List (not included)—drill, 3/8" wrench or socket, 5/32" and 1/8" drill bits, masking tape, #2 Phillips screwdriver, and marine sealant.
- Page 14 Drill pilot holes here. Level Align with the transom bottom. The transducer should extend 1/8" below fiberglass hulls or 3/8" below aluminum hulls. Keep it parallel with the water line. Fishfinder 90/140 Owner’s Manual...
-
Page 15: Installing The Fishfinder Unit
To mount the bracket assembly: 1. Using the tilt mount bracket (Fishfinder 90) or the swivel base (Fishfinder 140; Fishfinder 90 option) as a template, mark the location of the three holes that you use to secure the bracket to the mounting surface. -
Page 16: Installing The Unit On The Mount Bracket
2. Adjust the Fishfinder angle, and tighten the long mounting knob until snug. 3. For the Fishfinder 140 (Fishfinder 90 option), rotate the swivel mount bracket by twisting it left or right. The bracket clicks as you turn it. Select a good viewing angle, and then tighten all knobs. -
Page 17: Testing The Transom Mount Installation
DO NOT leave your boat in the water for an extended period of time without checking for leaks. Fishfinder 90/140 Owner’s Manual To test the transom mount installation: 1. Begin testing the installation at a slow speed. If the sonar appears to be working properly gradually increase the boat’s speed observing the sonar’s... -
Page 18: Operating Your Fishfinder
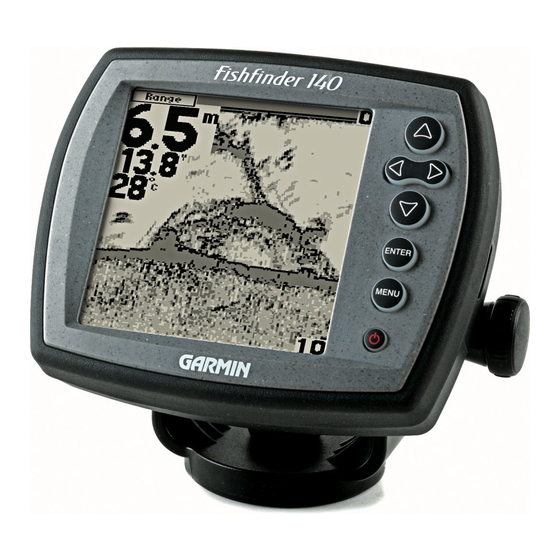
PERATING Arrow keys—the up and down Arrow keys select an item on a menu. Only the Fishfinder 140 has the right and left Arrow key that cycles through the Main menu options. ENTER key—confirms a selection. ENTER MENU key—shows or exits a menu. -
Page 19: Using The Main Menu
Scroll, Zoom, and View settings. • To view the current menu settings, press MENU. • To exit any window, press MENU. Fishfinder 90/140 Owner’s Manual • To quickly change a setting for the current option that appears in the upper-left corner of the screen (for example, the Range option in the above screen), press an Arrow key. -
Page 20: Using The Setup Menu
Deep—sets an alarm for the deep water warning at a specific depth. The settings are Off (default) and 1.0–600 feet. Fish—turns on or off (default) an alarm that sounds when the Fishfinder detects what it determines to be a fish. Fishfinder 90/140 Owner’s Manual... - Page 21 Background information appears, making fish identification easier. —the same as above with the target depth shown. Fishfinder 90/140 Owner’s Manual Beam—controls the angle of the transducer beam. Wide beam allows you to see more fish in shallow water, even off the sides of the boat. You can also choose Narrow (default) beam.
- Page 22 Beeper—controls all Fishfinder sounds. The settings are Off and On (default). Contrast—adjusts the contrast of the screen to compensate for light levels or viewing angles. Use the Arrow keys to increase or decrease the screen contrast. Defaults—restores all default settings. Fishfinder 90/140 Owner’s Manual...
-
Page 23: Appendix
Specifications are subject to change without notice. Optional Accessories Purchase the following optional accessories on the Garmin Web site: Swivel mount for the Fishfinder 90—allows your Fishfinder 90 to tilt and swivel on its mounting bracket. -
Page 24: Software License Agreement
SOFTWARE LICENSE AGREEMENT. PLEASE READ THIS AGREEMENT CAREFULLY. Garmin grants you a limited license to use the software embedded in this device (the “Software”) in binary executable form in the normal operation of the product. Title, ownership rights, and intellectual property rights in and to the Software remain in Garmin. - Page 25 RMA tracking number. The unit should be securely packed with the tracking number clearly written on the outside of the package. The unit should then be sent, freight charges prepaid, to any Garmin warranty service station. A copy of the original sales receipt is required as the proof of purchase for warranty repairs.
-
Page 26: Index
5 arrow 12 enter 12 menu 12 numbers 16 battery 16 water temperature 16 language setting 16 limited warranty 18 location, installation 9 optional accessories 17 packing list 4 product registration i Fishfinder 90/140 Owner’s Manual... - Page 27 18 temperature 16 sonar 1 specifications 17 view 14 storage ii swivel mount bracket 9, 10 Fishfinder 90/140 Owner’s Manual warning statement iv warranty, limited 18 water immersion ii water temperature number 16 whiteline 15 wiring harness 10...
- Page 32 For the latest free software updates (excluding map data) throughout the life of your Garmin products, visit the Garmin Web site at www.garmin.com. © 2006 Garmin Ltd. or its subsidiaries Garmin International, Inc. 1200 East 151 Street, Olathe, Kansas 66062, U.S.A.
Need help?
Do you have a question about the Fishfinder 140 and is the answer not in the manual?
Questions and answers