
Related Manuals for Voxx Movies to Go AMVXMTG13


Summary of Contents for Voxx Movies to Go AMVXMTG13
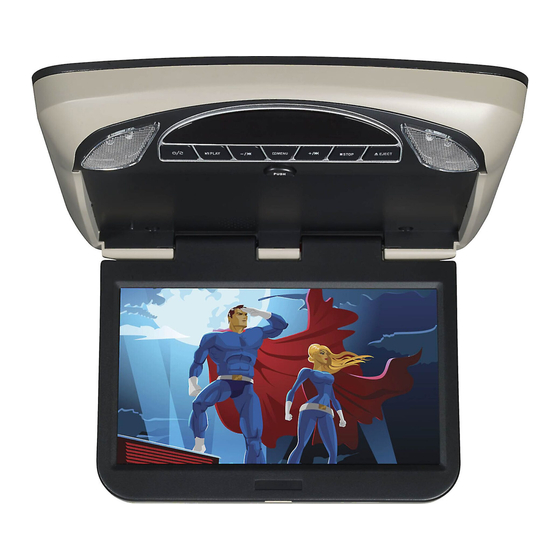
- Page 1 AMVXMTG13/VXMTG13 13.3” Overhead LCD Monitor With Built-In DVD Player Owner's Manual...
- Page 3 Warnings Do not use any solvents or cleaning materials when cleaning the video monitor. Do not use any abrasive cleaners, they may scratch the screen. Use only a lightly dampened lint free cloth to wipe the screen if it is dirty. Lock the LCD screen in the fully closed position when not in use.
- Page 4 Congratulations Congratulations on the purchase of your new In-Vehicle Rear Seat Entertainment System. The AMVXMTG13/VXMTG13 has been designed to provide passengers with unlimited content options delivering smiles for many miles. Please read the directions that follow to familiarize yourself with the product to ensure that you obtain the best results from your equipment.
-
Page 5: Table Of Contents
Table of Contents Features ......................6 Controls and indicators diagram(front view) ........7 Controls and indicators diagram(side view) ......... 9 Remote Control Operation ...............10 Remote Control Functions ................11 Turning the unit on or off ................15 Source menu ....................16 System Menu Setting and Adjustments ..........18 Playing DVD ....................25 DVD Basics ......................26 Playing USB and MP3 Discs ...............27... -
Page 6: Features
Features • 13.3” Digital Thin Film Transistor (TFT) Active Matrix Liquid Crystal Display LED Backlight Monitor • Built-in DVD Player • Last position memory for DVD Player • Five Audio / Video Source Inputs DVD, USB, AV, AUX, HDMI. • USB 2.0 Port (User Accessible with Media Playback and Charging support) •... -
Page 7: Controls And Indicators Diagram(Front View)
Controls and indicators diagram (front view) 1. POWER/SOURCE ( ) Button This button is used to turn the system on/off and to select the source . 2. Play/Pause (u/II ) Button This button is used to start playback of a disc or pause a disc. 3. - Page 8 Controls and indicators diagram (front view) - Continued 6. STOP (n) Button -Press the STOP button once: Stops playback. - Pressing the PLAY button again will resume normal playback from where movie was stopped. - Press the STOP button twice and then press the PLAY button to start playback from the beginning of the DVD.
-
Page 9: Controls And Indicators Diagram(Side View)
Controls and indicators diagram (side view) 1. DVD Disc Insertion Slot For loading and removing discs. When a disc is inserted, the unit will automatically turn ON and switch to DVD source. Insert a disc with label side facing up. Note: The disc slot indicator is red when a disc is inserted and green when the disc slot is empty. -
Page 10: Remote Control Operation
Remote Control Operation Battery Replacement 1. Remove the battery cover. 2. Insert two AAA batteries into the battery holder. Be sure to observe the correct polarity. 3. Reinstall the battery cover back into the Remote Control until it locks in place... -
Page 11: Remote Control Functions
Remote Control Functions... - Page 12 Remote Control Functions(Continued) Function control is available on the unit and the Remote Control. ** Function not available in this model. 1. POWER* Press this button to turn the unit ON and OFF. 2. SOURCE* Press to display the Source OSD for DVD, USB, AV, AUX, HDMI. 3.
- Page 13 Remote Control Functions(Continued) 14. SCAN FORWARD ( Press to search in a forward direction. Press repeatedly to change the search speed from 2, 4, 8, 20 times and normal speed. 15. PREVIOUS ( Press to return to the previous chapter or track. 16.
- Page 14 Remote Control Functions(Continued) 24. AUDIO Press to display and select audio language in DVD mode. Each time this button is pressed, the language changes. 25. PIX ( Picture Select ) This button is used to make picture adjustments. Use the UP or DOWN direction buttons to select BRIGHTNESS, CONTRAST,COLOR, TINT, or RESET.
-
Page 15: Turning The Unit On Or Off
Turning the unit on or off 1. Push in the Screen Release button to unlock the LCD screen. The screen will drop down slightly. 2. Pivot the screen downward until a comfortable viewing angle is reached. The hinge friction will hold the screen in position while the system is in use. 3. -
Page 16: Source Menu
Source Menu The System is capable of accessing six source inputs. To select or change a source, press the source button on the front panel or the Source button on the remote control. The source OSD will appear on the screen as shown in the figure below. Use the + or - cursor buttons on the front panel or the p or q cursor buttons on the remote control to highlight a source. - Page 17 Source Menu(Continued) HDMI This Source input allows the user to enjoy high-definition digital images and high-quality sound by connecting an HDMI device such as a smartphone, tablet or SmartTV Streaming devices with an HDMI output to the system. Connect your HDMI device with an optional HDMI cable.
-
Page 18: System Menu Setting And Adjustments
System Menu Setting and Adjustments The Setup Menu contains features and options that let you customize your DVD player. For example, you can set a language for the on-screen display or set up PARENTAL controls to control DVD playback for children. Using the System Menu Press the System Menu button on the remote. - Page 19 System Menu Setting and Adjustments(Continued) If without a Remote control user can use the local key to select the function setting. a.) Menu = Long press to call up the setup menu screen information or return/exit the system menu = Short press function as Down Key u /II Play = Enter Key = Left Key...
- Page 20 SYSTEM SYSTEM PLAYER PLAYER MOVE ADJUST EXIT MENU MOVE ADJUST EXIT MOVE SELECT EXIT MENU MENU System Menu Setting and Adjustments(Continued) 88.1MHz 91.1MHz 94.1MHz PICTURE PICTURE 88.3MHz 91.3MHz 94.3MHz 88.5MHz 91.5MHz 94.5MHz AUDIO AUDIO 88.7MHz 91.7MHz 94.7MHz 88.9MHz 91.9MHz 94.9MHz SYSTEM MODE PICTURE PICTURE...
- Page 21 DEFAULT DVD PICTURE MONITOR MODE AUDIO RESET SYSTEM PLAYER System Menu Setting and Adjustments(Continued) MOVE ADJUST EXIT MENU BRIGHTNESS RESET CONTRAST PICTURE PICTURE COLOR The RESET functions allows all settings options to AUDIO AUDIO TINT LANGUAGE ENGLISH be reset to factory settings. SYSTEM SYSTEM DEFAULT DVD...
- Page 22 TV SYSTEM NTSC TV SYSTEM NTSC SCREEN SAVER SCREEN SAVER PICTURE PICTURE PICTURE PICTURE ASPECT RATIO 16:9 ASPECT RATIO 16:9 AUDIO AUDIO AUDIO PASSWORD SETUP AUDIO PASSWORD SETUP SYSTEM RATING SYSTEM ADULT SYSTEM SYSTEM RATING ADULT System Menu Setting and Adjustments(Continued) LAST MEMORY PLAYER PLAYER...
- Page 23 System Menu Setting and Adjustments(Continued) LAST MEMORY The last memory function allows DVD playback TV SYSTEM TV SYSTEM NTSC NTSC to begin from the point when playback was last SCREEN SAVER SCREEN SAVER PICTURE PICTURE ASPECT RATIO 16:9 ASPECT RATIO 16:9 stopped.
- Page 24 System Menu Setting and Adjustments(Continued) FMM MODULATION(ON/OFF) This setting allows you to turn the FMM modulator ON or OFF. FM MODULATION FMM CHANNEL 88.1MHZ PICTURE PICTURE FMM CHANNEL AUDIO AUDIO This setting allows you to select the frequency. SYSTEM SYSTEM The unit has a 100 channel built-in wireless PLAYER PLAYER...
-
Page 25: Playing Dvd
Playing DVD Playing DVDs When a disc is loaded. Press the DISPLAY button on the remote control to display the status banner. The status banner includes the disc title, chapter audio language , subtitle & angle. Title Selection: Some DVDs contain more than one title (e.g. sitcoms, collections, etc.) Press the numeric (0-9) buttons to initiate a change of chapter title selection. -
Page 26: Dvd Basics
DVD Basics To get the optimum use out of the DVD Player, please read the following: DVD Region Code The DVD player is preset to a region code at the factory depending on where the DVD player is sold. A DVD from a different region cannot be played in this unit and the unit will display "WRONG REGION”. -
Page 27: Playing Usb And Mp3 Discs
Playing USB and MP3 Discs Use the cursor keys p q t or u and OK to navigate the on screen menus. The USB port can play AUDIO, PHOTO, VIDEO . The following formats are supported: Audio • • • Photo •... -
Page 28: Hdmi Basics
HDMI Basics HDMI An HDMI Input is located on the side of the unit. This input can be used for connecting devices with HDMI output ports (such as smartphones, tablets and SmartTV devices) and may require the purchase of an HDMI cable and HDMI adapter which is available from your device manufacturer. -
Page 29: Hdmi Devices
HDMI Devices HDMI Devices **: Amazon FireTV Stick streaming device: • www.amazon.com and search for FireTV Stick Chromecast media streaming device: • www.google.com and search for Chromecast Roku HDMI streaming device: • http://www.roku.com/products/compare... -
Page 30: Usb Input / Charging
USB Inputs/ Charging USB Port (User Accessible) The USB port provides two functions: Media port for USB thumb drives: Charging: • The USB port will not charge a portable device when the unit is turned OFF. • The USB port will charge a portable device in the following modes: •... -
Page 31: Troubleshooting
Troubleshooting PROBLEM SOLUTION IR remote inoperative • Verify that the battery in the remote is fresh. • Verify that the remote sensor eye is not obstructed. Disc won't play • Insert a disc with the label side facing the viewer. •... -
Page 32: Specifications
Specif ications AMVXMTG13/VXMTG13 Type TFT Active Matrix LCD Resolution 1920 (RGB) (X3) x 1080 Pixels 6,220,800 Operation Temperature 32 ~ 113º F (0 ~ 45º C) Storage Temperature -4 ~ 149º F (-10 ~ 65º C) Backlit life 20,000 Hours Video Display System NTSC / PAL / AUTO Video Output... -
Page 33: Warranty
D A M A G E S F O R B R E A C H O F T H I S O R A N Y O T H E R W A R R A N T Y . person or representative is authorized to assume for the Company any liability other than expressed herein in connection with the sale of this product. VOXX Electronics Corporation, 2351 J. Lawson Blvd, Orlando FL 32824 1-800-645-4994... - Page 36 © 2021 Voxx Electronics Corp., 2351 J. Lawson Blvd, Orlando FL 32824 700-116...
Need help?
Do you have a question about the Movies to Go AMVXMTG13 and is the answer not in the manual?
Questions and answers