
Summary of Contents for Estron TIMMKOO
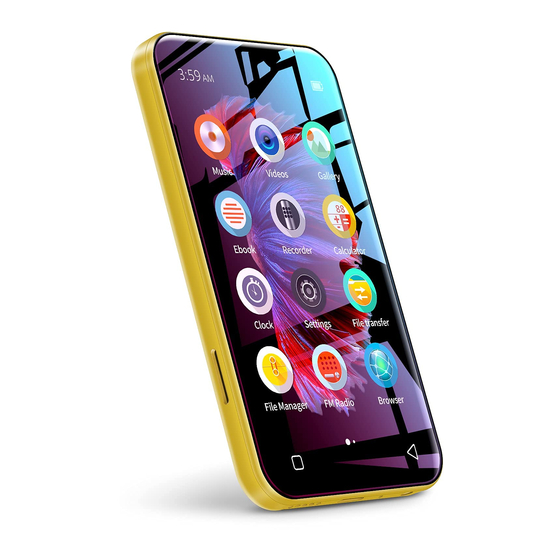
- Page 2 TIMMKOO NEW STYLE FULL SCREEN MP4 PLAYER WiFi available...
- Page 3 Volume+ Volume- Power SD Slot HOME BACK 3.5mm Port Built-in Speaker Reset USB-C Port...
- Page 4 Power: In shutdown state, press and hold for 3 seconds to turn on. In the boot state, long press for 3 seconds to activate the shutdown options: Power o , Restart, Airplane mode. Short press to turn o /on the screen. Volume +/-: Press + / - to turn up/down the volume.
- Page 5 Upload from your computer: 1. Use the included USB cable to connect the player to your computer. The computer will automatically recognize the device and install the driver. After the installation is successful, Click "My Computer", you will find an MTP device named "Q5" in the list of devices and drives, click on it to access the player's internal/external SD card and its folders.
- Page 6 Upload from your cellphone: Upload music or video to the player via your smartphone, and require your phone to install the specified App. MiniShare (for Android phone) Scan the following QR code to download and install MiniShare. ZapyaGo (for iPhone) Search for “Zapya Go”...
- Page 7 Unidirectional Upload In Minishare's Send/Receive mode, you can only transfer files from the sender to the receiver, but not to each other. iPhone → Q5 Player A. Click the “File transfer” icon on the desktop of the Q5 player to open the MiniShare app. And click the icon in the middle of the window to switch to Send/Receive mode, and then click...
- Page 8 Android phone → Q5 Player A. Click the “File transfer” icon on the desktop of the Q5 player to open the MiniShare app. And click the icon in the middle of the window to switch to Send/Receive mode, and then click the "Receive"...
- Page 9 Q5 player → Q5 Player A. Click the “File transfer” icon on the desktop of the Q5_A player to open the MiniShare app. And click the icon in the middle of the window to switch to Send/Receive mode, and then click the "Receive"...
- Page 10 Mutual Upload In Minishare’s Create Group/Join Group mode, you can transfer files between two devices iPhone Q5 Player A. Click the “File transfer” icon on the desktop of the Q5 player to open the MiniShare app. And click icon in the middle of the window to switch to Create Group/Join mode, and then click the "Create Group"...
- Page 11 A. Click the “File transfer” icon on the desktop of the Q5 player to open the MiniShare app. And click icon in the middle of the window to switch to Create Group/Join mode, and then click the "Create Group" icon, and the device will start hotspot and pop up a QR code for scanning.
- Page 12 A. Click the “File transfer” icon on the desktop of the Q5_A player to open the MiniShare app. And click the icon in the middle of the window to switch to Create Group/Join mode, and then click the "Create Group" icon, and the device will start hotspot and pop up a QR code for scanning.
- Page 13 1. Know The Main Interface of Music App Click the Music app on the player’s desktop to enter the main interface. Here, 1) Your songs are organized by Artists, Albums, and Songs. 2) Click the " Playlists" icon in the upper right corner to quickly access the playlist you created.
- Page 14 In the Playlists view, click the icon in the upper right corner, you can get the following shortcut menu: ▸Party shu e → Play the songs in the list in Party shu e mode. ▸Shu e all → Play the songs in the list in Shu e all mode.
- Page 15 ▸Use as ringtone → Use the current song as alarm ringtone. ▸Delete → Delete the current song. ▸Library → Quickly jump to the music library. 3.FAQ 1) Can I create a playlist by myself? Is there a limit to the number of playlists? Yes, you can create your own playlist, and there is no limit on the number.
- Page 17 1.Know the video management window Click the Videos app on the player’s desktop to enter the video management window. Here, 1) All folders with videos are displayed. Click to open any folder and you can see all the videos in that folder. 2) Click the icon in the upper right corner, you can get more menu options to help you better manage video files.
- Page 18 → Choose the audio track you want, if available. If you select “Disable”, there will be no sound when playing the video. → Click to switch to the next video; Long press, a pop-up menu will let you choose the playback mode: Loop one, Loop all, Shu e.
- Page 19 ▸Video zoom → Click this option, you can change the viewing size, the options are: Fit to screen, Stretch, Crop, 100%, Custom. You can also change the viewing size with GMD gesture control. ▸Subtitle → This option allows you to open the downloaded subtitles or search for subtitles online.
- Page 20 4) My video has audio tracks in di erent languages, such as English, Portuguese, can I choose one of them to play. Yes. There are several ways to choose or open your audio tracks: ① Click the icon in the play window, and then select the target audio track in the pop-up window ②...
- Page 21 1. Know the albums management window Click the Gallery app on the player’s desktop to enter the albums management window. Here, 1) All folders with photos are displayed. Click to open any folder and you can see all the photos in that folder. 2) The default view mode is “Albums”.
- Page 22 2. Know the photos management window Click an folder in the album management window to enter the photos management window. All photos in the folder are displayed here. In this window, you can do: 1) Select view: Click at the top of the window, you can choose “Filmstrip view”...
- Page 23 3. Edit Photo Click to open a photo in the photos management window. You can share or edit it as needed. ▸Share: Click to share to your friends by MiniShare or Bluetooth. ▸Delete: Click the icon in the upper right corner, and then select “Delete”...
- Page 24 1. Know the main interface of Ebook Click the Ebook app on the player desktop for the first time to enter the main interface, and a pop-up window will show the entrances of 5 modules: ▸Recent list: Manage the books you have read recently ▸My Shelf: Manage your favorite books ▸My Files: Manage your local and network folders...
- Page 25 Screen Orientation: Switch to horizontal / vertical screen display Day/Night mode: Switch to Day theme / Night theme Speak: Activate TTS voice reading (Need voice engine support) Autoscroll: Activate automatic scrolling, and no need to turn pages manually Chapters: Manage the chapters and bookmarks of the book, through which you can quickly click to access the target chapters or bookmarks.
- Page 26 4. FAQ 1. How to select text in the book to copy, annotate, highlight or add special processing? In the reading page, long press the target text, the app will pop up an option window, you can do: → Add background color to selected text →...
- Page 27 1. Know the recorder app interface Click the Recorder app on the player’s desktop to enter its main operation interface. here, you can do: → Start/pause recording → Stop recording. After clicking, you can choose “Discard” or “Save” the current recording. →...
- Page 28 FM Radio 1. Know the FM Radio app interface Click the FM Radio app on the player’s desktop to enter its main operation interface. Here, you can do: → Channel list. Save all channels that have been searched. → Quit FM Radio →...
- Page 29 1. Know the Clock app interface Click the Clock app on the player’s desktop to enter clock interface. Here, there are 4 clock-related modules. Alarm clock 1) Add a new alarm: Click the icon at the bottom of the window, it will jump to the "HH"...
- Page 30 Click the icon in the lower right corner of the alarm clock to delete the current alarm clock. ▸More alarm settings → Click the icon in the lower right corner of the window, and click “Settings”, you can define more basic parameters, such as alarm style, ringing duration, interval duration, volume, etc.
- Page 31 4) Stop or Resume timing Click the STOP button on the timer to pause timing, and then click the START button to resume timing 5) Reset a timer For the timer in the paused state, click the icon in the lower corner to return to the initial state and restart the timer.
- Page 32 1. Know the main interface of MiniShare Click the “File transfer” icon on the player’s desktop to run the MiniShare app. This app is mainly used for file transfer between mobile phone and player. On the main interface, you can see the following function icons.
- Page 33 5) Set default storage: Click the button > on the right of "Default Storage" under Settings, You can specify internal storage or external storage as the default storage for receiving files. Click the icon in the upper right corner, you can get di erent menu options: 1) Connect to Zapya: Guide you how to connect to Android device/Apple device/PC/Windows...
- Page 34 Click the “ Local File” button, you can view the photos, videos, and music in the local folder. Here, you can also quickly share them with friends follow the steps below. 1) Click the check-box behind the file to select the photo/video/audio that needs to be shared.
- Page 35 2. FAQ 1. How to get the mobile app MiniShare or ZapyaGo? ▸For Android phone Please scan the following QR code to download and install MiniShare. ▸For iPhone Please search for “Zapya Go” in the App store or scan the following QR code to download and install ZapyaGo.
- Page 36 In File Manager, you can directly access / manage internal storage and external SD card and all their folders and files. And you can: Add new folder Search files Click the icon in the lower right corner of the window, more menus you can choose. 1) Select file or folder Click this option to activate the selection &...
- Page 37 �. Rename → Select a target file or folder, Click the icon in the lower right corner and select "Rename" to edit the name of the file or folder. �. Cancel selection → please click √ in the upper left corner to exit the selection window. 2) Hide/Show hidden files Select "Hide hidden files"...
- Page 38 In the calendar window, you can: 1) Switch calendar view: Click the icon at the top of the window to switch the view to Day, Week, Month, Agenda. 2) Add New event: Click the icon in the upper right corner, select “New event”, enter the event name, location, time period, reminder and other information, and then click the “Done”...
- Page 39 1. WiFi Enable and disable WiFi function. 2. Bluetooth Enable and disable bluetooth function. 3. Sound Touch sounds → Check this option to activate touch screen sound. 4. Display ▸Wallpaper → You can choose your favorite picture as the wallpaper from the Gallery, Live Wallpapers, Wallpapers ▸Brightness →...
- Page 40 7. Security Here, you can enable the following 2 options to prevent others from accessing your device and data: ▸Screen lock - The optional lock methods are None, Slide, Voice Unlock, Pattern, PIN, Password. ▸Encrypt device - need to set a lock screen PIN or password before star encryption.
-
Page 41: Troubleshooting
1. The player can’t be charged. In the o state, when the USB cable is connected for charging, the player usually will light up and display the brand logo and remaining battery. Tips: due to the limitation of the charging protocol, you can only: ·Using a USB A to C cable, you can connect to a computer or a USB adapter to charge the player. - Page 42 2. Nothing happens when the player is connected to computer with USB cable. Usually, use a USB cable to connect the player to the computer, the top of the player will appear with 2 icon: . And an MTP device named Q5 will appear in the device and drive list of your computer.
- Page 43 3. FM radio cannot be turned on. The FM radio needs to be plugged into a wired headset/headphones as an antenna to turn on. If the headset is plugged in and the fault persists, it is likely that the 3.5mm port is in poor contact. Please replace one headset and try again.
- Page 44 Bluetooth version:4.2 Product Size: 4.2 x 2.4 x 0.5 inch Weight: 3.7 oz Screen Size: 4.0 inch (540 x 960 Pix) Battery Capacity: 1800mAh Input: 5V=1A Charging Time: 90 Minutes Internal Memory: 1G RAM+8GB ROM Music Playtime: 77 hours (Lab data) Video Playtime: 10 hours (Lab data) Expansion slot: Micro SD/TF Card (up to 512GB) Music format: MP3, WMA, OGG, APE, FLAC, WAV,...
- Page 45 ▸Do not leave the device in an environment where the temperature is too low or too high (below -10°C or above 50°C) for a long time. Extreme temperature environments will cause the device to deform and shorten the service life of the device;...
- Page 46 Thank you for purchasing our products. You will enjoy the following services when using this product. Warranty period: Within one year from the date of sale. Warranty scope: Limited to the product host. Warranty terms: �. Within 1 year after purchase, failure or damage caused by product quality problems can be replaced for free or full refund.
- Page 47 Email: estron@szestron.com Online support: Https://www.facebook.com/EstronCSS/ We promise to reply you as soon as possible within 24 hours.
Need help?
Do you have a question about the TIMMKOO and is the answer not in the manual?
Questions and answers
how to remove 512g TF/ Micro-SD card?