
Related Manuals for TES TES-593R


Summary of Contents for TES TES-593R
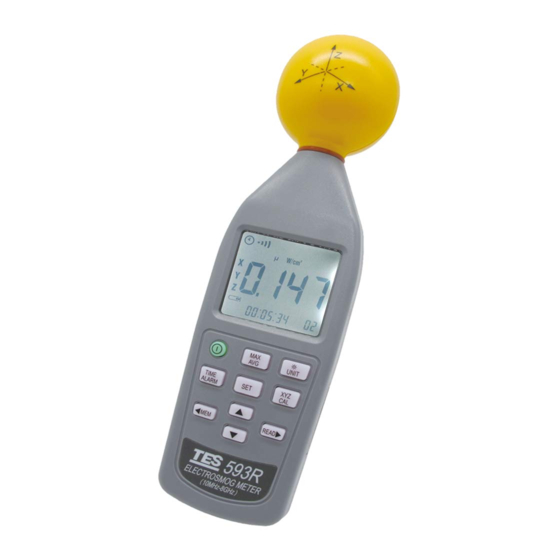
- Page 1 ELECTROSMOG METER TES-593R INSTRUCTION MANUAL TES ELECTRICAL ELECTRONIC CORP.
-
Page 3: Table Of Contents
4-6 Making measurements ............22 4-7 Manual data memory storing individual measured values . 23 4-8 Setting current data and time..........25 4-9 LCD backlight function............26 5. BATTERY CHARGING ............26 ※ Copyright © 2020 TES Electrical Electronic Corp. All rights reserved. -
Page 4: Safety Information
1. SAFETY INFORMATION CAUTION • When first use the meter or prolonged storage the meter, please charge the meter at least 10 minutes then use the meter. • Before making a measurement, check if the low battery symbol ( ) is shown on the display as soon as the meter is switched on or the battery remained capacity indicate “... -
Page 5: Introduction
• Field strength measuring device can underrate pulsed signals. Particularly with radar signals, significant measurement errors can arise. • All field strength measuring devices have a limited specified frequency range. Fields with spectral components outside of this frequency range are generally incorrectly evaluated and tend to be underrated. - Page 6 Magnetic field strength (H): A field vector that is equal to the magnetic flux density divided by the permeability of the medium. Magnetic field strength is expressed in units of amperes per meter (A/m). The meter uses of magnetic field strength for measurements only in the far-field area of the source.
-
Page 7: Application
2-2 Application Quite often routine operation, maintenance and service work has to be done in areas where active electromagnetic fields are present, e.g. in broadcasting stations, etc. Additionally, other employees may be exposed to electromagnetic radiation. In such cases, it is essential that personnel are not exposed to dangerous levels of electromagnetic radiation, such as: High frequency (RF) electromagnetic wave field strength measurement. -
Page 8: Features
2-3 Features The meter is a broadband device for monitoring high-frequency radiation in the range from 10MHz to 8GHz. non-directional electric field and high sensitivity also allow measurements of electric field strength in TEM cells and absorber rooms. The unit of measurement and the measurement types have been selected to expressed in units of electrical and magnetic field strength and power density. -
Page 9: Specifications
3. SPECIFICATIONS 3-1 General specifications • Measurement method: Digital, triaxial measurement. • Directional characteristic: Isotropic, triaxial. • Measurement range selection: One continuous range. • Display resolution: 0.1mV/m, 0.1µA/m, 0.1µW/m , 0.001µW/cm • Setting time: Typically 1s (0 to 90% of measurement value). •... -
Page 10: Electrical Specifications
3-2 Electrical specifications Unless otherwise stated, the following specifications hold under the following conditions: • The meter is located in the far-field of a source, the sensor head is pointed towards the source. • Ambient temperature: +23℃±3℃ • Relative air humidity: 25% to 75% Sensor type: Electrical field (E) Frequency range: 10MHz to 8GHz Specified measurement range:... -
Page 11: Operation
4. OPERATION 4-1 Front panel controls description (1). E-field sensor. (2). LCD display. (3). key: Press this key to turn the meter on or off. (4). key: Press this key to change sequential: “Instantaneous”→ “Max. instantaneous” → “Max. average”. - Page 12 (5). key: Press this key to change units selector: “mV/m or V/m” → “µA/m or mA/m” → “µW/m → “µW/cm 2” , mW/m or W/m 2” mW/cm ” Press and hold this key while turning the meter on to disable the audible sound, the “ ”...
- Page 13 (9). key: Press this key one time to store one data set to memory. Press and hold this key while turning the meter on to enter the clear manually recorded data mode, press key to exit this mode. (10). key: Press this key to switch to the manual data reading mode, press this key again to exit this mode.
-
Page 14: Lcd Display Description
4-2 LCD display description (1). : Auto power off function on / off. (2). : Displayed : Audible sound function on / off. (3). MAX : Maximum measured value displayed. (4). MAX AVG : Maximum average value displayed. (5). : Low battery indication. (6). - Page 15 (10). : Manual data memory address number (1~99). : The manual data memory full indication. (11). ALARM : Alarm function on / off or alarm setting indication. (12). ▲ : When the alarm function is on , this is the indication if measured value exceeds the limit.
-
Page 16: Use E-Field Sensor
4-3 Use E-field sensor The actual 3-channel sensor is located in the head part of the meter. The three voltages generated by the sensor are fed back to the meter. In far-fields, an E-field sensor is preferable due to the greater bandwidth. The E-field sensor for frequencies is from 10MHz to 8GHz. - Page 17 4-4-2 Result modes The bar graph display always shows each axis (X, Y or Z) the instantaneous measured dynamic range value. The digit display shows the instantaneous or result according to one of three modes which can be selected : •...
- Page 18 The CAL factor is often used as a means of entering the sensitivity of the field sensor in terms of its frequency response in order to improve measurement accuracy. Frequency-dependent sensor calibration factors are provided for this application. In many cases, the measurement accuracy will be sufficient even if the frequency response of sensor calibration factor is ignored.
-
Page 19: Setting The Meter
4-4-4 Alarm limit value (ALARM) The alarm limit value is used to monitor the display value automatically. It controls the alarm indication function. The alarm limit value can be edited in the displayed V/m unit. ※ Alarm limit function is only used for total three axial value comparator. - Page 20 4-5-2 Setting the result mode Instantaneous result mode is automatically set when the meter is turned on. With the key as followings: Instantaneous Max. Instantaneous Max. average...
- Page 21 4-5-3 Setting the alarm limit value (ALARM) Power off Hold-on...
- Page 22 When the meter is normally turned on, the alarm set limit value will display for 2 seconds. 1. Press key to turn off the meter. 2. Press and hold on key, then press key to turn on the meter to enter the alarm setting mode, the “mW/m ”...
- Page 23 When the meter is normally turned on, the calibration factor set value will display for 2 seconds. 1. Press key to turn off the meter. 2. Press and hold on key, then press key to turn on the meter to enter the calibration factor setting mode, the “...
- Page 24 4-5-6 Setting the audible sound function off disappears Power off Hold-on When the meter is normally turned on, the audible sound function is on. 1. Press key to turn off the meter. 2. Press and hold key and turn on the meter again to disable the audible sound, then the “...
-
Page 25: Making Measurements
4-6 Making measurements Important: The following effect will be noted with all field strength meters: If move the sensor quickly, excessive field strength values will be displayed which do not reflect the actual field conditions. This effect is caused by electrostatic charges. Recommendation: Hold the meter steady during the measurement. -
Page 26: Manual Data Memory Storing Individual Measured Values
4-6-3 Alarm function Use this feature in the “Instantaneous”, “Max. instantaneous” or “Max. average” modes. When the measured value exceeds the limit value, a sequence of warning beeps sounded. 4-7 Manual data memory storing individual measured values The meter includes a non-volatile manual data memory function which can store a maximum of 99 measured values. - Page 27 4-7-2 Reading individual measured values Entry Reading mode indicate Reading memory location Exit 1. Press key, the display then shows “ ” (reading mode). 2. Press key to select the desired memory location. 3. Press key to select the desired reading units. 4.
-
Page 28: Setting Current Data And Time
4-7-3 Deleting manual data memory measured values Once the memory is full, you can clear the entire contents of the manual data memory. Power off Hold-on 1. Press to turn off the meter. 2. Press and hold and turn on the meter again, the display then shows “... -
Page 29: Lcd Backlight Function
4-9 LCD backlight function Press key for 3 seconds to turn on or off the LCD backlight. When no button is pressed at 30 seconds then the backlight auto off. 5. BATTERY CHARGING 1. Battery capacity Indication Battery Capacity 100% capacity 80% capacity 60% capacity 40% capacity... - Page 32 TES ELECTRICAL ELECTRONIC CORP. 7F, No. 31, Lane 513, Rui Guang Road, Neihu Dist. Taipei. Taiwan, R. O. C. Tel : (02) 2799-3660 Fax : 886-2-2799-5099 E-Mail : tes@ms9.hinet.net http://www.tes.com.tw Oct-2020...
Need help?
Do you have a question about the TES-593R and is the answer not in the manual?
Questions and answers