Samsung GT-P5113 User Manual
Hide thumbs
Also See for GT-P5113:
- User manual (242 pages) ,
- Manual (146 pages) ,
- Service manual (63 pages)
Table of Contents
Advertisement
Quick Links
Advertisement
Table of Contents

Related Manuals for Samsung GT-P5113


Summary of Contents for Samsung GT-P5113
- Page 1 GT-P5113 user manual...
- Page 2 ● or from software provided by service providers or carriers, and are subject to change without prior notice. Access the Samsung website ( www.samsung.com ) for the latest version of the manual. Available features and additional services may vary by ●...
- Page 3 Samsung and their respective owners. Extracting and using these materials for commercial or other purposes is an infringement of copyright laws. Samsung is not liable for such copyright infringement by users. Please keep this manual for future reference.
- Page 4 Samsung Electronics. Trademarks SAMSUNG and the SAMSUNG logo are registered ●...
- Page 5 ® ® DivX , DivX Certified ● associated logos are trademarks of Rovi Corporation or its subsidiaries and are used under licence. All other trademarks and copyrights are the property of ● their respective owners. ABOUT DIVX VIDEO ® DivX is a digital video format created by DivX, LLC, a subsidiary of Rovi Corporation.
-
Page 6: Table Of Contents
Enter text ..................... 36 Web and GPS-based services ......39 Internet ....................39 Game Hub ................... 43 Latitude ....................43 Maps ...................... 44 Navigation ................... 45 Local ....................... 46 Play Store ..................... 47 Readers Hub ..................48 Samsung Apps .................. 48 Contents... - Page 7 S Suggest ..................... 48 YouTube ....................49 Communication ..........51 Google Mail ..................51 Email ...................... 53 Talk ......................55 ChatON ....................56 Messenger ................... 57 Google+ ....................57 Entertainment ............ 58 Camera ....................58 Video player ..................65 Gallery ....................67 Photo editor ..................
- Page 8 Bluetooth ..................... 93 GPS ......................95 VPN connections ................96 Tools ..............99 Alarm ..................... 99 Calculator ..................100 Downloads ..................100 Dropbox ..................... 101 My files ....................102 Polaris Office ..................103 Search ....................105 World clock ..................106 Settings ............
- Page 9 Language and keyboard ............. 113 Back up and reset ................115 Accessory ................... 116 Date and time .................. 116 Accessibility ..................116 Developer options ................. 117 About device ..................118 Troubleshooting ..........119 Contents...
-
Page 10: Assembling
Check your product box for the following items: Mobile device ● Quick start guide ● Use only Samsung-approved software. Pirated or illegal software may cause damage or malfunctions that are not covered by your manufacturer's warranty. The items supplied with your device and available ●... -
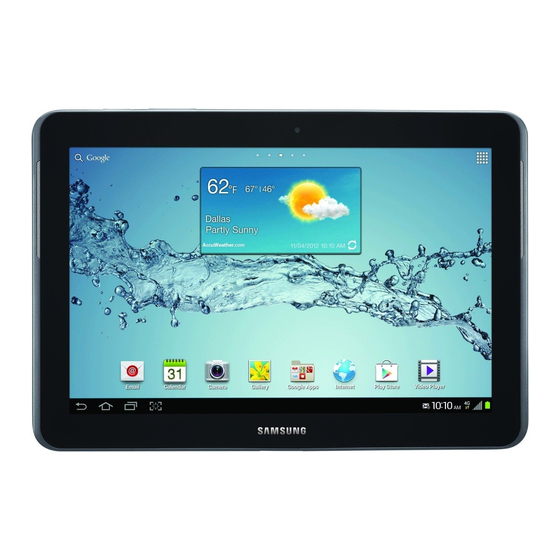
Page 11: Device Layout
Device layout › Front view Number Function Front camera lens Light sensor Speaker Touch screen Assembling... - Page 12 › Rear view Number Function IrLED Headset jack GPS antenna Microphone Memory card slot Power/Reset/Lock key Volume key Rear camera lens Multifunction jack 1. Do not touch or cover the area around the antenna with your hands or other objects while using the GPS functions. Assembling...
-
Page 13: Keys
Keys Function Turn on the device (press and hold); Access the device options (press Power/ and hold); Reset the device (press Reset and hold for 8-10 seconds); Turn off Lock and lock the touch screen or turn it Volume Adjust the device’s volume. 1. -
Page 14: Charge The Battery
You cannot replace the battery in the device. If you have problems with the battery or need it replaced, take the device to a Samsung Service Centre. Use only Samsung-approved chargers and cables. Unapproved chargers or cables may cause batteries to explode or damage your device. - Page 15 The device may heat up while charging. This is ● normal and should not affect your device’s lifespan or performance. If your device is not charging properly, take your ● device and the charger to a Samsung Service Centre. Assembling...
- Page 16 When the battery is fully charged, first unplug the USB cable from the device, and then unplug the USB power adapter from the electrical socket. To save energy, unplug the USB power adapter when not in use. The USB power adapter does not have a power switch, so you must unplug the USB power adapter from the electrical socket when not in use to avoid wasting power.
-
Page 17: Insert A Memory Card (Optional)
32 GB. Depending on the memory card manufacturer and type, some memory cards may not be compatible with your device. Samsung uses approved industry standards for memory cards, but some brands may not be fully compatible with your device. Using an incompatible memory card may damage your device or the memory card. - Page 18 Your device supports only the FAT file structure for ● memory cards. If you insert a memory card formatted with a different file structure, your device will ask you to reformat the memory card. Frequent writing and erasing of data will shorten the ●...
- Page 19 › Remove a memory card Ensure that the device is not currently accessing the memory card. Settings → Storage → In the application list, select Unmount SD card → Open the cover of the memory card slot. Push the memory card gently until it disengages from the device.
-
Page 20: Getting Started
Getting started Turn on or off your device To turn on your device, press and hold the Power key. If you are turning on your device for the first time, follow the on-screen instructions to set up your device. You must sign in to Google or create a Google account to use applications that interact with the Google server. -
Page 21: Use The Touch Screen
Use the touch screen Your device’s touch screen lets you easily select items or perform functions. Learn basic actions for using the touch screen. Do not press the touch screen with your fingertips, ● or use sharp tools on the touch screen. Doing so may damage the touch screen or cause it to malfunction. - Page 22 Control your touch screen with the following actions: Touch once to select or launch a menu, option, or application. Tap and hold Tap an item and hold it for more than 2 seconds. Drag Tap an item and move it to a new location.
-
Page 23: Lock Or Unlock The Touch Screen And The Keys
Flick Briskly scroll up, down, left, or right to move through lists or screens. Pinch Place two of your fingers far apart, and then pinch them together. Your device turns off the touch screen when you do ● not use it for a specified period. To turn on the screen, press the Power key. -
Page 24: Get To Know The Home Screen
To unlock them, turn on the screen by pressing the Power key, tap anywhere on the screen, and then drag your finger outside of the large circle. You can activate the screen lock feature to prevent others from using or accessing your personal data and information saved in your device. - Page 25 Number Function Launch the application that you specified as the quick launch shortcut. You can change this quick launch shortcut by selecting Settings → Display Quick launch. → Open the mini apps panel. View the current time and your device’s status; Open the notifications panel.
- Page 26 › Use the notifications panel To open the notifications panel, tap the right bottom of the screen. To hide the panel, select From the notifications panel, you can view your device’s current status and use the following options: Wi-Fi : Activate or deactivate the Wi-Fi feature. p.
- Page 27 › Remove an item from the Home screen Tap and hold an item, and then drag it to the rubbish bin. › Add or remove a panel from the Home screen You can add or remove Home screen panels to organise widgets.
-
Page 28: Access Applications
› Use widgets Widgets are small applications that provide convenient functions and information on your Home screen. The widgets available may vary depending on your region or service provider. Widgets to open the widget In the application list, select panel. Scroll left or right on the widget panel to find a widget. - Page 29 Select to return to the previous screen. Select return to the Home screen. You can add an application shortcut to the Home ● screen by tapping and holding an icon in the application list. If you rotate the device while using some features, the ●...
-
Page 30: Launch Multiple Applications
› Download an application Play Store or Samsung In the application list, select Apps. Search for an application and download it to the device. To install applications that you downloaded from other sources, you must select Settings Security → →... -
Page 31: Customise Your Device
› Manage applications You can manage multiple applications with the task manager. Task manager Active applications. → → Select The task manager launches and shows active applications. Control active applications: To switch applications, select one from the list. ● End. To close an application, select ●... - Page 32 › Switch to Silent mode To mute or unmute your device, do one of the following: Tap the right bottom of the screen to open the notifications ● panel, and then select Sound. Press and hold the Power key, and then select ●...
- Page 33 If you forget your password, take your device to a ● Samsung Service Centre to reset it. Samsung is not responsible for the loss of passwords ● or private information, or other damages caused by illegal software.
- Page 34 Set a face detection unlock Settings → Security → In the application list, select Screen lock → Face unlock. Set it up → Continue. Select Adjust the device to fit your face inside the figure. Continue. When your face is captured correctly, select Complete the setup of the secondary unlock PIN or pattern.
- Page 35 When your device is lost or stolen, you can view the current location of your device on the SamsungDive website ( www.samsungdive.com ). To use this feature, you must create a Samsung account for controlling the device remotely via the Internet. Settings →...
-
Page 36: Enter Text
Enter text You can enter text by speaking words into the microphone, selecting characters on the virtual keypad, or by writing on the screen. Text entry is not supported in some languages. To enter text, you must change the input language to one of the supported languages. - Page 37 To add input languages for voice recognition, select the Add more languages. → language › Enter text with the Samsung keypad Enter text by selecting alphanumeric keys or writing on the screen. You can also use the following keys: Number Function Change the case.
- Page 38 Number Function Access the keypad settings; Change the text input method (tap and hold). Insert a space. Clear your input. Start a new line. Add an item from the clipboard. › Copy and paste text From a text field, you can copy and paste text to another application.
-
Page 39: Web And Gps-Based Services
Web and GPS-based services You may incur additional charges for accessing the Internet and downloading media files. For details, contact your service provider. Internet Learn to access and bookmark your favourite webpages. This feature may be labelled differently depending on ●... - Page 40 Number Function Reload the current webpage. While the device is loading webpages, this icon changes to . View webpage details Enter a web address or a keyword. Access web browser options. View your bookmarks, saved pages, and recent Internet history. Activate the URL field.
- Page 41 Downloads. To view your download history, select ● → Print. To print the webpage via Wi-Fi or USB, select ● Your device is compatible only with some Samsung printers. → Settings. To change the browser settings, select ● › Search for information by voice This feature may be unavailable depending on your region or service provider.
- Page 42 Bookmarks. From → To view your bookmarks, select the bookmark list, tap and hold a bookmark to access the following options: Open To open the webpage in the current window, select ● file. Open in new tab. To open a new window, select ●...
-
Page 43: Game Hub
› View your recent history Internet → → History. In the application list, select Select a webpage to access. Game Hub Learn to download social and premium games. Game Hub. In the application list, select Select and install a game. Follow the on-screen instructions. -
Page 44: Maps
Select a friend, or enter an email address and select friends. Yes. Select When your friend accepts your invitation, you can share locations. Maps ™ Learn to use the Google Maps mapping service to find your location, search for places, and get directions. This feature may be unavailable depending on your ●... -
Page 45: Navigation
To search for a place nearby, select ● To get directions to a specific destination, select ● To add layers of additional information to the map or ● change the view mode, select › Get directions to a specific destination Maps. -
Page 46: Local
Navigation. In the application list, select Enter your destination with the following methods: Speak destination : Enter your destination by voice. ● Type destination : Enter your destination with the ● virtual keypad. Contacts : Select your destination from contacts’ ●... -
Page 47: Play Store
Play Store Your device’s functionality can be extended by installing additional applications. Play Store provides a quick and easy way to shop for mobile applications. This feature may be unavailable depending on your ● region or service provider. Your device will save user files from downloaded ●... -
Page 48: Readers Hub
Select a type of reading material. Search for and access reading material. Samsung Apps Samsung Apps allows you to easily download a wide range of applications and updates for your device. With fully optimised applications from Samsung Apps, your device becomes even smarter. -
Page 49: Youtube
YouTube ™ Learn to view and upload videos via the YouTube video sharing service. This feature may be unavailable depending on your region or service provider. › Play a video YouTube. In the application list, select Select a video. Control playback with the following keys: Number Function Pause or resume playback. - Page 50 › Upload a video YouTube. In the application list, select ACCOUNT. Select Select your Google account if it is linked to YouTube. Alternatively, you can select Add account and set up an account to sign in to YouTube. UPLOAD → Select a video.
-
Page 51: Communication
Communication Google Mail ™ Learn to send or view email messages via the Google Mail webmail service. This feature may be unavailable depending on your ● region or service provider. This feature may be labelled differently depending on ● your region or service provider. ›... - Page 52 From the message view, use the following options: To move to the next or previous message, scroll right or left. ● To reply to the message, select ● To reply to the message and include all recipients, select ● To forward the message to others, select ●...
-
Page 53: Email
Email Learn to send or view email messages via your personal or company email account. › Set up an email account Email. In the application list, select Enter your email address and password. Next. To enter account details manually, select Select Manual setup. - Page 54 To sort messages, select ● → To change the view mode of the message list, select ● View mode. → Print. To print the message via Wi-Fi or USB, select ● Your device is compatible only with some Samsung printers. Communication...
-
Page 55: Talk
To save the email addresses of the recipients to the ● → Save as phonebook as a group of contacts, select group. → Settings. To change the email settings, select ● → Delete all. To delete all messages, select ● To save an attachment to your device, select the ●... -
Page 56: Chaton
› Start a conversation Talk. In the application list, select Select a contact from the friend list. The conversation screen opens. Enter and send your message. → To add more contacts to the conversation, select ● Add to chat. To use video chat, select ●... -
Page 57: Messenger
Messenger Learn to send and receive instant messages from friends and family with the Google+ messenger instant messaging service. Messenger. In the application list, select If you are launching this application for the first time, follow the on-screen instructions to complete the account setup. -
Page 58: Entertainment
Entertainment Camera Learn how to take and view photos and videos. The camera turns off automatically when you do not ● use it for a specified period. The memory capacity may differ depending on the ● scene or shooting conditions. ›... - Page 59 Number Function Use camera shortcuts. : Switch to the front camera to take a ● photo of yourself. : Change the shooting mode. p. 60 ► ● : Select the length of the delay before ● the camera takes a photo. : Apply a special effect.
- Page 60 → Print. Your To print the photo via Wi-Fi or USB, select ● device is compatible only with some Samsung printers. → Rename. To change the name of a file, select ● To search for devices that have media sharing activated, ●...
- Page 61 Option Function Set the device to recognise a person’s face Buddy photo you have tagged in a photo and send it to share that person. › Customise camera settings Before taking a photo, select to access the following options: Option Function Edit shortcuts Edit shortcuts to frequently-used options.
- Page 62 Option Function Set the camera to include location information for your photos. To improve GPS reception, avoid ● shooting in locations where the signal may be obstructed, such as between buildings or in low- GPS tag lying areas, or in poor weather conditions.
- Page 63 Number Function Use camcorder shortcuts. : Switch to the front camera to record ● a video of yourself. : Change the recording mode (for ● attaching to a message or for saving normally). : Select the length of the delay before ●...
- Page 64 After recording a video, select the image viewer to view it. To view more videos, scroll left or right. ● To play the video, select ● To send the video to others, select ● → Start slideshow. Tap the To start a slide show, select ●...
-
Page 65: Video Player
Option Function Adjust the colour balance according to the White balance lighting conditions. Set to view the grid lines on the preview Guidelines screen. Select a memory location for saving Storage recorded videos. Reset Reset camcorder settings. › Edit the shortcut icons You can add or remove shortcuts to frequently-used options. - Page 66 › Play a video Video player. In the application list, select Select a video. Control playback with the following keys: Number Function Adjust the volume. Change the ratio of the video screen. Mute the sound. Scan forwards or backwards in the file by dragging or tapping the bar.
-
Page 67: Gallery
Number Function Insert a bookmark. Skip to the next file; Scan forwards in the file (tap and hold). During playback, select to access the following options: Share via. To send the video to others, select ● Trim. To trim a segment of the video, select ●... - Page 68 › View an image Gallery. In the application list, select → Select a folder an image. While viewing an image, use the following options: To view more images, scroll left or right. ● To zoom in or out, place two fingers on the screen and ●...
- Page 69 Print. Your → To print the image via Wi-Fi or USB, select ● device is compatible only with some Samsung printers. → Rename. To change the name of a file, select ● To search for devices that have media sharing activated, ●...
-
Page 70: Photo Editor
Photo editor You can edit images and apply various effects. Photo editor. In the application list, select Select picture → → Select an image, or select a folder image. To take a new photo, select Take picture. Selection → Select Draw a border around the area you want to select, and then select Done. -
Page 71: Video Maker
When you are finished, select Enter a name for the image and select Video maker You can edit videos and apply various effects. › Create a video Video maker. In the application list, select New Project. Select Select a frame theme. Select a category. - Page 72 › Trim a segment of a video Launch the video editor and open a video file. Select the thumbnail. Move the start bracket to the point where trimming should begin. Move the end bracket to the point where the trimming should end.
-
Page 73: Music Player
Add music files to your device Start by transferring files to your device or memory card: Download from the Internet. p. 39 ► ● Download from a computer with Samsung Kies. p. 83 ► ● Download from a computer with Windows Media Player. ●... - Page 74 Control playback with the following keys: Number Function Adjust the volume. Set the file as your favourite track. Mute the sound. Scan forwards or backwards in the file by dragging or tapping the bar. Activate Shuffle mode. Restart playback; Skip to the previous file (tap within 3 seconds);...
- Page 75 Number Function View music details. Open the playlist. Access music options. Select a sound effect. Change the repeat mode. Skip to the next file; Scan forwards in the file (tap and hold). You can control the music player with a headset. On the Home screen, press and hold the headset button to launch the music player.
- Page 76 › Create a playlist Music player. In the application list, select → New playlist. Select Enter a title for your new playlist and select Select a music category and select next to the files to include. Done. Select › Customise music player settings Music player.
-
Page 77: Music Hub
Music Hub You can access the online music store to search for and buy your favourite songs. You can also add music files to your wish list and play them. This feature may be unavailable depending on your region or service provider. Music Hub. -
Page 78: Personal Information
Personal information Contacts Learn to create and manage a list of your personal or business contacts. You can save names, phone numbers, email addresses, and more for your contacts. › Create a contact Contacts → Contacts → In the application list, select Select a memory location. - Page 79 › Create your namecard Contacts → Contacts. In the application list, select Select your name at the top of the contact list. Select Save. Enter your personal details and select You can send your namecard to others by selecting → Share namecard via.
-
Page 80: S Planner
Select an option for importing a single contact file, multiple contact files, or all contact files, and then select Select contact files to import, and then select Export contacts Contacts → Contacts. In the application list, select → Import/Export → Export to SD card or Select Export to USB storage. - Page 81 › Change the view mode S Planner. In the application list, select Select a view mode. Year : All months in the year ● Month : A full month in one view ● Week : Hourly blocks for the days in one full week ●...
-
Page 82: Memo
To protect the memo from accidental deletion, select ● → To print the memo via Wi-Fi or USB, select . Your ● device is compatible only with some Samsung printers. → To send the memo to others, select ● Personal information... -
Page 83: Connectivity
Data transfers may fail when using a USB hub. › Connect with Samsung Kies Ensure that Samsung Kies is installed on your computer. You can download the program from the Samsung website. Samsung Kies will work on both Windows and Macintosh computers. - Page 84 › Connect as a media device You can connect your device to a computer and access media files stored on your device. Connect your device to a computer with a USB cable. Tap the right bottom of the screen to open the notifications panel.
-
Page 85: Tv Connections
TV connections You can control a TV remotely with your device to browse your favourite shows and get programming suggestions based on your choices. You can also control other devices connected to the TV. › Set your device as a remote control for a TV You must first connect your device to a Wi-Fi AP and ensure that the device’s infrared port is facing the TV. -
Page 86: Wi-Fi
Option Function Reset Peel Reset the connection settings. Report your opinions for application Send Feedback development. Wi-Fi Learn to use your device’s wireless networking capabilities to activate and connect to any wireless local area network (WLAN) compatible with the IEEE 802.11 standards. You can connect to the Internet or other network devices anywhere an access point or wireless hotspot is available. - Page 87 › Add a Wi-Fi AP manually Settings → Wi-Fi → In the application list, select network. Enter an SSID for the AP and select a security type. Set the security settings according to the security type you selected, and then select Save. ›...
- Page 88 Connect with a WPS PIN Settings → Wi-Fi. In the application list, select Show Select an AP that has WPS available, and then select advanced options. WPS drop-down menu. Select the PIN from access point to enter a WPS PIN of the AP Select or select PIN from this device to use a WPS PIN of your device.
-
Page 89: Wi-Fi Direct
› Customise Wi-Fi settings Settings → Wi-Fi → → In the application list, select Advanced. Change the following options: Option Function Network Set the device to notify you when an notification open Wi-Fi AP is available. Keep Wi-Fi on Set whether or not to keep the Wi-Fi during sleep feature active in Sleep mode. -
Page 90: Allshare Play
AllShare Play. To use the AllShare Play service, you must sign in to your Google and Samsung accounts, and register two or more devices as file servers. The registration methods may vary depending on the device type. To get more details about →... - Page 91 › Send a file AllShare Play. In the application list, select Select a registered device or storage that contains media files. Select a media category and select the tick box on a file. Select Select a registered device or storage to save the file. ›...
- Page 92 › Use the Group Cast feature You can share screens with multiple other devices that are connected to the same Wi-Fi AP. AllShare Play. In the application list, select Select a media category and select the tick box on a file. Group Cast.
-
Page 93: Bluetooth
View AllShare Play information. Bluetooth Learn to exchange data or media files with other devices via Bluetooth. Samsung is not responsible for the loss, interception, ● or misuse of data sent or received via the Bluetooth feature. Always ensure that you share and receive data with ●... - Page 94 › Activate the Bluetooth feature In the application list, select Settings and then drag the Bluetooth switch to the right. › Find and pair with another device Settings → Bluetooth → In the application list, select Scan. Select a device. OK to match the Bluetooth PIN between two Select devices.
-
Page 95: Gps
› Receive data via Bluetooth Settings → Bluetooth and In the application list, select then select the tick box next to your device. To select the length of time that your device will be → Visible time-out. visible, select OK to match the Bluetooth PIN or When prompted, select enter the Bluetooth PIN and select OK (if necessary). -
Page 96: Vpn Connections
› Activate location services You must activate location services to receive location information or search the map. Settings → Location In the application list, select services. Change the following options: Option Function Use wireless Set to use Wi-Fi to find your location. networks Use GPS Set to use GPS satellites to find your... - Page 97 › Set up a VPN profile Settings → More settings → In the application list, select Add VPN network. → Change the following options: Option Function Name Enter a name for the VPN server. Type Select a VPN type. Server address Enter the address of the VPN server.
- Page 98 Option Function PPP encryption Set to encrypt data before sending it (MPPE) to the VPN server. Show advanced Set to change the advanced network options settings. The options available may vary depending on the VPN type. Save. When you are finished, select ›...
-
Page 99: Tools
Tools Alarm Learn to set and control alarms for important events. › Set an alarm Alarm. In the application list, select Select Set the details of the alarm. Done. When you are finished, select To deactivate an alarm, select the clock icon next to the alarm. -
Page 100: Calculator
Calculator Learn to perform calculations with your device. › Perform a calculation Calculator. In the application list, select Use the keys on the screen to perform basic calculations. › View the calculation history Calculator. In the application list, select Perform a calculation. Select to hide the calculator keypad. -
Page 101: Dropbox
Dropbox Learn to use the Dropbox cloud storage service to save and share your files with others. When you save files to your Dropbox folder, your device automatically synchronise with the web server and any other computers that have Dropbox installed. -
Page 102: My Files
› View a file Dropbox → In the application list, select Select a file. My files Learn to access various types of files saved in your device. › Supported file formats Your device supports the following file formats: Type Format Image bmp, gif, jpg, png Video... -
Page 103: Polaris Office
› View a file My files. In the application list, select Select a folder. To move up one level in the file directory, select ● To return to the Home directory, select ● Select a file. From the folder list, access the following options: To search for files saved in your device, select ●... - Page 104 › Create a document Polaris Office. In the application list, select If you are launching this application for the first time, register as an online user or skip the registration. → Select a document type. Select a template (if necessary). Create the document.
-
Page 105: Search
To open the editing toolbar, select ● To start a slide show in a PowerPoint document, select ● Tap the screen to move to the next slide. Select to exit the slide show. To search for text in a Text document, select ●... -
Page 106: World Clock
World clock Learn to view the time in another region and set world clocks to appear on your display. World clock → In the application list, select Enter a city name or select one from the globe. Select To apply summer time to the clock, tap and hold the clock, and then select DST settings. -
Page 107: Settings
Change the settings to control connections with other devices or networks. › Flight mode Activate Flight mode to disable all wireless functions on your device. You can use only non-network features. › Kies via Wi-Fi Connect your device to Samsung Kies via Wi-Fi. Settings... -
Page 108: Sound
› Set up and manage virtual private networks (VPNs). › Wi-Fi Direct Activate the Wi-Fi Direct feature to connect two devices via Wi-Fi without requiring an AP. › Nearby devices File sharing : Activate media sharing to allow other DLNA ●... -
Page 109: Display
Touch sounds : Set the device to sound when you select an ● application or option. Screen lock sound : Set the device to sound when you lock ● or unlock the touch screen. Display Change the settings to control the display and backlight on your device. -
Page 110: Power Saving
Power saving Activate Power saving mode and change the settings for Power saving mode. CPU power saving : Set the device to limit some system ● resource usage. Screen power saving : Set the device to decrease the ● brightness of the display. Learn about power saving : View information for saving ●... -
Page 111: Location Services
Location services Change the settings for location services. Use wireless networks : Set to use Wi-Fi for finding your ● location. Use GPS satellites : Set to use GPS satellites for finding your ● location. Location and Google search : Set the device to use your ●... - Page 112 ● device via the Internet when your device is lost or stolen. SamsungDive web page : Access the SamsungDive ● website to register your Samsung account. Make passwords visible : Set to show your passwords as ● you enter them.
-
Page 113: Language And Keyboard
Language and keyboard Change the settings for languages and text input. › Language Select a display language. › Default Select a text input method. › DioPen Chinese IME To change the DioPen Chinese IME keypad settings, select . Vibrate on keypress : Set the device to vibrate when you ●... - Page 114 Key-tap sound : Set the device to sound when you tap a ● key. Tutorial : View the tutorial for using the Samsung keypad. ● Reset settings : Reset the Samsung keypad settings to the ● factory defaults.
-
Page 115: Back Up And Reset
› Voice search Language : Select a language for Google voice recognition. ● SafeSearch : Select a level for filtering out explicit text and ● images from voice search results. Block offensive words : Set to hide offensive words from ●... -
Page 116: Accessory
Accessory Change the accessory settings. Dock sound : Set the device to play a sound when your ● device is connected to or removed from a desktop dock. Audio output : Select a sound output format to use when ● connecting your device to HDMI devices. -
Page 117: Developer Options
Accessibility shortcut : Add a shortcut to accessibility ● settings that appears when you press and hold the Power key. Screen time-out : Select the length of time that the device ● waits before turning off the display backlight. TalkBack : Activate TalkBack, which provides voice ●... -
Page 118: About Device
Show touches : Set to show the pointer when you touch ● the screen. Show screen updates : Set to flash areas of the screen ● when they are updated. Show CPU usage : Set to list all active processes. ●... -
Page 119: Troubleshooting
Restart your device to clear any temporary software bugs. ● Ensure that your device’s software is upgraded to the latest ● version. If the touch screen is scratched or damaged, take your ● device to a Samsung Service Centre. Troubleshooting... - Page 120 If the battery will no longer charge completely, you need to replace it with a new battery. Take your device to your local Samsung Service Centre. Your device is hot if touched When you use applications that require more power or use applications on your device for an extended period of time, your device may feel hot.
- Page 121 Restart the device. If you are still having trouble with ● the camera application after trying these tips, contact a Samsung Service Centre. Error messages appear when opening music files Some music files may not play on your device for a number of reasons.
- Page 122 Ensure that your device and the other Bluetooth device are ● within the maximum Bluetooth range (10 m). If the tips above do not solve the problem, contact a Samsung Service Centre. A connection is not established when you connect...
- Page 123 To install Samsung Kies (PC Sync) Download the latest version of Samsung Kies from the Samsung website (www.samsung.com/kies) and install it on your computer. Connect your device to a computer with a USB cable.