
Related Manuals for Mylek MYMD1062

Summary of Contents for Mylek MYMD1062
- Page 1 Metal Detector MYMD1062 User Manual— Please read and retain for future reference www.hsdonline.co.uk...
- Page 2 Introduction: General Information: Please read the entire instruction manual before using the product and then save it for future reference. We reserve the right for any errors in text or images and any necessary changes made to technical data. If you have any questions concerning technical problems please contact our Customer Services on 0800 091 3171.
-
Page 3: Technical Information
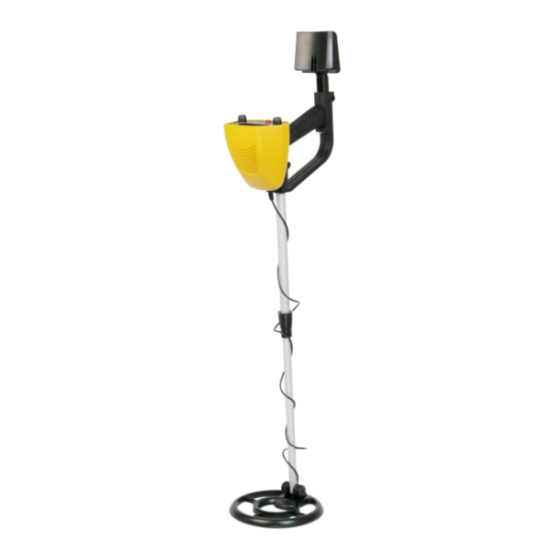
Technical Information: Metal Detector Model: MYMD1062 Voltage: 9V DC Battery Sensitivity: 12 – 15 cm Parts List : No. Description No. Description 1. PCB board 22 Handle 2. Screw 23 Screw 3. PCB board 24 Screw 4. Top Cover 25 Fixing knob 5. - Page 4 www.hsdonline.co.uk...
-
Page 5: Treasure Hunter's Code Of Ethics
TREASURE HUNTER’S CODE OF ETHICS: All treasure hunters might be judged by the example you set. Here are a few basic rules you should follow while using your detector. Always get permission before searching any site. ⚫ Respect the rights and property of others. ⚫... - Page 6 3. Insert the latch on the top of the handle into the assembly hole on the bottom of the control box. Then slightly pull the handle in the direction of IN on the handle to fix the latch in place. 4.
-
Page 7: Adjusting The Search Coil
ADJUSTING THE STEM: Follow these steps to adjust the metal detector’s stem. 1. Carefully turn the stem’s lock nut clockwise until it loosens. 2. Lengthen or shorten the stem so when you stand upright you are comfortable with the detector in your hand, the search coil is level with and about 1/2 to 2 inches above the ground with your arm relaxed at your side. -
Page 8: Installing Batteries
INSTALLING BATTERIES: 1. If the detector is on, turn VOLUME (on the control housing) to OFF. 2. Press on the correct battery compartment cover and slide the cover off in the direction of the arrow. Please note this unit only requires 1 x 9v battery (not supplied) in the compartment shown. -
Page 9: Traffic Safety
To connect earphones to the detector, insert the earphones’ 1/8-inch plug into the EAR jack on the bottom right on the front of the control housing. Note: The detector’s internal speaker disconnects when you connect earphones. Traffic Safety: Do not wear earphones while operating your detector near high-traffic areas. -
Page 10: Tuning The Detector
Tuning the Detector: 1. Rotate VOLUME to the 11 o’clock position. 2. Set DISCRIMINATION to its midpoint. 3. Hold the search coil about 1 foot above the ground and keep away from any metal objects. 4. Hold down the Auto Tune button on the handle until the pointer on the view meter rests at or near 0, then release the Auto Tune button. -
Page 11: Outdoor Testing And Use
If the detector detects the material, it might sound a tone. The pointer moves to the left and the TARGET indicator indicates by red light (ferrous) or to the right and the TARGET indicator indicates by green light (non-ferrous) while the detector determines the type of metal it is detecting. -
Page 12: Search Coil Sweeping Hints
Search Coil Sweeping Hints: Never sweep the search coil as if it were a pendulum. Raising the ⚫ search coil while sweeping or at the end of a sweep causes false readings. See below for correct sweep technique. Sweep slowly – hurrying makes you miss targets. ⚫... -
Page 13: Fine-Tuning The Detector
Fine-tuning the detector: After you become familiar with how your detector works, you can fine-tune it to make it more selective in what it finds. Discrimination is the detector’s ability to differentiate between types of metal. The detector’s DISCRIMINATION setting determines whether the detector will distinguish between different types of ferrous and non-ferrous metals. -
Page 14: Pinpointing A Target
PINPOINTING A TARGET Accurately pinpointing a target makes finding the item easier. Accurate pinpointing takes practice so we suggest you practice finding and digging up small metal objects on your own property before you search other locations. Sometimes, targets are difficult to accurately locate due to the sweep direction. -
Page 15: Troubleshooting
TROUBLESHOOTING: Problem Suggestions detector might sweeping displays false detector’s search coil too fast or signals. at the wrong angle. Sweep the search coil more slowly and hold detector correctly. “Testing and Using the Detector” and “Pinpointing a Target”. The detector might show a false signal detects heavily... -
Page 16: Environmental Responsibilities
If you have any problems with this product, please call our Help Desk on 0800 091 3171 or email sales@hygienesuppliesdirect.com Hygiene Supplies Direct Ltd, Castleford, England WF10 1PR declares that the Metal Detector is exclusively manufactured and imported for Mylek.
Need help?
Do you have a question about the MYMD1062 and is the answer not in the manual?
Questions and answers