Trane ComfortLink II XL1050 Manual
Hide thumbs
Also See for ComfortLink II XL1050:
- Manual (32 pages) ,
- User manual (20 pages) ,
- Installation manual (32 pages)

Related Manuals for Trane ComfortLink II XL1050


Summary of Contents for Trane ComfortLink II XL1050
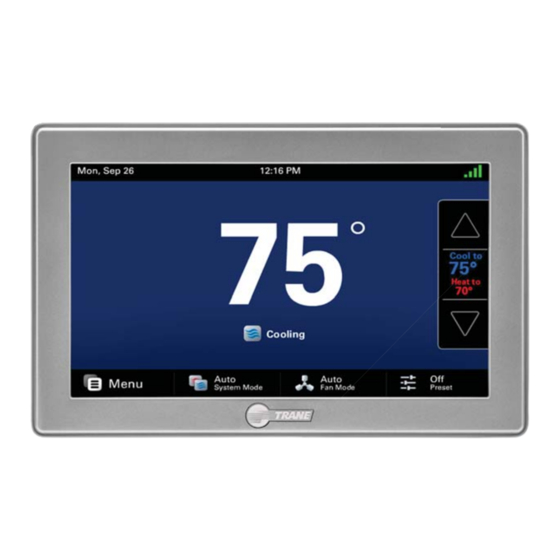
- Page 1 ComfortLink™ II XL1050 One System. Limitless Potential. Complete Control. Model TZON1050AC52ZA 32-5093-04B-EN...
- Page 2 Smart Control right away. • Screen Lock & Guest Access Security • Ten Year Warranty To enjoy the full benefit of your XL1050 Smart Control, it should be connected to a Trane Home • User Setup Wizard ® account. Trane Home is a cloud based platform •...
-
Page 3: Table Of Contents
Quiet Mode ............. 30 Notices Trane Home Remote Climate Access is included with the purchase of Trane smart connected controls. Up to eight Trane smart controls, of any FCC & IC NOTICE ............ 31 combination, may be connected to a Trane Home account without a monthly service fee. Additional smart controls and home automation devices may require a monthly subscription for remote access via most web-enabled smartphones, tablets and computers. -
Page 4: Navigation Overview
Navigation Overview All of the XL1050 features may be accessed via the Home, Menu, and Settings screens Home Screen Menu Screen Settings Screen 4:19 PM Wed, Jul 13 ° Cool to 74° Heat to 70° Cooling Auto Auto Menu System Mode Fan Mode Preset From Home Screen, select: MENU... -
Page 5: Home Screen
Home Screen Noti cations and System Alerts Trane Home and Network Date and 4:19 PM Time Wed, Jul 13 Status Increase temperature ° Current temperature and status is Cool to displayed 74° Heating or Cooling Heat to temperature 70° adjustment... -
Page 6: Menu Screen
Menu Screen Edit your schedule (when scheduling Weather, 5-Day Forecast, System Information: Alerts, is enabled) or edit 1-Touch Presets Demand Response, Radar and Weather Noti cations, and About (when scheduling is disabled) Alerts. View individual User settings Zone Temperature (see Settings and Temperature Screen) Settings in a... -
Page 7: Settings Screen
Settings Screen Manually set the Date, Time and Time Zone. No need to update when User Setup Wizard Modify screen brightness, backlight timer, screensaver, connected to Trane Home. and color theme Temperature scale, Deadband, Calibration* and Displayed Outdoor Temperature Sensor source Connect to a Wi-Fi network. -
Page 8: Home Screen Customization
Home Screen Customization Wed, Jul 13 4:19 PM You may choose to use the Default home screen or customize the interface with the following features. ° Default Default + Presets Add Optional Widgets Cool to 74° (Scheduling is Disabled) (Scheduling is Disabled) (Scheduling may be Heat to 70°... -
Page 9: Default + Presets
Default + Presets 1-Touch Presets provide predetermined Set To edit the parameters, select the EDIT Choose the desired preset and select button, and first, select AWAY. APPLY. The preset temperature settings Points for Home, Away and Sleep time periods. will be displayed on the Home Screen. The Note: 1-Touch Presets requires Scheduling To change the Cooling Set Point, select the selected preset will display at bottom right:... -
Page 10: Adding Widgets
Adding Widgets Optionally, up to 3 widgets may be chosen to appear on your home screen. They can be selected by navigating to Menu > Settings > Screen > Screen Layout When scheduling is 4:19 PM Wed, Jul 13 enabled, the Preset button is disabled In multi-zone and a Permanent... -
Page 11: User Setup Wizard
XL1050’s user configurable settings. Display To complete the Setup Wizard and connect the Screen Layout XL1050 to Trane Home, you need the following: Scheduling (A) Guided Schedules OR (B) 1-Touch Presets • Internet service Network • Your Wi-Fi network name and password Mobile App •... -
Page 12: Display
Begin wizard 1) Display From Home Screen, select: MENU > SETTINGS > USER SETUP WIZARD Select NEXT Select User Setup Wizard to begin. Select NEXT and set your preferred display brightness, backlight, screen saver and color theme settings. page 12 XL1050 User Guide... -
Page 13: Screen Layout
1 Requires internet service and registration with Trane Home. 2 Requires the servicing Trane dealer’s code to be entered in the control. 3 Requires weather service to be enabled. 4 Requires accessories to be installed. -
Page 14: Scheduling
3) Scheduling 4A) Guided Scheduling (If Scheduling Enabled Chosen) After selecting Scheduling Enabled, the welcome to Guided Scheduling screen is displayed. Select STAY HOME or LEAVE. Select NEXT. Scheduling Options in Wizard Stay Home will set up 2 periods per day, wake •... - Page 15 4B) 1-Touch Presets (If Scheduling Disabled Chosen) 1-Touch Presets provide predetermined Heating and Cooling Set Points for Home, Away and Sleep time periods. See page 9 for detailed instructions how to configure 1-Touch presets. Adjust the time you would prefer the Wake Period to Start using the up and down arrows.
-
Page 16: Network Setup
5) Network Setup There are several ways to connect the XL1050 2. Wi-Fi connection using WPS Select “Hidden Network” which will be at the Control to a local network: end of the list of available networks. If there are more than eight networks, you will need to scroll to the next page. -
Page 17: Mobile App Registration
CONNECT app to setup a Trane Home account. Download 4. The XL1050 also features an Ethernet jack NEW DEVICE. the Trane Home mobile app from the Google and may be connected to a router using CAT5 Play™... - Page 18 6) Mobile App Registration (cont.) Return to the XL1050 control and select NEXT. Read the License Agreement, then ACCEPT or DECLINE. Select CONTINUE. Enter the Pin Code and select NEXT. Registration successful. Select DONE. The mobile app will generate a Pin Code.
-
Page 19: Weather Setup
7) Weather Setup To view your local weather select LOCATION To view the 5 day forecast select FORECAST. To view weather warnings select ALERTS. and enter your Zip Code. Use the backspace button to delete the current To view the weather map select RADAR. Wizard zip code. -
Page 20: Manual Scheduling
Manual Scheduling The XL1050 Smart Control is capable of adjusting After selecting ENABLE SCHEDULE, the factory • Guided Scheduling – See the Guided Scheduling the temperature settings throughout the day default week-long schedule screen will be displayed. portion in the User Wizard. A series of screens will according to a user-programmable schedule. -
Page 21: Changing The Schedule
Changing the Schedule The day of the week to be To change the temperature settings in each period and adjust the period start and stop time press the red or blue area. The up/down Day arrows will change to Temperature and Add/Delete period buttons scheduled is highlighted will change to Time Start/Time Stop Schedule... - Page 22 Changing the Schedule (cont.) Changing Period Start or End Times To change temperature settings press in the red or blue 1. Select anywhere in a Period to make it Adjust start and area, then adjust the setting up or down with the arrows active.
-
Page 23: Adding Periods
Adding Periods Adding Periods 1. Select ADD PERIOD, the Add Period Screen is displayed. 2. Select the green circle where you would like to insert a Period. Press one of the plus signs to insert a new period here. 3. Choose a name for the new Period or select New to define a custom name and select Add Period NEXT. -
Page 24: Deleting Periods
Deleting Periods Deleting Periods 1. From the Schedule Screen select DELETE PERIOD, the Delete Periods Screen is displayed. Press one of the trash cans to delete that period. 2. Press the TRASH CAN icon in the Period(s) you wish to delete. Delete Period 3. -
Page 25: Screen Lock And Guest Access
Screen Lock and Guest Access The XL1050 features several options to lock the screen so users cannot make unwanted changes. Turning on Guest Access allows users to make up to 5 degree changes to temperature settings. All other settings will remain locked. Applying screen lock will cause the screen to lock Screen Lock after 1 minute of inactivity. -
Page 26: Trane Home
Trane Home When enrolled to a Trane Home account, the XL1050 is a Z-Wave Plus™ security-enabled device that can serve as a central hub for an entire network of home automation devices, POWER NETWORK including all non-battery powered devices that will act as repeaters on your network. -
Page 27: Adding/Removing Z-Wave Devices
DEVICE button. Advanced Z-Wave Settings Select ADVANCED for advanced Z-Wave functions including unregistering your bridge from Trane Home or factory resetting your bridge. See the Advanced Z-Wave Settings section for more information. Update Network Select UPDATE NETWORK to update the network of your bridge. -
Page 28: Adding Z-Wave Devices (Via Mobile App)
Adding Z-Wave Devices (via mobile app) 4. Select Z-Wave Device. Alternatively, your XL1050 allows you to add Z-Wave devices using the Trane Home app on your mobile device. Adding Z-Wave Devices 1. Start the mobile app. 2. Select the menu button in the top left corner. -
Page 29: Advanced Z-Wave Settings
This function is not allowed if your bridge is a primary controller with included Z-Wave devices. Unregister Removes the bridge from Trane Home. All remote control features will be disabled. Factory Reset Resets all Z-Wave information and removes all devices from the bridge. -
Page 30: Other Features
Remove, exclude, exclusion Automatic Software Updates COPY Copy, learn, replicate, replication When the XL1050 is connected to Trane Home, software updates will occur automatically and do not require user intervention. Other Information NOTE: Internet services are required for automatic software updates. -
Page 31: Fcc & Ic Notice
Notices FCC Notice IC NOTICE instructions, may cause harmful interference to radio communications. However, there is no FCC ID: XVRZON1050 IC ID: 6178D-ZON1050 guarantee that interference will not occur in a INFORMATION TO USER This device complies with Industry Canada particular installation. - Page 32 For more information, please visit trane.com or tranetechnologies.com. Trane has a policy of continuous data improvement and it reserves the right to change design and specifications without notice. We are committed to using environmentally conscious print practices.
Need help?
Do you have a question about the ComfortLink II XL1050 and is the answer not in the manual?
Questions and answers
All of a sudden, my Trane ComfortLink IIXL1050 lost wireless connectivity. It will not respond to any effort to connect to the network that I have used successfully for years via my iPhone 12 Pro. In Menu, I click on the icon to connect to "wireless" with no response. I **** an 85 year old unskilled person so if I have to reboot, will I have phone help to give step by step instructions so that I will not lose heat as this is winter? Thank you.