
Subscribe to Our Youtube Channel
Related Manuals for New Holland 9040L


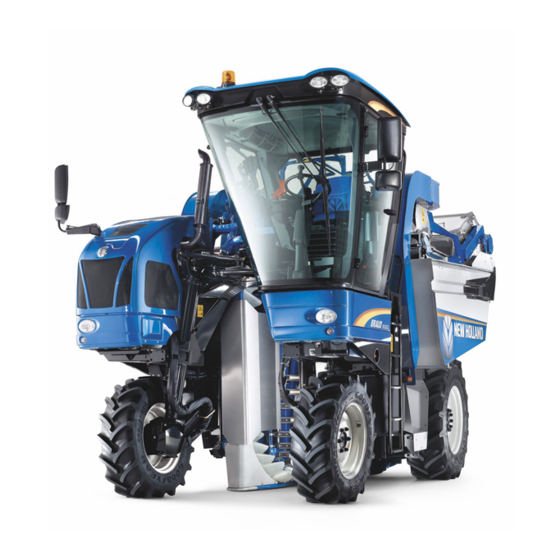
Summary of Contents for New Holland 9040L
- Page 1 SERVICE MANUAL 9040L / 9040M / 9060L H / 9060L / 9080L H 9080L / 9090L GE / 9090L H / 9090L Grape Harvester Part number 84490331C English April 2014 Copyright © 2014 CNH Industrial France S.A.S. All Rights Reserved.
- Page 2 SERVICE MANUAL 9040L 9040M 9060L 9080L 9090L 84490331C 27/03/2014 Find manuals at https://best-manuals.com...
- Page 3 Link Product / Engine Product Market Product Engine 9040L Europe F4HE9484 9040L International Region F4HE9484 null [HAG00690K00002 - ] Europe F4HE9687 null [HAG00690K00002 - ] International Region F4HE9687 9080L International Region F4HE9687 9080L Europe F4HE9687 9090L Europe F4HE9687 9090L International Region...
- Page 4 Contents INTRODUCTION Rear axle system................ 27 [27.100] Powered rear axle..............27.1 Hydrostatic drive.................
- Page 5 [55.924] Cab grape harvesting controls ........... . . 55.4 [55.408] Warning indicators, alarms, and instruments .
- Page 6 INTRODUCTION 84490331C 27/03/2014 Find manuals at https://best-manuals.com...
-
Page 7: Table Of Contents
Contents INTRODUCTION Foreword (*) ..................3 Foreword . - Page 8 INT --- WE IMPORTANT INFORMATION All repair and maintenance operations described in this manual must be carried out exclusively by the New Holland Service network, strictly complying with the instructions provided and using specific tools as required. Any operator who carries out the operations specified in this document without complying strictly with the instructions provided shall be personally liable for the damages that may result.
- Page 9 INTRODUCTION Foreword Technical Information This information in this manual has been structured using a unique coding environment. This is the way in which technical information is created, stored and retrieved in the Technical Information Database. The location (on the machine) has been coded using SAP coding to align locations with the warranty system. The coding classifies all information in three ways.
- Page 10 INTRODUCTION Sections Sections are grouped according to the main functions or a systems on the machine. Each Section is identified by a letter number etc. The amount of Sections included in the manual will depend on the type and function of the machine that the manual is written for.
- Page 11 INTRODUCTION This manual contains these sections. Contents INTRODUCTION Engine Rear axle system Hydrostatic drive Brakes and controls Hydraulic systems Frames and ballasting Direction Electrical systems Grape harvester shaking Product feeding Cleaning Secondary cleaning / Destemmer Crop storage / Unloading Accessories Your manual contains these Sections.
- Page 12 INTRODUCTION Information Units and Information Search Each chapter is composed of information units. The coding is not included in the Information Unit title. Page Header and Footer The page header will contain the following references: • Section and Chapter description The page footer will contain the following references.
-
Page 13: Basic Instructions
INTRODUCTION Basic instructions 9000 L INT --- WE 9040M INT --- WE SHIMMING For each adjustment operation, select adjusting shims, individually measure using a micrometer, then add up the recorded values. Do not rely on measuring the entire shimming set, which may be incorrect, and do not rely on the rated value indicated on each shim. - Page 14 INTRODUCTION PROTECTING THE ELECTRONIC/ELECTRICAL SYSTEMS DURING CHARGING OR WELD- To avoid damaging the electronic/electrical systems, always follow the safety instructions below: 1. Never make or break any of the charging circuit connections, including the battery connections, when the engine is running. 2.
- Page 15 Only genuine spare parts guarantee the same quality, duration, and safety of original parts, as they are the same parts installed during standard manufacturing operations. Only New Holland genuine spare parts can offer this guarantee. When ordering spare parts, always provide the following information: •...
-
Page 16: Torque Hydraulic Connectors
INTRODUCTION Torque Hydraulic connectors 9000 L INT --- WE 9040M INT --- WE NOTICE: The data below applies to general use of lightly lubricated, standard hydraulic connection threads whose counterparts are steel. BSP hydraulic adapter connections Nut nominal size Tightening torques BSP SIZE Nm (lbsf/ft) 17 Nm (12.5 lb ft) - Page 17 INTRODUCTION Metric system Nut nominal size Tightening torque NM (lbsf/ft) 5/16-24 . 10 Nm (7 lb ft) 3/8-24 . 10 Nm (7 lb ft) 7/16-20 . 14 Nm (10 lb ft) 1/2-20 . 20 Nm (15 lb ft) 9/16-18 . 22 Nm (20 lb ft) 5/8-18 .
-
Page 18: Special Tools
INTRODUCTION Special tools - List of special tools for the entire machine - Hot air blower to weld conveyor belts, Ref.: 298207. COIL11GRH036A0A Manual pliers to fit rivets to baskets. Ref. : 298201. COIL11GRH038A0A Pneumatic pliers to fit rivets to baskets. Ref. : 298202. COIL11GRH037A0A Tool to screw the lift cylinder parachute valves onto the front of the machine. - Page 19 INTRODUCTION Tool to fit the wheel motor brake pistons. Ref: 298229. H and h = 10 mm (0.394 in). D1 = 215 mm (8.465 in). d1 = 205 mm (8.071 in). D2 = 190 mm (7.480 in). d2 = 180 mm (7.087 in). COIL11GRH040A0A Spanner to tighten the extractor castellated nuts.
- Page 20 INTRODUCTION Clamp to remove complete rotors from the destemmers. A = 475 mm (18.701 in). B and C = 10 mm (0.394 in). D = Ø: 26 - 34 mm (1.024 - 1.339 in). E = Radius 21 mm (0.827 in). F = 200 mm (7.874 in).
- Page 21 INTRODUCTION Tool to remove the pins in the round "Deutsch" harness connector of harvesting equipment Kit ref.: 380 000 350 comprising: - 80 900 370 for pin Ø 8 mm white - - 80 900 371 for pin Ø 6.8 mm green - - 80 900 372 for pin Ø...
- Page 22 INTRODUCTION Tool for removing and refitting the front struts. ITEMS DESCRIPTIONS DIMENSIONS QUAN- MATERIAL TITY Tube A = 193.7 mm (7.626 in) is the internal diameter of the tube. B = 650 mm (25.6 in). C = 5.4 mm (0.213 in) is the thickness of the tube. Threaded rod A = 1200 mm (47.2 in).
- Page 23 INTRODUCTION COIL11GRH049H0B 84490331C 27/03/2014...
-
Page 24: Conversion Factors
INTRODUCTION Conversion factors 9000 L INT --- WE 9040M INT --- WE Linear 1 mm 0.03937 in 1 in 25.4 mm 1 Km 0.6214 miles 1 mile 1.6093 km 3.281 ft 1 ft 0.3048 m Surface 1 ha 2.471 acre 1 acre 0.4047 ha Volume... -
Page 25: Product Identification
INTRODUCTION Product identification 9000 L INT --- WE 9040M INT --- WE EXPLANATION OF MACHINE SERIAL NUMBERS Example: No. HAG 00 --- E 00 001 001 HAG 00 --- E 00 001 001: the first three figures is a code for Coëx production (France) HAG 00 --- E 00 001 001: free areas are marked 00 HAG 00 --- E 00 001 001: these three figures relate to the machine type 9060L = ---... - Page 26 SERVICE MANUAL Rear axle system 9040L 9040M 9060L 9080L 9090L 84490331C 27/03/2014...
- Page 27 Contents Rear axle system - 27 [27.100] Powered rear axle..............27.1 84490331C 27/03/2014...
- Page 28 Rear axle system - 27 Powered rear axle - 100 9040L 9040M 9060L 9080L 9090L 84490331C 27/03/2014 27.1 [27.100] / 1...
- Page 29 Contents Rear axle system - 27 Powered rear axle - 100 SERVICE Rear axle Transform - Changing the rear track - (*) ............3 (*) See content for specific models 84490331C 27/03/2014 27.1 [27.100] / 2...
- Page 30 Rear axle system - Powered rear axle Rear axle - Transform - Changing the rear track - 9040L INT --- WE 9060L INT --- WE 9080L INT --- WE 9090L INT --- WE NOTE: To change the rear track of the machine by 160 mm (6.3 in), you must turn over the wheel arm fastening bearings.
- Page 31 Rear axle system - Powered rear axle 6. Remove the spring retaining rings (7) and pull out the bearings (5). COIL11GRH022A0B 7. Fit the bearings (8) onto the wheel arms at the required track width. • Position A = wide track. •...
- Page 32 Rear axle system - Powered rear axle 14. Adjust the side stops of the harvesting equipment. • The diagram shows how the stop is fitted when the machine track is in the wide position. The spacer ring (10) is fitted inside the bracket. •...
- Page 33 Index Rear axle system - 27 Powered rear axle - 100 Rear axle - Transform - Changing the rear track - (*) ........... . 3 (*) See content for specific models 84490331C 27/03/2014 27.1 [27.100] / 6...
- Page 34 84490331C 27/03/2014 27.1 [27.100] / 7...
- Page 35 All rights reserved. No part of the text or illustrations of this publication may be reproduced. NEW HOLLAND policy is one of continuous improvement and the right to change prices, specification or equipment at any time without notices is reserved.
- Page 36 SERVICE MANUAL Hydrostatic drive 9040L 9040M 9060L 9080L 9090L 84490331C 27/03/2014...
- Page 37 Contents Hydrostatic drive - 29 [29.218] Pump and motor components............29.1 [29.202] Hydrostatic transmission .
- Page 38 Hydrostatic drive - 29 Pump and motor components - 218 9040L 9040M 9060L 9080L 9090L 84490331C 27/03/2014 29.1 [29.218] / 1...
- Page 39 Contents Hydrostatic drive - 29 Pump and motor components - 218 SERVICE Pump Remove - Forward control pump- ............. 3 Install - Forward control pump- .
-
Page 40: Remove - Forward Control Pump
Hydrostatic drive - Pump and motor components Pump - Remove - Forward control pump- NOTE: When removing the hydraulic piping, have a suitable container readily available to capture any residual hy- draulic oil. 1. Remove the shaker control pump. (see instructions) Hydraulic systems - Remove - Shaker control pump - (35.000). - Page 41 Hydrostatic drive - Pump and motor components 11. Unscrew the screw (11) and remove the sleeve (12). COIL10GRH446A0B 84490331C 27/03/2014 29.1 [29.218] / 4...
-
Page 42: Install - Forward Control Pump
Hydrostatic drive - Pump and motor components Pump - Install - Forward control pump- NOTE: The component weighs approximately 83 kg (183.0 lb). Install a suitable lifting device. 1. Unplug the pump ports to fit the union installations (2). 2. Fit the drive shaft (3)sleeve. To do this: •... - Page 43 Hydrostatic drive - Pump and motor components 8. Connect all the electrical connectors to the HP block (8). COIL10GRH449A0B NOTE: The forward motion circuit will not function correctly unless the electrical connections correspond to those in the diagram. 9. Fasten the hydraulic block (12) to the inside of the ma- chine using screws (13).
- Page 44 Hydrostatic drive - Pump and motor components 14. Re-fit the shaker pump. (see instructions) Hydraulic systems - Install - Shaker control pump - (35.000) 15. Fit a manometer of 300 bar (4350.0 psi) minimum on the standby Minimess connector (A) on the HP block 16.
-
Page 45: Remove - Rear Wheel Motor - (*)
Hydrostatic drive - Pump and motor components Motor - Remove - Rear wheel motor - 9000 L INT --- WE 9040M INT --- WE NOTE: When removing the hydraulic piping, have a suitable container readily available to capture any residual hy- draulic oil. - Page 46 Hydrostatic drive - Pump and motor components 5. Remove the fixing screws (6) and take out the motor. COIL10GRH460A0B ATTENTION: The component weighs approximately 160 kg (352.7 lb). Install a suitable lifting device. 6. Remove the hose installations from the motor and plug them.
-
Page 47: Install - Rear Wheel Motor - (*)
1. Check that the motor is installed on the correct side of the machine. These motors have a specific direction of rotation. To ascertain the direction of rotation, check the part number NEW HOLLAND on the manufacturer's plate for the motor: • 87672923 — right-hand motor. - Page 48 Hydrostatic drive - Pump and motor components 7. Adjust the speed sensor. To do this: • Press the target (disc) against the hub using the wheel nuts. • Position the bracket between (8) and 3 mm (0.118 in) from the ends of the target (disc) (10). •...
-
Page 49: Remove - Front Wheel Motor - (*)
Hydrostatic drive - Pump and motor components Motor - Remove - Front wheel motor - 9000 L INT --- WE 9040M INT --- WE NOTE: When removing the hydraulic piping, have a suitable container readily available to capture any residual hy- draulic oil. -
Page 50: Install - Front Wheel Motor - (*)
Hydrostatic drive - Pump and motor components Motor - Install - Front wheel motor - 9000 L INT --- WE 9040M INT --- WE ATTENTION: The component weighs approximately 70 kg (154.3 lb). Install a suitable lifting device. 1. The left-hand and right-hand motors are identical and have no specific direction of rotation. - Page 51 This as a preview PDF file from best-manuals.com Download full PDF manual at best-manuals.com...
Need help?
Do you have a question about the 9040L and is the answer not in the manual?
Questions and answers