
Related Manuals for MASSEY FERGUSON MF 1800


Summary of Contents for MASSEY FERGUSON MF 1800
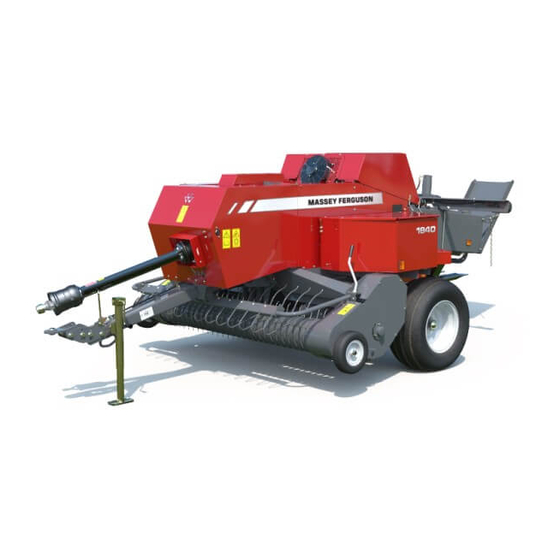
- Page 1 MF 1800 Series Small Square Baler Models: 1836 / 1838 / 1840 / 1840 CE s/n: AGCM18400FHBS3101 and Up OPERATOR’S MANUAL FROM MASSEY FERGUSON...
- Page 2 TO OUR CUSTOMER: ® Congratulations on your selection of a Massey Ferguson Product. We believe you have exercised excellent judgment in the purchase of your Massey Ferguson ® machine. We are most appreciative of your patronage. Your Dealer has performed the pre-delivery service on your new machine.
- Page 3 CONTENTS MASSEY FERGUSON ® 1836 / 1838 / 1840 / 1840 CE 700741544D Rev. CONTENTS SAFETY ................................A-1 GENERAL INFORMATION ..........................B-1 OPERATION ..............................C-1 ADJUSTMENTS ..............................D-1 LUBRICATION AND MAINTENANCE ....................... E-1 TROUBLESHOOTING ............................F-1 SPECIFICATIONS ............................. G-1 ACCESSORIES AND OPTIONS ........................H-1 ASSEMBLY .................................
- Page 4 CONTENTS NOTES A-ii 700741544D Rev. Find manuals at https://best-manuals.com...
-
Page 5: Table Of Contents
SAFETY SAFETY Contents Safety Alert Symbol ............................A-3 Safety Messages ............................A-3 Informational Messages ..........................A-4 Safety Signs ..............................A-4 A Word To The Operator ..........................A-4 Operator Manual ............................. A-5 Prepare For Operation ............................ A-6 Operation ................................ A-6 General Information ..........................A-6 Personal Protection Equipment ........................ - Page 6 SAFETY NOTES 700741544D Rev. Find manuals at https://best-manuals.com...
-
Page 7: Safety Alert Symbol
SAFETY SAFETY ALERT SYMBOL FIG. 1: The safety alert symbol means ATTENTION! BECOME ALERT! YOUR SAFETY IS INVOLVED! Look for the safety alert symbol both in this manual and on the safety signs on this baler. The safety alert symbol will direct you to information that involves your safety and the safety of others. -
Page 8: Informational Messages
SAFETY INFORMATIONAL MESSAGES The words IMPORTANT and NOTE are not related to personal safety, but are used to give additional information and tips for operating or servicing this equipment. IMPORTANT: Identifies special instructions procedures which, if not strictly observed, could result in damage to or destruction of the machine, process, or its surroundings. -
Page 9: Operator Manual
SAFETY Do not let anyone operate the machine without instruction and training. For your personal safety and the personal safety of others, follow all safety precautions and instructions found in the manuals and on safety signs affixed to the machine and all attachments. -
Page 10: Prepare For Operation
SAFETY PREPARE FOR OPERATION Read and understand all operating instructions and precautions in this manual before operating or servicing the machine. Make sure you know and understand the positions and operations of all controls. Make certain all controls are in neutral and the tractor parking brake is applied before starting the machine. -
Page 11: Personal Protection Equipment
SAFETY Stay off slopes too steep for operation. Be aware of the size of the equipment and have enough space available to allow for operation. Make sure all persons are clear of the rear of the bale chute when raising and lowering the chute, throwing, or dumping a bale. -
Page 12: Shields And Guards
SAFETY When the instructional seat is used the machine must be driven at a slower speed and on level ground. Avoid quick starts, stops and sharp turns. Avoid driving on highways or public roads. Shields and Guards FIG. 8: All shields and guards must be in the correct operating position and in good condition. -
Page 13: Flying Debris
SAFETY Flying Debris FIG. 11: Never stand near the machine during operation. Debris can be thrown from the machine during operation possibly resulting in injury. D-8278 FIG. 11 Agricultural Chemicals Agricultural chemicals can be very hazardous. Improper use of fertilizer, fungicides, herbicides, insecticides and pesticides can injure people, plants, animals, soil and other people’s property. - Page 14 SAFETY Make sure the tractor is in the proper operating condition according to the tractor operator manual. Make sure the tractor brakes and the machine brakes, if equipped, are adjusted correctly. The tractor must have enough weight and braking capacity, especially when operating on roads and terrain that is not even.
-
Page 15: Maintenance
SAFETY MAINTENANCE General Information FIG. 14: Before doing any unplugging, lubricating, servicing, cleaning, or adjusting: • Park the machine on a solid level surface. • Disengage the tractor PTO. • Put the tractor transmission in PARK and apply the tractor parking brake. •... -
Page 16: Fire Prevention And First Aid
SAFETY FIG. 16: Do not operate the machine with the drive shaft shields open or removed. Entanglement in rotating drive shafts can cause serious injury or death. Stay clear of rotating components. Never start the tractor with the PTO engaged. Make sure rotating guards turn freely. -
Page 17: Checking For High Pressure Leaks
SAFETY If any flame cutting, welding, or arc welding is to be done on the machine or attachments, make sure to clear any crop material or debris from around the area. Make sure the area below the work area is clear of any flammable material as falling molten metal or sparks can ignite the material. -
Page 18: Tire Safety
SAFETY Tire Safety FIG. 22: Check tires for cuts, bulges and correct pressure. Replace worn or damaged tires. When tire service is needed, have a qualified tire mechanic service the tire. Tire changing can be very hazardous and must be done by a qualified tire mechanic using proper tools and equipment. -
Page 19: Safety And Information Signs - Non-Ce
SAFETY SAFETY AND INFORMATION SIGNS - NON-CE Safety and Information Signs on the Outside of the Baler D-23079 FIG. 23 FIG. 23: Safety and informational signs on left-hand front part of the baler. NOTE: The signs can be in different locations than is shown in this figure. - Page 20 SAFETY FIG. 25: Safety sign (2) Hazard (A) - Entanglement hazard in baler intake area. Avoidance (B) - Never reach into the pickup area with the tractor running and PTO connected. Stop the engine and remove the key before doing maintenance or repair work.
- Page 21 SAFETY FIG. 28: Safety sign (5) This decal is on the driveline cover. Hazard (A) - Entanglement hazard. Rotating shaft/PTO driveline Avoidance (B) - Do not reach into areas of moving parts Hazard (C) - General safety alert Avoidance (D) - Read the Operator Manual for safety information and operating instructions before operating the machine 700728658...
- Page 22 SAFETY FIG. 31: Safety sign (8) Hazard (A) - Entanglement hazard - belt and chain drives. Avoidance (B) - Wait until all movement has stopped before doing maintenance or repair work. 700716438 FIG. 31 FIG. 32: Safety sign (9) (A) Push the handle to the left-hand to unlock the knotter/needle lockout.
- Page 23 SAFETY D-23080 FIG. 33 FIG. 33: Safety and informational signs on the left-hand rear part of the baler. FIG. 34: Jack point sign (1) Shows the location to apply a jack On both sides 619718 FIG. 34 700741544D Rev. A-19...
- Page 24 SAFETY FIG. 35: Informational sign (2) Tie down location, on both sides 516932D1 FIG. 35 FIG. 36: Yellow reflector (3) The baler has yellow reflectors on both sides of the bale chamber and on the front of the left-hand twine box. 700717403 FIG.
- Page 25 SAFETY FIG. 38: Red reflector (5) The baler has two red reflectors, one on each side. 700717402 FIG. 38 FIG. 39: Safety sign (6) Hazard (A) - Crushing hazard - risk of personal injury. Needle frame can move without putting hay in the baler. Avoidance (B) - Turn off PTO and tractor engine and engage knotter/needle lockout before threading needles, threading knotters or adjusting twine tensioners.
- Page 26 SAFETY D-23084 FIG. 41 FIG. 41: Safety and informational signs on right-hand front part of the baler. FIG. 42: Safety sign (1) Hazard (A) - Entanglement hazard in baler intake area. Avoidance (B) - Never reach into the pickup area with the tractor running and PTO connected.
- Page 27 SAFETY FIG. 43: Yellow reflector (3) The baler has yellow reflectors on both sides of the bale chamber and on the front of the left-hand twine box. 700717403 FIG. 43 FIG. 44: Informational sign (3) Lubrication location on the top of the baler. There are nine lubrication locations on the baler.
- Page 28 SAFETY FIG. 46: Safety sign (5) Hazard (A) - General safety alert Avoidance (B) The machine is only to be operated with a 540 RPM PTO. This sign is on the outside of the front shield over the flywheel. 700714573 FIG.
-
Page 29: Safety And Information Signs On The Inside Of The Baler
SAFETY Safety and Information Signs on the Inside of the Baler FIG. 48: Danger - safety sign (7) Rotating driveline Contact can cause death Keep away! Do not operate without - • All drivelines, tractor and equipment shields in place •... - Page 30 SAFETY FIG. 50: Danger - safety sign (1) Danger Shield missing Do not operate Danger This decal is under the driveline cover, on the driveline. Driveline shield removed for clarity. 700708583 FIG. 50 D-22709 FIG. 51 FIG. 51: Decal at front of baler on left-hand side. FIG.
- Page 31 This as a preview PDF file from best-manuals.com Download full PDF manual at best-manuals.com...
Need help?
Do you have a question about the MF 1800 and is the answer not in the manual?
Questions and answers