Advertisement
Table of Contents
- 1 Important Safeguards
- 2 Additional Important Safeguards
- 3 Notes on Pressure Release Valve
- 4 Getting to Know Your Multi Cooker
- 5 Control Panel Function Time Chart
- 6 Before Using for the First Time
- 7 Before each Use
- 8 For Best Results
- 9 Cooking under Pressure
- 10 Rice Cooking Chart
- 11 Usda Cooking Guidelines
- 12 User Maintenance Instructions
- 13 Care and Cleaning Instructions
- 14 Storing Instructions
- 15 Troubleshooting
- 16 Recipe Guide
- Download this manual
Advertisement
Table of Contents

Related Manuals for Cooks Fast Pot 780-3857


Summary of Contents for Cooks Fast Pot 780-3857
- Page 1 6 quart multi cooker Owner’s Manual Lot No. 780-3857 SO-315533_22276_COOKS_6qt FastPot Multi Cooker_IM_R10.indd 1 2018-08-14 10:08 AM...
- Page 2 SO-315533_22276_COOKS_6qt FastPot Multi Cooker_IM_R10.indd 2 2018-08-14 10:08 AM...
-
Page 3: Important Safeguards
IMPORTANT SAFEGUARDS When using electrical appliances, basic safety precautions should always be followed, including the following: 1. READ ALL INSTRUCTIONS. 2. Do not touch hot surfaces. Use handles or knobs. 3. To protect against electrical shock, do not immerse cord, plugs or appliance in water or other liquid. 4. -
Page 4: Additional Important Safeguards
16. Intended for countertop use only. 17. WARNING: Spilled food can cause serious burns. Keep appliance and cord away from children. Never drape cord over edge of counter, never use outlet below counter, and never use with an extension cord. FOR HOUSEHOLD USE ONLY SAVE THESE INSTRUCTIONS ADDITIONAL IMPORTANT SAFEGUARDS... - Page 5 6. The cord to this appliance should be plugged into a grounded 3-prong 120V electrical wall outlet. 7. Do not use this appliance in an unstable position. 8. Never use the cooking pot on a gas or electric cook top or on an open flame. 9.
- Page 6 NOTES ON THE PLUG This appliance has a grounded 3-prong plug. Connect to a properly grounded outlet only. Do not attempt to modify the plug in any way. NOTES ON THE CORD A short power-supply cord (or detachable power-supply cord) is to be provided to reduce risks resulting from becoming entangled in or tripping over a longer cord.Never use with an extension cord.
-
Page 7: Notes On Pressure Release Valve
NOTES ON PRESSURE RELEASE VALVE: • The pressure release valve is used to regulate pressure inside the Multi Cooker while cooking. Small amounts of steam may escape during cooking, this is normal. • Never operate the Pressure Cooker under cabinets. When releasing steam, make sure the area several feet above the pressure release valve is clear from all lighting fixtures, furniture or cabinetry. - Page 8 INTRODUCING THE COOKS 6 QT FAST POT MULTI COOKER Multifunctional One Pot Cooking! With the ability to both pressure cook and slow cook, saute and steam, your Digital Multi Cooker is an absolutely indispensable kitchen appliance. 10 preset functions are automatically timed and temped to ensure perfectly cooked soups, stews, meats, chicken.
-
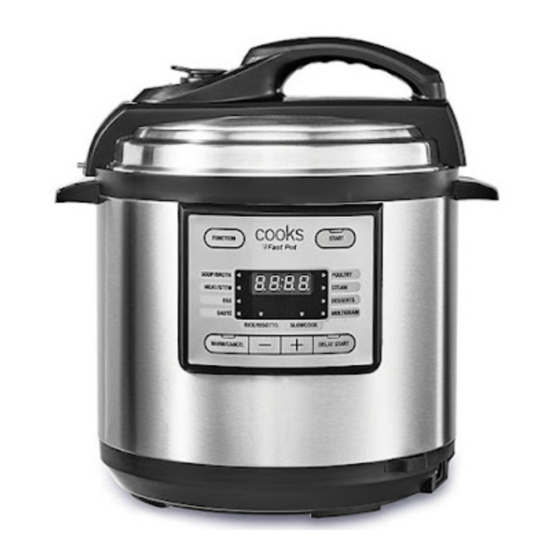
Page 9: Getting To Know Your Multi Cooker
GETTING TO KNOW Pressure Release Valve YOUR MULTI COOKER Safety Valve Product may vary Lid Handle (pops up when under pressure) slightly from illustrations. Housing Lid Aluminum Cover Gasket Removable Cooking Pot Base Handles Condensation Tray Time Display +/– TIME Buttons Control Panel Spatula Holder Base Unit... - Page 10 Figure 1A - Lid Underside Figure 2 - Control Panel Center hole Gasket Cover Grip Figure 1 Aluminum Cover Vent Strainer Cap Center Pin Lid Lock Safety Valve (as viewed from the bottom) SO-315533_22276_COOKS_6qt FastPot Multi Cooker_IM_R10.indd 10 2018-08-14 10:08 AM...
-
Page 11: Control Panel Function Time Chart
CONTROL PANEL FUNCTION TIME CHART The operating pressures mentioned below will be reached after the pressure build up cycle is complete. Make sure to securely lock the lid and set the pressure release valve to PRESSURE position. Function Default Time Minimum - Maximum Cook Temperature Time... -
Page 12: Before Using For The First Time
BEFORE USING FOR THE FIRST TIME 1. Carefully unpack your Multi Cooker. Remove all packaging materials from parts and accessories. Remove all labels and tags from the product. 2. Unlock the Lid: Firmly grasp the lid handle (Figure 3) and turn the lid clockwise (follow the arrow) to the UNLOCK position to open. - Page 13 5. Lid Assembly: Replace clean gasket. Make sure the gasket is attached properly around the aluminum cover. (See Figure 7.) With the cover grip facing outwards, place the cover’s center hole over the pin in the center of the lid’s underside. (See Figure 8.) Firmly press the aluminum cover into the inside of the lid.
-
Page 14: Before Each Use
8. Place the Digital Multi Cooker on a flat, level surface, approximately 2 feet from a standard 3-prong 120V electrical outlet. DO NOT let cord hang over the edge of a table or countertop. WARNING: When slow cooking or cooking under pressure, never place the Digital Multi Cooker under cabinets. When releasing steam, make sure the area several feet above the pressure release valve is clear from all lighting fixtures, furniture or cabinetry. - Page 15 OPERATING INSTRUCTIONS - 10 DIGITAL ONE-TOUCH FUNCTIONS • Delay Start IMPORTANT: Do not use DELAY START when cooking perishable foods that may spoil if left out at room temperature. The Multi Cooker offers a DELAY START from 1 minute to 2 hours. 1.
-
Page 16: For Best Results
FOR BEST RESULTS: Figure 10 • Always pat food dry with paper towels. • Cut food into small, uniform pieces. • SAUTE food in small batches. Do not crowd the cooking pot. 4. Add oil, as called for in the recipe. IMPORTANT: To avoid scratching the non-stick surface of the cooking pot, use non- metal, plastic or wooden utensils to turn food when sautéing or browning. - Page 17 • Slowcook The SLOWCOOK function allows cooking for up to 12 hours, much like a covered pot on the stove top, but safer. 1. Place food to be cooked into the removable cooking pot. IMPORTANT: Do not fill the removable cooking pot higher than the 3/5 line inside the cooking pot when cooking vegetables or whole pieces of meat.
-
Page 18: Cooking Under Pressure
• 8 Pressure Cook Functions RICE/RISOTTO, SOUP/BROTH, MEAT/STEW, EGG, STEAM, DESSERTS, POULTRY, MULTIGRAIN IMPORTANT: Since overcooked food cannot be corrected, it is advisable to err on the undercooked side by cooking an unfamiliar food for a shorter cook time than you may think necessary. You can always go back and continue cooking a minute or two longer if need be. - Page 19 4. Turn the pressure release valve to the PRESSURE position. Figure 13 (See Figure 13.) IMPORTANT: If the pressure release valve is not closed Pressure or is not in the PRESSURE position, the Multi Cooker will not build pressure. 5. Plug the cord into a 3-prong 120V AC electrical wall outlet. A series of 4 dashes (- - - - ) will be displayed. 6.
- Page 20 13. For all other pressure-cook functions, when cook time reaches 00 minutes (0:00), 5 audible beeps can be heard; “bb” will be displayed to indicate the unit has advanced to a 4 hour WARM cycle, during which the steam will be released naturally and then the Multi Cooker will turn itself OFF .
- Page 21 4. Plug the cord into a 3-prong 120V AC electrical wall outlet. A series of 4 dashes (- - - - ) will be displayed. 5. Use the FUNCTION button to select RICE/RISOTTO. The RICE/RISOTTO function light will illuminate and the START light will begin to flash.
-
Page 22: Rice Cooking Chart
RICE COOKING CHART IMPORTANT: Add one tablespoon of oil (vegetable, olive, sesame) to reduce excess foaming. NOTE: Use Rice Measuring Cup (provided) to measure both rice and water. RAW WHITE RICE (cups) WATER (cups) RAW BROWN RICE (cups) WATER(cups) 3-1/4 4-1/2 4-3/4 6-1/4... - Page 23 • Egg 1. Place the removable cooking pot into the base unit. Arrange 12 to 18 eggs in the stainless steel steam tray included with your Fast Pot Multi Cooker. Use the steam tray handles to lower eggs into the removable cooking pot. 2.
- Page 24 • Steam Use the STEAM function for steaming fresh or frozen vegetables as well as fresh fish and shellfish. PREPARING VEGETABLES FOR STEAM • Peel vegetables or scrub well. Keep in mind that hard vegetables such as potatoes and beets hold their shape better when the peel is left intact.
- Page 25 7. If a recipe calls for a time that is not the default cook time, press the “+” or “-“ buttons to manually change the time from 5 minutes (0:05) to 99 minutes (1:39). 8. Press START to begin operation. 9.
- Page 26 • Quick Steam Release NOTE: Quick Steam Release should be used when cooking with RICE/RISOTTO, EGG, STEAM, DESSERTS, and MULTIGRAIN functions, or whenever the recipe specifies. CAUTION: After using the SOUP/BROTH function, allow several minutes before releasing the pressure and removing the lid to prevent hot liquids from boiling over.
-
Page 27: Usda Cooking Guidelines
USDA COOKING GUIDELINES PLEASE NOTE: Cook all food to these minimum internal temperatures as measured with a food thermometer before removing food from the heat source. For reasons of personal preference, consumers may choose to cook food to higher temperatures. This chart is intended as a general guide by the USDA. Product Minimum Internal Temperature &... -
Page 28: Care And Cleaning Instructions
CARE & CLEANING INSTRUCTIONS NOTE: After cooking rice or larger pot meals, some cooking liquid may pool under the lid at the top of the unit around the cooking pot. This is normal. 1. Please follow the detailed Lid Disassembly instructions described in the BEFORE USING FOR THE FIRST TIME section of this instruction manual. -
Page 29: Storing Instructions
STORING INSTRUCTIONS 1. Unplug and allow unit to cool completely. Be sure all parts are clean and dry before storing. Assemble lid (see Figures 7 and 8) before storing. 2. Store the detachable power cord, rice measuring cup, andspatula in the cooking pot. 3. -
Page 30: Recipe Guide
RECIPE GUIDE Grab a thermometer, the finest, richest, organic whole milk, and any plain organic yogurt containing active yogurt cultures as a starter. Follow these simple steps to produce your own great-tasting, creamy 2-ingredient Organic Yogurt. Delicious with fresh fruit and granola. Combine fresh yogurt with your favorite herbs and spices for salad dressing. Add strained and chopped cucumbers, lemon and spices to make a fabulous tzatziki sauce. - Page 31 Organic Yogurt • 1/2 gallon organic whole milk • 1 tablespoon plain organic or organic Greek yogurt (with active yogurt cultures) 1. In preparation to your homemade yogurt-making experience, set up a yogurt straining/cooling station. Add a strainer to a large pot or bowl and set on top of a bed ice cubes.
- Page 32 Quick, easy, all natural ingredients. No preservatives. Nothing artificial. For a morning start, swirl Organic Berry Berry Ginger Jam into fresh Organic Yogurt. Delicious spread onto toast or pancakes. Add to custards for fresh trifles, spoon into fresh fruit smoothies, drizzle over frozen yogurt, great for baked desserts like cookies and cakes. SAUTE: 6 - 7 minutes DESSERT: 5 minutes, natural steam release Organic Berry Berry Ginger Jam...
- Page 33 This Low Carb Frittata is light and airy whipped eggs, cradled in velvety smooth riced cauliflower with creamy avocado chunks. Little bursts of sweet chicken apple sausage and fresh tomato flavor, are embellished in rivers of spicy cheese. This Frittata a complete meal at any time of day. Serve with Chunky Spiced Ketchup; recipe follows. SAUTE: 8 - 10 minutes DESSERT: 10 minutes, quick steam release Low Carb Frittata...
- Page 34 This preservative-free healthy ketchup is low in sugar and high on taste. Great to smother French Fries, hashbrowns, hamburgers, hot dogs, or chicken nuggets! Spoon homemade Chunky Spiced Ketchup over the Low Carb Frittata. Add fresh horseradish to make a superb cocktail sauce. Add to mayonnaise and relish for Russian dressing, a tasty addition to fresh remoulade sauce. DESSERT: 8 minutes, quick steam release SAUTE: 5 minutes Chunky Spiced Ketchup...
- Page 35 Pressure Steaming preserves vitamins and minerals and retains the natural colors in fresh vegetables. Use the STEAM function for steaming fresh or frozen vegetables as well as fresh fish and shellfish. STEAM: 1 minute, quick steam release Teriyaki Steamed Baby Bok Choy & Asparagus Serves 4 •...
- Page 36 A crowd pleaser any day of the year. Sweet tender potatoes laced with chunky corn and smoky bacon. Serve alone on a cold stormy day or leave out the bacon for an easy vegetarian option. Your friends and family will love this Corn Chowda alongside steamed shellfish, any grilled fish, pork sliders, hot dogs, hamburgers, sausage, ribs, steak, BBQ chicken.
- Page 37 We added a crunchy twist to this All-American favorite. Serve plain or top with vanilla frozen yogurt bathed in walnut- studded maple syrup or rich caramel sauce. DESSERT: 10 minutes, natural steam release Baked Apples Serves 6 • 6 large apples •...
- Page 38 COOKS Limited Warranty Limited One (1) Year Warranty J. C. Penney Corporation, Inc. (JCPenney) warrants this product to be free of defects in material and workmanship for a period of one (1) year from the date of original purchase (the “Warranty Period”). Dated proof of purchase such as a bill of sale is required to establish warranty eligibility.
- Page 39 SO-315533_22276_COOKS_6qt FastPot Multi Cooker_IM_R10.indd 39 2018-08-14 10:08 AM...
- Page 40 Cooks JCPenney Home is a registered trademark of the J.C. Penney Purchasing Corporation, Inc. Distributed in the U.S. by J.C. Penney Corporation, Inc. Plano, Texas 75024-3698 SO-315533_22276_COOKS_6qt FastPot Multi Cooker_IM_R10.indd 40 2018-08-14 10:08 AM...
Need help?
Do you have a question about the Fast Pot 780-3857 and is the answer not in the manual?
Questions and answers