Table of Contents
Advertisement
Quick Links
Advertisement
Table of Contents

Related Manuals for Vasco T350


Summary of Contents for Vasco T350
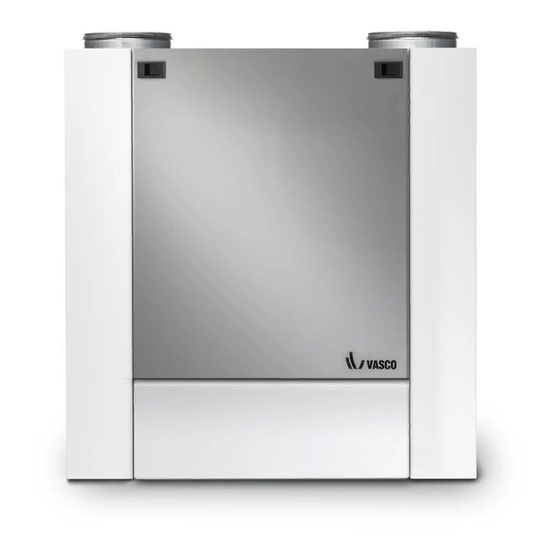
- Page 1 INSTALLATION MANUAL VENTILATION UNIT VASCO T350/T500...
-
Page 2: Table Of Contents
2. SAFETY 3. INSTALLERS MANUAL • CONTENTS PACKAGING • DIMENSION • INSTALLATION CONDITIONS • ASSEMBLY PREPARATIONS • ELECTRIC PRE-HEATING ELEMENT T350/T500 • MOUNTING THE VENTILATION UNIT/ CONDENSATION DRAIN • AIR DUCT CONNECTIONS • MOUNTING SWITCHES • COMMISSIONING AND ADJUSTMENT 4. MAINTENANCE 5. -
Page 3: Introduction
The D ventilation system from Vasco Ventilation Concepts is a balance ventilation system with heat recovery that guarantees a comfortable and healthy indoor climate in a controlled way. -
Page 4: Installers Manual
Vasco is not liable for any damage caused by not observing the safety instructions or GUARANTEE not following the instructions in the user manual. You will find the guarantee conditions on page 24 of this manual. - Page 5 wall bracket Suspension brackets ventilation Installation wireless mode manual unit switch User Manual 2 bumpers (supplied separately) 2 Galva sockets (below unit connection) INSTALLATION MANUAL FOR THE INSTALLER 03...
-
Page 6: Dimension
DIMENSION Sizes indicated in mm. 252,5 Screws and plugs not included Distance from the wall: Depth 560 centre distance Ø180 Mains cable 230 VAC Antenna RF Cable grommet wired 3 position switch or cable 0-10V control (both cables to be provided by the installer) 04 DIMENSIONAL DRAWINGS... -
Page 7: Installation Conditions
INSTALLATION To determine whether the installation of the ventilation unit in a certain room is CONDITIONS possible, the following aspects should be taken into account: • the room must be frost-free • The installation must be carried out in accordance with the general and locally applicable safety and installation regulations for, among other things, ventilation, electricity and sewerage as well as the regulations in this manual. - Page 8 For this, only the mounting brackets of the ventilation unit have to be fixed on the right side as shown in the following figures: CONFIGURATION LEFT STANDARD CONFIGURATION RIGHT REVERSED Stick the protective caps on the ventilation unit before fixing the ventilation unit to the wall.
-
Page 9: Electric Pre-Heating Element T350/T500
For the T350 /T500 units, an electric pre-heating element is optionally ELECTRIC available. There is one type: PREHEATING ELEMENT Electric pre-heating element T350 / T500 Article number 11VE 44130 T350 /T500 MOUNTING AND ELECTRICAL CONNECTION OF THE PRE-HEATING ELEMENT Attention: The electric pre-heating element must be in place before the ventilation unit is fixed to the wall. -
Page 10: Mounting The Ventilation Unit/ Condensation Drain
The ventilation unit must be mounted on a wall of sufficient strength. Wall MOUNTING plugs and screws are not supplied. Use the appropriate fixing materials VENTILATION depending on the wall structure. UNIT 75 cm min. 1 cm min. 1 cm 61 cm CONDENSARY FOOD The condensate from the ventilation unit must be discharged in a... -
Page 11: Air Duct Connections
For a low-noise ventilation system, Vasco recommends using the components AIR DUCT from the range offered for Vasco. CONNECTIONS Mount the installation with the lowest possible air resistance and free of leaks. The main air ducts should have an internal diameter of Ø170 mm or Ø180 mm. -
Page 12: Mounting Switches
Mounting tips MOUNTING SWITCHES Always place the switch away from places where moisture drops can form. Never place the wall transmitter in a metal housing or near large metal objects. MOUNTING RF SWITCH Always install the RF position switch in an easily accessible location. Step 1: Loosen the knobs and the electronics module to free the base plate for wall mounting. - Page 13 MOUNTING CO2 RF SWITCH Always install the RF switch in an easily accessible location in the room in which you wish to monitor the concentration. Always provide a 230 V power supply for the switch. Step 2: Step 3: Step 1: Dismantle the switch.
- Page 14 PCB via the cut-out with grommet provided for this purpose in the ventilation unit. Finally, connect the cable to terminal X9 "Connection 3 position switch" according to the following diagram. Circuit board T350 /T500 Sample circuit 3 position switch NIKO (type...
- Page 15 Next, a correct cable must be led to the PCB through the grommet in the ventilation unit. Finally, connect the control signal to terminal X26 "Building control system connection" according to the following diagram. Circuit board T350 /T500 X6X22 X5X21 X15X26 0-10V signalGround Grommet provided in ventilation unit.
-
Page 16: Commissioning And Adjustment
Press the button for position 3 for at least 3 seconds and release it when the LED in the centre of the switch gives a series of light signals. These indicate the air quantity set. In the factory, the LED lights up orange once. Indication LED on switch T350 T500 1x green 230 m³/h 350 m³/h... - Page 17 Activating and deactivating additional optional RF switches: The switch supplied with the unit is factory-coupled to the ventilation unit. In total, up to 20 switches can be connected to the system. Activating and deactivating additional optional RF switch (11VE20012): Sign up: Unplug the ventilation unit and plug it back in.
- Page 18 Activating and deactivating additional optional RH RF switch (11VE20014): Sign up: Unplug the ventilation unit and plug it back in. After this, the ventilation unit will search for new switches for 10 minutes. Then take out the batteries and replace them (see RH RF switch battery replacement).
-
Page 19: Maintenance
4 MONITORING The user must ensure that the entire installation is maintained periodically by the installer. Remove the plug from the mains socket before commencing maintenance work. 1x per four years INSPECTION / • Dismantle the door panel. CLEANING OF HEAT Remove the filter trays from the unit. - Page 20 INSPECTION / CLEANING 1x per four years VENTILATORS • Dismantle the door panel. Remove the filter trays from the appliance. • • Pull the strap of the heat exchanger, never remove it! • Disconnect the connectors. • Disconnect the temperature sensors. •...
-
Page 21: Electrical Diagram
5 ELECTRICAL DIAGRAM X23 temperature to dwelling X20 temperature from dwelling X22 temperature from outside X21 temperature to the outside CONNECTOR FUNCTION X5 (BLACK) = EXHAUST FAN CONTROL X6 (WHITE) = SUPPLY FAN CONTROL =FAULT RELAY (NO), CLOSES WHEN FAULT OCCURS = WIRED 3 POSITION SWITCH CONNECTION X13 (BLACK) = EXHAUST FAN POWER SUPPLY X14 (WHITE) -
Page 22: Malfunction
6 MALFUNCTION OBSERVATION POSSIBLE CAUSE SOLUTION Ventilation unit runs at a higher Clean filters speed than when it was first put Filters dirty. (see page 6). into operation. Change filters and reset error LED display lights up "2 x signal (see page 6). orange"... - Page 23 OBSERVATION POSSIBLE CAUSE SOLUTION Reset the unit by removing the The unit is switched off and plug from the wall socket and when the RF switch is pressed the The unit is switched off because putting the unit back on power. following LED indication appears the temperature of the air to the on the circuit board...
-
Page 24: Parts List
Galva sleeve Ø 180mm 11VE 50004 Plastic plug Ø 180mm 11VE 50306 Filter drawer - T350/T500 811VE 50358Filter setgreen 495x186x10mm (2 pcs) - T350/T500 11VE 50359Filter set F7/G4 481x186x20mm - T350/T500 911VE 50400Heat exchanger- T350/T500 1011VE 51101Fan 85W190 - T350 11VE... -
Page 25: Warranty Conditions
8 GUARANTEE CONDITIONS Vasco declares that it will give a two year guarantee on the Vasco T350 /T500 from the date of purchase. The installation company's invoice date will be used as proof of purchase. If no invoice is available the production date will be used as the date of purchase. - Page 26 VENTILATION SYSTEM D T350 T350 T350 T500 T500 T500 Type designation sensor sensors sensor sensors Specific energy consumption (SEC) -37,85 -40,34 -43,18 -35,56 -38,64 -42,14 [kWh/(m².a)]. Residential ventilation unit (RVE) Non- RVE/NRVE residential ventilation unit (NRVE) One-way ventilation unit (EVE) Two-...
- Page 27 CALCULATION SHEET AIR DEBATE VENTILATION local valve n° supply drain design measure design measure m³/h d m³/h m³/h d m³/h living room living room office Bedroom 1 Bedroom 2 Bedroom 3 Bedroom 4 .......... kitchen kitchen toilet washing station bathroom .....
- Page 28 Kruishoefstraat 50 B-3650 Dilsen T. +32 (0)89 79 04 11 F. +32 (0)89 79 05 00 info@vasco.e www.vasco.eu...
Need help?
Do you have a question about the T350 and is the answer not in the manual?
Questions and answers