Table of Contents
Advertisement
Advertisement
Table of Contents

Related Manuals for Britax BOULEVARD CS


Summary of Contents for Britax BOULEVARD CS
- Page 1 Boulevard ® User Guide...
-
Page 2: Table Of Contents
Securing Your Child ... 34 Care and Maintenance ... 36 Warranty ... 40 ©2009 Britax Child Safety, Inc. All rights reserved. Printed in U.S.A P363300 R1:04.09 This product and its components are subject to change without notice. Table of Contents... -
Page 3: Warnings
40 lb (18.1 kg) child is the vehicle LATCH anchor limit. • The use of non-Britax Child Safety, Inc., covers, inserts, toys, accessories, or tightening devices is not approved by Britax. Their use could cause this child seat not perform as intended in a crash. -
Page 4: Important Notes
Child seats can be recalled for safety reasons. You must register this child seat to be reached in a recall. Send your name, address, and the child seat’s model number and manufacturing date to Britax Child Safety, Inc., 13501 South Ridge Drive Charlotte, NC 28273, or call 1-888-4BRITAX, or register online at www.BritaxUSA.com/registration. -
Page 5: Important Harness Adjustments
Safety Information Important Harness Adjustments According to the American Academy of Pediatrics: All infants should ride rear-facing until they have reached at least 1 year of age and weigh at least 20 lbs (9.1 kg). That means that if your infant reaches 20 lbs (9.1 kg) before her first birthday, she should remain rear-facing at least until she turns 1 year old. -
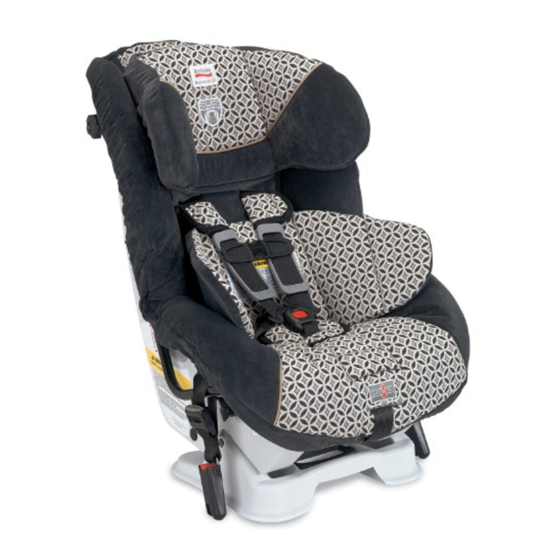
Page 6: Child Seat Features
Child Seat Features Comfort Pad Cover Infant Body Pillow Harness Chest Clip LATCH Bar HUGS™ (Harness Ultra Guard Rear-Facing Lock-Off System) Chest Pads LATCH Adjuster Release Button Harness Buckle LATCH Adjuster Belly Pad LATCH Connector Release Button Harness Adjuster Release Lever LATCH Connector (under cover) (stored under cover) -
Page 7: Vehicle Compatibility
Vehicle Compatibility Incompatible Vehicle Seat Belts WARNING! The following types of vehicle belts are NOT compatible with this child seat: Vehicle belts with top or bottom anchor points on the vehicle door. Lap-shoulder belts that have a separate retractor each for the lap section and shoulder section Lap belts that have a retractor that locks only in case of a sudden stop (emergency locking... -
Page 8: Installation: Rear-Facing
Installation: Rear-Facing LATCH Installation • Figure A illustrates a rear-facing LATCH installation. • Verify that your vehicle is equipped with LATCH anchors. If LATCH anchors are not available, you must use the vehicle belt installation methods. IMPORTANT: LATCH connectors must be in an upright position (as shown in figure B) and the strap should be tight and not twisted to ensure proper installation. -
Page 9: Lap-Shoulder Belt Installation
Installation: Rear-Facing Lap-Shoulder Belt Installation • Figure A illustrates a rear-facing, lap- shoulder belt installation. • When not in use, always store the LATCH connectors in the storage slots. See page 30. Recline the child seat and place it rear- facing on the vehicle seat. -
Page 10: Lap-Belt Installation
Installation: Rear-Facing Lap-Belt Installation • Figure A illustrates a rear-facing, lap-belt installation. • When not in use, always store the LATCH connectors in the storage slots. See page 30. Recline the child seat and place it rear- facing on the vehicle seat. This child seat must be in the recline position when installed rear-facing. -
Page 11: Installation: Forward-Facing
Installation: Forward-Facing LATCH Installation • Figure A illustrates a forward-facing LATCH installation. • Verify that your vehicle is equipped with LATCH anchors. If LATCH anchors are not available, you must use vehicle belt installation methods. WARNING! • This child seat must not be used forward-facing for children less than one year of age OR who weigh less than 20 lbs (9.1 kg). -
Page 12: Lap-Shoulder Belt Installation
This child seat must be in full upright position when installed forward-facing for children who weigh more than 33 lbs (15.1 kg). IMPORTANT: Britax recommends that the Versa- Tether be used at all times. Using the tether will ® improve the stability of the child seat and reduce the risk of injury. -
Page 13: Lap-Belt Installation
33 lbs (15.1 kg). IMPORTANT: Britax recommends that the Versa-Tether be used at all times. Using the tether will improve the stability of the child seat and reduce the risk of injury. Check your vehicle owner’s manual for approved tether locations. -
Page 14: Installation: Aircraft
DO NOT modify the vehicle without advice from the vehicle manufacturer if a tether anchorage is not available. IMPORTANT: • Britax recommends that the tether be used at all times. Using the tether will improve the stability of the child seat and reduce the risk of injury. •... -
Page 15: Using The Versa-Tether
1 in. (2.5 cm) at the belt path. Tether Connector Strap NOTE: Britax child seats are shipped with the tether connector strap attached to the Versa-Tether installations that have designated tether anchors or forward-facing installations, store the tether connector strap in the tether pouch. -
Page 16: Energy-Absorbing Tether
Switching the LATCH Connectors NOTE: Child seats are shipped from Britax with the LATCH connectors in the storage slots and configured for rear-facing mode. -
Page 17: Storing The Latch Connectors
LATCH storage slots (Fig. A). Fold the LATCH adjuster and the connector, then slide each set into the adjacent slot. NOTE: Child seats are shipped from Britax with the LATCH connectors in the storage slots. Recline Adjustment Pull the recline handle (Fig. -
Page 18: Harness Buckle
Child Seat Functions Harness Buckle Fastening the Harness Buckle Hold the harness buckle with one hand. Use your other hand to insert one buckle tongue at a time into the harness buckle (Fig. A). • A proper connection is confirmed with an audible click after inserting each buckle tongue. -
Page 19: Securing Your Child
Securing Your Child Buckling and Tightening the Harness Loosen the harness by lifting the harness adjuster release lever located on the front of the child seat while pulling both shoulder straps forward (Fig. A). Release the chest clip by squeezing the tabs and sliding the pieces apart (Fig. -
Page 20: Care And Maintenance
Care and Maintenance Cover Removal Remove the infant body pillow. Loosen the harness by lifting the harness adjuster lever while pulling both shoulder straps forward as far as possible. Release the chest clip and unbuckle the harness. Unhook the shoulder straps from the harness yoke on the rear of the child seat (Fig. - Page 21 Care and Maintenance Harness Buckle Removal Recline the child seat. Locate the metal buckle strap retainer on the bottom of the child seat. Pull the retainer away from the child seat to loosen. Turn the retainer so the short side will fit through the slot in the child seat shell (Fig.
-
Page 22: Warranty
The warranty and remedies as set forth above are exclusive and in lieu of all others, oral or written, express or implied. In no event will Britax, or the retailer selling this product, be liable for any damages, including incidental or consequential damages, arising out of the use or inability to use this product. - Page 23 Notes Notes...
- Page 24 See Buckling and Tightening the Harness, pages 34 – 35, for more details. Click & Safe™ Snug Harness Indicator Britax Child Safety, Inc. 13501 South Ridge Drive Charlotte, NC 28273 A Britax Childcare Group Limited company Tel 1.888.427.4829 www.BritaxUSA.com...
Need help?
Do you have a question about the BOULEVARD CS and is the answer not in the manual?
Questions and answers