
Related Manuals for Thermo Scientific MaxQ SHKE8000 Series


Summary of Contents for Thermo Scientific MaxQ SHKE8000 Series
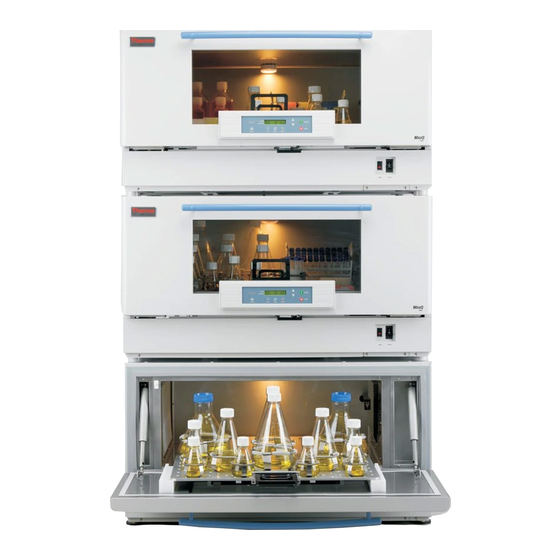
- Page 1 MaxQ SHKE8000 Series Stackable Orbital Shakers* Operating and Maintenance Manual 7010443 Rev. 6 Visit us online to register your warranty www.thermoscientific.com/labwarranty...
- Page 2 Updated Maximum Load/Speed in Specifications to Maximum Product Weight 40970 6/8/16 Updated Temperature Specification on pg 5-1 (S. Livingston) 7/27/15 Corrected typo in Electrical in Specifications 40139 4/15/15 Updated warranty information 28036/OS-751 9/3/14 Release 3 (new control board) ECR/ECN DATE DESCRIPTION Thermo Scientific MaxQ SHKE8000 Series Shakers...
- Page 3 Caution All internal adjustments and maintenance must be performed by qualified service personnel. Warning Use MaxQ SHKE8000 Series Orbital Shakers to process non-flammable materials only! Warning Grounding circuit continuity is vital for the safe operation of this shaker. Never operate this unit with the grounding conductor disconnected.
- Page 4 Always use the proper protective equipment (clothing, gloves, goggles, etc.) Always dissipate extreme cold or heat and wear protective clothing. Always follow good hygiene practices. Each individual is responsible for his or her own safety. Thermo Scientific Model SHKE8000 Series Shakers...
- Page 5 We can also provide you with a quotation on our Extended Warranty for your Thermo Scientific products. Whatever Thermo Scientific products you need or use, we will be happy to discuss your applications. If you are experiencing technical problems, working together, we will help you locate the problem and, chances are, correct it yourself...over the telephone without a service...
-
Page 6: Table Of Contents
Quick Release Platform ........1-17 Thermo Scientific MaxQ SHKE8000 Series Shakers... - Page 7 Defrost Control ........2-22 Set the Defrost Temperature ......2-23 MaxQ SHKE8000 Series Shakers Thermo Scientific...
- Page 8 Warranty Information ......... 9-1 Thermo Scientific MaxQ SHKE8000 Series Shakers...
-
Page 9: Installation
Important Failure to request an inspection of damage within a few days after receipt of shipment absolves the carrier from any liability for damage. Call for a damage inspection promptly. MaxQ SHKE8000 Series Stackable Orbital Shakers are shipped with the following materials: 4 - Foot pads 4 - Painted 1½”... -
Page 10: Positioning
1-2). Do not attempt to lift a stack of units by the threaded inserts. The inserts are provided to lift and position only one unit at a time. Figure 1-2. Exterior Top of Unit MaxQ SHKE8000 Series Shakers Thermo Scientific... -
Page 11: Floor Installation Of Single Or Base Unit
Figure 1-5. Reinstall the back cover plate after stack is secure. Tabs Remove screws Figure 1-4. Kick Panel on Front of Unit (middle or top unit) Figure 1-5. Cover Plate on Back of Unit (middle or top unit) Thermo Scientific MaxQ SHKE8000 Series Shakers... - Page 12 7. Reinstall all brackets and cover panel. Be top left corner careful when routing wiring and wire of base unit connectors on rear of relay box. This Figure 1-8. Shaker To Shaker may affect operation of the shaker. MaxQ SHKE8000 Series Shakers Thermo Scientific...
-
Page 13: Single Unit On A Stand
This structure is not designed to support the weight of the unit. Caution Do not lift or position the unit by the door or door handle. Damage to door mounting and gasket may occur. Thermo Scientific MaxQ SHKE8000 Series Shakers... -
Page 14: Single Or Base Unit On Stand
Refer to Figure 1-12. Leveling foot Neoprene pad 1” Figure 1-12. Spacer Figure 1-11. Leveling Feet 4. Using the appropriate lifting device, carefully raise the unit to be stacked and remove all (4) leveling feet. MaxQ SHKE8000 Series Shakers Thermo Scientific... -
Page 15: Stacking Units On A Stand
See Figure 1- 16. Re-install back cover plate after stack is secure. Thermo Scientific MaxQ SHKE8000 Series Shakers... - Page 16 1½ bottom unit (Figure 1-10). 3. Using the appropriate lifting device, carefully raise Figure 1-18. Spacer the unit to be stacked and remove all (4) the leveling feet. MaxQ SHKE8000 Series Shakers Thermo Scientific...
-
Page 17: Leveling The Stackable Shaker
Caution Leveling feet extend only a very short distance. When unit is leveled and tuned, with leveling feet locked in place, adjustment and locking nuts should be no further than 1/4 inch apart. Thermo Scientific MaxQ SHKE8000 Series Shakers... -
Page 18: Chamber Drain
For flask clips through 500 ml, insert the end of each spring into the holes on the top of the clip leg as shown in Figure 1-23. Figure 1-23. Clip Assembly Figure 1-24. For Liter or Larger Flasks 1-10 MaxQ SHKE8000 Series Shakers Thermo Scientific... -
Page 19: Install Flask Clips
1, 2 and 2.8 liter flasks use five screws. The 250/300ml flask clip has an adhesive-backed flask cushion pad which is installed on the flat base of the clip body. A hole is provided in the pad for the mounting screw. Thermo Scientific MaxQ SHKE8000 Series Shakers 1-11... -
Page 20: Install Test Tube Holders
....Locking Pin to swing/tilt test tube rack 15°, 30°, 45° Figure 1-25. Test Tube Rack with Swing/Tilt Mechanism 1-12 MaxQ SHKE8000 Series Shakers Thermo Scientific... - Page 21 (Figure 1-27). A cable with RJ-11 plugs and an RJ-11 to DB-25 adapter are required. Figure 1-27. Location of RS-232 and Remote Alarm Connectors Thermo Scientific MaxQ SHKE8000 Series Shakers 1-13...
-
Page 22: Rs-232 Interface Connector
H ..... . .H for timer count up mode (Hold) or no H for timer countdown mode 1-14 MaxQ SHKE8000 Series Shakers Thermo Scientific... -
Page 23: Connect The Remote Alarm
Section 1 Installation RS-232 Interface The MaxQ SHKE8000 Series Shakers transmit time, speed and temperature information one minute after power is first applied to the unit Connector (cont.) and then every 60 minutes thereafter unless the shaker receives either a <Ctrl><Q>... -
Page 24: Connect To Electrical Power
Caution Connect the orbital shaker to a grounded, dedicated circuit. The power outlet plug is the mains disconnect device for the orbital shaker. Position the unit so the plug is easily accessible. 1-16 MaxQ SHKE8000 Series Shakers Thermo Scientific... -
Page 25: Quick Release Platform
Figure 1-32. Handle Up to Close Door Figure 1-31. Handle When Loading Note The platform must be fully inserted into the cabinet and the center handle pressed into the ‘up’ position to ensure the platform is secured. Thermo Scientific MaxQ SHKE8000 Series Shakers 1-17... -
Page 26: Operation
Do not operate the shaker at maximum speed without a load. Warning Do not load or unload the platform until it has come to a complete stop. Thermo Scientific MaxQ SHKE8000 Series Shakers... -
Page 27: Control Panel Operation
For most alarms, the audible warning will sound again in about fifteen minutes, if the condition is not corrected. Alarm features are discussed in detail later in this section. Figure 2-2. Control Panel MaxQ SHKE8000 Series Shakers Thermo Scientific... -
Page 28: Quick Start-Up
Default SHKE8000-7 & SHKE8000-8CE Audible Alarm RPM Tracking Limit (fixed) 5 RPM 5 RPM Temp Tracking Limit 10°C 10°C Over Temp Shutdown 63°C - 65°C Under Temp Shutdown -1°C to +2°C All Remote Alarms Defrost ON, 12°C Thermo Scientific MaxQ SHKE8000 Series Shakers... -
Page 29: Change Temperature, Speed, Time Settings
Operating Screen, storing and acting upon any changes made. New settings are also stored and acted upon immediately when either arrow button is pressed. MaxQ SHKE8000 Series Shakers Thermo Scientific... -
Page 30: Hold Temperature Control
5.0°C in the lower right corner of the display is the temperature at which the product is being held. Hold will continue at this temperature until the START button is pressed or a new Hold or operating temperature is entered. Thermo Scientific MaxQ SHKE8000 Series Shakers... -
Page 31: Change Time
Hold temperature. The refrigerated shaker can be programmed to oper- ate at one temperature, then hold the cabinet at another temperature when the countdown reaches zero. The platform will stop, but the fans and the temperature control systems continue to operate. MaxQ SHKE8000 Series Shakers Thermo Scientific... -
Page 32: Alarms
Drive Belt Integrity Check Belt Temp Sensor Integrity Main Temp Sensor, Over Temp Sensor Temp Control Status Temperature is High, Temperature is Low Platform Movement Status Platform Stalled Motor Drive Board Input Power Integrity Check Fuse Thermo Scientific MaxQ SHKE8000 Series Shakers... -
Page 33: Overtemp Shutdown
15 minutes if the alarm condition is still present. However, the alarm message and indicator lights persist until the fault is corrected. Afterward, the remaining relevant alarm components are cleared by pressing the Silence button. MaxQ SHKE8000 Series Shakers Thermo Scientific... -
Page 34: Power Failure
15 minutes if the alarm condition is still present. However, the alarm message and indicator lights persist until the fault is corrected. Afterward, the remaining relevent alarm components are cleared by pressing the Silence button. Thermo Scientific MaxQ SHKE8000 Series Shakers... -
Page 35: Temperature Sensor Fault
The delay is reduced to 20 minutes when the temperature is within the temperature setpoint alarm band. See Section 3 for further information on setting the tracking alarm. 2-10 MaxQ SHKE8000 Series Shakers Thermo Scientific... -
Page 36: Check Fuse
To access the system Configuration menu, press the down arrow, the up arrow, then the Silence button, in that order. This screen will appear. Pressing the down arrow continues system configuration. Pressing the up arrow returns to the Operating Screen. Thermo Scientific MaxQ SHKE8000 Series Shakers 2-11... -
Page 37: Turn The Audible Alarm On And Off
15 seconds to save the new setpoint value and return the display to the Operating Screen. When the audible alarm is disabled, a warning message displays in the Setpoint portion of the Operating Screen as shown at right. 2-12 MaxQ SHKE8000 Series Shakers Thermo Scientific... -
Page 38: Set Alarm Limits
15 seconds to save the new setpoint value and return the display to the Operating Screen. Note The Overtemp Alarm setpoint values are calculated from the hardware and will not include every numerical value between the upper and lower limits. Thermo Scientific MaxQ SHKE8000 Series Shakers 2-13... - Page 39 15 seconds to save the new setpoint value and return to the Operating Screen. Note The Undertemp Alarm setpoint values are calculated from the hardware and will not include every numerical value between the upper and lower limits. 2-14 MaxQ SHKE8000 Series Shakers Thermo Scientific...
- Page 40 15 seconds to save the new setpoint value and return the display to the Operating Screen. Thermo Scientific MaxQ SHKE8000 Series Shakers 2-15...
-
Page 41: Power Failure
Power Failure setting to memory. If no buttons are pressed, the display will automatically return to the Operating Screen after about 15 seconds, saving the selection. 2-16 MaxQ SHKE8000 Series Shakers Thermo Scientific... -
Page 42: Rpm Tracking
Whether the unit has been operated in the Hold or Countdown modes, and/or has been turned off and unplugged many times, the microprocessor control system maintains a running total of platform operating hours. Thermo Scientific MaxQ SHKE8000 Series Shakers 2-17... -
Page 43: Heat
Silence button, and then the down arrow three times, in the sequence shown below. The screen shown at the right will appear on the display. Press the Temp button beneath Heat %. 2-18 MaxQ SHKE8000 Series Shakers Thermo Scientific... -
Page 44: Software Version
When finished, press any of the three buttons (Time, Speed, or Temp) to save new setpoint value and return to previous screen, or press nothing for about 15 seconds to save new setpoint value and return to Operating Screen. Thermo Scientific MaxQ SHKE8000 Series Shakers 2-19... -
Page 45: Overtemp Sensor
To turn the Temperature Control on or off, open the Configuration menu by pressing the down arrow, the up arrow, the Silence button, and then the down arrow button four times, in the sequence shown below. 2-20 MaxQ SHKE8000 Series Shakers Thermo Scientific... -
Page 46: Defrost Control
Silence button, and then the down arrow five times, in the sequence shown below. The screen shown at right appears on the display. Press the Speed button beneath On/Off and the screen on the right appears. Thermo Scientific MaxQ SHKE8000 Series Shakers 2-21... -
Page 47: Set The Defrost Temperature
When finished, press any of the three buttons (Time, Speed, or Temp) to save the new setpoint value and return to the previous screen, or press nothing for about 15 seconds to save the new setpoint value and return to the Operating Screen. 2-22 MaxQ SHKE8000 Series Shakers Thermo Scientific... - Page 48 Sets Operating Temp 37.0 Hold Sets Hold 02:15 37.0 Temp Hold Hold Note: Numerical values and alarm settings shown here Page One are for reference only and may not match any specific shaker Thermo Scientific MaxQ SHKE8000 Series Shakers 2-23...
- Page 49 Alarm On and Off Actual Temperature Alarms Setpoints Over Under Trckng Go to Page Four Note: Numerical values and alarm settings shown here Page Two are for reference only and may not match any specific shaker 2-24 Model SHKE8000 Shakers Thermo Scientific...
- Page 50 Setpoints next Go to Page Six Go to Page Five Note: Numerical values and alarm settings shown here Page Three are for reference only and may not match any specific shaker Thermo Scientific MaxQ SHKE8000 Series Shakers 2-25...
- Page 51 Sets Undertemp Undertemp Alarm Alarm Value Sets Temp Tracking Limit Tracking 10.0 Alarm Value Note: Numerical values and alarm settings shown here Page Four are for reference only and may not match any specific shaker 2-26 Model SHKE8000 Shakers Thermo Scientific...
- Page 52 Alarm On and Off next Turns the Remote Temp Hi/Low: Alarm On and Off next Note: Numerical values and alarm settings shown here Page Five are for reference only and may not match any specific shaker Thermo Scientific Model SHKE8000 Series Shakers 2-27...
- Page 53 Defrost Control: Control On and Off 14.0 Defrost Temp: 12.0 Sets Defrost Temperature 12.0 Note: Numerical values and alarm settings shown here Page Six are for reference only and may not match any specific shaker 2-28 Model SHKE8000 Shakers Thermo Scientific...
-
Page 54: Maintenance
Maintenance Section 3 The MaxQ SHKE8000 Series Shakers use a brushless DC motor and oversized, permanently lubricated bearings which require no maintenance. Platform and Cabinet The anodized brushed aluminum platform and powder-coated steel cabinet surfaces can be cleaned with common laboratory materials. -
Page 55: Platform Handle Adjustment
The air filter is held in place with a flange around its perimeter (Figure 3-3) and is easily removed. It may be replaced, or washed in water with a mild detergent and dried between two lint-free towels. Figure 3-3. Inside Front Grille MaxQ SHKE8000 Series Shakers Thermo Scientific... - Page 56 Section 3 Maintenance Thermo Scientific MaxQ SHKE8000 Series Shakers...
- Page 57 Section 3 Maintenance MaxQ SHKE8000 Shakers Thermo Scientific...
-
Page 58: Service
Continuously notifies operator that audible alarm is disabled Platform Stalled Free movement of platform is obstructed Check Fuse Power loss to motor drive circuit board, most likely the primary drive motor fuse is blown Thermo Scientific MaxQ SHKE8000 Series Shakers... -
Page 59: Change The Chamber Air Filter
Operate • The door may be open - Lift the door to its fully closed position. • Time countdown reached - Reset the time, or change to continuous operation (Hold). MaxQ SHKE8000 Series Shakers Thermo Scientific... -
Page 60: Replace The Door Stop
8. Install the new door stop as it was removed. Make sure each retaining clip is installed so that the tip of the clip is showing at the bottom of the door stop (Figure 4-5). Thermo Scientific MaxQ SHKE8000 Series Shakers... -
Page 61: Spare Fuses
It is held in place by a screw on each end of the panel and two tabs at the top. To access the fuses, remove the retainer/cover plate holding the relay enclosure in place. See Figure 4-6. Table 4-2. Fuses MaxQ SHKE8000 Series Shakers Rating Application Part Number 0.25 amp... -
Page 62: Circuit Boards
To access the heating element and this circuit breaker, remove Reset Button the eight Phillips screws securing the right side grille to the chamber wall Figure 4-8. Circuit Breaker Reset (Figure 4-7). Thermo Scientific MaxQ SHKE8000 Series Shakers... -
Page 63: Platform Vibration Adjustment
6. With the unit turned on and empty, set the speed to 300 RPM. Allow shaker to run for several minutes. If the vibration is normal, return the unit to service. If not, repeat Step 4. MaxQ SHKE8000 Series Shakers Thermo Scientific... -
Page 64: Handle Adjustment
Place the handle into a vertical position. 5. Close the door and with the unit empty, set the speed to 300 RPM. If there is undue vibration noise, repeat the steps above. If not, return the unit to service. Thermo Scientific MaxQ SHKE8000 Series Shakers... -
Page 65: Calibrate The Temperature
10. Allow the cabinet to re-stabilize for 1 hour. Recheck temperature. If necessary, return to Step 6 until no additional adjustments are needed. 11. Temperature calibration is now complete. Remove calibration equipment and resume use. MaxQ SHKE8000 Series Shakers Thermo Scientific... -
Page 66: Calibrate Platform Speed (Rpm)
When finished, press any of the three buttons (Time, Speed, or Temp) to save the new setpoint value and return to the previous screen, or press nothing for about 15 seconds to save the new setpoint value and return to the Operating Screen. Thermo Scientific Model SHKE8000 Series Shakers... -
Page 70: Specifications
Temperature ... . Independent over and under temp Speed ..... Independent platform motion Thermo Scientific MaxQ SHKE8000 Series Shakers... - Page 71 ....(84.8cm x 30.0cm x 60.5cm) Electrical SHKE8000 Nominal 120VAC, 60Hz, 1 PH, 6.4 FLA SHKE8000-1CE Nominal 230VAC, 50Hz, 1 PH, 3.0 FLA SHKE8000-7 Nominal 120VAC, 60Hz, 1 PH, 9.0 FLA SHKE8000-8CE Nominal 230VAC, 50Hz, 1 PH, 4.5 FLA MaxQ SHKE8000 Series Shakers Thermo Scientific...
- Page 72 Orbital shakers are designed to provide increased aeration in a stable envi- ronment Unintended Use 1) Not intended for use in Class I or II applications as defined in 21 CFR 2) Not intended for mixtures of flammable materials Thermo Scientific MaxQ SHKE8000 Series Shakers...
- Page 73 2 Pollution Degree describes the amount of conductive pollution present in the operat- ing environment. Pollution Degree 2 assumes that normally only non-conductive pollution such as dust occurs with the exception of occasional conductivity caused by condensation. MaxQ SHKE8000 Series Shakers Thermo Scientific...
-
Page 74: Parts List
129052 ......Spring, Door 194024 ..Spare Parts Bag (Test Tube Holder) 194254 ..Platform Assembly Latch Handle Thermo Scientific MaxQ SHKE8000 Series Shakers... - Page 75 203034 ......Compressor 300276 ......Relay, 20A MaxQ SHKE8000 Series Shakers Thermo Scientific...
- Page 76 Thermo Scientific MaxQ SHKE8000 Series Shakers...
- Page 77 Thermo Scientific Model SHKE8000 Series Shakers...
- Page 78 MaxQ SHKE8000 Series Shakers Thermo Scientific...
- Page 79 Thermo Scientific Model SHKE8000 Series Shakers...
- Page 80 Model SHKE8000 Series Shakers Thermo Scientific...
- Page 81 Thermo Scientific Model SHKE8000 Series Shakers...
- Page 82 Model SHKE8000 Series Shakers Thermo Scientific...
- Page 83 Thermo Scientific Model SHKE8000 Series Shakers...
- Page 84 MaxQ SHKE8000 Series Shakers Thermo Scientific...
- Page 85 Thermo Scientific Model SHKE8000 Series Shakers...
- Page 86 8-10 MaxQ SHKE8000 Series Shakers Thermo Scientific...
- Page 87 Thermo Scientific Model SHKE8000 Series Shakers 8-11...
- Page 88 8-12 Model SHKE8000 Series Shakers Thermo Scientific...
- Page 89 Thermo Scientific MaxQ SHKE8000 Series Shakers...
- Page 90 Model SHKE8000 Series Shakers Thermo Scientific...
- Page 91 thermoscientific.com © 2014 Thermo Fisher Scientific Inc. All rights reserved. All trademarks are the property of Thermo Fisher Scientific and its subsidiaries. Specifications, terms and pricing are subject to change. Not all products are available in all countries. Please consult your local sales representative for details.
Need help?
Do you have a question about the MaxQ SHKE8000 Series and is the answer not in the manual?
Questions and answers