Table of Contents
Advertisement
Quick Links
2 9 6 1 6
WIDE
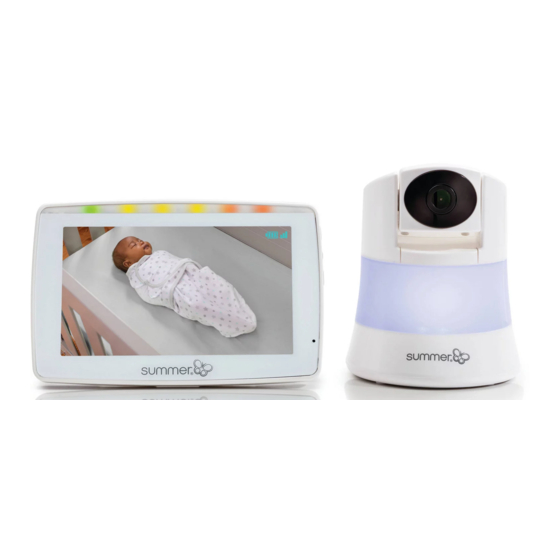
VIEW 2.0 DUO
2 - c a m e r a d i g i t a l c o l o u r v i d e o m o n i t o r s e t
For more detailed instructions, refer to the full user manual which follows the Quick Start Guide
Charge the Handheld
Carregar a unidade portátil
De draagbare unit opladen
Зарядите портативное устройство
ﺍﺷﺣﻧﻲ ﺍﻟﻭﺣﺩﺓ ﺍﻟﻣﺣﻣﻭﻟﺔ
Install the Camera
Installazione della videocamera
Установите камеру
Secure the Camera Cord
Prender o cabo da câmara
De camerakabel bevestigen
Zabezpiecz przewód kamery
•
Chargez l'unité portable
•
Caricamento dell'unità portatile
•
Handgerät aufladen
•
Naładuj urządzenie ręczne
•
Installez la caméra
•
De camera installeren
•
Podłącz kamerę
•
•
Fixez le câble de la caméra
•
Fissaggio del cavo della videocamera
•
Kamerakabel sichern
ﺛﺑﺗﻲ ﺳﻠﻙ ﺍﻟﻛﺎﻣﻳﺭﺍ
•
>1 m
Q UICK STAR T G U IDE
•
Cargar la unidad portátil
•
Instalar la cámara
•
Kamera installieren
ﺭﻛﺑﻳﺎﻟﻛﺎﻣﻳﺭﺍ
or
•
Sujetar el cable de la cámara
Зафиксируйте шнур камеры
•
t e m p e r a t u r e
2 x z o o m
n i g h t l i g h t
•
Instalar a câmara
t a l k - b a c k
5hr.
Advertisement
Table of Contents

Summary of Contents for Summer WIDE VIEW 2.0 DUO
- Page 1 Q UICK STAR T G U IDE 2 9 6 1 6 WIDE VIEW 2.0 DUO 2 - c a m e r a d i g i t a l c o l o u r v i d e o m o n i t o r s e t t e m p e r a t u r e 2 x z o o m n i g h t l i g h t...
- Page 2 Q U ICK STAR T GU IDE Switch on camera/handheld Mettez en marche la caméra/l’unité portable Encender la cámara/unidad portátil Ligar a câmara/unidade portátil Accensione della videocamera/dell’unità portatile De camera/draagbare unit aanzetten Kamera/Handgerät einschalten Включите камеру/портативное устройство Włącz kamerę / urządzenie ręczne ﺷﻐ...
- Page 3 QUICK S TAR T G U IDE Selecting camera Sélection de la caméra Selección de la cámara Selecionando Câmera Selezione Camera Selecteren van de camera Kamera auswählen Выбор камеры Wybór aparatu ﺍﺧﺗﻳﺎﺭ ﺍﻟﻛﺎﻣﻳﺭﺍ SCAN VIEW CAM DELETE CAM ADD CAM EXIT MENU BACK...
- Page 4 Q U ICK STAR T GU IDE Screen Icons • Icônes de l'écran • Iconos en pantalla • Ícones do ecrã • Icone dello schermo Schermpictogrammen • Bildschirmsymbole • Значки на дисплее • Ikony ekranu • ﺃﻳﻘﻭﻧﺎﺕ ﺍﻟﺷﺎﺷﺔ ° ° Nightlight On •...
- Page 5 Q U ICK STAR T GU IDE Function Buttons • Boutons de fonction • Botones de función • Botões de função • Pulsanti delle funzioni • Functieknoppen • Funktionstasten • Функциональные кнопки • Przyciski funkcyjne ﺃﺯﺭﺍﺭ ﺍﻟﻭﻅﺎﺋﻑ • Power/Nightlight • Marche-arrêt/Veilleuse •...
- Page 6 QU ICK S TAR T G UIDE Nightlight Veilleuse Luz nocturna Luz de presença Luce notturna Nachtlampje Nachtlicht Ночная подсветка Oświetlenie nocne ﺍﻹﺿﺎءﺓ ﺍﻟﻠﻳﻠﻳﺔ Zoom Увеличени ﺗﻛﺑﻳﺭ е 1 sec.
- Page 7 Q U ICK STAR T GU IDE Talkback Communication Transmisión de voz Intercomunicador Interfono Terugspreekfunctie Gegensprechanlage Функция Talkback Funkcja komunikowania się ﺍﺗﺻﺎﻝ ﻣﺗﺑﺎﺩﻝ Sound Activated Lights Voyants activés par le son Luces de sonido activadas Luzes ativadas pelo som Spie di rilevamento dei suoni Door geluid geactiveerde lampjes Geräuschaktivierte Lampen Подсветка, активируемая...
- Page 8 Helderheid aanpassen Helligkeit einstellen Регулировка яркости Regulacja jasności ﺿﺑﻁ ﺍﻟﺳﻁﻭﻉ Summer Infant stands behind all of its products. If you are not completely satisfied or have any questions, please contact our Consumer Relations Team at +44 (0) 1442 505000 or customerserviceuk@summerinfant.com...


Need help?
Do you have a question about the WIDE VIEW 2.0 DUO and is the answer not in the manual?
Questions and answers
Немного включить камеру
This is all I am getting for a picture. What should I try?
To improve picture quality on the Summer WIDE VIEW 2.0 DUO, try the following steps:
1. Adjust Brightness – Use the menu navigation to increase or decrease screen brightness.
2. Ensure Proper Lighting – Use the nightlight feature if needed for better visibility in low-light conditions.
3. Check Camera Placement – Ensure the camera is positioned correctly and not obstructed.
4. Clean the Camera Lens – Wipe the lens gently to remove dust or smudges.
5. Reduce Interference – Keep the camera and handheld unit away from electronic devices that may cause signal issues.
6. Ensure Proper Connection – Verify that the camera is properly paired with the monitor.
If issues persist, refer to the manual for further troubleshooting.
This answer is automatically generated