KitchenAid 5KSB1585 Instructions Manual
Hide thumbs
Also See for 5KSB1585:
- Instructions for use manual (20 pages) ,
- Manual (244 pages) ,
- Manual (20 pages)
Table of Contents
Advertisement
Available languages
Available languages
Quick Links
Advertisement
Chapters
Table of Contents

Related Manuals for KitchenAid 5KSB1585


Summary of Contents for KitchenAid 5KSB1585
- Page 1 5KSB1585, KUA15 INSTRUCTIONS INSTRUÇÕES W10710483A_ENv03.indd 1 9/16/14 11:56 AM...
-
Page 2: Table Of Contents
CMD + SHIFT CLICK TO CHANGE COPY BLENDER INSTRUCTIONS TABLE OF CONTENTS BLENDER SAFETY Important safeguards ������������������������������������������������������������������������������������������� 3 Electrical requirements ��������������������������������������������������������������������������������������� 4 PARTS AND FEATURES ����������������������������������������������������������������������������������������� 5 ASSEMBLING THE BLENDER Preparing the Blender for use ����������������������������������������������������������������������������� 6 OPERATING THE BLENDER Using the Blender ������������������������������������������������������������������������������������������������... -
Page 3: Blender Safety
BLENDER SAFETY IMPORTANT SAFEGUARDS When using electrical appliances, basic safety precautions should always be followed, including the following: 1. Read all instructions� 2. To protect against risk of electrical shock, do not put Blender in water or other liquid� 3. This appliance can be used by children aged from 8 years and above and persons with reduced physical, sensory or mental capabilities or lack of experience and knowledge if they have been given supervision or instruction concerning... -
Page 4: Electrical Requirements
10. Blades are sharp� Handle carefully� 11. Always operate Blender with cover in place� 12. The use of attachments not recommended by KitchenAid may cause a risk of injury to persons� 13. Always operate Blender with cover securely in place and be sure to use only the Hot Foods function when blending hot foods�... -
Page 5: Parts And Features
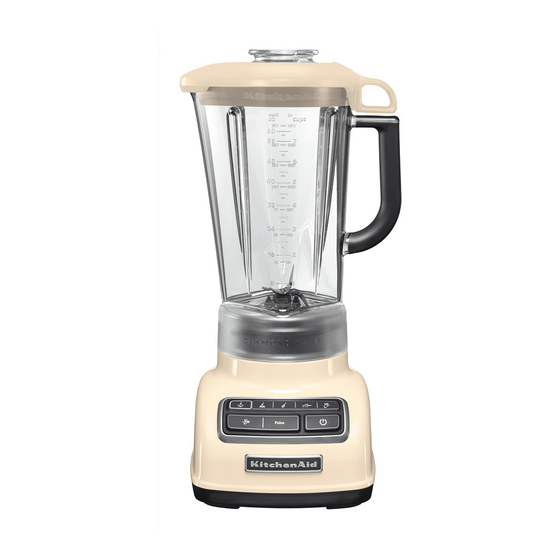
CMD + SHIFT CLICK TO CHANGE COPY PARTS AND FEATURES Lid with ingredient cup BPA Free pitcher Stainless steel blade Speed selection buttons Clean touch control pad Die-cast metal base W10710483A_ENv03.indd 5 8/26/14 8:46 AM... -
Page 6: Assembling The Blender
ASSEMBLING THE BLENDER Preparing the Blender for use Before first use Before using your Blender for the first time, wipe Blender base with a warm damp cloth, then wipe clean with a damp cloth� Dry with a soft cloth� Wash pitcher, lid, and ingredient cup in warm, sudsy water (see “Care and Cleaning”... -
Page 7: Operating The Blender
OPERATING THE BLENDER Using the Blender Before use While the Blender Power indicator light or the PULSE (Pulsar) mode indicator light is on: - Do not interfere with blade movement� - Do not remove pitcher lid� Before operating the Blender, make sure the pitcher is properly locked onto the CHOP (Picar), The Blender has four speeds:... -
Page 8: Using The Hot Foods (Sopa) Function
OPERATING THE BLENDER To remove the lid, first use the loop When finished, press POWER on the back of the lid to lift the lid and to stop the Blender, then press POWER break the seal� a second time to turn off� Unplug Blender before removing the pitcher�... -
Page 9: Using The Crush Ice Function
OPERATING THE BLENDER When the Hot Foods function is Press POWER , then press the finished, the Blender will stop� Press the HOT FOODS (Sopa) button � The ) button POWER to turn off� Unplug indicator light above the Hot Foods Blender before removing the pitcher�... -
Page 10: Using The Pulse Function
CMD + SHIFT CLICK TO CHANGE COPY OPERATING THE BLENDER Using the Pulse function Your Blender offers a PULSE (Pulsar) function, which allows a “Pulse-at-any-speed” feature� Before operating the Blender, make sure Put ingredients into the pitcher and the pitcher is properly positioned on firmly place lid�... -
Page 11: Using The Blender Pitcher Ingredient Cup And Soft Start Blending Feature
OPERATING THE BLENDER Using the Blender pitcher ingredient cup and Soft Start blending feature • The Blender pitcher ingredient cup can • The Soft Start blending feature be used to measure and add ingredients� automatically starts the Blender at a Remove cup and add ingredients at lower speed to draw ingredients into the blades, then quickly increases to the... -
Page 12: Tips For Great Results
TIPS FOR GREAT RESULTS Quick tips • If you’re making beverages using ice, • If desired, remove center ingredient cup of pitcher lid to add liquids or ice cubes start with CRUSH ICE (Triturar Gelo), then while the Blender is operating at finish with LIQUIFY (Liquefazer) in order to CHOP (Picar) or MIX (Misturar) speeds�... -
Page 13: Care And Cleaning
TIPS FOR GREAT RESULTS Prepare pancake or waffle batter from Grate cheese: Cut very cold cheese into mix: Place mix and other ingredients in 1�5 cm cubes� Place up to 1/2 cup (120 mL) cheese in the pitcher� Cover, and blend at pitcher�... -
Page 14: Troubleshooting
TROUBLESHOOTING IMPORTANT: The Blender will not operate at any speed unless the POWER ( ) button is pressed first� Blender does not operate when a setting is selected Check to see if the Blender is plugged into a grounded outlet� If it is, press POWER ( );... - Page 15 CMD + SHIFT CLICK TO CHANGE COPY INSTRUÇÕES DO LIQUIDIFICADOR ÍNDICE SEGURANÇA DO LIQUIDIFICADOR Instruções importantes de segurança ���������������������������������������������������������������� 16 Requisitos elétricos �������������������������������������������������������������������������������������������� 18 PEÇAS E RECURSOS �������������������������������������������������������������������������������������������� 19 MONTAGEM DO LIQUIDIFICADOR Preparando o Liquidificador para o uso������������������������������������������������������������� 20 OPERANDO O LIQUIDIFICADOR Usando o Liquidificador �������������������������������������������������������������������������������������...
-
Page 16: Instruções Importantes De Segurança
CMD + SHIFT CLICK TO CHANGE COPY SEGURANÇA DO LIQUIDIFICADOR A sua segurança e a dos outros é muito importante. Este manual e o electrodoméstico contêm várias mensagens de segurança importantes. Deve sempre ler e respeitar todas as mensagens de segurança. Este é... - Page 17 10. As lâminas são afiadas. Manuseie-as com cuidado. 11. Sempre opere o Liquidificador com a tampa em seu lugar. 12. O uso de acessórios não recomendados pela KitchenAid, incluindo a jarra, pode ocasionar ferimentos. 13. Sempre opere o Liquidificador com a tampa firmemente no lugar e não se esqueça de usar a função Alimentos Quentes...
-
Page 18: Requisitos Elétricos
CMD + SHIFT CLICK TO CHANGE COPY SEGURANÇA DO LIQUIDIFICADOR Requisitos elétricos Potência: 550 Watts AVISO Tensão: 220-240 Volts Frequência: 60 Hz OBSERVAÇÃO: Se o plugue não se encaixar na tomada, chame um eletricista qualificado� Não modifique o plugue de nenhuma forma�... -
Page 19: Peças E Recursos
CMD + SHIFT CLICK TO CHANGE COPY PEÇAS E RECURSOS Tampa com copo para ingredientes Copo livre de BPA (bisfenol A) Lâmina de aço inoxidável Botões seletores Painel de de velocidade controle Clean Touch Base de metal fundido W10710483A_PTv04.indd 19 8/26/14 8:46 AM... -
Page 20: Preparando O Liquidificador Para O Uso
CMD + SHIFT CLICK TO CHANGE COPY MONTAGEM DO LIQUIDIFICADOR Preparando o Liquidificador para o uso Antes de utilizar pela primeira vez Antes de usar o Liquidificador pela primeira vez, limpe a base do Liquidificador com um Guia pano úmido quente e, em seguida, limpe com um pano úmido�... -
Page 21: Usando O Liquidificador
CMD + SHIFT CLICK TO CHANGE COPY OPERANDO O LIQUIDIFICADOR Usando o Liquidificador Antes de utilizar Enquanto a luz indicadora de energia do Liquidificador ou a luz indicadora de modo Pulsar estiver ligada: - Não interfira com o movimento da lâmina� - Não retire a tampa do copo�... - Page 22 OPERANDO O LIQUIDIFICADOR Quando terminar, pressione Para remover a tampa, primeiro utilize a parte curva na parte traseira da tampa Liga/Desliga ( ) para parar o para levantar a tampa e quebrar o Liquidificador, em seguida, pressione vácuo, se houver� Liga/Desliga ( ) uma segunda vez para desligar�...
-
Page 23: Usando A Função Sopa
OPERANDO O LIQUIDIFICADOR Usando a função Sopa IMPORTANTE: Se for misturar alimentos quentes ou líquidos - tais como sopas ou molhos - certifique-se de que a tampa esteja firmemente em seu lugar e use apenas a função Sopa Antes de operar o Liquidificador, Coloque os ingredientes no copo e certifique-se de que o copo está... -
Page 24: Usando A Função Triturar Gelo
CMD + SHIFT CLICK TO CHANGE COPY OPERANDO O LIQUIDIFICADOR Usando a função Triturar gelo O Liquidificador oferece uma função Triturar gelo� Quando selecionada, o Liquidificador irá pulsar automaticamente por 30 segundos em intervalos alternados na velocidade ideal para triturar gelo ou outros ingredientes� Antes de operar o Liquidificador, Coloque os ingredientes no copo e certifique-se de que o copo está... -
Page 25: Usando A Função Pulsar
OPERANDO O LIQUIDIFICADOR Usando a função Pulsar O Liquidificador oferece uma função Pulsar, que permite pulsar em qualquer velocidade� Antes de operar o Liquidificador, Coloque os ingredientes no copo e certifique-se de que o copo está coloque a tampa firmemente� posicionado corretamente na base�... -
Page 26: Usando A Tampa De Ingredientes (Medidor) E
OPERANDO O LIQUIDIFICADOR Quando terminar, pressione Liga/ Desliga ( ) para desligar� Desligue o Liquidificador antes de retirar o copo� Usando a Tampa de Ingredientes (Medidor) e a função Soft Start (Início suave) • O copo da tampa do Liquidificador •... -
Page 27: Guia De Controle De Velocidade
OPERANDO O LIQUIDIFICADOR Guia de controle de velocidade Velocidade Item Sopa Molhos quentes Sopa (molho de carne, molho branco) Bebidas quentes Frutas picadas Salada de carne para Pesto Cobertura de farinha recheio de sanduíche de rosca salgada Legumes picados Patês Picar Cobertura de farinha Molho de frutas frias... -
Page 28: Dicas Rápidas
CMD + SHIFT CLICK TO CHANGE COPY DICAS PARA RESULTADOS MELHORES Dicas rápidas • Se você estiver fazendo uso de • Se desejar, remova o copo medidor de bebidas geladas, comece com a função ingredientes central da tampa do copo Triturar gelo, em seguida, conclua com para adicionar líquidos ou cubos de gelo Liquefazer, a fim de produzir uma textura... -
Page 29: Cuidados E Limpeza
CMD + SHIFT CLICK TO CHANGE COPY DICAS PARA RESULTADOS MELHORES Preparar molho branco: Coloque leite, Preparar massa de mistura de panqueca farinha de trigo e, se desejado, sal no copo� ou waffle: Coloque a mistura e os outros ingredientes no copo� Cubra e misture em Cubra e misture em Misturar até... -
Page 30: Resolução De Problemas
CMD + SHIFT CLICK TO CHANGE COPY CUIDADOS E LIMPEZA IMPORTANTE: Lave à mão a tampa e o copo medidor de ingrediente para obter melhores resultados� Para limpar o copo individualmente: Lave o copo na máquina de lavar louça, virado de cabeça para baixo�... -
Page 31: O Liquidificador Para Enquanto Misturando
Todas as luzes indicadoras estão piscando alternadamente� Se o problema não puder ser resolvido com os passos fornecidos nesta seção, entre em contato com uma Central de Relacionamento KitchenAid� W10710483A_PTv04.indd 31 8/26/14 8:46 AM... - Page 32 © 2014. All rights reserved. Specifications subject to change without notice. © 2014. Todos os direitos reservados. As especificações estão sujeitas a alterações sem aviso prévio. W10710483A 09/14 W10710483A_Bk-Cover.indd 27 9/16/14 11:59 AM...