Advertisement
Quick Links
For assistance or replacement
parts please contact :
The Step2 Company, LLC.
10010 Aurora-Hudson Rd.
Streetsboro, OH 44241 USA
1-800-347-8372 USA & Canada
Only (330)656-0440
www.step2.com
MANUFACTURING / ___________________________________________________
C.O.C. DATE CODE FROM CARTON: ______________________________________
SAVE THIS SHEET FOR FUTURE REFERENCE.
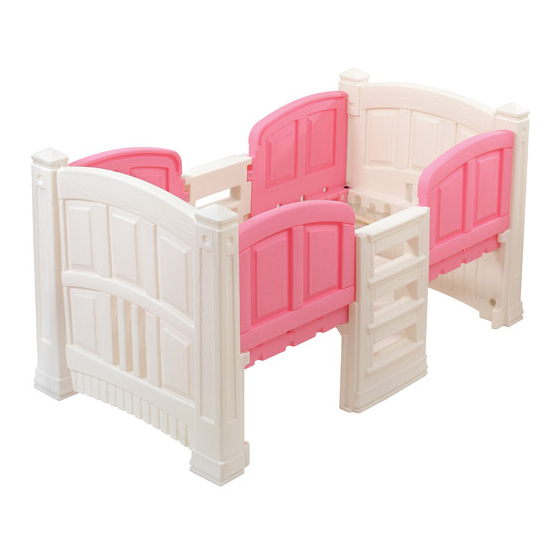
Loft & Storage Twin Bed
MODEL #: _______________________________________________________
DATE OF PURCHASE: ______________________________________________
™
8342/8361
Advertisement

Summary of Contents for Step2 Loft & Storage Twin Bed 8342
- Page 1 Loft & Storage Twin Bed ™ 8342/8361 For assistance or replacement parts please contact : The Step2 Company, LLC. 10010 Aurora-Hudson Rd. Streetsboro, OH 44241 USA 1-800-347-8372 USA & Canada Only (330)656-0440 www.step2.com SAVE THIS SHEET FOR FUTURE REFERENCE. MANUFACTURING / ___________________________________________________ MODEL #: _______________________________________________________ C.O.C.
-
Page 2: Cleaning Instructions
Loft & Storage Twin Bed™ 8342/8361 Thank you for purchasing the Step2® Loft & Storage Twin Bed™. We’d appreciate a few minutes of your time to complete a brief survey so we can continue providing you with great products. For assistance or replacement... - Page 3 • ¡EVITE EL RIESGO DE ATRAPAMIENTO! NO coloque la cama infantil contra la pared a connessioni e sostituire i componenti danneggiati o usurati. Contattare Step2 menos que el espacio entre la cama y la pared sea menor a 76 mm (3 pulg.) Company per ottenere ricambi.
- Page 4 Inspeccione este produto antes de cada utilização. Aperte bem as ligações e vang beschadigde of versleten componenten. Neem contact met de substitua os componentes danificados ou desgastados. Contacte a Step2 Step2 Company voor vervangingsonderdelen. Company para obter peças de substituição.
-
Page 5: Instrukcja Czyszczenia
12 x 1-7/8” (4,76 Należy sprawdzać produkt przed każdym użyciem. Mocno dokręcić połączenia i wymienić uszkod zone lub zużyte części. W celu wymiany części należy skontaktować się z firmą Step2. Instrukcja czyszczenia: • Ogólne czyszczenie: Do czyszczenia części plastikowych używać wody z dodatkiem mydła. - Page 6 H x2 Repeat to the other side. Repeat to the other side. Procédez de même de l’autre côté. Procédez de même de l’autre côté. Repita en el lateral opuesto. Repita en el lateral opuesto. Ripetere sull’altro lato. Ripetere sull’altro lato. Herhaal aan de andere kant.
- Page 7 4 x 1-7/8” (4,76 cm) Repeat to the other side. Procédez de même de l’autre côté. Repita en el lateral opuesto. Ripetere sull’altro lato. Herhaal aan de andere kant. Repita para o outro lado. 4 x 1-7/8” (4,76 cm) Powtórzyć po drugiej stronie. Repeat to all 4 corners.
-
Page 8: Parts List-A
Liste des pièces détachées-a: • If you decide to dispose of a Step2 product, disassemble and dispose of it in such a way that no unreasonable hazards exist. Any disposal practice must be in compliance with all Federal, State/ Provincial, and Local laws and regulations. - Page 9 2 x 1-7/8” (4,76 cm)
- Page 10 Grand Balcony Dollhouse Examine el producto antes de cada utilización. Fije las conexiones y sustituya los componentes que presenten daños o desgaste. Póngase en contacto con la empresa Step2 para obtener piezas de repuesto. For assistance or replacement Step2 UK LTD...
- Page 11 Produkt należy zutylizować, jeśli to możliwe. Należy utylizować zgodnie z obowiązującymi, krajowymi przepisami. Thank you for purchasing the Step2® Grand Balcony Dollhouse™. We’d appreciate a few minutes of your time to complete a brief survey so we can continue providing you with great products.
- Page 12 Remove Supprimer Quitar Rimuovere Verwijder Remover Usunąć 2 x 1-1/2” (3,81 cm) 3 x 1-1/2” (3,81 cm) 2 x 1-1/2” (3,81 cm) 2 x 1-1/2” (3,81 cm) 2 x 1-1/2” (3,81 cm)
- Page 13 Decal Application: Colocación de los adhesivos: Plakplaatje aanbrengen: Umieszczanie naklejek: Clean and dry area thoroughly. Center decal in area. Limpie y seque la superficie en profundidad. Sitúe Reinig en droog het gebied grondig. Centreer het Należy dokładnie wyczyścić i wysuszyć powierzchnię. Apply pressure from center to outer edge.


Need help?
Do you have a question about the Loft & Storage Twin Bed 8342 and is the answer not in the manual?
Questions and answers