Table of Contents
Advertisement
Available languages
Available languages
TV
Zusätzlich erforderliche Unterlagen für den Komplettservice
Additionally required Service Documents for the Complete Service
Service
Manual
Sicherheit
Safety
Materialnr./Part No.
720108000001
Materialnummer / Part Number 720100573000
Änderungen vorbehalten / Subject to alteration
TCC 1216 MP • Prepared in Germany
http://www.grundig.com
Service Manual
Chassis G5
32 VLE 5620 BN
43 VLE 5620 BN
49 VLE 5620 BN
PSN000
PSP000
PSQ000
Advertisement
Table of Contents

Related Manuals for Grundig 32 VLE 5620 BN


Summary of Contents for Grundig 32 VLE 5620 BN
- Page 1 Service Manual Chassis G5 32 VLE 5620 BN PSN000 43 VLE 5620 BN PSP000 49 VLE 5620 BN PSQ000 Zusätzlich erforderliche Unterlagen für den Komplettservice Additionally required Service Documents for the Complete Service Service Manual Sicherheit Safety Materialnr./Part No. 720108000001 Materialnummer / Part Number 720100573000 Änderungen vorbehalten / Subject to alteration...
-
Page 2: Table Of Contents
GRUNDIG Service Chassis G5 Es gelten die Vorschriften und Sicherheitshinweise The regulations and safety instructions shall be valid gemäß dem Service Manual "Sicherheit", Material- as provided by the "Safety" Service Manual, part nummer 720108000001, sowie zusätzlich die even- number 720108000001, as well as the respective tuell abweichenden, landesspezifischen Vorschriften! national deviations. -
Page 3: Spezial-Funktionen
GRUNDIG Service Chassis G5 Durchführen von Messungen Carrying out Measurements Bei Messungen mit dem Oszilloskop an Halb leitern sollten Sie nur When making measurements on semi-con duc tors with an oscillo scope, Tast köpfe mit 10:1 - Tei ler verwen den. Außerdem ist zu beachten, dass ensure that the test probe is set to 10:1 dividing factor. -
Page 4: Geräte- Und Display-Varianten
Product Code Code" oder Ihre Display-Variante Chassis manual, please look for a current nicht aufgeführt sein, können version at the GRUNDIG service Sie eine aktualisierte Version auf portal "http://service.grundig.de". dem GRUNDIG Service-Portal Serialnummer / Before changing any board please "http://service.grundig.de"... - Page 5 GRUNDIG Service Chassis G5 32" 1 - 5...
- Page 6 GRUNDIG Service Chassis G5 Technische Daten / Technical Data 32" 32 VLE 5620 BN 43 VLE 5620 BN 49 VLE 5620 BN Order No. PSN000 PSP000 PSQ000 Product Code Country IT; NO; SE; HR IT; NO; SE; HR IT; NO; SE; HR...
- Page 7 GRUNDIG Service Chassis G5 32 VLE 5620 BN 43 VLE 5620 BN 49 VLE 5620 BN DVB-C Front end Input frequency (MHz) 47 - 862 VHF & UHF 47 - 862 VHF & UHF 47 - 862 VHF & UHF Imput level / Impedance 47 - 70dbµV / 75 Ohm...
-
Page 8: Bedienhinweise
Bedienhinweise Dieses Kapitel enthält Auszüge aus der Bedienungsanleitung. Weitergehende Informationen entnehmen Sie bitte der gerätespezifischen Bedienungsanleitung, die Sie unter www.grundig.de, Menüpunkt Downloads/Bedienungsanlei- tungen herunterladen können. AUF EINEN BLICK AUF EINEN BLICK ------------------------------------------------------------------------------------------- ------------------------------------------------------------------------------------------- Anschlüsse des Fernsehgerätes USB1 USB-Buchse für externe Bedienelemente des Fernseh- Datenträger ohne eigene... - Page 9 Videotext auf halbem nächster/vorheriger Titel Fernsehgerätes. vom Medienserver. Bildschirm Voraussetzung dafür ist, Sie laden die kostenlose Applikation »GRUNDIG TV Ohne Funktion Remote« vom Apple App Store oder vom Untertitel wählen Google play (Android Market) und installie- Netflix Applikationen ren diese auf Ihrem Apple iPhone/Smart- aufrufen.
- Page 10 ERSTINSTALLATION ERSTINSTALLATION ------------------------------------------------------------------------------------ ------------------------------------------------------------------------------------ Erstinstallation durchführen Die benötigte Option »Standfuß« oder Anmeldung am Heimnetzwerk – mit Zeile »Netzwerk wählen« mit » « oder »Wandmontage« mit » « oder » Λ « wäh- » Λ « wählen und mit »OK« bestätigen. einem LAN-Kabel Fernsehgerät mit »...
- Page 11 ERSTINSTALLATION ERSTINSTALLATION ------------------------------------------------------------------------------------ ------------------------------------------------------------------------------------ Programme (DVB-S) einstellen Suchlauf mit » « (rot) starten. Programme (DVB-C) einstellen Programme (DVB-T) einstellen – Das Menü »Digital Suche« wird ein- Hinweis: Die Option »Kabel (DVB-C)« mit » « oder Die Option »Terrestrisch (DVB-T/T2)« mit geblendet, die Suche nach Programmen »...
- Page 12 ERSTINSTALLATION ERSTINSTALLATION ------------------------------------------------------------------------------------ ------------------------------------------------------------------------------------ Programmtabelle für die Programmtabelle anwählen Programme in der Programmtabelle Reihenfolge der Programme in der suchen Programmtabelle ändern digi talen Programme ändern Menü mit »MENU« aufrufen. Mit dieser Suche werden Programme schnell Im Menü »Programmtabelle« die Program- <...
- Page 13 ERSTINSTALLATION ERSTINSTALLATION ------------------------------------------------------------------------------------ ------------------------------------------------------------------------------------ Programme in der Programmtabelle Hinweise: Eigene Namen für die Favoritenlisten Eigene Namen für die AV-Programm- nach „Kriterien“ sortieren vergeben (max. 6 Zeichen) plätze vergeben Programme können wieder aus Favoriten- listen gelöscht werden. Sie können die Reihenfolge der Programme in Sie können für alle Favoritenlisten eigene Na- Sie können für alle AV-Programmplätze eigene Dazu den Bearbeitungsmodus mit »...
- Page 14 HBBTV-BETRIEB USB-RECORDING ------------------------------------------------------------------------------------------------- ------------------------------------------------------------------------------------------- HbbTV Bedienung HbbTV aus-/einschalten Externe Datenträger anschließen Hinweise: Die Buchse USB1 des Fernsehgerätes Nach dem Umschalten auf ein Fernsehpro- Wenn Sie den interaktiven Dienst HbbTV aus- Hinweise: liefert gemäß USB-Spezifikationen maximal gramm das HbbTV unterstützt, wird eine Infor- schalten, ist dieser Dienst nicht mehr verfügbar.
- Page 15 USB-RECORDING USB-RECORDING ------------------------------------------------------------------------------------------- ------------------------------------------------------------------------------------------- Einstellungen für USB Recording Externe Datenmedien auswählen Partition des externen Datenträgers Timeshift – Sendungen formatieren „anhalten″ Wenn mehrere externe Datenträger an das Menü anwählen Fernsehgerät angeschlossen sind, können Sie Im Menü »Datenträgerverwaltung« die Zeile Die aktuelle Sendung kann „angehalten” wer- Menü...
- Page 16 Hinweise: nahmezeit und der noch zur Verfügung Im „normalen“ Fernseh-Betrieb kann das Grundig ist nicht für den Inhalt und die stehende Speicherplatz. Menü »Meine Apps« mit »@« aufgerufen Qualität des Inhaltes der Applikationen – Nach kurzer Zeit werden diese Informatio- und wieder abgeschaltet werden.
- Page 17 Anmelden Überspringen Gewünschte Applikation mit » «, » «, Λ Name, Vorname, Telefonnummer (optional) Bei der Anwahl des Menüs »GRUNDIG appLI- < > » « und » « wählen und mit »OK« bestä- und Geburtsdatum eingeben: CATION store« wird das „Anmeldemenü“ ein- tigen.
- Page 18 Der GRUNDIG Online Store Applikationen herunterladen und instal- Applikationen deinstallieren Applikationen als Favoriten markieren lieren Applikation, die deinstalliert werden soll mit Sie können bevorzugte Applikationen als Favo- Im GRUNDIG Online Store, der Ihnen Online < > » «, » Λ «, »...
- Page 19 SMART INTER@CTIVE TV 4.0 FUNKTIONEN JUGENDSCHUTZEINSTELLUNGEN ----------------------- ------------------------------------------- Hauptmenü Menü mit »MENU« aufrufen. Menüs sperren Die Applikationen. Menüpunkt »Einstellungen« mit » «, Mit dieser Funktion können Sie folgende Me- Online Store Meine Apps < > » «, » « oder » «...
- Page 20 JUGENDSCHUTZEINSTELLUNGEN JUGENDSCHUTZEINSTELLUNGEN ------------------------------------------- ------------------------------------------- PIN-Code ändern Fernsehprogramme sperren Ein gesperrtes Fernsehpro- gramm ansehen Sie können statt des Werkscodes »1234« einen Sie können einzelne Fernsehprogramme mit persönlichen PIN-Code eingeben. Notieren Sie einem persönlichen PIN-Code sperren, zum Sie können ein durch den PIN-Code gesperrtes sich bitte Ihren persönlichen PIN-Code.
- Page 21 GERÄTESOFTWARE ZUBEHÖR VERWALTEN -------------------------------------------------------------------------------------- -------------------------------------------------------------------------- Menü mit »MENU« aufrufen. Achtung: Sie können an Ihr Fernsehgerät umfangreiches Zubehör anschließen. Im folgend beschriebenen Während des Updates das Fernsehgerät Menüpunkt »Einstellungen« mit » «, » Λ «, Menü sehen Sie den Status des jeweiligen Gerä- nicht ausschalten! Nach erfolgreichen Up- <...
- Page 22 RESET-FUNKTIONEN NETZWERK INSTALLATION ---------------------------------------------------------------------------------- ------------------------------------------------------------------ Menü mit »MENU« aufrufen. Einstellungen mit Kapitel „Erstinstallation und Anmeldung am Router für den Die Option »Kabel« mit » « or » Λ « wäh- Fernsehprogramme einstellen“ auf Seite 19 len und mit »OK« bestätigen. LAN-Betrieb Menüpunkt »Einstellungen«...
- Page 23 NETZWERK INSTALLATION NETZWERK INSTALLATION ------------------------------------------------------------------ ------------------------------------------------------------------ Manuelle Anmeldung Anmeldung an das Heimnetzwerk mit » « Betrieb über WLAN Wir empfehlen, während des Betriebes mit (rot) starten. der SMART Inter@ctive TV 4.0 Funktion Wenn keine automatische IP-Adresse vorhanden andere Geräte im Heimnetzwerk abzu- –...
- Page 24 NETZWERK INSTALLATION NETZWERK INSTALLATION ------------------------------------------------------------------ ------------------------------------------------------------------ Voraussetzungen Anmeldung an das Heimnetzwerk mit » « Automatische Anmeldung mit Eingabe Einstellungen > Netzwerk Dienstag (rot) starten. xx xxx xxxx des Netzwerk-Kennwortes Die meisten Heimnetze sind dynamisch, d.h. – Die Meldung »WPS-Taste an ...« wird die Daten für IP Adresse, Netzwerkmaske und Verwenden Sie diese Art der Anmeldung, wenn eingeblendet.
- Page 25 NETZWERK INSTALLATION NETZWERK INSTALLATION ------------------------------------------------------------------ ------------------------------------------------------------------ Hinweis: Manuelle Anmeldung Zeile »Netzmaske« mit » « wählen und mit Name des Fernsehgerätes »OK« bestätigen. Damit sich das Fernsehgerät am Heimnetz- ändern Wenn keine automatische IP-Adresse vorhanden Daten mit »1…0« eingeben und mit »OK« werk anmelden kann, muss der Netzwerk- ist, müssen Sie die Zugangsdaten für »IP Adres- Um Ihr Fernsehgerät im Netzwerk identifizieren...
- Page 26 NETZWERK INSTALLATION WEITERE PROGRAMME EINSTELLEN ------------------------------------------------------------------ ------------------------------------- Fernsehgerät bei einem „ver- Zeile »Sicherheitstyp« mit » « oder » Λ « Signalinformationen anzeigen < > wählen und mit » « oder » « die benötigte steckten“ Netzwerk anmelden (nur bei digitalen Programmen) Option (WPA2) wählen.
- Page 27 Operating Hints This chapter contains excerpts from the operating instructions. For further particulars please refer to the appropriate user instructions which can be downloaded by www.grundig.com, submenu Downloads/Manuals. OVERVIEW OVERVIEW -------------------------------------------------------------------------------------------------------------- -------------------------------------------------------------------------------------------------------------- Connections on the television set Control buttons on the TV...
- Page 28 Turns volume on/off (mute) may control your TV by your phone after data media; selects stations step by step downloading the free »GRUNDIG TV Starts playback in the DLNA menu. Record, playback, pause Remote« application from Apple App. Store or stop (only digital televi- or Google Play (Android Market).
- Page 29 INITIAL SET-UP INITIAL SET-UP --------------------------------------------------------------------------------------------------- --------------------------------------------------------------------------------------------------- Arrange Initial set-up Select the required option »Stand« or »Wall- Connecting to a home network with a Select the line »Select Access Point« with mounted« with » « or » Λ «. » « or » Λ...
- Page 30 INITIAL SET-UP INITIAL SET-UP --------------------------------------------------------------------------------------------------- --------------------------------------------------------------------------------------------------- Searching television channels with sat- Tuning cable digital television channels Tuning terrestrial digital television ellite signal (DVB-S) (DVB-C) channels (DVB-T) Select the option »Satellite (DVB-S/S2)« Select the option »Cable (DVB-C)« with Select the option »Air (DVB-T/T2)« with with »...
- Page 31 INITIAL SET-UP INITIAL SET-UP --------------------------------------------------------------------------------------------------- --------------------------------------------------------------------------------------------------- Changing the Channel Editor for Opening the Programme Table Searching channels by name in the Moving the channels in the channel or- Channel Editor ganizer to different channel positions the digital channels Open the menu with »MENU«. While arranging the channels in the Channel In the »Channel Editor«...
- Page 32 INITIAL SET-UP INITIAL SET-UP --------------------------------------------------------------------------------------------------- --------------------------------------------------------------------------------------------------- Sequencing channels in the Channel Notes: Enter own names for the favourites lists Renaming AV channels Editor (max. 6 characters) You can delete channels from the favourites You can rename AV channels according to the list.
- Page 33 HBBTV MODE USB RECORDING ------------------------------------------------------------------------------------------------------ ------------------------------------------------------------------------------------------- Using HbbTV Deactivate and activate HbbTV Connecting external data media Notes: The socket USB1 of the television supports When you switch to a TV program that supports This option allows turning off Hbb TV feature, Notes: 500 mA current according to the USB HbbTV, an info message will appear stating that...
- Page 34 USB RECORDING USB RECORDING ------------------------------------------------------------------------------------------- ------------------------------------------------------------------------------------------- USB recording settings Selecting external data media Formatting the partition Time shift – ″ Pausing” programmes If there are more than one external data media In the »Disk Management« menu select the Selecting the menu connected to the television, then select one of line »Format Partition«...
- Page 35 – These information will disappear after a You may connect a keyboard or mouse to both der (DVB-S). on your Grundig TV. You can download many short while. Recording symbol and record- sockets USB(HDD) or socket USB1 to use in applications from Grundig Application Store.
- Page 36 Press »@« to open »MyApps« menu. Select the letters/numbers with » «, » Λ «, Register Enter Skip – Grundig Smart App entry screen is dis- < > » « or » « and confirm with »OK«. played. After you’ve entered the data, use »...
- Page 37 «, » « or » « to select the Λ Grundig Application Store is an online depot – My Apps menu will be displayed. application that you want to uninstall. where you can download many applications Select the desired category in Grundig Online Applications with »...
- Page 38 SMART INTER@CTIVE TV 4.0 FEATURE PARENTAL SETTINGS -------------------------------- --------------------------------------------------------------------------------- Open menu with »MENU« button. Note: When the TV is in review buffer mode, the Smart Inter@ctive TV Select menu item »Settings« with » «, » Λ «, Online Store My Apps parental rating of the program in the live <...
- Page 39 PARENTAL SETTINGS PARENTAL SETTINGS --------------------------------------------------------------------------------- --------------------------------------------------------------------------------- Blocking the multifunction Blocking a television channel Watching a blocked television switch channel You can block individual television channels which are not suitable for children using a When the key lock is activated, the multi function You can watch a TV channel blocked with PIN personal PIN code.
- Page 40 SOFTWARE OF THE DEVICE ACCESSORIES --------------------------------------------------------------- ------------------------------------------------------------------------------------------------------ Open menu with »MENU« button. Warning: You can connect various accessories to your television to use with video talk, volume control, Television will restart after update. Do Select menu item »Settings« with » «, »...
- Page 41 RESET FUNCTIONS NETWORK SETUP ---------------------------------------------------------------------------------------- ------------------------------------------------------------------------------------------- Open menu with »MENU« button. Deleting channel history Wired network settings Select the line »Network Configuration« < > with » « or » Λ « and use » « or » « to Select menu item »Settings« with » «, »...
- Page 42 NETWORK SETUP NETWORK SETUP ------------------------------------------------------------------------------------------- ------------------------------------------------------------------------------------------- Manual connection With » « (red) select »Connect« option to Wireless network Wireless network settings establish modem connection. Certain networks require Static IP address. If You have several ways to connect your TV to Wireless network connection –...
- Page 43 NETWORK SETUP NETWORK SETUP ------------------------------------------------------------------------------------------- ------------------------------------------------------------------------------------------- Technical requirements To continue after pressing the WPS button Select the line »Select Access Point« with Connecting automatically by entering on the access point, select the option »Con- » « or » Λ « and press »OK« to confirm. the network password Most of the home networks are Dynamic.
- Page 44 NETWORK SETUP NETWORK SETUP ------------------------------------------------------------------------------------------- ------------------------------------------------------------------------------------------- Note: Manual connection Select the line »Gateway« with » «. Change TV Name Enter Gateway address with »1…0«. For device to discover the wireless modem Certain networks require Static IP address. If To make it possible to identify your TV in the net- on the network, the network name should your network requires a Static IP address, you Select the line »Select Access Point«...
- Page 45 NETWORK SETUP SETTING FURTHER CHANNELS ------------------------------------------------------------------------------------------- ----------------------------------------------------- Connecting the TV to a “hidden” Select the network with » « or » Λ « and Creating a list of favourites - analog Displaying signal information press »OK« to confirm. channels network (only for digital television channels) –...
-
Page 46: Service- Und Sonderfunktionen
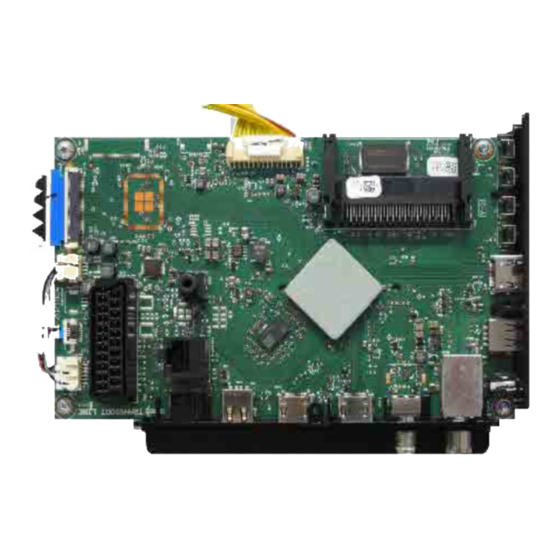
1. Basic Settings Menü Menüpunkt Einstellung Menu Point of Menu Adjustment 32 VLE 5620 BN 43 VLE 5620 BN 49 VLE 5620 BN 3 3 3 3 4 4 4 4 1 1 1 1 2 2 2 2 TV Mode Customer/Factory... - Page 47 GRUNDIG Service Chassis G5 Platinenabbildungen und Schaltpläne / Layout of PCBs and Circuit Diagrams Chassisplatte / Chassis Board ZG7190R-2 Bestückungsseite / Component Side Lötseite / Solder Side POS. POS. POS. POS. POS. POS. POS. POS. C100 T 136 C606 C806...
- Page 48 GRUNDIG Service Chassis G5 POS. POS. POS. POS. POS. POS. POS. POS. R904 R1016 T 100 R1202 T 188 S1100 T 128 TP30 TP80 B 187 TP131 B 185 TP181 B 42 R905 R1017 T 102 R1203 T 186 S1101 T 192...
- Page 49 Chassisplatte / Chassis Board ZG7190R-2 Ansicht von der Bestückungsseite / View of Component Side S1200 IC1300 C901 Trigger T901 BARCODE R510 R1301 R909 C900 R534 R932 C1301 R1302 R1303 C1302 R902 C1300 L1300 X1400 R907 R922 R535 L910 S101 IC1400 R508 S1201 R937...
- Page 50 Chassisplatte / Chassis Board ZG7190R-2 Ansicht von der Lötseite / View of Solder Side TP54 BARCODE TP208 TP158 TP107 TP109 TP110 TP171 TP23 TP17 TP111 TP112 TP162 TP178 TP24 TP18 TP172 TP103 TP22 TP16 TP173 TP20 TP108 TP177 TP105 TP84 TP15 FID7 TP175...
-
Page 51: Ram
Chassisplatte – Blockschaltplan / Chassis Board – Block Circuit Diagram PANEL_PWR POWER_SW ENABLE VCC3V3_FE IC700 IC906 URSA6 50/60Hz Tuner POWER_SW 100/120Hz Analog ENABLE DVB-T/T2/C VCC3V3 IC905 USB_CTRL POWER_SW2 POWER_SW R908 POWER_SW Si2151 USB2.0 ENABLE IC401 BRI_ADJ VCC1V8 IC900 IC702 USB_CTRL BL_CTRL VCC3V3-ST IC1400... -
Page 52: Flash
GRUNDIG Service Chassis G5 Chassisplatte – Übersicht / Chassis Board – Overview Power Supply FRC-SCK FRC-SCK LDIM_U10_SPI_DI LDIM_U10_SPI_DI LDIM_U10_SPI_CS LDIM_U10_SPI_CS Scaler-SOC/LVDS LDIM_U10_SPI_DO LDIM_U10_SPI_DO LDIM_U10_VSYNC LDIM_U10_VSYNC LVDSA LVDSA LVDSB LVDSB FRC_BL_CTRL FRC_BL_CTRL LVDSxA LVDSxA LVDSxB LVDSxB LVDSxC LVDSxC FRC_TCON_ON FRC_TCON_ON LVDSxD... - Page 53 Chassisplatte – Netzteil / Chassis Board – Power Supply Current Sense Charge Current Pump Limit L915 8-ms TP102 Driver Deglitch S900 VCC_ST L900 +12V PANEL_PWR UVLO Trigger +5V2_ST L901 OTSD TP103 PSU with 5V XC6222B181ER-G R900 C901 +5V2_ST VCC3V3-ST C900 TPS2530 Thermal IC900...
-
Page 54: Ir/Keyboard
GRUNDIG Service Chassis G5 Chassisplatte – Netzteil / Chassis Board – Power Supply VDDC IC100F VDDC C300 C302 C303 C304 C301 VDDC VDDC-> 5250mA VDDC 47UF 100NF 100NF VDDC 100NF 47UF VDDC VDDC VDDC VDDC VDDC MCP-> 300mA VDDC VDDC... -
Page 55: Hdmi
GRUNDIG Service Chassis G5 Chassisplatte / Chassis Board – HDMI HDMIA HDMIC HDMID HDMIA-RX0_N HDMIC-RX0_N HDMID-RX0_N HDMIA-RX0_N HDMIC-RX0_N HDMID-RX0_N HDMIA-RX0_P HDMIC-RX0_P HDMID-RX0_P HDMIA-RX0_P HDMIC-RX0_P HDMID-RX0_P HDMIA-RX1_N HDMIC-RX1_N HDMID-RX1_N HDMIA-RX1_N HDMIC-RX1_N HDMID-RX1_N HDMIA-RX1_P HDMIC-RX1_P HDMID-RX1_P HDMIA-RX1_P HDMIC-RX1_P HDMID-RX1_P HDMIA-RX2_N HDMIC-RX2_N HDMID-RX2_N... - Page 56 GRUNDIG Service Chassis G5 Chassisplatte / Chassis Board – LAN, SCART, SPDIF, USB Service Socket R601 SCART S600 LEFT TP184 VGA-TX UART-TX UART-TX VGA-RX UART-RX UART-RX SCART_RIN+ RIGHT TP185 SCART_RIN+ C600 SCART_GIN- SCART_GIN- C601 SCART_GIN+ SCART_GIN+ 100R CKX-3.5-31(3P) TP183 SCART_BIN+...
-
Page 57: Tuner
GRUNDIG Service Chassis G5 Chassisplatte / Chassis Board – Tuner Si2151 DEMOD ANT. TERRESTRIAL TUNER FILTER C700 DEMOD VCC3V3_FET 24MHz X700 0 / 90 LOW-IF XC8101 Vout X_2151 XTALO_T 3.3V C702 FREQ XOSC ADDR SYNTH Gate Current 1.8V C703 Control... - Page 58 GRUNDIG Service Chassis G5 Chassisplatte / Chassis Board – PCMCIA-Interface S500 PC007-R68127M1B1A7Y PCM_CD1_N PCM_D3 CI CD LOGIC CI POWER CD1# TS0_D3 PCM_D4 TPS2530 MDO3 VCC3V3 TS0_D4 PCM_D5 IC500 R500 MDO4 PCM_WAIT_N TS0_D5 PCM_D6 L500 VCC-PCMCIA MDO5 TS0_D6 PCM_D7 MDO6 +5V2_ST...
- Page 59 GRUNDIG Service Chassis G5 Chassisplatte / Chassis Board – RAM R1000 22R*4 R1001 22R*4 AVDD_DDR1 IC100A B_DDR3_A12 B-DDR3-A12 B_DDR3_DQL0 B-DDR3-DQL0 B_DDR3_A0 B_DDR3_BA1 B-DDR3-BA1 B_DDR3_DQL2 B-DDR3-DQL2 B_DDR3_A0 B_DDR3_A1 IC1000 B_DDR3_A1 B_DDR3_A2 K4B2G1646 B_DDR3_A2 B_DDR3_A3 R1002 22R*4 R1003 B_DDR3_A3 B_DDR3_DQL6 B-DDR3-DQL6 B_DDR3_A4...
- Page 60 GRUNDIG Service Chassis G5 Chassisplatte / Chassis Board – FRC DVDD_DDR_DATA AVDDIO_DATA1 DVDD AVDDIO_DATA0 FRC_AVDD_MOD DVDD FRC_VDDP R1400 SPI_DI SPI_CK SPI_CZ LVDSxA SPI_DO A0x_P A0x_P FRC_TCON_ON A0x_N FRC_TCON_ON A0x_N A1x_P LDIM_U10_VSYNC A1x_P A1x_N 3D_SYNC_FRC_O A1x_N A2x_P NORMAL 3.3V POWER LDIM_U10_SPI_DI...
-
Page 61: Scaler-Soc/Lvds
GRUNDIG Service Chassis G5 Chassisplatte / Chassis Board – Scaler-SOC/LVDS S100 Cabinet TEMP SOC TEMP (optional) S301 IC102 AT30TS74 IC103 I2C-SDA I2C-SDA VCC3V3 VCC3V3 I2C-SCL I2C-SCL C102 C103 A3x_P ALERT ALERT 100NF A3x_N C0x_P C0x_P ACKx_P C0x_N C0x_N ACKx_N C1x_P... -
Page 62: Amplifier
GRUNDIG Service Chassis G5 Chassisplatte – Verstärker / Chassis Board – Amplifier C802 330pF 50V C803 C800 4.7nF R804 2.2n C801 C804 C805 R800 100R 33nF 50V 1UF 25V 470R 47NF C807 C809 L800 100nF C806 4.7nF NR 6045T 220M... - Page 63 GRUNDIG Service Chassis G5 LED-Konverter / Converter ZNL193-05 Ansicht von der Bestückungsseite / View of Component Side POS. C2000 T 132 ZNL193-05 55'' C2001 T S2000 LED W2 L2003 L2008 L2007 L2009 C2002 B 37 D2009 D2001 C2008 C2003 T 132...
- Page 64 Netzteil / Power Supply ZNV194-03 Ansicht von der Bestückungsseite / View of Component Side POS. POS. C2000 T D2011 B 66 POZA2 FUSE T 10A 250V C2027 C2005 C2001 T D2012 T 166 C2002 T D2013 T 170 C2003 B 137 D2500 T 182 L2015 DC INPUT...
- Page 65 Netzteil / Power Supply ZNV194-03 Ansicht von der Lötseite / View of Solder Side POS. POS. R2040 B 212 TP12 B 42 FID4 R2041 B 32 TP13 B 72 IC2002 D2011 R2042 B 60 TP14 B 46 FID3 R2043 B 81 TP15 B 48 C2007...
- Page 66 Netzteil / Power Supply ZNV194-03 VBUS TR2000 R2001 100R C2003 VBUS R2005 100R 2.2NF R2002 EL2007 EL2010 EL2012 EL2000 DB2000 + C2000 + C2001 D2000 GBL408 D2006 C2024 68UF 68UF 0.22R R2008 R2009 R2010 UF4007F 2.2NF 450V 450V C2002 EL2001 3.3NF J2000 630V...
-
Page 67: Power Supply Znv194-03
GRUNDIG Service Chassis G5 Netzteil / Power Supply ZNV194-03 C2510 C2511 C2501 2.2NF 2.2NF TP70 2.2NF R2500 R2519 TP69 100R 100R C2500 12.5V 2.2NF D2500 100V J2506 R2515 ILED: 328mA (ADIM: Rtop: 200k, Rbot: 18k, RSENSE:1.2R) ILED: 203mA (ADIM: Rtop: 200k, Rbot: 18k//27k, RSENSE: 1.2R) -
Page 68: Spare Parts Lists
Spare Parts List Spare Parts List FOR INTERNAL USE ONLY FOR INTERNAL USE ONLY 11 / 2016 32 VLE 5620 BN 12 / 2016 43 VLE 5620 BN BESTELL-NR. / ORDER NO.: PSN000 (PSN) BESTELL-NR. / ORDER NO.: PSP000 (PSP) ©... - Page 69 If your “Product Code” or display variant is oder Ihre Display-Variante nicht aufgeführt sein, not mentioned in the spare parts list, please finden Sie eine aktualisierte Version auf dem look for a current version at the service portal Service-Portal „http://service.grundig.de“. “http://service.grundig.de”. 001.000 759551851500 GEH.-VORDERTEIL SCHWARZ FRONT CABINET BLACK 001.100...
- Page 70 GRUNDIG Service GRUNDIG Service Chassis SU Chassis G5 Ersatzteilliste / Spare Parts List NUR FÜR INTERNEN GEBRAUCH / FOR INTERNAL USE ONLY 12 / 2016 CHASSISMODUL / CHASSIS BOARD G5 Pos. Part Number Description D400 759551832600 DIO-SMD ESD PRTR5V0U2X SOT143B...
Need help?
Do you have a question about the 32 VLE 5620 BN and is the answer not in the manual?
Questions and answers