
Related Manuals for Broyhill A601002522


Summary of Contents for Broyhill A601002522
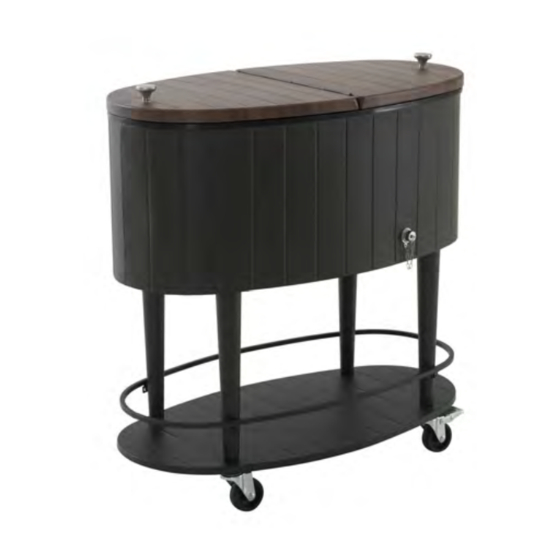
- Page 1 ASSEMBLY INSTRUCTIONS ITEM#: A601002522 SKU#:810550786 LINDMERE COOLER Need help? We are here for you! 1(866)578.6569 24/ 7 • Toll Free...
-
Page 2: Warranty
GENERAL BEST PRACTICES FOR ASSEMBLY: • Please read and understand this entire manual before attempting to assemble or install the product. • Before beginning assembly of product, make sure all parts are present. Compare parts with package contents list and hardware contents list. -
Page 3: Exploded Drawing
EXPLODED DRAWING 3/10... -
Page 4: Parts List
PARTS LIST Label Part Number Description Part Image P005100112 Knob P00310011001 P00320001701 Body P00540053401 P00500055601 Support Ring P00430009001 Bottom Board P003300027 Caster Caster With P003300028 Brake Drain Plug P005100102 Pre-assembled HARDWARE LIST Label Part Number Description Part Image H010030525 Bolt M6*12 H010110069 Bolt M4*35 H090030002... -
Page 5: Helpful Hints
HELPFUL HINTS • Tools needed and not included • Separating parts before starting Provided in hardware pack Provided How many people needed for the installation work 5/10... - Page 6 STEP 1 Assembled View: Attached Leg (D) to Body (C) with Bolts (H1), tighten with Wrench (HW). 6/10...
- Page 7 STEP 2 Assembled View: Attached Support Ring (E) to Leg (D) with Bolts (H1), tighten with Wrench (HW). 7/10...
- Page 8 STEP 3 Assembled View: Attached Caster (I), Bottom Board (F) and Caster with brake (J) to Leg (D),tighten with Wrench (HW1). 8/10...
- Page 9 STEP 4 Assembled View: Attached Knob (A) to Lid (B) with Bolts (H2). 9/10...
- Page 10 STEP 5 Assembled View: Put the assembled lid (A/B) to basin (C). 10/10...
Need help?
Do you have a question about the A601002522 and is the answer not in the manual?
Questions and answers