Table of Contents
Advertisement
Advertisement
Table of Contents

Related Manuals for AVERATEC 3200 Series


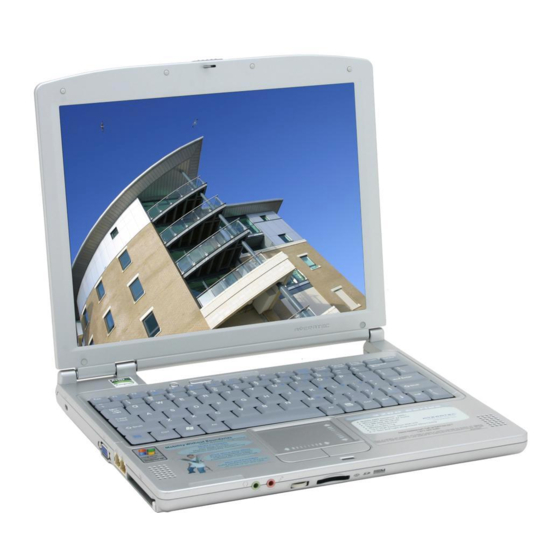
Summary of Contents for AVERATEC 3200 Series
- Page 1 3200 Series User’s Manual © 2004 AVERATEC, Inc.
- Page 2 Introduction — Getting Started...
-
Page 3: Getting Started
Introduction — Getting Started Getting Started Congratulations on your purchase of a notebook computer! Your new notebook features the most innovative advances in portable computing technology. It combines state-of-the-art ergonomics with sophisticated architecture to provide you with a personal computer that is compact, powerful, and easy to use. Designed for a wide range of general, business, and personal productivity applications, the notebook is an ideal choice for use in the office, at home, and on the road. - Page 4 Inventory This computer system is designed for years of productive and pleasurable computing. Use this section to keep details of your purchase. This information will be required should you need to make repairs to your notebook during the warranty period. Update this section when you add new options. DATE OF PURCHASE: PLACE OF PURCHASE: DEALER'S NAME:...
-
Page 5: Safety And Maintenance
Safety and Maintenance You can use your notebook computer under a wide range of environmental conditions. However, to ensure long use and continued high performance, consider the following factors when setting up your computer: • Follow all warnings and instructions noted in this documentation and in the Windows Help program. - Page 6 • Internal battery • AC adapter with power cord • Recovery CDs OPTIONS The following items are AVERATEC’s web site or your preferred computer store. • Spare Lithium Ion Battery • Spare AC Adapter • Auto Adapter • Carrying bag •...
-
Page 7: Where To Look For Information
Introduction — Features Features High Capacity Hard Disk Drive The computer has a high capacity hard disk drive to store your favorite programs and large multimedia files. Built-in Modem/LAN Capability/WLAN Module A built-in 56Mbps 802.11g wireless LAN, 56k data and fax modem and 10/100 Mbps Ethernet LAN allows you to access the Internet or a local area network (LAN) with or without wires. -
Page 8: Adjusting The Volume
Adjusting the Volume You can adjust the volume with the volume control knob located below the touchpad. Volume control button Alternatively, you can adjust the volume with the Windows volume control applet located on the taskbar. Adjusting the Brightness Use the following hot key combinations to adjust the LCD panel brightness: •... -
Page 9: Turning Off Your Computer
Turning off Your Computer Turning off the computer properly is important to maintaining your computer. 1. On the Start menu, click Shut Down. If you are going to be away from the computer for a short period, there are ways of conserving power without shutting down the system. -
Page 10: Tips For New Owners
Tips for New Owners Take responsibility for backup Back up files often. Users who need to manage large amounts of data may wish to use backup devices such as a tape backup unit or a ZIP drive. If you use your notebook as a networked workstation with system backup, talk to the system administrator about backup procedures for your notebook. - Page 11 Getting Started — Hardware and Software...
-
Page 12: Hardware And Software
Getting Started — Hardware and Software Hardware and Software This chapter introduces the different components and controls of your notebook computer, including the hardware components, the software, and the audio and video systems. Getting Started Before you begin using your computer, read this chapter to familiarize yourself with the main components installed in the system. -
Page 13: Front View
Front View 1. LCD release latch 2. LCD panel 3. Battery 4. Keyboard 5. Status indicators 6. Speakers 7. Touchpad Getting Started — Front View 8. Touchpad buttons 9. Volume control knob 10. Microphone-in jack 11. Audio-out jack for external speakers or headphones 12. -
Page 14: Left View
Getting Started — Left View Left View 1. Kensington lock hole 2. VGA port for external video display 3. Phone jack for internal modem 4. LAN RJ-45 jack 5. PCMCIA card slot 6. PCMCIA card eject button... -
Page 15: Right View
Right View USB ports Optical drive Optical drive eject button AC-adapter port Getting Started — Right View... -
Page 16: Bottom View
Bottom View Ventilation slots RAM compartment Battery release button Battery Getting Started — Bottom View... -
Page 17: Led Status Indicators
LED Status Indicators The status indicators in the upper left corner of the keyboard light up when a particular function of the computer is active. Each indicator is marked with a symbol. Optical Drive Number-Lock Caps-Lock Scroll-Lock Power Indicators The power indicators show which power source the system is using. They also show battery status and low battery power alerts. -
Page 18: Function Key
Function Keys Hold the Fn key while pressing the numbered function key. Function key Fn + F3 Fn + F4 Fn + F5 Fn + F6 Fn + F7 Numeric Keypad The embedded numeric keypad consists of ten keys that make number intensive input more convenient. -
Page 19: Touchpad Precautions
2. Gently move your thumb across the pressure-sensitive touchpad in the direction you want the cursor to move. The pad detects the change in pressure and moves the cursor in the corresponding direction. 3. The touchpad offers another method of making selections in a software program. -
Page 20: Floppy Disk Drive
Connecting a USB Floppy Disk Drive Your notebook computer supports a USB 1.44 MB floppy disk drive (must be purchased separately). The FDD is “hot pluggable,” so you do not have to power down the notebook to connect it. Disk Drives Your computer comes with several components for reading and writing (recording) information. -
Page 21: Inserting A Disk
Inserting a Disk 1. Press the button on the front of the drive to open the disk tray and pull the tray open. 2. Place the disk on the tray, label side up. 3. Place the disk on the central spindle and press gently until the disk clicks into place. -
Page 22: Connecting The Printer
Warning: Do not insert any foreign objects into the disc tray. Do not force the tray to open or close manually. When not in use, keep the tray closed to prevent dust or dirt from entering the drive unit. If you experience difficulty when removing an optical media, stretch a paper clip (or use a... -
Page 23: Replacing A Memory Card
Note: Please read the instructions included with your PC card. Most cards may be inserted while your notebook computer is running, while a few may require that your notebook computer is turned off. Removing a Card 1. If a card is in use, you must shut down the card before removing it. Click the Safely Remove Hardware icon on the right side of the taskbar, then select the device. -
Page 24: Inserting A Memory Card
Pull upwards on the card and then slide the card out (2). Inserting a Memory Card Hold the memory card by its edges with the edge-connector side towards the slot. Hold the card at a shallow angle (about 25 degrees) and insert the edge connector into the connector slot (3). -
Page 25: The Graphics System
The Graphics System Your computer has a high-performance graphics system, which can easily handle the demands of today's multimedia computing. Screen Controls Brightness Function keys can increase or decrease the brightness of the monitor. • <Fn> + <F6> decreases the LCD panel brightness •... -
Page 26: Dual Displays
4. In the Display Properties window, click Advanced in the Settings tab. Click the Display Modes tab. 5. Under Driver mode, you can select the appropriate options to change the display to an external monitor. 6. Adjustments to screen resolution and color depth can also be made in this dialog box. -
Page 27: Communication Components
combination is available—you can cycle the video output by pressing the Fn + F5 keys. If the external CRT is connected, the display on the LCD and the CRT is the same. Tip: To ensure trouble-free video output, the first time you use an external monitor, change the output in the Display Properties dialog box. - Page 28 Making Connections —Making Connections...
-
Page 29: Making Connections
Making Connections Your notebook computer is equipped with a full array of ports and connectors, including standard input/output (I/O) ports for quickly and easily adding peripheral devices such as printers, keyboards, and mice. Refer to documentation included with individual devices for details on connecting these devices to your computer. Your computer includes three USB ports and a modem and LAN port, offering the latest in communications technology. -
Page 30: Right Side Connectors
Warning: Plug your modem into an analog telephone jack only. Most homes use analog lines. Do not use digital lines, such as the PBX and ISDN systems found in many offices. Digital lines may damage your modem. 4. LAN RJ-45 Jack Used to make a network connection using the built-in Ethernet LAN. -
Page 31: Front Side Connectors
Making Connections —Front Side Connectors Front Side Connectors 1. Audio-out Jack Connect a stereo headset or external speakers to this jack to listen to multimedia. 2. Microphone-in Jack Connect a microphone to this jack to record audio. - Page 32 System Software —Error! Style not defined.
-
Page 33: Before You Start
System Recovery Before you start Your system includes Recovery media in the event you choose to reinstall the factory software. Follow the steps in the appropriate section below to reinstall the factory software. • The factory has pre-partitioned your system's hard disk, so you may directly install the system software;... - Page 34 Power Management —Error! Style not defined.
-
Page 35: Power Management
Power Management Battery Calibration The first time you use a battery, you should calibrate it. The calibration process empties and charges the battery once. This allows the Windows battery gauge to accurately monitor battery status. To calibrate a battery, follow these steps: 1. -
Page 36: Monitoring Battery Power
Monitoring Battery Power There are two ways to monitor how much power the battery has left. 1. Click start/Settings/Control Panel/Power Options; then click Power Meter. 2. Moving the cursor to the battery icon on the taskbar is the simplest way to check on battery power status. -
Page 37: Battery Charging
Battery Charging When you use the AC adapter to connect your Notebook to a power outlet, the internal battery will automatically begin to recharge. While the battery is charging, the Battery Charge icon on the indicator panel will be active. When the battery is fully charged, the Battery Charge icon will turn off. -
Page 38: Initiating Suspend Mode
Hibernate is similar to turning off the computer, Hibernate except that the current state of the computer is copied to the hard disk. When the computer returns from hibernation mode, the desktop appears with the same files and programs open prior to your computer entering hibernation mode. -
Page 39: Power Saving Tips
Power Saving Tips • Avoid operating the fax/modem, or audio and video applications when using battery power. Operating a fax modem, video, or audio equipment increases the computer's power requirements. • Decreasing monitor brightness can also save power. Decrease brightness by pushing <Fn>... - Page 40 Using the BIOS Setup Utility —BIOS Setup Menu...
-
Page 41: Using The Bios Setup Utility
Using the BIOS Setup Utility —BIOS Setup Menu Using the BIOS Setup Utility Your notebook has a BIOS setup utility which allows you to configure important system settings, including settings for various optional functions of the computer. This chapter explains how to use the BIOS setup utility. BIOS Setup Menu The BIOS setup Utility allows you to configure your computer’s basic settings. -
Page 42: Navigating And Entering Information In Bios
Using the BIOS Setup Utility —Navigating and Entering Information in BIOS Navigating and Entering Information in BIOS Use the following keys to move between fields and to enter information: Press Del to start the BIOS utility after turning on the computer. Press Esc to exit any section. - Page 43 Using the BIOS Setup Utility —The Main Menu Power Management Setup Auto-Detect Hard Disks Change User Password Change Supervisor Password Auto Configuration with Optimal Settings Save Settings and Exit Exit Without Saving Standard CMOS setup for changing time, date, hard disk type, etc. ↑...
-
Page 44: Standard Cmos Setup
Standard CMOS Setup The Standard CMOS Setup page of the Setup Utility has a list of fields that describe the basic configuration of your computer. CMOS is simply a type of random access memory, or RAM, used to store the basic configuration of the computer. AMIBIOS SETUP –... -
Page 45: Standard Feature Description
Standard Feature Description Field Setting System Time Use these fields to set the time and date. The time is displayed in & Date 24-hour format. The date can be set from January 1, 1980 to December 31, 2099. The values set in these two fields take effect immediately. -
Page 46: Advanced Cmos Setup
Advanced CMOS Setup AMIBIOS SETUP – ADVANCED CMOS SETUP (C)2001 American Megatrends, Inc. All Rights Reserved 1st Boot Device 2nd Boot Device 3rd Boot Device S.M.A.R.T. for Hard Disks Password Check TouchPad Support Share Memory Size USB 1.1 Device Legacy Support Display Expansion Support Figure 6-3 Field... - Page 47 1st Boot Device CD/DVD 2nd Boot Device USB FDD 3rd Boot Device S.M.A.R.T. for Hard Disabled Disks Enabled Display Expansion Disabled Support Enabled Password Check Setup Always Share Memory Size 16MB 32MB 64MB Using the BIOS Setup Utility — 1st Boot Device default is USB FDD. 2nd Boot Device default is CDROM.
- Page 48 Power Management This section of the BIOS manages` power settings in operating systems other than Windows 98 or above, or operating systems using ACPI power management. In Windows 98 or above, power management is controlled through the Power Management window in My Computer, and BIOS power management settings have NO effect.
-
Page 49: Auto-Detect Hard Disk
Disabled Disabled Battery Auto Calibration Enabled Disabled FAN Auto Learning Enabled Auto-Detect Hard Disk When Auto-Detect Hard Disk is selected, the BIOS will automatically detect Pri. Master and Sec. Master settings. AMIBIOS SETUP – STANDARD CMOS SETUP (C)2000 American Megatrends, Inc. All Rights Reserved Date (mm/dd/yyyy): Wed Jan 12,2001 Time (hh/mm/ss) : 16:55:24... -
Page 50: Change User Password
Change User Password With a User password, you can enter the Setup Utility and change or remove the User password, but you cannot enter the Setup Utility and change or remove the Supervisor password, nor enable diskette access if it has been disabled. Change Supervisor Password A supervisor password must be set before a lower-level user password can be set. - Page 51 — Frequently Asked Questions...
-
Page 52: Frequently Asked Questions
Frequently Asked Questions Q: My screen seems to time out too quickly. I have to constantly hit a key or move the mouse in order to bring it back. How can I adjust the screen time- out? This is part of Windows Power Management. Access Power Management by clicking on Start / Settings / Control Panel / Power Management. - Page 53 inserting a needle into the reset button pinhole. (The reset button locate on the computer bottom side.) Why can’t I charge the battery of my portable computer after it was out of use for some time? After portable computers have not been used for a long time (more than one month), the batteries will go into the low voltage protection mode due to data back-ups and natural electrical discharge.
- Page 54 — Statements...
-
Page 55: Federal Communications Commission Statement
Statements Federal Communications Commission Statement This equipment has been tested and found to comply with the limits for a Class B digital device, pursuant to Part 15 of the FCC Rules. These limits are designed to provide reasonable protection against harmful interference in a residential installation. -
Page 56: About The Modem
Appendix B — Statements About The Modem This equipment complies with Part 68 of FCC rules. On the bottom of this equipment is a label that contains, among other information, the FCC registration number and ringer equivalence number (REN) for this equipment. If requested, this information must be provided to the telephone company. -
Page 57: European Notice
European Notice Products with the CE Marking comply with both the EMC Directive (89/336/EEC) and the Low Voltage Directive (73/23/EEC) issued by the Commission of the European Community. Compliance with these directives implies conformity to the following European Norms: EN 55022 ( CISPR 22 ) Radio Frequency Interference EN 55024 ( EN61000-4-2, EN61000-4-3, EN61000-4-4, EN61000-4-5, EN61000-4- 6, EN61000-4-8,EN61000-4-11, EN61000-3-2, EN61000-3-3 ) Generic Immunity Standard... -
Page 58: Battery Disposal
Before installing this equipment, users should ensure that it is permissible to be connected to the facilities of the local telecommunications company. The equipment must also be installed using an acceptable method of connection. In some cases, the company's inside writing associated with a single line individual service may be extended by means of a certified connector assembly (telephone extension cord). - Page 59 Appendix B — Statements CLASSIFIED AS A "CLASS 1 LASER PRODUCT.” TO USE THIS MODEL PROPERLY, READ THE INSTRUCTION MANUAL CAREFULLY AND KEEP THIS MANUAL FOR FUTURE REFERENCE. IN CASE OF ANY TROUBLE WITH THIS MODEL, PLEASE CONTACT YOUR NEAREST "AUTHORIZED SERVICE STATION.”...
Need help?
Do you have a question about the 3200 Series and is the answer not in the manual?
Questions and answers