Cleveland SteamCub 1SCE Operation Installation Maintenance Manual
Convection steamers
Hide thumbs
Also See for SteamCub 1SCE:
- Operation manual (30 pages) ,
- Operator's manual (11 pages) ,
- Specifications (2 pages)
Table of Contents
Advertisement
Quick Links
Visit www.clevelandrange.com to locate a
service or sales representative in your area.
SteamCub
Convection Steamers
Operation, Installation & Maintenance Manual
This manual is updated as new information and models are released. Visit our website for the latest manual.
MO EL:
1SCE
Read the manual thoroughly.
!
Improper installation, operation or
maintenance can cause property
damage, injury or death.
For your future reference.
Model # ______________________________________
Serial # ___________ ____________________________
September 2019
Part # - KE004045-2 C
Advertisement
Table of Contents

Related Manuals for Cleveland SteamCub 1SCE


Summary of Contents for Cleveland SteamCub 1SCE
- Page 1 Visit www.clevelandrange.com to locate a service or sales representative in your area. SteamCub Convection Steamers Operation, Installation & Maintenance Manual This manual is updated as new information and models are released. Visit our website for the latest manual. MO EL: 1SCE For your future reference.
- Page 2 Cleveland Range, LLC s’est efforcé à Cleveland Range, LLC se ha esforzado en unintentional errors and omissions. fournir des renseignements précis dans ce suministrar información precisa en este The information in this document may...
- Page 3 FOR YOUR SAFETY / POUR VOTRE SÉCURITÉ / PARA SU SEGURIDAD FOR YOUR SAFETY POUR VOTRE SÉCURITÉ PARA SU SEGURIDAD Do not store or use Ne pas entreposer ou No guarde ni use gasolina gasoline or any other utiliser d'essence ou o cualesquiera otros flammable liquids and d'autres liquides ou...
- Page 4 WARNING / AVERTISSEMENT / ADVERTENCIA Improper installation, operation, adjustment, alteration, Heavy / Lourd / Pesado service or maintenance can cause property damage, Team or mechanical lift. / Équipe ou remontée injury or death. Read the installation and operating mécanique. / Equipo o elevador mecánico. instructions thoroughly before installing, operating or servicing this equipment.
-
Page 5: Table Of Contents
Operation, Installation & Maintenance MANUAL SteamCub 1SCE Table of Contents Chapter ........................Page 1 General Safety ......................1 A. Laws, Codes, and Regulations ......................1 B. Operational Safety..........................1 2 Product Information ....................2 A. Product Information ..........................2 B. Model Numbers and Serial Numbers ....................2 C. - Page 6 8 Startup Procedure ....................20 A. Startup Instructions .......................... 20 B. Shutdown Instructions ........................20 9 Operating Tests ......................21 A. Startup Procedure with the Appliance De-Energized ..............21 B. Operating Test for Dial Timer......................22 C. Operating Test For Electronic Timer....................23 D.
-
Page 7: General Safety
5. Wear BOOTS appropriate to the work area to help protect feet, and to help prevent slips and falls. 6. Allow only qualified Cleveland Range authorized service representatives to service the appliance. 7. Use only factory authorized repair parts. -
Page 8: Product Information
For further information, contact your Cleveland Range sales representative or Cleveland Range. B. MODEL NUMBERS AND SERIAL NUMBERS 1. Cleveland Range, LLC assigns two product identification numbers to each appliance: a model number and a serial number. 2. Please provide this information when you contact Cleveland Range or a qualified Cleveland Range authorized service representative: •... -
Page 9: Before Each Use
CHAPTER 3 BEFORE EACH USE A. INSPECTING THE COOKING COMPARTMENTS 1. Before every steaming operation, inspect the cooking compartments and remove any food scraps or debris. See Chapter 5. 2. Inspect and clean the drain before each use. See Figure 3-1. Drain Pan Drain Drain Valve Handle... -
Page 10: Cooking
CHAPTER 4 COOKING Press switches and keys with fingertips only. Injury and equipment damage can result from pressing switches and keys with anything else. A. QUICK REFERENCE START-UP AND SHUTDOWN SUMMARY INSTRUCTIONS • The following START-UP and SHUTDOWN SUMMARY is for quick reference ONLY. •... -
Page 11: B Operating And Cooking Procedure
B. OPERATING AND COOKING PROCEDURE Some foods drip juices. Use a solid catch pan under perforated pans when steaming food that may drip juices. Failure to use a catch pan can cause clogged drain screens and drains. 1. Inspect and clean the drain and the cooking compartment as required. See Chapter 3. 2. -
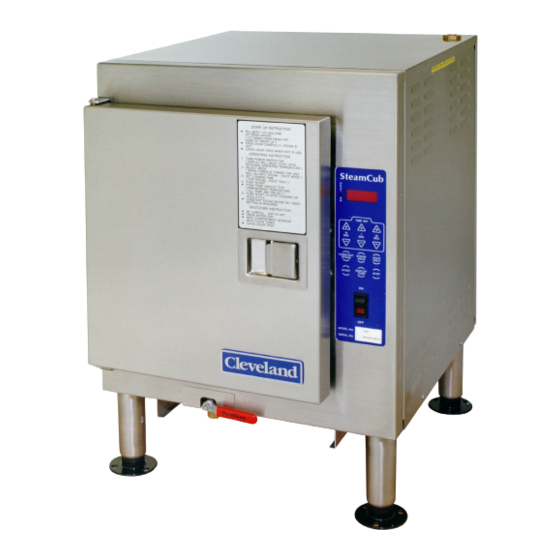
Page 12: Steamcub Product View
SteamCub Product View – 1SCE Shown Condensate Vent Side Panel Rating Plate on Rear Panel Digital Display Operating Controls ON/OFF Switch Drain Valve Drain Pan Guides with Drain Pan Figure 4-1 SteamCub Steam Cooker And Holding Cabinet... -
Page 13: Keypad Control Panel Operation
Keypad Control Panel Operation 1. Keypad Control Panel 1. Digital Display: • Time remaining in minutes and seconds from 00:00 to 99:50 when at temperature in Timed mode or when the timer is being set. • PAUSE when in Timed mode but below cooking temperature, or the door is open, and the timer has been started. - Page 14 2. Cooking Operations – Keypad Control Panel – Steam and Hold Mode • In the Steam and Hold mode, the timer monitors the cooking time and automatically starts the Holding mode at the end of the cooking time. a. Inspect and clean the cooking compartment. See Chapters 2 and 5. b.
- Page 15 d. Turn ON the ON/OFF switch. e. Press the Constant Steam key to put the steamer in Continuous Steam mode. Slide the pans of food into the slide racks inside the steamer. • Do not place pans or anything else on the bottom of the compartment. •...
- Page 16 h) When the food is needed for serving, carefully open the cooking compartment door, and remove the pans from the slide racks. • If the steamer will be used again in a few minutes shut the door to maintain the cooking compartment temperature.
-
Page 17: Dial Timer Control Panel Operation
Dial Timer Control Panel Operation 1. Cooking Operations – Dial Timer Control Panel 1. TIMER – This dial sets the operating time from 0 to 60 minutes. • Turn the dial clockwise until it points to the required number of minutes. •... - Page 18 2. Manual and Timed Modes • The steamer has two operating modes: Manual and Timed. • The TIMED/MANUAL rocker switch selects the operating mode. • Pressing the MANUAL end of the switch selects the manual-operating mode. • Pressing the TIMED end of the switch selects the timed operating mode. •...
- Page 19 • Use Manual Mode mode for: • Preheating. • Continuous supply of steam. • Cooking times longer than the timer can measure. • Maintaining the compartment temperature between cooking batches. (1) Using the Timer in Manual Mode The timer may be used when the steamer is operating in the manual mode, but it will not start or stop the steaming cycle.
-
Page 20: Cleaning
CHAPTER 5 CLEANING A. SHUTDOWN AND CLEANING • Perform the Shutdown and Cleaning Procedure at the end of each shift or more often if needed. ELECTRIC SHOCK HAZARD Do not clean this appliance with hoses or water jets! Doing so can cause injury and equipment damage. HIGH HEAT HAZARD Wait for this appliance to cool before cleaning! Attempting to clean a hot appliance can cause... - Page 21 (“scale”) and helps prevent more costly maintenance and service. • Cleveland Range does not recommend the use of detergent, but if detergent has been used to clean the inside of the cooking compartment, rinse off the water sensor with the vinegar solution.
-
Page 22: General Installation Information
Improper installation, adjustment, alteration, service, or maintenance of this appliance, or installation of a damaged appliance can result in DEATH, INJURY, EQUIPMENT DAMAGE, and void the warranty. NEVER install damaged appliances, equipment, or accessories. ALWAYS have installation and service performed by qualified Cleveland Range authorized personnel. -
Page 23: Installation
Make sure the air vents of this appliance are not blocked with or by anything. Allow for sufficient extra distance if a "high heat source," e.g. a broiler, is located next to this appliance. Contact Cleveland Range at 216-481-4900 or 1-800-338-2204 for recommendations. -
Page 24: Splash Pan
C. Splash Pan Place the perforated splash pan in the water reservoir with legs down. D. Slide Racks (Pan Racks) 1. Refer to Figure 3-1. Each rack has four loops: two top, and two bottom. Hold the slide rack so the ends of the hanger loops are towards compartment wall, as shown in Figure 3-1. -
Page 25: Installation Checklist
G. Installation Checklist Installation Check List TASK REFERENCE COMPLETED Chapter (Initial and Date) Preparation Check Operating Location Clearances Ch 7. & Spec Sheet Electric Power Requirements Met Rating Plate & Ch.7 Installation Ch.7 Check Level Front-to-Back and Side-to-Side Ch.7 Check Electrical Supply Connection Ch.7 Notes:... -
Page 26: Startup Procedure
CHAPTER 8 STARTUP PROCEDURE Without power, there is NO safe method of operation of this appliance. DO NOT ATTEMPT TO START OR OPERATE this appliance during a power failure. DEATH, INJURY, AND/OR EQUIPMENT DAMAGE may result. BURN and SCALD HAZARD Exposure to steam, condensate, and hot surfaces can cause death, burns, and scalds. -
Page 27: Operating Tests
After successfully performing the Startup Procedure, perform the test procedure for the type of control panel on the appliance being installed. • For high altitude use (above 3500 feet), contact Cleveland Range at 216-481-4900 about parts and adjustments required. A. Startup Procedure with the Appliance De-Energized. -
Page 28: Operating Test For Dial Timer
B. Operating Test for Dial Timer Note: Temperatures need to be adjusted for high altitude use (above 3500 feet). Contact Cleveland Range at 216-481-4900 about parts and adjustments required. 1. Turn ON the Main External Power Switch. 2. Turn ON the ON/OFF switch. -
Page 29: Operating Test For Electronic Timer
C. Operating Test for Electronic Timer Note: Temperatures shown are for altitudes between sea level and 3500 feet. Temperatures need to be adjusted for high altitude use (above 3500 feet). Contact Cleveland Range at 216-481-4900 about parts and adjustments required. -
Page 30: General Information About The Steam Shut Off Switch
8. Press the Display Temp key again. The display reads about 205°F. • The heater will cycle ON and OFF between cooking compartment temperatures of 195°F and 205°F. 9. Set the timer using the (+) and (–) keys and set it for 0 hours, 1 minute, 0 seconds. 10. -
Page 31: Function Test For The Steam Shut Off Switch
7. Close the cooking compartment door. Steaming starts, and the cooking compartment reaches cooking temperature. • If steaming does not start: Shut down the appliance and call your qualified Cleveland Range authorized service representative. 8. After completing the Initial Startup Procedure, the Operating Test procedure and the Steam Shut Off Test procedure, the steamer is ready for use. -
Page 32: Preventative Maintenance
• Increase the frequency of maintenance as needed depending on use and water quality. • Contact your qualified Cleveland Range authorized service agency or Cleveland Range for more information about maintenance scheduling, products, and services. B. Maintenance and Service Records 1. -
Page 33: Troubleshooting Guide
“Remedy / Reference” (right column) lists fixes for problems from easiest to hardest. • “Notes” in “Remedy / Reference column are at end of the Troubleshooting Guide. ATTEMPTING TO REPAIR OR CORRECT PROBLEMS REQUIRING A QUALIFIED CLEVELAND RANGE AUTHORIZED SERVICE REPRESENTATIVE VOIDS THE WARRANTY Trouble Shooting Guide... - Page 34 See Note 1. NOTES 1. If the problem is inside the appliance, call a qualified Cleveland Range authorized service representative or Cleveland Range. (Please have the model number and serial number ready when calling.) Cleveland Range will not pay for warranty repairs by unauthorized maintenance and repair centers.
- Page 35 +1-800.338-2204 WWW.CLEVELANDRANGE.COM Every new piece of Welbilt Foodservice equipment comes with KitchenCare® and you choose the level of service that meets your opera onal needs from one restaurant to mul ple loca ons StarCare – Warranty & life me service, cer fied OEM parts, global parts inventory, performance audited ExtraCare —...
Need help?
Do you have a question about the SteamCub 1SCE and is the answer not in the manual?
Questions and answers