Table of Contents
Advertisement
Advertisement
Table of Contents

Related Manuals for Canon BJC-80


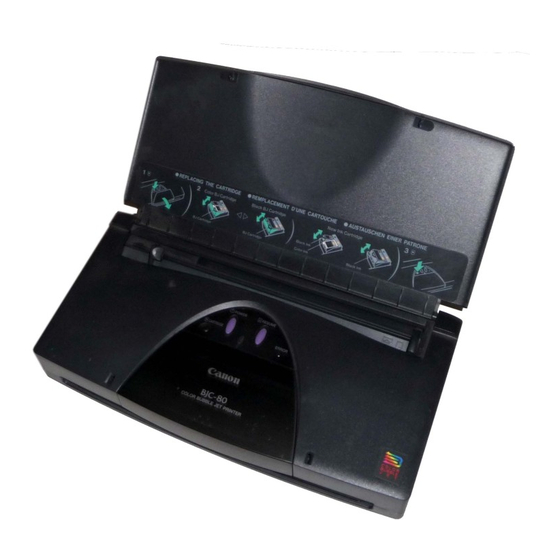
Summary of Contents for Canon BJC-80
- Page 1 BJC-80 USER’S MANUAL Canon...
- Page 2 Supplies and Accessories BJ Cartridges and BJ Tanks Canon Specialty Papers Color Image Scanner Cartridge Portable Kit, Battery Pack, and Universal Adapter Getting Help From Canon Servicing the Printer Using the Printer With Windows Installing a Printer Driver Printing a Document...
- Page 3 Printing on Envelopes Using Canon's Specialty Papers Specialty Paper Guidelines Maintaining the Printer Printer Guidelines Cleaning the Printer Printing the Test Pages Starting the Test Pages From Windows Starting the Test Pages From the Operator Panel Cleaning the Print Head...
- Page 4 Troubleshooting Identifying Your Printer Problem General Problems Clearing Paper Jams Appendix A Specifications Appendix B Using the IrDA Wireless Interface Glossary Index FCC Regulations 3 of 3 4/24/98 2:24 PM...
- Page 5 Congratulations on your purchase of the Canon BJC-80 Color Bubble Jet Printer. We appreciate our choosing this printer to meet your printing needs. The BJC-80 offers color printing, excellent print quality, and fast print speed with the convenience of portability and low cost. We are certain you will be satisfied with its advanced Bubble Jet technology.
-
Page 6: Supplies And Accessories
Supplies and Accessories BJ Cartridges and BJ Tanks You can use the following BJ cartridges and BJ tanks with the BJC-80 printer: O BC-11e Color BJ Cartridge O BCI-11 Color BJ tank O BCI-11 Black BJ tank O BC-10 Black BJ Cartridge... -
Page 7: Canon Specialty Papers
Canon has more engineers dedicated to creating quality ink for providing the best results for output on Bubble Jet printers than any other organization. Canon does not prohibit the use of third-party inks and the use of third-part inks does not invalidate the product's limited warranty. However, Canon cannot guarantee the quality or performance of your printer when you are using inks from other suppliers. -
Page 8: Color Image Scanner Cartridge
This option instantly turns your printer into a high-quality, color sheet fed scanner. All you have to do is replace the BJ cartridge in the BJC-80 with the IS-12 Color Image Scanner Cartridge. For this option, you must use an IEEE-1284-compatible, bi-directional parallel interface cable to connect the BJC-80 to your computer. -
Page 9: Getting Help From Canon
Getting Help From Canon Canon Computer Systems, Inc. offers a full range of customer technical support options including*: 24-hour, 7-day-a-week, toll-free automated support for troubleshooting issues on most current products (1-800-423-2366) Speak to a technician free of service charge (currently Monday through Friday, 8:00 a.m. -
Page 10: Servicing The Printer
If you feel your BJC-80 Color Bubble Jet Printer needs servicing, contact Canon on the World Wide Web to locate the Canon Authorized Service Facility (ASF) nearest you. If you do not have access to the Web, you can call Canon (see page for details). -
Page 11: Using The Printer With Windows
You must install the BJ Printer Driver before you can use the printer with your computer. See your Quick Start Guide for instructions. 1 of 1... -
Page 12: Printing A Document
Choose Print Setup from the File menu. Click on the Setup button if you want to make any adjustments as appropriate for printing your document. (See Printer Setup Within Windows 95 or Printer Setup Within Windows 3.1 for details.) Select OK to close the Print Setup dialog box. -
Page 13: Printer Setup Within Windows 95
From within any Windows application, you can select the Print or Print Setup command. From the Printers folder, you can select the printer and then select the Properties command from the File menu. From the Printers folder, you can select the printer, click the right mouse button, and then select Properties from the drop down list. -
Page 14: Accessing The Printing Options
If the Print Setup option does not appear in the File menu for your application, refer to the user's manual supplied with the application. It should provide information about changing the printer setup parameters In Windows 3.1, the printing options are displayed on these tabs: Paper, Graphics, Setting, and Control. - Page 15 Details (Windows 95 only) This tab allows you to specify printer port settings, spool settings, and time-out settings. (You see this tab when you open the Properties dialog box from the Printers folder, but not from within a Windows application.)
- Page 16 Graphics This tab allows you to specify print quality, color model, and print model. (The printing options on this tab are the same for both Windows 95 and Windows 3.1. However, the Image Color Matching feature is available in Windows 95 only.) Setting This tab allows you to turn on or off the Setup Analyzer and Cartridge Detection.
-
Page 17: Specifying Your Printing Options
Control This tab allows you to print test pages, turn off the printer, enable or disable the auto power feature, and clean the print head. It also allows you to turn off the printer after a certain period of inactivity. (The printing options on this tab are the same for both Windows 95 and Windows 3.1.) -
Page 18: Recommended Graphics Settings
Recommended Graphics Settings You can select the following printing options from the Graphics tab to achieve the specified results: 1 of 2 4/24/98 3:01 PM... - Page 19 To achieve Fastest B&W output possible Fast letter quality output Fast B&W photograph and graphic output High quality photograph and graphic output High quality Fast color output Color output High quality color output High quality color output 2 of 2 Driver settings Print quality Color model Results...
-
Page 20: Using The Setup Analyzer
On the Setting tab, click on the green Check to enable the Setup Analyzer. Click on the red Circle symbol to disable it. When you exit the printer driver and accept your printing settings by clicking the OK button, the Setup Analyzer (if enabled) checks to see if any of your settings are contrary to the recommended settings. -
Page 21: Using Cartridge Detection
If you choose the Monochrome Color Model and you have a BC-11e Color BJ Cartridge installed, you'll see: Performance Tip! You now have a color cartridge installed in your printer. For faster printing speed, change the color cartridge to the monochrome cartridge. Printing Speed Versus Color The BJ Printer Driver for Windows can interpret and translate the full spectrum of colors, up to 16.7 million colors. -
Page 22: For Quick Color Printing
Use the optional BC-10 Black BJ cartridge to optimize the printer's performance when you are printing black text and graphics only. In the BJ Printer Driver for Windows, choose the following settings to tell your printer to print using black ink only. -
Page 23: Other Ways To Improve Print Speed In Windows
Other Ways to Improve Print Speed in Windows To improve printing speed, you cna try the following: Turn off the Print Manager in the Windows Control Panel (Windows 3.1 only). This avoids the extra step of sending the print file to the Print Manager and may increase your printing speed by as much as 25%, depending on the computer you are using. - Page 24 Use the Draft print quality. The printer will need to image fewer dots. Use Plain Paper as the Media Type. The print head will make only one pass for each printed line.
-
Page 25: Paper Handling
This chapter describes how to use the printer for all your printing operations. It includes: Selecting paper types Loading paper Printing on envelopes Using Canon's Specialty Papers To ensure the best performance of your printer, you want to select the best paper and load it correctly. -
Page 26: Selecting Paper Types
Greeting Cards Get the most out of your Canon Creative or other card making software with Canon Greeting Cards GC-101. These cards give your unique, personalized cards the look and feel of professional cards. You can create cards, invitations, announcements, and more. - Page 27 Fabric Sheets Use Fabric Sheet FS-101 for Canon Bubble Jet printers to print pillow covers, scarves, flags, and other textile items. Use these sheets for appliques and other craft and sewing projects. Fabric sheets are 9.5 x 14 inches.
-
Page 28: Paper Guidelines
When using graph paper, the lines may not match because the 1/6 inch line spacing of the printer is slightly less than that of graph paper. If the print density of your page is very high, light paper stock may curl slightly due to the large amount of ink. -
Page 29: Automatically Feeding Paper
The paper support helps keep paper straight and limits the possibility of jams. Make sure the paper guide is moved to the left. For best results, fan the paper before loading it. Always fan a stack of paper along the edge that will feed into the printer first. 4/24/98 3:05 PM... - Page 30 Align the edge of the paper with the right edge of paper into the the sheet feeder. stack of sheet Do not force the paper into the printer. feeder until it Insert the paper so that the side you want to print on is facing you. If you are using stops.
- Page 31 1 of 1 This keeps the paper feeding straight into the printer and reduces skewing. Be sure there is no gap between the paper guide and the edge of the stack of paper. Make sure the printer is turned on and on-line.
-
Page 32: Auto Feed Guidelines
Do not open the front cover while printing. This may cause paper jams, smudges, or malfunctions. Do not leave paper stacked in the printer for long periods of times; longer sheets of paper may become bent or curled over time. This may cause the paper to misfeed or jam. -
Page 33: Printing On Envelopes
U.S. Commercial number 10 (COM10) envelopes and European DL envelopes are recommended. You may be able to stack envelopes of other sizes in the sheet feeder; however, Canon cannot guarantee consistent performance on envelope sizes other thanCOM10 and DL. The following envelopes are not recommended because they may cause jams or... - Page 34 Prepare the envelopes 1 of 2 Arrange the stack of envelopes on a firm surface and envelopes. press down firmly on the edges to make the folds crisp. Press around the envelopes to remove any curls and expel air from inside the envelopes. Also, press firmly on the area that corresponds to the edges of the flap.
-
Page 35: Using Canon's Specialty Papers
This section provides guidelines for printing on Canon's specialty papers. Specialty Paper Guidelines Be sure to read any instructions that come with your Canon specialty paper. These instructions provide important information regarding how to achieve the highest print quality with these papers. - Page 36 each sheet after it is delivered. Do not allow film sheets to stack up. 2 of 2 4/24/98 3:06 PM...
- Page 37 To avoid smudging caused by fingerprints, use a pair of thin cloth gloves while loading and handling the film. Although Canon inks are light resistant, to avoid fading, do not expose the printed film to prolonged sunlight. Store unused papers and films flat. Do not remove papers from their protective packaging until you are ready to use them.
-
Page 38: Maintaining The Printer
This chapter covers the care and maintenance required for your printer. It includes: Printer guidelines Cleaning the printer Printing the test patterns Cleaning the print head BJ cartridge guidelines Switching the BJ cartridges Replacing a BJ tank Storing a BJ cartridge... -
Page 39: Printer Guidelines
Place the printer where the temperature is stable and set for human comfort. Avoid areas of excessive heat or humidity as well as direct sunlight. Do not leave the printer in a closed vehicle; this may expose the printer to extremely high temperatures. 1 of 1... -
Page 40: Cleaning The Printer
Cleaning the Printer Your printer requires little routine maintenance. Perform the following maintenance, as necessary, to keep your printer in good operating condition. Be very careful when cleaning the printer. Clean inside the printer. 1 of 1 Make sure the BJ cartridge is in the home position (all the way to the right). - Page 41 Use a soft, dry cloth. Clean any smudges or dust. Do not clean the exterior of the printer with volatile liquids such as thinners, benzine, or any spray-type or chemical cleaners; doing so will damage the surface of the printer.
-
Page 42: Printing The Test Pages
Printing the Test Pages You can verify the print quality of your printer by printing any of several test pages. Test A This test prints a repeating pattern of characters. Demonstration This test prints a sample page describing the printer's features. - Page 43 2 of 2 4/24/98 3:09 PM...
-
Page 44: Cleaning The Print Head
Starting the Test Pages From the Operator Panel To print any of the test patterns, make sure the printer is turned off and paper is loaded in the sheet feeder. Press and hold the POWER button until you hear the number of beeps that corresponds to the test pattern you wish to print. -
Page 45: Cleaning The Print Head From Windows
Cleaning the Print Head From Windows If you are using Windows, you can execute the quick cleaning procedure from the Control tab of the printer driver. Simply click on the Clean Ink Head button to clean the print head. Cleaning the Print Head Using the Operator Panel... -
Page 46: Bj Cartridge Guidelines
BJ Cartridge Guidelines You can use these BJ cartridges and BJ tanks with the printer. BJ cartridges contain the Bubble Jet print head and BJ tank, while BJ tanks contain ink only. BC-11e Color BJ Cartridge Incorporates a Bubble Jet print head and two replaceable BJ tanks: a tri-color BJ tank (BCI-11 Color) and a black BJ tank (BCI-11 Black). - Page 47 SB-10 Ink Cartridge Storage Box Stores one BJ cartridge. One box comes with the printer. 2 of 2 4/24/98 3:10 PM...
- Page 48 You can use either the BC-11e or BC-10 BJ Cartridge with the printer. The BC-11e Color BJ Cartridge contains both color (cyan, magenta, yellow) and black ink; the BC-10 Black BJ Cartridge contains ink only. Use the BJC-10 Black BJ Cartridge when you will be printing with black ink only.
-
Page 49: Bj Cartridge And Bj Tank Maintenance
Canon has more engineers dedicated to creating quality ink for providing the best results for output on Bubble Jet printers than any other organization. Canon does not prohibit the use of third-party inks and the use of third-party inks does not invalidate the product's limited warranty. However, Canon cannot guarantee the quality or performance of your printer when you are using inks from other suppliers. - Page 50 Hold the BJ cartridge on the sides only. Do not touch the silver plate or circuit area on the print head unit of the BJ cartridge. The metal area may become hot during printing. 2 of 2 4/24/98 3:10 PM...
- Page 51 Switching the BJ Cartridges Follow these instructions to change cartridges when you want to switch from color printing to high-speed black printing (or vice versa). You also follow these steps to replace a used BJ cartridge. However, you only need to replace a BJ cartridge if for some reason the print head becomes damaged (see Appendix A, Specifications, for cartridge life expectancy).
- Page 52 Open the front Gently press and pull the cover toward you. cover. 2 of 2 4/24/98 3:11 PM...
- Page 53 Remove the BJ Press the green tab on the front left edge of the BJ Cartridge cartridge holder. cartridge. This releases the BJ cartridge. Lift the entire cartridge out of the printer. 1 of 2 4/24/98 3:11 PM...
- Page 54 Store the BJ When switching cartridges, you must store the cartridge you are not using in the cartridge. Ink Cartridge Box. If you are replacing an old BJ cartridge, dispose of the old cartridge properly. 2 of 2 4/24/98 3:11 PM...
- Page 55 Unpack the BJ cartridge. 1 of 2 If installing a new BJ cartridge, take it out of its protective packaging. Peel off the protective foil, and lift the cartridge out. 4/24/98 3:11 PM...
- Page 56 Remove the Lift off the orange cap from the print head. protective material Then remove the orange tape. from the BJ cartridge. 2 of 2 4/24/98 3:11 PM...
- Page 57 CARTRIDGE button. 1 of 1 The BJ cartridge snaps into place. Lift up and gently press the cover into place. The cartridge holder moves to the home position on the right side. The printer executes print head cleaning. 4/24/98 3:11 PM...
- Page 58 CARTRIDGE button. 1 of 1 The BJ cartridge snaps into place. Lift up and gently press the cover into place. The cartridge holder moves to the home position on the right side. The printer executes print head cleaning. 4/24/98 3:12 PM...
-
Page 59: Replacing A Bj Tank
If the output is still blank, replace the empty BJ tank in the BJ cartridge. Leave the BJ cartridge in the printer when replacing a BJ tank. Make sure the paper support is open and the power is on. - Page 60 Do not touch the interior of the cartridge holder, the base of the print head unit, the print head, the film cable, or the BJ tank's filter when changing a BJ tank. When replacing a BJ tank, remove only the used BJ tank and leave the Note print head unit in the cartridge holder to avoid soiling your hands.
- Page 61 Take the new BJ O Then remove the orange protection cap. tank out of its bag. 2 of 2 4/24/98 3:12 PM...
- Page 62 Carefully slide the the empty slot on the BJ cartridge. 1 of 2 Insert the BJ tank so the points of the small triangular guide new BJ tank into marks match. 4/24/98 3:12 PM...
- Page 63 Press down on the left side of the BJ tank until it snaps into place. 2 of 2 4/24/98 3:12 PM...
-
Page 64: Storing A Bj Cartridge
CARTRIDGE button. Storing a BJ Cartridge If you unwrap a BJ cartridge but do not install it in the printer, store it in the Ink Cartridge Storage box to prevent the print head from drying and clogging. Open the Ink Cartridge Storage Box. - Page 65 Close the Ink Cartridge Storage Box. Whenever you remove a BJ cartridge from the printer, store the cartridge in the storage box (unless you are disposing of it). 1 of 1 You must insert the cartridge correctly or the storage box will not close.
-
Page 66: Traveling With The Printer
Turn off the power. The printer is designed so that you can transport it with the BJ cartridge installed. Therefore, do not remove the BJ cartridge. An Note opened BJ cartridge that is not installed in the printer may leak, and the print head may dry out. - Page 67 If you are traveling to another country, make sure the AC adapter matches the power requirements of that country. (The optional portable kit and universal adapter allow you to operate the printer in any country.) When traveling with the printer, always pack it with your carry-on items.
-
Page 68: Storing The Printer
Make sure that the front cover and paper support are closed. Place the printer and any accessories in their original packing materials. Do not remove the BJ cartridge or a BJ tank while transporting or storing the printer. Otherwise, the print head on the BJ cartridge may dry out. -
Page 69: Battery Pack Guidelines
This chapter describes how to install and use the battery pack that comes with the Canon Portable Kit NK-300. You can purchase the Portable Kit as an option for your printer. You can also purchase additional battery packs (NiMH Battery Pack NB-300) to use with the Portable Kit. -
Page 70: Examining The Battery Case
Remove the battery pack when you are storing the printer. Always turn off the printer before unplugging the AC adapter or closing the paper support—this allows the print head to return to the home position and prevents it from drying out. -
Page 71: From The Back
From the Back Attaching the Battery Case to the Printer Make sure the printer is turned off and close the paper support. Then remove the AC adapter and the interface cable from the printer. Turn the printer Make sure the bottom of the printer is facing up. - Page 72 Make sure the battery and interface cable compartments are to facing up. Fit the power connector on the battery case into the AC adapter receptacle on the printer Fit the mounting screw on the battery case into its opening on the back of the printer. 4/24/98 3:14 PM...
- Page 73 Insert the battery pack. Secure the With the battery case toward you, press down on the left side of the battery pack battery pack. until it clicks into place. On the left side of the battery pack is a latch that clicks into place. 1 of 2 The battery pack fits into the battery pack compartment.
- Page 74 Turn the Set the printer in the upright position. Printer over. 2 of 2 4/24/98 3:14 PM...
-
Page 75: Charging The Battery Pack
When the AC adapter is connected, the battery pack charges whenever the printer is idle (whether or not it is tuned on). You must always charge a new battery pack. A new battery pack is not charged. It takes approximately 1 hours to charge a new battery or a fully discharged battery. - Page 76 Plug in the Plug the other end of the AC adapter into an electrical outlet. AC adapter. The CHARGE light blinks as the battery pack charges. When the battery is fully charged, the CHARGE light turns off. 2 of 2 4/24/98 3:14 PM...
-
Page 77: Using The Printer With The Battery Pack
Lift the back of the battery case and printer if necessary. Gently press the cable connector into the port. Secure the cable connector by snapping the two wire clips (located on the printer) into th cable connector. 4/24/98 3:14 PM... - Page 78 Close the interface cover. 2 of 2 4/24/98 3:14 PM...
-
Page 79: Battery Pack Capacity
When you finish printing, turn of the power. When the battery becomes completely discharged, the POWER and ERROR lights start to blink, the printer sounds a long beep followed by a short beep, and 1 of 2 4/24/98 3:15 PM... - Page 80 Any data that has not printed is lost. Press the POWER button to turn off the printer. To continue printing, make sure the printer is turned off and attach the AC adapter to supply power. 2 of 2...
-
Page 81: Discharging The Battery Pack
It’s a good idea to let the battery pack completely discharge before you charge it. This will optimize the charge capacity of the battery pack. If you notice the printer is printing fewer pages with a full charge, you can initiate a complete discharge process. First, make sure the battery pack is installed in the battery case, and make sure the AC adapter is attached. - Page 82 You can use the printer while the battery pack is discharging. 2 of 2 4/24/98 3:15 PM...
-
Page 83: Removing A Battery Pack
Removing a Battery Pack Make sure you have completed your current printing job as removing the battery pack erases all data in the printer’s memory. Turn the printer upside down. Press in on the battery pack latch and lift up on the battery pack. - Page 84 Removing a Battery Case Make sure you the printer is turned off and the paper support is closed. Make sure the AC adapter and the parallel interface cable are disconnected. Turn the printer upside down. Turn the thumbwheel to the left (toward the mark) to loosen the battery case from the printer.
-
Page 85: Installing The Color Image Scanner Cartridge
The printer can be converted to a color image scanner by installing the optional IS-12 Color Image Scanner Cartridge. This chapter describes how to install and remove the scanner cartridge. For details about operating the printer as a scanner, see the Color Image Scanner Cartridge IS-12 User’s Manual that comes with the optional scanner cartridge package. - Page 86 Remove the With the tip of your finger, life up the green tab on the corner of the BJ cartridge BJ cartridge. then raise the entire cartridge unit out of the cartridge holder. Make sure you remove both the BJ cartridge and the BJ tank(s). 2 of 2 4/24/98 3:15 PM...
-
Page 87: Installing The Scanner Cartridge
Store the BJ Place the BJ cartridge in an Ink Cartridge Storage Box. cartridge. Installing the Scanner Cartridge Unpack the Remove the scanner cartridge from its protective packaging. scanner cartridge. 1 of 2 4/24/98 3:15 PM... - Page 88 Insert the With the label on the scanner cartridge facing up, insert it into the cartridge scanner holder diagonally so the points of the small triangular guide marks match. cartridge. 2 of 2 4/24/98 3:15 PM...
-
Page 89: Removing The Scanner Cartridge
Remove the scanner cartridge as soon as you are finished scanning and replace it with a BJ cartridge. To avoid problems with printer and scanner cartridge operation, never leave the scanner cartridge in the printer. Always remove the scanner cartridge and store it when it is no longer in use. 1 of 2 Press down gently on the left side of the scanner cartridge until it snaps into place. - Page 90 Start the procedure. Make sure the printer is on. Press the CARTRIDGE button. The cartridge holder moves to the center. Open the front cover. 2 of 2 4/24/98 3:16 PM...
- Page 91 Lift up the Lift up the tab on the left side of the scanner cartridge then raise it out of the cartridge. cartridge holder. Store the scanner cartridge. Replace the BJ cartridge. 1 of 1 Store the scanner cartridge in the Ink Cartridge Storage Box provided with the cartridge.
-
Page 92: Troubleshooting
This chapter contains very basic information to help you solve printer problems. For complete problem solving information, be sure to use our other support services. See Getting Help From Canon in Chapter 1 (page 1-5) for Canon’s customer technical support options. Identifying Your Printer Problem... -
Page 93: General Problems
General Problems The most basic problems you may encounter are "the printer does not print" and "your print quality is not satisfactory." If the printer does not print If your print quality is not satisfactory If colors are missing If you want to print from an MS-DOS application that does not have... -
Page 94: Clearing Paper Jams
Remove the jammed paper. 1 of 1 Gently pull the paper out with one hand while holding the printer in place with the other hand. If the leading edge of the jammed sheet of paper has not yet emerged from the exit slot, pull the paper out from the sheet feeder while pressing down on the o/o butto on the right side of the sheet feeder. - Page 95 If the platen is soiled after a paper jam, the back of your printed page will be smeared. Clean the platen as described in Cleaning the Printer on page 4-3. If you are having repeated paper jams, you may be loading the paper improperly, or using the wrong kind of paper.
-
Page 96: Specifications
Canon Transparency Film (CF-102) Canon Back Print Film (BF-102) Canon High Gloss Film (HG-101) Canon Glossy Photo Paper (GP-201) Fabric Sheets (FS-101) for Canon Bubble Jet Printers Canon T-Shirt Transfers (TR-101) Canon Greeting Cards (GC-101) Commercial Number 10 European DL... - Page 97 Paper Weight 17 to 38 lb. (64 to 105 g/m²) with automatic feed Print Speed BC-11e Color BJ Cartridge Up to 2 ppm at 15% coverage BC-10 Black BJ cartridge Up to 4.5 ppm Print Width Maximum Line Feed Speed Approximately 70 ms/line at 1/6-inch line feeds in standard and draft modes Printable Area-Papers The shaded portion in the following figure shows the printing area for letter-size...
- Page 98 Printable Area -- Envelopes The shaded portion in the following figure shows the printing area for a COM10 envelope. The table lists the minimum margins. Margin Inches 0.25 1.25 0.12 0.65 BJ Cartridges and BJ Tanks BC-11e Color BJ Cartridge Print Head Ink color Cartridge life...
-
Page 99: Portable Kit Specifications
Acoustic Noise Level per ISO 9296 Under 45 db (A) Interface IEEE 1284-compatible parallell Built-in IrDA Operating Environment Temperature Humidity Storing Environment Temperature Humidity Power Source USA/ Canada Power Consumption 5 watts standby 27 watts maximum printing Dimensions 11.8" (300mm) W x 6.2" (157.6mm) D x 2.2" (57mm) H Weight Approx. -
Page 100: Wireless Interface
Windows 95 installed. This device driver is provided with your computer if it has an IrDA interface. See your Quick Start Guide to set up the printer for the IrDA interface. The IrDA interface is available for Windows 95 only. -
Page 101: Software Requirements
Make sure a COM port has been selected for IrDA with the Printer Wizard. Make sure the BJC-80 is selected as the default printer via the BJC-80 printer driver (Ver. 3.91 or later). The IrDA interface cannot detect the printer status and reset the printer. If communication between the printer and computer is interrupted and the print Note job is aborted, the printer is initialized automatically.