Table of Contents
Advertisement
Advertisement
Table of Contents

Related Manuals for Holley SNIPER EFI


Summary of Contents for Holley SNIPER EFI
- Page 1 5” Sniper EFI Digital Dash 553-200 User Manual...
- Page 2 Contents MOUNTING ............................... 3 CONNECTIONS ..............................4 CAN/POWER ..............................4 MAKING ADJUSTMENTS ..........................5 HOME SCREEN ..............................5 TUNING ................................6 MONITOR ............................... 14 SETTINGS............................... 17 WIZARD ................................21...
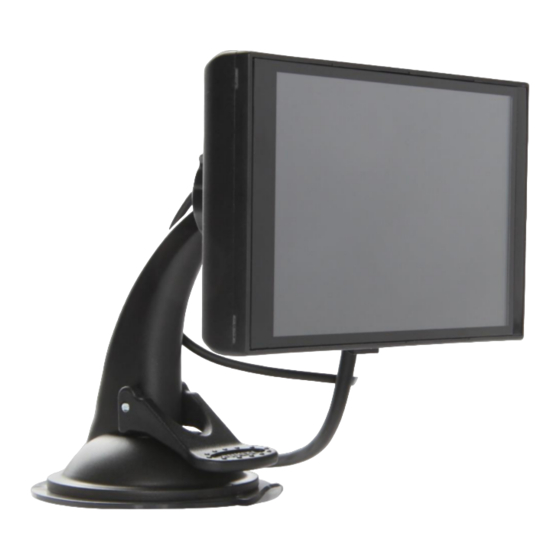
- Page 3 PACKAGE CONTENTS MOUNTING The 5” Sniper Dash comes with a suction cup mount and two different length mounting stands, offering a wide variety of mounting solutions. The mounting stands slide into the back of the display, as shown below. Modular Mounting Brackets Slide mount into display housing.
- Page 4 A 4 pin male receptacle connector is used to connect to the Sniper EFI Main Harness. Once all connections have been made, the Sniper EFI 5” Dash may be powered up. After a brief initial loading sequence, the default gauge display will appear.
- Page 5 MAKING ADJUSTMENTS Slider Bar: Slide the bar left or right with the stylus, or use the right and left arrow keys for fine adjustment. List: Use the scroll bar on the right hand side of the screen to view all list entries. Touch the desired list item and click ‘OK’...
- Page 6 TUNING The Sniper 5” Dash facilitates ‘laptop-free’ tuning changes to help optimize mileage, drivability, and performance. Tuning is categorized by “Basic”, “System”, “Advanced”, “Advanced 2” and “Super Sniper”. BASIC TUNING From the Left MENU, select TUNING, then BASIC. There are four areas you can modify, BASIC FUEL, CLOSED LOOP &...
- Page 7 TARGET AFR: Allows changes to the Target Air/Fuel ratio at idle, cruise, and wide open throttle. The following are typical values and some tuning notes. Idle Air/Fuel Ratio – Typically between 15” and 15.0. Engines with larger cams may need a richer setting for smoothest idle.
- Page 8 ACCELERATION ENRICHMENT: This changes the “accelerator pump” function of the fuel injection. Raising the number increases the amount of fuel added when the pedal is pushed. Lowering the number decreases the amount of fuel added when the pedal is pushed. It is highly recommended NOT to change this until the ECU is allowed to perform self-tuning. FUEL PRIME: Fuel prime is an option that is enabled by default in all of the base calibrations.
- Page 9 CLOSED LOOP & LEARN CLOSE LOOP ENABLE / DISABLE: The Closed Loop Enable / Disable menu turns Closed Loop “On” and “Off”. If enabled, the fuel table will be modified based on target AFR vs Actual Wideband AFR. LEARN ENABLE / DISABLE: The LEARN Enable / Disable menu turns the Self Tuning “On”...
- Page 10 BASIC IDLE Selecting BASIC IDLE allows you to change the Target Engine Idle Speed. This should be adjusted to your desired idle RPM. Values between 650-800 rpm are typical. Larger camshafts or aftermarket torque converters may require a slightly higher value to maintain proper idle quality while in gear. All Sniper base tunes contain timing curves that will provide adequate engine operation, however the ignition timing at idle, cruise, and wide open throttle can be adjusted independently from each other to compensate for geographical and climate extremes.
- Page 11 NEVER wire them directly to the fans! The AC Disable value is a TPS value above which a 12 volt output is sent out to deactivate the air conditioning compressor at wide open throttle. Detailed wiring instructions are provided with Sniper EFI Kits.
- Page 12 ENGINE SETUP Number of Cylinders: Select how many cylinders your engine has, 4, 6, or 8. Engine Displacement: Enter how many cubic inches your engine is. CAM Type: Select your Camshaft Type: Stock -This selection will work well on most applications equipped with stock or “street performance”...
- Page 13 IGNITION SETUP Ignition Type: Select how the Sniper ECU will be receiving the RPM signal from your engine. Coil (-) [no timing control] CD Ignition Box [no timing control] Magnetic Distributor Holley Dual Sync Distributor HyperSpark Distributor Reference Angle (Timing Control Only): This is the value in crank degrees of the distributor's crank pulse.
- Page 14 MONITOR Choose MONITOR from the HOME screen to access live telemetry and customizable gauge screen options. The Sniper 5” Dash come pre-loaded with 3 default layouts. Default Layout 1...
- Page 15 Default Layout 2 Default Layout 3...
- Page 16 CHANNELS SCALING Each channel displayed by the 5” Touchscreen can be configured to have caution and warning indicators. To do this, choose ‘Ranges’ from the Gauge Settings menu. Cautions will display as Yellow and Warnings or Alarms will display as RED. Press and hold any gauge on the display to open the gauge editing menu.
- Page 17 SD card. It will also allow you to download a global folder from the ECU to the SD card so that it may be opened on any Windows based PC with free Sniper EFI software installed. Software may be downloaded at: https://www.holley.com/support/fuel_injection/sniper_efi/...
- Page 18 ECU UPDATE : Use this menu to update ECU Firmware. Choose the .eep file you are updating the Sniper EFI ECU to. If there are more than 1 versions of firmware on the SD Card all versions will show up and you will need to...
- Page 19 LOCAL SETUP: Contains Local Info, Local Options, and Backlight adjustments. LOCAL INFO Displays device information and current Firmware Version. LOCAL OPTIONS This menu allows you to adjust the display for your local Time and Time zone, Speedometer Units, and Temperature Units.
- Page 20 BACKLIGHT: Can adjust a Night Brightness & Day Brightness defaults, which is toggled by pressing the Sniper EFI logo on any of the Monitor Screens or within the Backlight Settings menu.
- Page 21 The GCF Wizard is a base calibration selection tool used with Sniper EFI kits. Using the part number of the specific Sniper EFI kit, the questions may vary. At the end of the wizard a key cycle is required. After this key cycle the Sniper EFI ECU will have the calibration created by the Wizard loaded into it, and ready to start.
- Page 22 Step 3 – Select the number of cylinders your engine has – Press Next Step 4 Select displacement of your engine, you can do this with the slider bar, or the calculator icon at the bottom. – Press Next Step 5 Enter the desired HOT Idle speed of your engine.
- Page 23 Step 6 Stock/Mild = This selection will work well on most applications equipped with stock or “street performance” camshafts Street/Strip = Select this if your engine has between 8” and 13” of manifold vacuum Race = Select this if your engine has less than 7”...
- Page 24 CD Box are Non Timing Controlled options. For timing control, you must run either a Magnetic Distributor, Holley Dual Sync, or HyperSpark. Note *This selection is based on what is the ECU getting an RPM Signal from, in majority of...
- Page 25 Step 10 The calibration is now complete – Press Next to send this calibration to your Sniper ECU. – Press Next Step 11 The initialization Wizard is now complete. Cycle the ignition power. Congratulations, your engine should be ready to start!
- Page 26 Sniper® Performance Products 1801 Russellville Road Bowling Green, KY 42101 1-270-781-9741 1-866-464-6553 www.Sniper.com © 2022 Sniper Performance Products, Inc. All rights reserved. Tous Droits Réservés. 199R12240 Date: 1-21-22...
Need help?
Do you have a question about the SNIPER EFI and is the answer not in the manual?
Questions and answers