Table of Contents
Advertisement
Quick Links
Advertisement
Table of Contents

Related Manuals for SunFounder PiCar-S


Summary of Contents for SunFounder PiCar-S
- Page 1 SunFounder PiCar-S www.sunfounder.com Nov 10, 2021...
-
Page 3: Table Of Contents
CONTENTS 1 About the PiCar-S Components List .......... -
Page 5: About The Picar-S
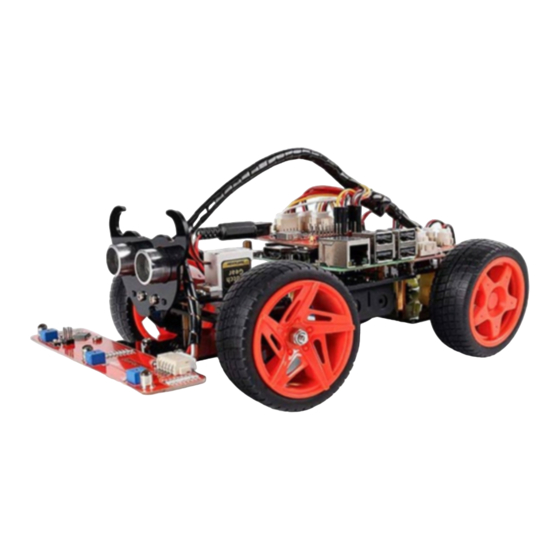
ABOUT THE PICAR-S The PiCar-S is a cool smart car that can work with Raspberry Pi 3 model B, 3 model B+, and 4 model B. Equipped with three sensor modules including ultrasonic obstacle avoidance, light follower, and line follower, you can better learn the programming on how to control the car. -
Page 6: Components List
4. Ultrasonic Support x 1 5. Bearing Shield x 8 6. Steering Linkage x 1 7. Steering Connector x 2 8. Ultrasonic Connector x 1 9. Back Half Chassis x 1 10. Sensor Connector x 1 Chapter 1. About the PiCar-S... - Page 7 SunFounder PiCar-S 1.1.2 SunFounder SF006C Servo x 1 1. Servo x 1 2. 1-arm Rocker Arm x 1 3. arm Rocker Arm x 1 4. 4-arm Rocker Arm x 1 5. Rocker Arm Fixing Screw x 1 6. Rocker Arm Screw...
- Page 8 SunFounder PiCar-S Chapter 1. About the PiCar-S...
- Page 9 SunFounder PiCar-S 1.1.3 Mechanical Fasteners 1.1. Components List...
- Page 10 SunFounder PiCar-S 1.1.4 Wires Chapter 1. About the PiCar-S...
- Page 11 SunFounder PiCar-S 1.1.5 PCB 1.1. Components List...
- Page 12 SunFounder PiCar-S 1.1.6 Other Components Chapter 1. About the PiCar-S...
- Page 13 SunFounder PiCar-S 1.1.7 Tools 1.1.8 Self-provided Components The following components are not included in this kit. Note: 1. You are recommend to use 18650 batteries without a protective board. Otherwise, the car may be cut power and stop running because of the overcurrent protection of the protective board.
-
Page 14: Introduction
3. In order to keep the car working for a long time, use large-capacity batteries as much as possible. 1.2 Introduction The PiCar-S is a SMART SENSOR car robot based on Raspberry Pi, which comes with three sensor modules, including the light follower, line follower and ultrasonic obstacle avoidance. With these modules, this smart car is capable of some simple automatic actions. -
Page 15: Building The Car
SunFounder PiCar-S 1.3 Building the Car Extremely excited when opening the box and checking so many components? Keep your patience and take it easy. Please note that some details in the following steps need CAREFUL observation. You should double-check your work based on the figures in the manual after finishing each step. - Page 16 flexibly when the connection would not be too loose. Assemble the other front wheel in the same way, but bear in mind the Steering Connector on the wheel should be symmetric with the previous one: Chapter 1. About the PiCar-S...
- Page 17 SunFounder PiCar-S Now two front wheels have finished assembly. 1.3.3 Steering Part Connect the Steering Linkage and the 1-arm Rocker Arm with the M1.5x4 Self-tapping Screw. Note: Insert it into the FIRST hole of the arm (as indicated by the arrow below) which is the farthest from the gears.
- Page 18 SunFounder PiCar-S Note: Fasten them as tightly as possible, and then loosen the screw a little so the Steering Linkage can move flexibly. Chapter 1. About the PiCar-S...
- Page 19 SunFounder PiCar-S 1.3.4 Upper Plate Mount the M2.5x8 copper standoffs and M2.5 nuts into the upper plate first. Pay attention that the side the protrud- ing prop should face up. 1.3. Building the Car...
- Page 20 Fasten the battery holder with two M3x8 countersunk screws and two M3 nuts: pay attention to the direction of battery holder’s wire. Chapter 1. About the PiCar-S...
- Page 21 SunFounder PiCar-S 1.3.6 Rear Wheels (Screws) Insert four M3x8 screws with four M3x25 copper standoffs: 1.3. Building the Car...
- Page 22 SunFounder PiCar-S Chapter 1. About the PiCar-S...
- Page 23 SunFounder PiCar-S 1.3.7 PCB Assembly 1) Assemble the Raspberry Pi (TF Card inserted) with eight M2.5x8 copper standoffs, then plug the Robot HATS onto it. 2) Fix the Robot HATS with four M2.5x6 screws. 3) Fix The PCA9685 PWM Driver, the Motor Driver with eight M2.5x12 screws and M2.5 nuts into the down plate.
- Page 24 Assemble the two motors to the Back Half Chassis with four M3x25 screws and M3 nuts. Pay attention to place the motors with wires inward, providing convenience for connecting the circuit. Assemble the rear wheels with 4 M3 nuts. Chapter 1. About the PiCar-S...
- Page 25 SunFounder PiCar-S Align the rear wheels with the motor shaft, and rotate to insert them gently. 1.3. Building the Car...
- Page 26 SunFounder PiCar-S Chapter 1. About the PiCar-S...
-
Page 27: Circuits Building
SunFounder PiCar-S 1.4 Circuits Building 1.4.1 Connect the Power 1.4. Circuits Building... - Page 28 SunFounder PiCar-S 1.4.2 Connect the Modules Chapter 1. About the PiCar-S...
- Page 29 SunFounder PiCar-S 1.4.3 Connect the Servo 1.4. Circuits Building...
- Page 30 SunFounder PiCar-S 1.4.4 Connect the Motor The complete connection is shown as follows. Chapter 1. About the PiCar-S...
-
Page 31: Get Started With Raspberry Pi
SunFounder PiCar-S So now the circuit boards are all installed onto the car and the wiring is done. But still you’re not ready to adjust the servo yet. First you need to complete some software installation. 1.5 Get Started with Raspberry Pi In this chapter, we firstly learn to start up Raspberry Pi. - Page 32 Insert your SD card into the computer or laptop SD card slot. Step 4 In the Raspberry Pi Imager, select the OS that you want to install and the SD card you would like to install it on. Chapter 1. About the PiCar-S...
- Page 33 SunFounder PiCar-S Note: 1) You will need to be connected to the internet the first time. 2) That will then stored future offline use(lastdownload.cache, C:/Users/yourname/AppData/Local/Raspberry Pi/Imager/cache, ). So the next time you open the software, it will have the display “Released: date, cached on your computer”.
- Page 34 Then scroll down to complete the wifi configuration and click SAVE. Note: wifi country should be set the two-letter ISO/IEC alpha2 code for the country in which you are using your Raspberry Pi, please refer to the following link: https://en.wikipedia.org/wiki/ISO_3166-1_alpha-2#Officially_ assigned_code_elements. Chapter 1. About the PiCar-S...
- Page 35 SunFounder PiCar-S Step 7 Click the WRITE button. Step 8 If your SD card currently has any files on it, you may wish to back up these files first to prevent you from permanently losing them. If there is no file to be backed up, click Yes.
- Page 36 SunFounder PiCar-S Step 9 After waiting for a period of time, the following window will appear to represent the completion of writing. Chapter 1. About the PiCar-S...
- Page 37 SunFounder PiCar-S 1.5.2 Power on the Raspberry Pi Now, the Raspberry Pi OS is configured. You can plug out the USB card reader and then plug the Micro SD card into the Raspberry Pi. Put two 18650 fully charged batteries in the holder, plug the wires from the battery holder into the development board then toggle the switch from off to on.
- Page 38 Type in ssh pi@ip_address . “pi” is your username and “ip_address” is your IP address. For example: pi@192.168.18.197 Step 3 Input “yes”. Step 4 Input the passcode and the default password is raspberry. Step 5 We now get the Raspberry Pi connected and are ready to go to the next step. Chapter 1. About the PiCar-S...
- Page 39 SunFounder PiCar-S Note: When you input the password, the characters do not display on window accordingly, which is normal. What you need is to input the correct passcode. For Windows Users If you’re a Windows user, you can use SSH with the application of some software. Here, we recommend PuTTY (You can download from Google).
- Page 40 Click Open. Note that when you first log in to the Raspberry Pi with the IP address, there prompts a security reminder. Just click Yes. Step 3 When the PuTTY window prompts “login as:”, type in “pi” (the user name of the RPi), and password: “raspberry” (the default one, if you haven’t changed it). Chapter 1. About the PiCar-S...
-
Page 41: Servo Configuration
You can find the source code in our Github repositories. Download the source code by git clone: /home/pi/ git clone --recursive https://github.com/sunfounder/SunFounder_PiCar-S.git -b V3.0 Note: Please pay attention to your typing – if you get the prompt of entering your user name and password, you may have typed wrong. - Page 42 1) Noisy, hot. 2) If unplug the servo line and rotate the rocker arm, it sounds like “ka” “ka” “ka” or there has no sounds of gear driving. Chapter 1. About the PiCar-S...
- Page 43 SunFounder PiCar-S 3) Rotate slowly but continuously. If you find one of the conditions above, please send e-mail to service@sunfounder.com . We will change a new one to you. If it is broken in the process of using or assembling, you should go to the official website www.sunfounder.com...
- Page 44 SunFounder PiCar-S Mount the wheels onto the Upper Plate carefully. Chapter 1. About the PiCar-S...
- Page 45 SunFounder PiCar-S Then put the assembled Front Half Chassis onto the Upper Plate with standoffs aligned with the holes. 1.6. Servo Configuration...
- Page 46 SunFounder PiCar-S Hold them carefully, turn upside down, and fasten the standoffs and the Upper Plate with four M3x8 screws: Chapter 1. About the PiCar-S...
-
Page 47: Calibration
SunFounder PiCar-S So now, the whole assembly is DONE! Congratulations! 1.7 Calibration 1.7.1 Calibrate the Servo Remember the commands to adjust the servo to 90 degrees previously? Now, let’s talk about the other two commands. The second command front-wheel-test is used to test whether the front wheels can turn flexibly after assembly. When you run this command, it will drive them to turn left and right. - Page 48 If the front wheels is still not facing the exact front, you may need to edit the file config for a couple of times. The front wheels may need to be adjusted about 3 to 5 times usually. We can move on to calibration of the rear wheels when the front wheels are done. Chapter 1. About the PiCar-S...
- Page 49 Press Ctrl + O to save the changes, and press Ctrl + X to exit. Run the command picar rear-wheel-test again to check whether the rear wheels are rotating in accordance with the command. picar rear-wheel-test Copy config to the directory example under PiCar-S. cp config ~/SunFounder_PiCar-S/example 1.7. Calibration...
-
Page 50: Arming The Car
PiCar into the PiCar-S. What exactly is the PiCar-S? ——- We arm the PiCar with some sensors, which endow the car with the ability to collect and process the data. The sensor modules to the PiCar is what the cartridges to the game console; they are added to the basic design of the game and thus richening the play. - Page 51 The ultrasonic obstacle avoidance module detects and transfers the collected data to Raspberry Pi that can calculate the distance from the obstacle. The Pi will send a command to adjust the front wheels and rear wheels direction and rotation to control the PiCar-S walk away from the obstacle if there is one. Procedures Step 1 Assembly Connect the ultrasonic module to the ultrasonic connector with M1.4*8 screws and M1.4 nuts.
- Page 52 However, this ultrasonic module is precise enough for obstacle avoidance. Step 4. Get on the road! Now we have a general idea of the ultrasonic module’s effect after the test above. Let’s run the code of the ultrasonic Chapter 1. About the PiCar-S...
- Page 53 The PiCar-S starts running now. Just place the car on the ground. It will follow the program to turn when it detects an obstacle; if the obstacle is too close, it will move backwards, and turn left/right. You can also modify the threshold of obstacle detecting range and that of moving backwards in the code.
- Page 54 Thus, we call the time module in Python for timing here. The formula to calculate the distance is written in the ultrasonic module’s driver. The main program just calls the corresponding program to get the distance value. Subflow of the Obstacle Avoidance Function Chapter 1. About the PiCar-S...
- Page 55 SunFounder PiCar-S When the car starts, it will detect obstacles and measure the distance in cycle, make judgement, and take actions. Here are three cases: when the distance to the obstacle is equals to the threshold, the car will turn directions; when the distance is less than the threshold, the car will move backwards before turning direction;...
- Page 56 0-100) is, the faster the wheel rotates. fw.turn(angle), function in the back_wheels, to set the turning angle. The angle is 90 when the car moves straight forwards; reduce the number to turn left, and increase it to turn right. Chapter 1. About the PiCar-S...
- Page 57 SunFounder PiCar-S fw.turn_straight(), making the front wheels return to the angle of moving straight forwards. More: back_distance and turn_distance Try to modify the constants to make the car back off and turn away in a desired distance and angle as you like during the obstacle avoidance.
- Page 58 Step 3 Test Let’s test the light follower first. ~/SunFounder_PiCar-S/example/ python3 test_light_module.py Expose the phototransistors to the light spot of the flashlight. When you increase the light intensity, more LEDs light up, and the output values decrease. Chapter 1. About the PiCar-S...
- Page 59 SunFounder PiCar-S Here we can rotate the blue adjustable resistor to change the values under the same light luminance. The best status is as follows: 1) When there is only one LED lights up, the output value is 255 2) When the light is the brightest and all the LED light up, the output value is about 10-25.
- Page 60 Light-sensitive sensors need to be calibrated before actual use because of complex light conditions in the environment. It gathers the information of the ambient light luminance. The car can follow light only when the light source is brighter than the surroundings. Chapter 1. About the PiCar-S...
- Page 61 SunFounder PiCar-S Here write two main functions/modules including light following calibration and light following in the main program. Subflow of Light Follower Calibration Function We need to configure three light-sensitive components separately, so we set three lists to store the values in A0, A1, and A2 collected for multiple times.
- Page 62 When there is no light detected, the status is [0,0,0], so we set the response action to stop and return to the standby mode. Chapter 1. About the PiCar-S...
- Page 63 SunFounder PiCar-S Here, we need to set another variable – the steering angle – to distinguish between the large-angle and small-angle turning. If the light is at the central left side (status [1,1,0]), we should apply a small-angle turning; if the light is at the edge of the left side (status [1,0,0]), we should apply a large-angle turning.
- Page 64 Connect the light follower to the Sensor Connector with M3*10 screws and M3 nuts, and then assemble them to the car with two M3*10 screws and two M3 nuts. You’re suggested to hold the nuts underneath with your fingers. Chapter 1. About the PiCar-S...
- Page 65 SunFounder PiCar-S Step 2 Wiring Connect the light follower to the Robot HATS with a 5-pin anti-reverse cable as shown below. Step 3 Test Get into the directory example: cd ~/SunFounder_PiCar-S/example Check whether any i2c device is recognized or not via i2c-tools sudo i2cdetect -y We can see 11 is the line follower’s i2c address.
- Page 66 When the module calibration is all completed, we can run the car then. Place the PiCar-S with probes above the black line on the white board, and then it will go forward following the line itself.
- Page 67 SunFounder PiCar-S 3. The semidiameter of curves: more than 138mm. When the front wheels turn left or right 45 degrees, the semidiameter of the path by which the car turns is equal to the wheelbase (the distance between the center of the front wheels and rear wheels).
- Page 68 Then we take the average value of black and white as reference value: if the detected value is higher than the reference, it should be white; if the detected is lower than the reference, it should be black. We will show the five detectors’ status by 5 elements [0,0,0,0,0]. Chapter 1. About the PiCar-S...
- Page 69 SunFounder PiCar-S Subflow of Line Following Function 1.8. Arming the Car!
- Page 70 90+step degrees; to turn right, the servo should be in 90-step degrees. There is a special case: if the car runs off the track, and all the probes cannot detect the black lines any more, then it will continue the program below. Chapter 1. About the PiCar-S...
- Page 71 SunFounder PiCar-S In some case, especially when the car turns in a direction when the semi diameter of the curve is very small (1), the car may run out of the track and cannot detect any black line (2). If there is no response program in such case, the car will be unable to follow the line again.
- Page 72 = 2; if the spot is at the back, it will return light_flag = 3; if no light spot is detected, it will return light_flag = 4. Chapter 1. About the PiCar-S...
- Page 73 SunFounder PiCar-S The main program main() will run the corresponding program according to avoid_flag and light_flag, and the avoid_flag is superior in priority. 1.8. Arming the Car!
- Page 74 SunFounder PiCar-S Chapter 1. About the PiCar-S...
-
Page 75: Appendix
1.9.1 Installing Manually 1. Update the apt list. sudo apt-get update 2. Install python-smbus. sudo pip3 install smbus2 3. Install the PiCar module. git clone --recursive https://github.com/sunfounder/SunFounder_PiCar.git cd SunFounder_PiCar python3 setup.py install 4. Enable I2C. Edit the file /boot/config.txt sudo nano /boot/config.txt The “#”... - Page 76 TF card caused by batteries running out of power. The PCF8591 is used as the ADC chip, with I2C communication, and the address 0x48. 1. Digital ports: 3-wire digital sensor ports, signal voltage: 3.3V, VCC voltage: 3.3V. Chapter 1. About the PiCar-S...
- Page 77 4. 5V power output: 5V power output to PWM driver. 5. UART port: 4-wire UART port, 5V VCC, perfectly working with SunFounder FTDI Serial to USB. 6. Motor control ports: 5V for motors, direction control of motors MA and MB and a floating pin NC; working with motor driver module.
- Page 78 3. PWM power input: 12V max. 4. LED: power indicator for the chip and for the PWM power input. Motor Driver Module The Motor Driver module is a low heat generation one and small packaged motor drive. Chapter 1. About the PiCar-S...
- Page 79 SunFounder PiCar-S 1. Power and motor control port: includes pins for supplying the chip and the motors and controlling the motors’ direction 2. PWM input for the motors: PWM signal input for adjusting the speed of the two motors 3. Motor output port: output port for two motors...
- Page 80 Therefore, all we need to do is to collect data by the AD converter on the Atmega328 and then send the data to the master control board via I2C communication. This module is an infrared tracking sensor one that uses 5 TRT5000 sensors. The blue LED of TRT5000 is the emission Chapter 1. About the PiCar-S...
- Page 81 SunFounder PiCar-S tube and after electrified it emits infrared light invisible to human eye. The black part of the sensor is for receiving; the resistance of the resistor inside changes with the infrared light received. Light Follower Module Phototransistor, also known as photodiode, is a device that converts light to current. Currents are generated when photons are absorbed in the P-N junction.
- Page 82 3mm. each HC-SR04 module includes an ultrasonic transmitter, a receiver and a control circuit, so we have to be careful with the Trig and Echo pin connections when using the HC-SR04 module. When we attach it to the picar-s, it measures the distance and detects if there is an obstacle ahead. Principle Supply a short 10S pulse to the Trig to start the ranging, and then the module will send out an 8 cycle burst of ultrasound at 40 kHz and raise its echo back.
- Page 83 SunFounder PiCar-S SunFounder SF006C Servo The SunFounder SF0180 Servo is a 180-degree three-wire digital servo. It utilizes PWM signal of 60Hz and has no physical limit – only control by internal software to 180 degrees at most. Electrical Specifications: DC Gear Motor It’s a DC motor with a speed reducing gear train.
-
Page 84: Thank You
SunFounder PiCar-S Copyright Notice All contents including but not limited to texts, images, and code in this manual are owned by the SunFounder Company. You should only use it for personal study, investigation, enjoyment, or other non-commercial or nonprofit purposes, under the related regulations and copyrights laws, without infringing the legal rights of the author and relevant right holders. -
Page 85: Copyright Notice
CHAPTER COPYRIGHT NOTICE All contents including but not limited to texts, images, and code in this manual are owned by the SunFounder Company. You should only use it for personal study,investigation, enjoyment, or other non-commercial or nonprofit purposes, under therelated regulations and copyrights laws, without infringing the legal rights of the author and relevant right holders.
Need help?
Do you have a question about the PiCar-S and is the answer not in the manual?
Questions and answers