Table of Contents
Advertisement
CANON INC.
30-2, Shimomaruko 3-chome, Ohta-ku, Tokyo 146-8501, Japan
U.S.A.
CANON U.S.A.,INC. NEW JERSEY OFFICE
100 Jamesburg Road, Jamesburg, NJ 08831 USA
CANON U.S.A.,INC. CHICAGO OFFICE
100 Park Blvd., Itasca, IL 60143 USA
CANON U.S.A.,INC. LOS ANGELES OFFICE
15955 Alton Parkway, Irvine, CA 92618 USA
CANON U.S.A.,INC. HONOLULU OFFICE
210 Ward Avenue, Suite 200 Honolulu, HI 96814 USA
● If you have any questions, call the Canon U.S.A. Information
Center toll-free at 1-800-828-4040(U.S.A.only)
CANADA
CANON CANADA INC.NATIONAL HEADQUARTERS
6390 Dixie Road, Mississauga, Ontario L5T 1P7
CANON CANADA INC. CALGARY
2828, 16th Street, N.E, Calgary, Alberta T2E 7K7
CANON CANADA INC. MONTRÉAL
5990 Côte-de-Liesse, Montréal, Québec H4T 1V7
● If you have any questions, call the CANON CANADA Customer Information
Centre toll-free at 1-800-OK-CANON (652-2666) (Canada only)
MEXICO
CANON MEXICANA, S. DE R.L.DE C.V.
Periferco Sur No. 4124, Col. Ex-Rancho de Anzaldo, C.P. 01900
México, D.F., México
CENTROY
SURAMERICA
CANON LATIN AMERICA, INC.
6505 Blue Lagoon Drive, Suite 325, Miami, FL 33126, USA
ASIA
CANON SINGAPORE PTE. LTD.
79 Anson Road, #09-01/06, Singapore 079906 Republic of Singapore
CANON HONGKONG CO., LTD.
9/F., The Hong Kong Club Building, 3A, Chater Road, Central, Hong Kong
OCEANIA
CANON AUSTRALIA PTY.LTD.
1 Thomas Holt Drive, North Ryde, Sydney, N.S.W. 2113, Australia
EUROPE
CANON EUROPA N.V.
P.O.Box 2262, 1180 EG Amstelveen, The Netherlands
CANON EUROPE LTD.
6 Roundwood Avenue, Stockley Park, Uxbridge Middlesex, UB11 1JA, United Kingdom
PUB.YT1-1000-000
xxxxxxxx
© CANON INC.2002
PRINTED IN JAPAN
NETWORK CAMERA
User's Manual
VB-C10
Please read this instruction manual carefully before operation.
Be sure to read the "a Safe Use of Equipment" section before using
this equipment. Store this manual in a readily accessible location for
future reference.
VB-C10R
´
ENGLISH
Advertisement
Table of Contents

Related Manuals for Canon VB-C10


Summary of Contents for Canon VB-C10
- Page 1 2828, 16th Street, N.E, Calgary, Alberta T2E 7K7 CANON CANADA INC. MONTRÉAL 5990 Côte-de-Liesse, Montréal, Québec H4T 1V7 ● If you have any questions, call the CANON CANADA Customer Information Centre toll-free at 1-800-OK-CANON (652-2666) (Canada only) MEXICO CANON MEXICANA, S. DE R.L.DE C.V.
-
Page 2: Introduction
Thank you for purchasing the Canon Network Camera VB-C10/VB-C10R (referred to hereafter as the VB-C10/VB-C10R). This manual describes how to set up and use the VB-C10/VB-C10R. Read this manual carefully before using the VB-C10/VB-C10R to ensure effective operation. In particular make sure that you read the "a Safe Use of Equipment"... - Page 3 With respect to the disclosure of live videos, we request that sufficient consideration be given to matters of privacy and rights not to be photographed. Canon considers the following points concerning such matters when it operates camera sites for which it has been responsible to install and operate: ●We take measures such as adding limitations on zoom magnifications so that people...
-
Page 4: Table Of Contents
Safe Use of Equipment... vii Maintenance ... xii Chapter 1 Before Using the VB-C10/VB-C10R Features of the VB-C10/VB-C10R ... 1-2 System Configuration ... 1-4 Hardware and Software Requirements ... 1-6 Webview Livescope Viewer Software ... 1-6 VB Administration Tools ... 1-6 VBCollector ... - Page 5 Chapter 4 VB Administration Tools Overview of VB Administration Tools ... 4-2 VBAdmin Startup Panel ... 4-2 Panorama Creation Tool ... 4-2 View Restriction Tool ... 4-3 Preset Setting Tool ... 4-3 Log Viewer ... 4-3 Admin Viewer ... 4-3 Installing VB Administration Tools ...
- Page 6 Contents Using the Helper Viewer to Distribute Videos ... 5-21 Example of a Web page Using the Helper Viewer ... 5-23 Distributing Videos Using a Browser Only ... 5-24 Example of Video Distribution Using One Fixed Global Address ... 5-26 Chapter 6 Using the Picture Recording Function Using the Still Picture Recording Function Linked to an External Device ...
-
Page 7: Safe Use Of Equipment
BACK). NO USER-SERVICEABLE PARTS INSIDE. REFER SERVICING TO QUALIFIED SERVICE PERSONNEL. The serial number of this equipment may be found on the bottom of the VB-C10/ VB-C10R. No others have the same serial number as yours. You should record the number and other vital information here and retain this book as a permanent record of your purchase to aid identification in case of theft. - Page 8 If such changes or modifications should be made, you could be required to stop operation of the equipment. Canon U.S.A. Inc. One Canon Plaza, Lake Success, NY 11042, U.S.A. Tel No. (516) 328-5600 This product does not exceed the Class B limits for radio noise emissions from digital apparatus as set out in the Interference-causing equipment standard entitled ‘Digital Apparatus’, ICES-003 of the Industry Canada.
-
Page 9: A Important Safety Instructions
IMPORTANT SAFETY INSTRUCTIONS In these safety instructions, the word “equipment” refers to the Canon Network Camera VB-C10/VB-C10R and all its accessories. 1. Read Instructions - All the safety and operating instructions should be read before the equipment is operated. - Page 10 19. Replacement Parts - When replacement parts are required, be sure the service technician has used replacement parts that are specified by Canon or that have the same characteristics as the original part. Unauthorized substitutions may result in fire, electric shock or other hazards.
- Page 11 22. When any of the following occurs, immediately switch OFF the equipment, unplug it from the main power supply and contact your nearest Canon supplier. Do not continue to use the equipment as this can cause a fire or electric shock.
-
Page 12: Maintenance
a Safe Use of Equipment Maintenance Cleaning the Equipment 1. Unplug the AC adapter from the wall outlet. 2. Carefully wipe the equipment with a soft cloth that has been moistened with water or a mild detergent. a WARNING: Do not use flammable solvents such as alcohol, benzene or thinners. The use of such substances can cause a fire or electric shock. -
Page 13: Before Using The Vb-C10/Vb-C10R
Chapter Before Using the VB-C10/VB-C10R This chapter contains information that you should read before using the VB-C10/VB-C10R. It also describes the features of the VB-C10/VB-C10R, the system configuration, the hardware and software requirements, and the name and functions of the system components. -
Page 14: Features Of The Vb-C10/Vb-C10R
Features of the VB-C10/VB-C10R The VB-C10/VB-C10R is a system that distributes live videos via the Internet or an Intranet. It can be used in a wide range of applications, such as distributing live videos from a Web site or monitoring. The system is configured of the VB-C10/VB-C10R and viewer software. Please use the supplied viewer software for viewing videos distributed by the VB-C10/VB-C10R and controlling cameras. - Page 15 By accessing a Settings page provided on the Web, you can use the Web browser on your PC to set up and manage the VB-C10/VB-C10R from a remote location without ever visiting the place where the VB-C10/VB-C10R is actually installed.
-
Page 16: System Configuration
Viewer Software Functions Viewer Software • Videos from the VB-C10/VB-C10R can be displayed by a Web browser that can run Java applet. • Because the Java Viewer is automatically downloaded and does not need to be pre- installed, unlike the Helper Viewer, it is compatible with any platform that supports Java Viewer Java-capable environments. -
Page 17: Optional Products
VB-C10/VB-C10R operating status. It also lets you select and create a monitoring screen best suited to the number of VB-C10/VB-C10Rs on the LAN from among a rich variety of examples. MV Station lets you use the monitoring screen created in MV Manager to view videos from multiple points where VB-C10/VB-C10R units are installed while also remote controlling cameras and external devices. -
Page 18: Hardware And Software Requirements
Internet Explorer 4.01 or later recommended * This viewer is installed on the VB-C10/VB-C10R and is automatically downloaded by the client at access. * This software may not run stably on operating systems and Web browsers other than those listed above. -
Page 19: Vbcollector
VBCollector (→ P.6-6) This tool is for viewing still pictures recorded by the VB-C10/VB-C10R. IBM PC/AT Compatible Operating System Windows 98SE/Me or Windows NT 4.0/Windows 2000/Windows XP Web Browser Microsoft Internet Explorer 5 or later required * Must be installed in advance from the supplied CD-ROM. -
Page 20: Package Contents
Package Contents The VB-C10/VB-C10R package contains the following items. If any of these items is missing, please contact the retailer from which you purchased the product. 1. VB-C10 main unit (or VB-C10R main unit) VB-C10 3. AC cable (1 meter 3 ft. -
Page 21: System Components And Their Operation
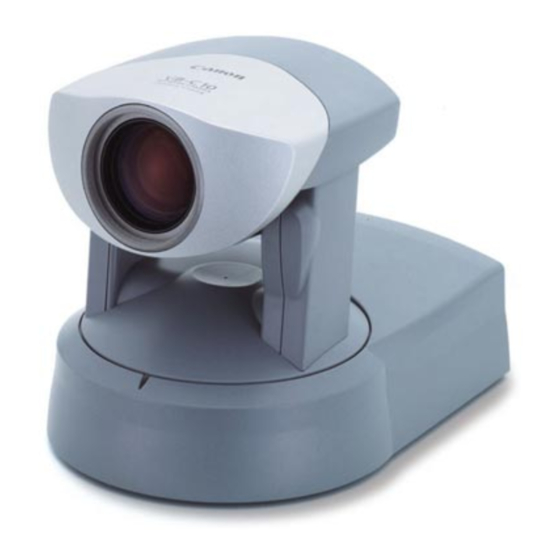
System Components and Their Operation Front Rear VB-C10 Camera head Base Camera LED • When power is turned on: Flashing Green light • During normal operation: Steady Green light Power connection socket 100/10 BT Ethernet connector (100Base-TX, 10Base-T auto-negotiation) External device I/O terminals Network LED •... - Page 22 System Components and Their Operation Front Rear 1-10 VB-C10R Mounting plate Camera LED • When power is turned on: Flashing Green light • During normal operation: Steady Green light Base Camera head Network LED • When connected to network : Off •...
- Page 23 Bottom On the bottom of the VB-C10/VB-C10R are the MAC address required for network settings, a Reset switch that returns the factory default settings, and the serial number. Screw hole for tripod mounting Reset switch You can return all settings on...
- Page 24 1-12...
-
Page 25: Chapter 2 Installation
Chapter Installation This chapter explains how to connect the system components and describes a sample network configuration. -
Page 26: Before Using The Vb-C10/Vb-C10R
VB-C10/VB-C10R (→ P.1-11). Please make a note of it before installing this unit (→ P. 3-3). Using a Tripod (VB-C10) The screw for mounting a tripod is on the bottom of the VB-C10 toward the front. ● Do not overtighten the mounting screw. If excessive force is used to tighten the mounting... - Page 27 Wide-angle Converter a WARNING: The Wide-angle Converter WL-37 is designed specifically for the VB-C10 and cannot be used on the VB-C10R. If the converter is used on the VB-C10R, the mount will gradually loosen and the converter will fall off the camera.
-
Page 28: Connecting The Components
Turning the Power ON and OFF The VB-C10/VB-C10R itself does not have a power switch. You can switch the VB-C10/VB-C10R on by plugging the AC adapter into a wall outlet. When power to the VB-C10/VB-C10R is switched on, the Camera LED turns green. -
Page 29: Sample Network Configurations
Viewer PC This example shows the VB-C10/VB-C10R connected to a LAN by Ethernet. In this configuration, videos can be seen by viewers in the same Ethernet segment as the VB-C10/VB-C10R and by viewers with access to that segment. Sample Configuration in an ISP Environment... -
Page 31: Setup Procedures
Chapter Setup Procedures This chapter describes the procedures from the initial setup of the VB-C10/VB-C10R through to operation checking and the method for specifying detailed settings. The VB Administration Tools described in Chapter 4 provide a convenient way to set view restrictions and presets. -
Page 32: Preparations For Initial Setup
VB-C10/VB-C10R and a PC. Installation Example Installation Procedure 1. As shown in the diagram above, the VB-C10/VB-C10R is connected to a PC via a hub and LAN cables (10Base-T/100Base-TX). At this stage, please do not connect the AC adapter to the VB-C10/VB-C10R yet. -
Page 33: Initial Setup
3. When the “VB-C10/VB-C10R IP Installer” dialog box appears, connect the AC adapter to the VB-C10/VB-C10R and turn on the power. See “Turning the Power ON and OFF” (→ P.2-4) for how to turn on power to the VB-C10/VB- C10R. - Page 34 ● Be careful to distinguish between lower-case and upper-case letters in order to accurately enter the user name and password. ● The user name is fixed at “root” for both the VB-C10 and VB-C10R. It cannot be changed. ● For reasons of system security, we recommend that you change the administrator password at regular intervals.
- Page 35 Initial Setup 2 Enter the user name and password. User name: root Password: VB-C10 (default setting) 3 The settings title page is displayed. Initial settings are now complete.
-
Page 36: Checking Operation
Checking Operation When you have completed the initial setup, check that the VB-C10/VB-C10R works normally. Use the sample page to simplify checking. 1. Access the sample page from the Web browser. Example) http://192.168.101.7/sample/ Enter the value you have specified in the Initial Setup (→ P.3-3) as the IP address (192.168.101.7). -
Page 37: Detail Settings
Detail Settings Accessing the Settings Title Page The various settings on the VB-C10/VB-C10R are specified by using a browser to access Web pages on the VB-C10/VB-C10R. You begin by accessing the Settings Title Page. This manual uses the IP address 192.168.100.1 (the factory default setting) below as an example to describe the detail settings. -
Page 38: Settings Title Page
Detail Settings Settings Title Page The various settings on the VB-C10/VB-C10R are specified by using a browser to access Web pages on theVB-C10/VB-C10R. From this title page, you can move to each settings pages. Settings Title Page for VB-C10/VB-C10R Clicking on the titles displays each setting pages. -
Page 39: System/Network Settings Page
System/Network Settings Page This page is used to make Ethernet and password settings for the administrator. Ethernet “IP Address” Enter the IP address you want to assign to VB-C10/VB-C10R. “Subnet Mask” Enter the subnet mask specified for the network to be connected. -
Page 40: Date/Time Settings Page
This returns you to the settings title page. 3-10 Date and Time “Current Camera Time” Displays the date and time currently set on the VB-C10/VB- C10R. “New Camera Time” One of three methods can be selected: “Synchronize with computer time”, “Synchronize with NTP server”, or “Set manually”. -
Page 41: Camera Settings Page
Camera Settings Page Use this page to set the camera control parameters and the video capture size and video quality. Using VB Administration Tools is a convenient way to set view restrictions (→ P.4-12). * With the VB-C10R, the displayed pan and tilt values change. - Page 42 Sets the focusing mode for the camera. Select “Auto”, “Auto (for domes)”, or “Fixed at infinity”. When the VB-C10/VB-C10R is used with an outdoor housing, focusing on the wall of the outdoor housing can be avoided if the Focus mode is set to “Auto (for...
-
Page 43: Range Of Camera Head Movement
If the camera head is accidentally moved by hand or other objects Note touching it, be sure to restart the VB-C10/VB-C10R by turning the power supply OFF then ON again. The deviation from the position that the VB-C10/VB-C10R memorizes will be corrected and the operation will be back in order. - Page 44 Detail Settings About view restriction ● Pan and tilt range varies with the zoom ratio (field of view angle). When you set the view restriction, the angles of camera movement are automatically restricted. If the visible range is exceeded because the zoom is set to wide range, the camera angle (pan, tilt) will be adjusted automatically.
-
Page 45: Preset Settings Page
VB Administration Tools for making settings (→ P.4-17). Detail Settings Common Settings “Restrict Camera Control to Presets” VB-C10/VB-C10R camera control using Helper Viewer and Java Viewer can be restricted to the preset angle only. Presets 1-8 Up to 8 presets can be specified. -
Page 46: Picture Recording And External Device I/O Settings Page
Select the angle to be used in Post-event Recording. Select “Not Specified” or from Preset 1 to 8 (→ P.3-15). ● When recording pictures, if you turn off the VB-C10/VB-C10R’s power switch and then reboot it, all recorded still pictures will be deleted. - Page 47 5 MB. Available space can be checked with the Administration Tools Note settings page (→ P.3-22). ● Recorded pictures are deleted when power to the VB-C10/VB-C10R is shut off or the VB-C10/VB-C10R is restarted. Please use VBCollector to collect recorded pictures (→ P.6-6).
- Page 48 Detail Settings Picture Recording triggered by External Devices Picture Recording A B ● Pictures can be recorded in response to ON/OFF events detected from an external device. A: Pre-event recording for an ON event C: Pre-event recording for an OFF event ●...
-
Page 49: Access Control Settings Page
Access Control Settings Page From this page, you can permit access to the VB-C10/VB-C10R to specific authorized users only. Unauthorized clients’ access is prohibited. Click the “OK” button to change the settings. To discard the changes, click the “Cancel” button. This returns you to the settings title page. -
Page 50: Webview Livescope Setting Settings Page
65535. The default setting is 65310. “Camera Control Port” Set a TCP port number to be used for controlling the camera between the VB-C10/VB-C10R and the WebView Livescope Viewer. Enter an integer between 1 and 65535. The default setting is 65311. -
Page 51: Miscellaneous Settings Page
1 and 65535. The default setting is No. 80. “Global Address for Web Pages” If a private address has been set in the VB-C10/VB-C10R and you want to use the router’s NAT function to have a fixed global address assigned to the VB-C10/VB-C10R (→... -
Page 52: Administration Tools Settings Page
IP address are returned to the factory default settings (→ P.8-5). Note ● Since the work area for the VB-C10/VB-C10R is included in the free space on the on-board file system, files may not be created when the free space becomes approximately 100KB (→... -
Page 53: Vb Administration Tools
Chapter VB Administration Tools This chapter describes how to use the VB Administration Tools in order to create panoramas, set view restrictions, make presets, view logs, and use the Admin Viewer. Although view restriction and preset settings can be made following the procedures described in Chapter 3, the VB Administration Tools and their more visual environment make the settings much easier. -
Page 54: Overview Of Vb Administration Tools
VB Administration Tools comprises “VBAdmin Startup Panel” and “Panorama Creation Tool,” “View Restriction Tool,” “Preset Setting Tool,” “Log Viewer,” and “Admin Viewer” applications. Operations such as setting the VB-C10/VB-C10R or viewing pictures from a remote location with special privilege, checking operating status or obtaining logs are easily performed through the Internet or Intranet. -
Page 55: View Restriction Tool
Presets can be set by operating the mouse while referring to panorama previews. This tool enables viewing of operation status logs that are output to the VB-C10/VB-C10R. This tool has a special privilege aimed at administrators of the VB-C10/VB-C10R. Use it when setting presets, view restrictions, etc. - Page 56 If power to the PC is already on and Windows is running, exit all other applications before installing VB Administration Tools. 2. Insert the CD-ROM supplied with the VB-C10/VB-C10R into the PC’s CD-ROM drive, and follow the procedure below. 1 Double-click “My Computer” on the desktop.
- Page 57 Please consult with the network administrator for proxy settings. “Use HTTP Proxy Server” Select this item if the connection to the VB-C10/VB-C10R is to pass through a proxy server. “Host Name” Specify the host name or IP address of the proxy server.
- Page 58 “Log Viewer” and “Admin Viewer” can be started up at the same time. ● If the connection to the VB-C10/VB-C10R is made through a proxy server, the “Panorama Creation Tool”, “Log Viewer”, and “Admin Viewer” cannot be used.
-
Page 59: Panorama Creation Tool
Panorama Creation Tool The Panorama Creation Tool is used to take and create panorama pictures for the VB-C10/ VB-C10R. When they have been created, the panorama pictures can be viewed when accessed from the viewer. The Panorama Creation Tool is used to take and create panorama pictures and save them in the VB-C10/VB-C10R. - Page 60 3 Update Panorama Image button Sends panorama pictures to the VB-C10/ VB-C10R and reloads them. 4 Captured date display The date the panorama picture was captured, if one was recorded, are displayed here.
- Page 61 Capturing Panorama Pictures Since the entire area of panorama picture is captured and displayed during capturing, if the VB-C10/VB-C10R is accessed from the viewer and pictures are viewed, even Note when view restrictions (→ P.3-12) have been set, there is a possibility that third parties that were originally not intended to see the pictures may see them.
- Page 62 Or, a square section in the displayed grid can be captured again by double-clicking on that section. Updating/Deleting Panorama Pictures When capturing ends, the panorama picture is reflected when it is sent to the VB-C10/VB-C10R and loaded. ○ ○ ○ ○ ○ ○...
-
Page 63: Reconnecting
Reconnecting Reconnections are made when a connection with the VB-C10/VB-C10R has been cut. To make a reconnection, choose “Reconnect” from the File menu. Opening/Saving Pictures Panorama pictures can be opened from picture files or saved as picture files. To retrieve a picture file and use it for a panorama picture, choose “Open”... -
Page 64: View Restriction Tool
View Restriction Tool The View Restriction Tool is used to set view restriction visually and more easily for the VB-C10/ VB-C10R. The viewing range is simply set using mouse operations such as dragging, while viewing the panorama picture. Example: You want to distribute video of a tourist site but you want to place restrictions on the zoom. - Page 65 2 Send button Sends to the VB-C10/VB-C10R the current view restriction values edited with this tool. 3 Reflect set values button Reflects in the VB-C10/VB-C10R the view restriction values that were sent by clicking the “Send” button. 4 Cancel button This button can be clicked during communication with the VB-C10/VB-C10R to cut the connection.
-
Page 66: Admin Viewer
“Upper value” ... Value for the upper limit of the view restriction. The upper value of the VB-C10/VB-C10R’s shooting angle is obtained using the “Get Value” button. “Lower value” ... Value for the lower limit of the view restriction. The lower value of the VB-C10/ VB-C10R’s shooting angle is obtained using the “Get Value” button. -
Page 67: Setting View Restrictions
1: Retrieving values from Admin Viewer and changing settings ○ ○ ○ ○ ○ ○ To Make Settings... Start up Admin Viewer and set the view restriction from the shooting angle of the VB-C10/ VB-C10R. 1 Select the “Apply the View Restriction”. - Page 68 Check the Status List to be sure the values were sent correctly. Then when the “Reflect set values” button is clicked, the values will be reflected in the VB-C10/VB-C10R. ● Since previews using Panorama Preview may be slightly different from the actual pictures, after the view restrictions have been set, please check to be sure the viewer correctly reflects the view restrictions in the actual picture.
-
Page 69: Preset Setting Tool
Preset Setting Tool The Preset Setting Tool more easily and uniformly sets the preset function of the VB-C10/VB-C10R. Settings can be made using simple mouse operations such as clicking and dragging while referring to the panorama picture. Setting presets using the Preset... -
Page 70: Preset Setting Tool Display Screen
2 Send button Sends to the VB-C10/VB-C10R the current preset settings edited with this tool. 3 Reflect set values button Reflects in the VB-C10/VB-C10R the preset settings that were sent by clicking the “Send” button. 4 Cancel button This button can be clicked during communication with the VB-C10/VB-C10R to cut the connection. - Page 71 Displays the results of communication between this tool and the VB-C10/VB-C10R. Edited content will not be reflected in the viewer accessed to the VB-C10/VB-C10R at the stage when the “Send” button is used to send edited content to the VB-C10/ Note VB-C10R.
-
Page 72: Setting Presets
○ ○ ○ ○ ○ ○ To Make Settings... Start up Admin Viewer and set the shooting angle of the VB-C10/VB-C10R as a preset. 1 From the Preset Selection box, select the preset to be set, and enter the Preset Name. - Page 73 Check the Status List to be sure the values were sent correctly. Then when the “Reflect set values” button is clicked, the values will be reflected in the VB-C10/VB-C10R. ● If view restrictions are to be used, be sure that the Preset Preview Frame (yellow) does not protrude outside the View Restriction Frame (blue).
-
Page 74: Log Viewer
Log Viewer The VB-C10/VB-C10R includes a feature that writes operating status to a log file and saves it. Log Viewer simplifies the reading of log files and provides management and resolution of errors. Log Viewer not only displays all logs, it is also capable of filtering so that only the required information is displayed. -
Page 75: Log Viewer
●Specify End Date & Time Logs generated before the specified date and time can be displayed. ● There is no log message related to the HTTP server and the driver in the VB-C10/ VB-C10R. ● “Application” and “System” correspond to the log messages list (→ P.7-4). -
Page 76: Admin Viewer
Admin Viewer Admin Viewer is a viewer containing functions for managing the VB-C10/VB-C10R. Compared to the Helper and Java Viewers, Admin Viewer lets you perform operations such as retrieve exclusive camera control privileges, ignore view restrictions, and operate external devices. -
Page 77: Operating External Device
Setting Notification of Changes in External Device Input Status A message box can be displayed in the event a change in the external device input status occurs due to a sensor connected to the VB-C10/VB-C10R or other factor. ○ ○ ○ ○ ○ ○... -
Page 78: Enabling/Disabling View Restrictions
Admin Viewer 2. The “External Device Input” dialog box appears. To save this content as a log, click the “Save” button, then specify a file name and where it should be saved. To clear the content in the display, click the “Clear” button. To close the dialog box, click the “Close”... -
Page 79: Creating Web Pages
Chapter Creating Web Pages This chapter describes how to use the VB-C10/VB-C10R to webcast information. Picture data can be distributed in various ways, including displaying video or still pictures and displaying multiple images on a Web page. -
Page 80: Web Pages For Video Distribution
If you select a link requesting video in step 1, a file that includes the IP address information for the VB-C10/VB-C10R is sent from the Web server in step 2. If you are using the Java Viewer, the applet is downloaded to the viewer PC from the VB-C10/VB-C10R in response to the request in step 3 and the video is distributed. -
Page 81: Features Of The Java Viewers
“Glimpse”, which only has video display functions. Because both viewers use WebView-HTTP as the transfer protocol, they do not require special settings to penetrate firewalls. Viewer Types Viewer Name 1 Displays videos from the VB-C10/VB-C10R. 2 Allows camera control. LiveApplet 3 Allows overlays and superimposition of bitmaps in the video frame. - Page 82 Web Pages for Video Distribution Java Viewer LiveApplet Video display function Camera control function Java Viewer Glimpse Video display function Click Panorama Picture...
-
Page 83: Features Of The Helper Viewer
Features of the Helper Viewer The Helper Viewer is an application which is launched from a Web browser. Unlike the Java Viewer, it must be pre-installed on the client's computer. The features of the Helper Viewer are described below. ● Must be pre-installed, but once installed, start-up time is quick and operation is stable. -
Page 84: Viewing Sample Pages
1. Launch your Web browser and enter the following URL: http://192.168.100.1/sample/ * The underlined portion is a sample IP address. Enter the actual IP address that was set on the VB-C10/ VB-C10R. 2. The page shown below appears with links to the other sample pages. -
Page 85: Using The Java Viewer To Distribute Videos
Enter the parameters required by the applet between the <applet> -</applet> tags. Use the <param> tag for parameters other than the common attributes for applets (codebase, code, archive, width and height). * The underlined portion is a sample IP address. Enter the actual IP address set for the VB-C10/VB-C10R. -
Page 86: Saving Web Page Data
Using the Java Viewer to Distribute Videos Saving Web Page Data The VB-C10/VB-C10R is equipped with a Flash memory where Web page data can be saved. Data is saved by transfering the data files using FTP. The data is placed as a file under /usr/html/ local. -
Page 87: Example Of Using The Java Viewer To Create A Web Page
Embed the Java Viewer, and Display a Text in a Separate Frame Writing IP Addresses Using the Web server functions built into the VB-C10/VB-C10R, IP addresses can be expressed as <_I_P_A_D_D_R_> (all upper-case characters, including the angle brackets) in the three file types (html, wvh and wvp) used by the Web server in the VB-C10/VB-C10R. - Page 88 3 lvappl.htm <html> <head> <title>LiveApplet</title> </head> <body> <applet codebase="http://192.168.100.1/-wvdoc-01-/LiveApplet/" code="LiveApplet.class" archive="LiveApplet.zip" width=450 height=380> <param name=cabbase value="LiveApplet.cab"> <param name=url value="http://192.168.100.1/"> </applet> </body> </html> * The underlined portion is a sample IP address. Enter the actual IP address set for the VB-C10/VB-C10R. 5-10...
- Page 89 Using Glimpse and LiveApplet Together This section describes how to create a Web page that allows clients to use Glimpse to download quickly and view live video at a low frame rate, and then use LiveApplet to view video at a high frame rate and control the camera when they find videos they are particularly interested in.
- Page 90 <head> <title>LiveApplet</title> </head> <body> <center> <applet codebase="http://192.168.100.1/-wvdoc-01-/LiveApplet/" code="LiveApplet.class" archive="LiveApplet.zip" width=450 height=380> <param name=cabbase <param name=url </applet> </center> </body> </html> * The underlined portion is a sample IP address. Enter the actual IP address set for the VB-C10/VB-C10R. 5-12 value="LiveApplet.cab"> value="http://192.168.100.1/">...
- Page 91 Providing “LiveApplet” without Camera Control This section describes how to create a Web page that only displays live video and has no camera control GUI for situations where you want to prohibit camera control. <applet ... width=320 height=240> <param name=controller_style value="none"> ... 1 1 specifies the camera control user interface.
- Page 92 Note ● At startup, the default character string that is displayed while a connection to the VB-C10/VB-C10R is being established is “now connecting”, but there is also a parameter called “connect_msg” for changing this character string. For additional parameters for changing display character strings, see page 5-17.
- Page 93 Displaying the Host Name, Frame Count and Other Information on the Video Screen <param name=show_fps value="on"> <param name=show_counter value="on"> <param name=hostname value="CANON"> <param name=show_hostname value="on"> <param name=comment value="VB-C10 site"> <param name=show_comment value="on"> 1 specifies whether the frame rate is displayed on the screen. “on”: Displayed. “off”: Not displayed.
- Page 94 <param name=bg_color value="#cccccc"> </applet> </body> </html> * The underlined portion is a sample IP address. Enter the actual IP address set for the VB-C10/VB-C10R. Pasting a Picture to the Background <param name=bg_image value="/local/images/back.gif"> ... 1 <param name=image_offset value="0,0"> ... 2 1 specify the displayed picture file.
-
Page 95: Java Viewer Parameters
Java Viewer Parameters You can specify applet parameters to provide an applet tailored to modify the behaviour or appearance of applets. Refer to the table below to ensure that you thoroughly understand the parameters. LiveApplet Parameter Name Omissible Use this parameter to set the background color. The parameter specification format is“#RRGGBB”... - Page 96 Using the Java Viewer to Distribute Videos Parameter Name Omissible superimpose video_width auto_connect bg_image click_action connect_msg controller_style disconnect_msg error_msg font_size image_offset no_connect_msg overlay_font_color show_logo too_many_msg 5-18 Description This function displays a bitmap image as an overlay on the video image. Specify the image using the “bitmap-filename,x,y”...
- Page 97 Glimpse Parameter Name Omissible This parameter specifies the comment text string displayed as an overlay on the comment applet. If this parameter is omitted, no comment is displayed. This parameter specifies the host name displayed in the applet (alphanumeric hostname character only).
- Page 98 Using the Java Viewer to Distribute Videos Applet Tag Descriptions Attribute Name Omissible code codebase width height archive When specifying an address included in the codebase attribute of the applet tag and a URL parameter of the applet, specify one that can be accessed from the client’s computer.
-
Page 99: Using The Helper Viewer To Distribute Videos
If a client is using the Helper Viewer to receive videos, the video sender must set up the Web server and create the necessary wvh files. ● The settings below are not required if the VB-C10/VB-C10R’s built-in Web server is used. - Page 100 192.168.100.1 65311 wvhttp:192.168.100.1 80 ●The first line gives the IP address (or host name) of the VB-C10/VB-C10R and the TCP port number used for the video transmission. The default setting is 65310 (→ P.3-20). The default setting will be used if no particular value is specified.
-
Page 101: Example Of A Web Page Using The Helper Viewer
Include the tags that link to the wvh file in the text or images in the Web page. 1 <A HREF="WebView.wvh">Let's view the image</A> To use the sample page template in the VB-C10/VB-C10R to supply videos, specify <A HREF=http://IP-address/sample/helper/default.wvh>. Using the Helper Viewer to Distribute Videos... -
Page 102: Distributing Videos Using A Browser Only
(or) <IMG SRC=http://192.168.100.1/-wvhttp-01-/GetOneShot> * The underlined portion is a sample IP address. Enter the actual IP address set for the VB-C10/VB-C10R. Displaying a Specified Number Of Live Video Frames As a Video at Access The Server Push format provided as an extended function by Netscape Communications Corp. -
Page 103: Getstillimage Parameters
The example below displays a still picture shot with the camera panned right by 40° and tilted down 10°. <IMG SRC=http://192.168.100.1/-wvhttp-01-/GetStillImage?p=40&t=-10> * The underlined portion is a sample IP address. Enter the actual IP address set for the VB-C10/VB-C10R. GetStillImage Parameters Parameter Specifies the camera pan angle. -
Page 104: Example Of Video Distribution Using One Fixed Global Address
Set the wvh file description of the Helper Viewer (→ P.5-22) as follows: 192.168.1.10 65310 192.168.1.10 65311 wvhttp:192.168.1.10 80 * The underlined portion is a sample IP address. Enter the actual IP address set for the VB-C10/VB-C10R. Contact respective manufacturers for details on setting the router. Note 5-26... -
Page 105: Using The Picture Recording Function
Using the Picture Recording Function This chapter describes a couple of specific examples of the Picture Recording function using the VB-C10/VB-C10R. This function can be used to automatically record still pictures according to a preset schedule or in response to inputs from... -
Page 106: Using The Still Picture Recording Function Linked To An External Device
By combining various sensors and switches to operate according to External Device Input settings, it is possible to build a monitoring system that responds to external events. Still pictures are recorded in the VB-C10/VB-C10R’s memory (→ P.3-16). Sample Application Combining a Door-opening Sensor This is a monitoring system in which the VB-C10R installed in the ceiling records pictures every second for 3 seconds before the doors opens and 7 seconds after the door opens between 5 p.m. - Page 107 Using the Still Picture Recording Function Linked to an External Device ○ ○ ○ ○ ○ ○ ○ ○ ○ Sample Still Picture Recording Settings Settings specified on the “Camera Settings” page (→ P.3-11) Specify the appropriate settings for the VB-C10R being used. Settings specified on the “Preset Settings”...
-
Page 108: Using The Still Picture Recording Function With A Predetermined Schedule
Using the Still Picture Recording Function with a Predetermined Schedule By using the “Schedule” setting, you can construct a monitoring system that records pictures according to a predetermined schedule. Recorded still pictures are stored in the VB-C10/VB- C10R’s memory (→ P.3-17). - Page 109 ● The number of still pictures that can be recorded depends on size of the pictures. Check the average file size per still picture in advance (→ P.3-17 and 3-22). Note ● Still pictures beyond VB-C10/VB-C10R’s capacity can be recorded if VBCollector is used to automatically download still pictures recorded by the VB-C10/VB-C10R (→ P.6-6).
-
Page 110: Viewing Recorded Pictures
Viewing Recorded Pictures VBCollector is used to view pictures recorded by the VB-C10/VB-C10R. With VBCollector, you can collect and display still pictures recorded by the VB-C10/VB-C10R based on inputs from an external device or schedules. VBCollector accesses the VB-C10/VB-C10R at specific times expressed in units such as dates, weeks, or months, and then downloads the recorded pictures. -
Page 111: Installing Vbcollector
If power to the PC is already on and Windows is running, exit all other applications before installing VBCollector. Please also be sure to close the Windows Service Panel. 2. Insert the CD-ROM supplied with the VB-C10/VB-C10R into the PC’s CD-ROM drive, and follow the procedure below. -
Page 112: Starting Up Vbcollector
Choose [Program]-[WebView Livescope]-[VBCollector Task View] from the Start menu to start up VBCollector. Registering a Server To use VBCollector for downloading pictures from the VB-C10/VB-C10R (hereafter referred to as “server”), the server must first be registered. Adding a Server Add a new server to which VBCollector will download pictures. - Page 113 Enter the proxy server port number. (The default is 8080.) * PPP Dialup Connection cannot be used with the VB-C10/VB-C10R. If the picture recording function of the VB-C10/VB-C10R is to be used, this function is conveniently used when “Delete images on the server” is selected.
-
Page 114: Registering Tasks
Viewing Recorded Pictures Editing Server Information Content of the registered server information can be edited. ○ ○ ○ ○ ○ ○ To Edit Server Information... 1. Choose “Edit” from the Server menu, and when the Server List dialog box appears, select the server name to be edited and click the “Edit”... - Page 115 2. Enter the various items and click the “OK” button. ●Task Name Assign the task a name. “Enable this setting” Select “Enable this setting” if the task is to be performed according to the schedule. If not selected, the added task will not be executed.
-
Page 116: Executing And Canceling Tasks
Viewing Recorded Pictures Editing Tasks The details of a registered task can be edited. ○ ○ ○ ○ ○ ○ To Edit a Task... 1. In the Task View, select the task to be edited by clicking on its name, then choose “Edit Task”... -
Page 117: Details Displayed On The Task View
Details Displayed on the Task View The execution status can be checked on the Task View. ●Task Name The names that were specified at Task Settings are displayed here. The status of each task is displayed as an icon at the left of the name. Running This task is currently being executed. -
Page 118: Starting/Stopping The Service
Viewing Recorded Pictures Starting/Stopping the Service The task scheduler service can be started and stopped. ○ ○ ○ ○ ○ ○ To Make Settings... Viewing Recorded Images The images that were downloaded according to the task schedule are saved in the folder specified at Server Information. - Page 119 3. When the confirmation dialog box appears, click the “OK” button. 4. HTML for displaying the images is generated, the Web browser starts up, and thumbnail images of the selected date are displayed in 100-image units on the page. Click on the image to be viewed; it is displayed in the original saved dimensions.
-
Page 120: Viewing Logs
Viewing Recorded Pictures Viewing Logs VBCollector outputs logs concerning the execution of tasks. To view a log, choose “Display Log” from the Tools menu. The following information about logs is displayed: 1 Code Identification codes are displayed here. Four types of icons representing the level are also displayed with these codes. - Page 121 Displaying Logs According to Selection Criteria Logs can be filtered according to type, code, or date and time so that only the required information is displayed. ○ ○ ○ ○ ○ ○ To Make Settings... 1. Choose Filter from the View menu. 2.
-
Page 122: Setting Download Capacity
Viewing Recorded Pictures Setting Download Capacity In order to perform downloads based on a task schedule, you can set the upper limit on the number of pictures or specify the response to be made in the event the specified percentage on available space on the drive where pictures are to be saved is exceeded. -
Page 123: Troubleshooting
Chapter Troubleshooting This chapter explains how to deal with problems that arise with the operation of the VB-C10/VB-C10R and other faults. -
Page 124: Log Messages
Troubleshooting Before you contact your Canon dealer or service outlet, check the items listed below. If a log message is displayed, refer to the log message list for the log details and the appropriate response. The VB-C10/VB-C10R does not start up. The Camera LED does not light. - Page 125 User’s Manual (Mon-E.pdf) contained on the supplied CD-ROM. ● If the video quality is poor, check the quality settings on the VB-C10/VB-C10R (→ P.3-11). Also, check settings such as the number of background colors as on the viewer PC.
-
Page 126: Log Messages
VB-C10 (VB-C10R) [1] malfunction (%1) Error (read|write|timeout|...) Explanation Camera control I/O error. Response If this occurs frequently, this is a malfunction. Contact an authorized Canon service representative. ● A022 Applet archive load failure (warning) Message archive/%1 not found Applet archive name (glimpse.cab|glimpse.zip|lvapplet.cab|lvapplet.zip|imagemap. gif) Explanation The applet archive file does not exist or is corrupted. - Page 127 ● A023 Status change of external input devices (err) Message a %1 detected at %2 external device input change (front-edge|rear-edge) external device terminal (In1) A change was detected at external device terminal In1. “front edge” denotes OFF → ON and Explanation “rear-edge”...
-
Page 129: Chapter 8 Appendix
Chapter Appendix... -
Page 130: Specifications
●These specifications are subject to change without notice due to product improvements, etc. VB-C10/VB-C10R Linux TCP/IP, HTTP, BOOTP, FTP and WebView (from Canon) Motion-JPEG (video quality settings variable from 1 to 5) JPEG (for still pictures) 160 × 120, 320 × 240, 640 × 480 (pixel) 80 ×... -
Page 131: External Device I/O Terminals
The output terminals use optocouplers and are separate from the internal circuit in the VB-C10/VB-C10R. * External input status can be checked and external output status can be controlled using Admin Viewer (→... -
Page 132: Restoring The Factory Default Settings
Restoring the Factory Default Settings Since the VB-C10/VB-C10R supports a wide variety of functions, we recommend that you make a note of the settings for each function (→ P.8-6). If you want to redo the settings from the beginning because you have forgotten them or for some other reason, first restore the factory default settings. -
Page 133: If The Ip Address And Password Are Unknown
If the IP Address and Password are Unknown If the VB-C10/VB-C10R’s IP address or administration password are not known or have been forgotten, the VB-C10/VB-C10R cannot be operated over a network. In this case, press the Reset switch at the bottom of the unit. -
Page 134: Factory Default Setting
Left/Right value Telephoto/Wide-angel None ●Preset ●Picture recording ●Access Control ●User list Setting Item Setting 1 ( (y) (m) (d)) Item setting 2 ( (y) (m) (d)) root VB-C10 admin +9 (Japan time) 192.168.100.1 255.255.0.0 192.168.100.254 320 × 240 Standard Auto... - Page 135 Item ●WebView Livescope Video Transmission Port 65310 Camera Control Port 65311 Max Clients Control Queue Length 20 Max Frame rate (fps) 30.0 Max View Time (sec) 0 Max Camera Control Time (sec) 20 Camera Stabilization Time (ms) 1500 Service time restriction None ●Miscellaneous Settings HTTP Port Global Address for...
-
Page 136: Index
External device names ... 3-17 External device output terminals (OUT A, OUT B) ... 8-3 Factory default setting ... 8-6 Features of the Helper Viewer ... 5-5 Features of the VB-C10/VB-C10R ... 1-2 Focus mode ... 3-12 FTP client ... 5-8... - Page 137 Hub ... 3-2 Important safety instructions ... ix Initial setup ... 3-3 Initialization ... 2-4 Installing the VB-C10/VB-C10R ... 2-2 Installing the VB-C10R on the ceiling ... 2-2 Installing VBCollector ... 6-7 IP address ... 2-5, 3-3, 3-4, 3-6, 3-7, 3-9, 3-10, 3-21, 4-5 IP installer ...
- Page 138 Index Safe use of equipment ... vii Sample configuration in an ISP environment ... 2-5 Sample LAN environment configuration ... 2-5 Sample network configurations ... 2-5 Sample page ... 3-6 Saving web page data ... 5-8 Schedule ... 3-17 Screw hole for tripod mounting ... 1-11 Serial No.