Table of Contents
Advertisement
Advertisement
Table of Contents

Related Manuals for Canon SNAPPY LXII BF-8


Summary of Contents for Canon SNAPPY LXII BF-8
-
Page 2: Handling Precautions
5. Use a blower brush to remove dust and sand from the lens and inside the camera. Do not apply any fluids to the lens or body. Take the camera to an authorized Canon service facility for a more thorough cleaning if necessary. - Page 3 This device complies with Part 15 of the FCC Rules. Operation is subject to the following two conditions: (1) This device may not cause harmful interference, and (2) this device must accept any interference received, including interference that may cause undesired operation. Do not make any changes or modifications to the equipment unless otherwise specified in the instructions.
-
Page 4: Précautions D'emploi
Si l’appareil tombe accidentellement dans l’eau, portez-le au service après-vente agréé Canon. Évitez d’exposer l’appareil aux embruns et à une humidité excessive. Si l’appareil a été utilisé à la plage, nettoyez- le soigneusement à l’aide d’un chiffon sec. -
Page 5: Precauciones En La Manipulación
1. Esta cámara no es resistente al agua, y no la deberá usar bajo la lluvia o la nieve. Si la deja caer accidentalmente en el agua, póngase en contacto con un servicio Canon autorizado. 2. Guarde la cámara en un lugar fresco, seco y libre de polvo. -
Page 6: Wichtige Hinweise Zum Gebrauch
1. Diese Kamera ist nicht wasserdicht und eignet sich daher nicht für den Einsatz in Regen oder Schnee. Sollte die Kamera versehentlich ins Wasser fallen, wenden Sie sich an einen autorisierten Canon- Kundendienst. Schützen Sie die Kamera vor salzhaltigem Sprühwasser und übermäßiger Feuchtigkeit. -
Page 7: Precauzioni Per L'uso
Se la si è lasciata cadere accidentalmente in acqua, rivolgersi ad un centro di servizio autorizzato Canon per un controllo. Tenere la macchina al riparo da spruzzi di acqua salata e da eccessiva umidità. -
Page 8: Precauções No Manuseamento
Se a máquina cair acidentalmente à água, entre em contacto com um ponto de assistência autorizado da Canon. Mantenha a máquina afastada de salpicos de sal e humidade excessiva. Se usar a máquina numa praia, limpe-a completamente depois do uso com... -
Page 9: Conventions
´ Conventions The following conventions are used in these instructions: q Warnings you should observe when using the camera. w Additional information on using the camera. Ï Conventions Les symboles suivants sont utilisés dans ces instructions: q Avertissements que vous devez observer lorsque vous utilisez l’appareil. -
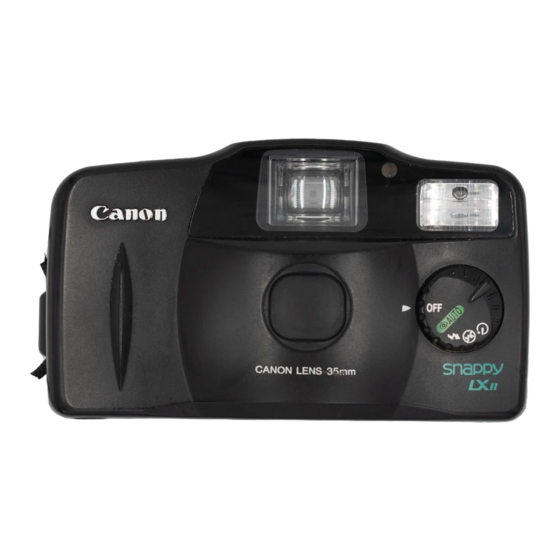
Page 10: Nomenclature
´ Nomenclature q Film Rewind Button w Shutter Button e Frame Counter r Viewfinder Window t Light Metering Window Ï Nomenclature q Touche de rembobinage de film w Déclencheur e Compteur de vues r Fenêtre de viseur t Fenêtre de posemètre Í... -
Page 11: Teilebezeichnungen
˝ Teilebezeichnungen q Filmrückspultaste w Auslöser e Bildzählwerk r Sucherfenster t Belichtungsmeßzelle ˆ Nomenclatura q Tasto di riavvolgimento pellicola w Pulsante di scatto e Contapose r Finestrella del Mirino t Sensore per la misurazione della luce ∏ Nomenclatura q Botão de Rebobinagem do Filme w Disparador e Contador de Exposições... - Page 12 ´ !0 Push-button Release* !1 Strap Fixture !2 Strap Holder !0 Deverrouillage de bouton Ï poussoir* !1 Passant de sangle !2 Anneau de bandoulière Í !0 Desenganche por botón* !1 Enganche de la correa !2 Fijación de la correa *Use the projection on the strap fixture to press small buttons such as the film rewind button and the date...
- Page 13 ˝ !0 Betätigungsknopf* !1 Riemenöse !2 Trageriemenöse !0 Rilascio pulsante* ˆ !1 Attacco per la cinghia !2 Attacco per la tracolla ∏ !0 Botão auxiliar* !1 Presilha para Correia !2 Braçadeira da Correia * Zum Betätigen kleiner Tasten, z.B. der Filmrückspultaste und der Datum-Einstelltasten, verwenden Sie den Vorsprung an der Riemenschnalle.
- Page 14 ´ Nomenclature !3 Viewfinder !4 Green Indicator !5 Film Check Window !6 Battery Cover !7 Tripod Socket !8 SET Button !9 SELECT Button Ï Nomenclature !3 Viseur !4 Témoin vert !5 Fenêtre de contrôle de film !6 Couvercle du logement de piles !7 Écrou de trépied !8 Touche SET !9 Touche SELECT...
- Page 15 ˝ Teilebezeichnungen !3 Sucher !4 Grüne Anzeigelampe !5 Filmfenster !6 Batteriefachdeckel !7 Stativgewinde !8 SET-Taste (Einstellung) !9 SELECT-Taste (Stellenauswahl) ˆ Nomenclatura !3 Mirino !4 Spia verde !5 Finestrella di controllo pellicola !6 Coperchio del comparto batterie !7 Attacco per treppiede !8 Tasto di impostazione (SET) !9 Tasto di selezione (SELECT) ∏...
- Page 16 ´ @0 MODE Button @1 Back Cover Open/Close Latch @2 Date Display Ï @0 Touche MODE @1 Verrou du dos @2 Affichage de la date Í @0 Botón MODE @1 Pestillo de apertura/cierre del respaldo @2 Presentación de fecha...
- Page 17 ˝ @0 MODE-Taste (Datum/Uhrzeit-Format) @1 Rückwandentriegelungs-Taste @2 Datum/Uhrzeit-Anzeige ˆ @0 Tasto di modalità (MODE) @1 Cursore di apertura/chiusura del dorso @2 Indicazione della data ∏ @0 Botão MODE @1 Botão de Abertura/Fecho da Tampa Posterior @2 Exibição da Data...
-
Page 18: Table Of Contents
´ Thank you for purchasing this Canon product. Before taking pictures, please read these instructions carefully for a thorough understanding of how the camera operates. Table of Contents Handling Precautions ...2 Conventions...9 Nomenclature ...10 Table of Contents...18 z Loading the Batteries/Turning the Power On ...24 x Loading the Film ...32... - Page 19 Ï Merci d’avoir acheté ce produit Canon. Avant de prendre des photos, veuillez lire ces instructions attentivement pour bien comprendre comment l’appareil fonctionne. Table des matières Précautions d’emploi ...4 Conventions ...9 Nomenclature ...10 Table des matières...19 z Mise en place des piles/Mise sous tension ...24 x Chargement du film ...32...
-
Page 20: Tabla De Contenidos
Í Muchas gracias por haber comprado este producto Canon. Antes de comenzar a tomar fotografías, lea con atención estas instrucciones para entender completamente cómo funciona la cámara. Tabla de contenidos Precauciones en la manipulación...5 Convenciones tipográficas...9 Nomenclatura ...10 Tabla de contenidos...20 z Carga de las pilas/Encendido de la cámara ...24... - Page 21 ˝ Zunächst einmal vielen Dank für Ihr Vertrauen in den Namen Canon. Bevor Sie die ersten Bilder machen, sollten Sie sich die Zeit nehmen, diese Anleitung aufmerksam durchzulesen, um sich mit den Funktionen und der Handhabung Ihrer Kamera anzufreunden. Inhaltsverzeichnis Wichtige Hinweise zum Gebrauch ...6...
-
Page 22: Indice
ˆ Grazie per aver acquistato questo prodotto Canon. Prima di iniziare a scattare fotografie, leggere attentamente queste istruzioni per una completa comprensione del funzionamento di questa macchina fotografica. Indice Precauzioni per l’uso ...7 Simbologia...9 Nomenclatura ...11 Indice ...22 z Inserimento delle batterie/Accensione della macchina fotografica...25... - Page 23 ∏ Obrigado por ter adquirido este produto Canon. Antes de tirar fotografias, por favor leia atentamente estas instruções para compreender completamente o funcionamento da máquina fotográfica. Sumário Precauções no Manuseamento ...8 Convenções ...9 Nomenclatura ...11 Sumário ...23 z Colocação das Pilhas/Ligação da Alimentação ...25 x Carregamento do Filme...33...
-
Page 24: Loading The Batteries/Turning The Power On
z Loading the Batteries/Turning the Power ´ This camera uses two LR6 AA-size batteries. 1. Turn the camera off and open the battery cover on the bottom of the camera. 2. Load the batteries with the + and – terminals correctly positioned. -
Page 25: Inserimento Delle Batterie/Accensione Della Macchina Fotografica
z Einlegen der Batterien/Einschalten der Kamera ˝ Diese Kamera wird von zwei LR6-Batterien (Größe AA) mit Strom versorgt. 1. Schalten Sie die Kamera aus, und öffnen Sie dann den Batteriefachdeckel an der Unterseite. 2. Legen Sie die Batterien mit korrekt ausgerichteten Polen (+ und –) in das Fach. - Page 26 ´ 3. Turn the mode dial to on) and check the batteries. • Make sure that the lens cover is completely open. • If the green indicator lights up when the shutter button is pressed halfway, the batteries are in good condition. Ï...
- Page 27 ˝ 3. Stellen Sie das Betriebsartenrad auf Einschalten der Kamera), und prüfen Sie dann, ob die Batterien Strom liefern. • Vergewissern Sie sich, daß der Objektivdeckel ganz geöffnet ist. • Wenn die grüne Anzeigelampe bei halb angedrücktem Auslöser leuchtet, sind die Batterien in gutem Zustand. ˆ...
- Page 28 ´ • Always check the batteries before taking any pictures. • Do not use nickel-cadmium or lithium batteries. • When replacing the batteries, be sure to replace both batteries at the same time with new ones. • Always remove the batteries from the camera if you will not be using it for a long time.
- Page 29 ˝ • Bevor Sie Aufnahmen machen, sollten Sie nicht vergessen, den Zustand der Batterien zu überprüfen. • Verwenden Sie keine Nickel-Kadmium- oder Lithium-Batterien. • Ersetzen Sie beim Auswechseln der Batterien stets beide Batterien durch frische. • Nehmen Sie die Batterien stets aus der Kamera, wenn diese voraussichtlich längere Zeit nicht gebraucht wird.
- Page 30 • Autonomía de las pilas: aprox. 50 rollos de película de 24 exposiciones utilizando el flash al 50%. (Datos basados en el Método de prueba estándar de Canon). • Se recomienda usar pilas alcalinas de larga duración. • Si la cámara no funciona después de instalar las pilas...
- Page 31 • Durata delle batterie: circa 50 rullini di pellicola da 24 esposizioni con un uso del flash del 50%. (Dati basati sul metodo standard Canon.) • Si consiglia di impiegare batterie alcaline di lunga durata. • Se la macchina fotografica non funziona dopo che sono state inserite delle batterie nuove, estrarre le batterie e quindi reinserirle.
-
Page 32: Loading The Film
x Loading the Film ´ Use DX-coded ISO 100, 200 or 400 film. The camera automatically detects the film speed and selects the correct setting. 1. Open the back cover. 2. Load a new film. • Pull the film tip across until it reaches the film tip position mark. -
Page 33: X Einlegen Des Films
x Einlegen des Films ˝ Verwenden Sie DX-codierten Film mit der ISO-Empfindlichkeit 100, 200 oder 400. Die Kamera erkennt die Empfindlichkeit dieser Filme automatisch und stellt sich entsprechend ein. 1. Öffnen Sie die Rückwand. 2. Legen Sie einen neuen Film ein. •... - Page 34 ´ 3. Close the back cover. • The film automatically advances. 4. “1” is displayed in the frame counter. Ï 3. Fermez le dos. • Le film avance automatiquement. 4. “1” est affiché sur le compteur de vues. Í 3. Cierre el respaldo. •...
- Page 35 ˝ 3. Schließen Sie die Rückwand. • Der Film wird automatisch bis zum ersten Bild vorgespult. 4. “1” im Bildzählwerk angezeigt wird. ˆ 3. Chiudere il dorso. • La pellicola avanza automaticamente. 4. “1” appare nel contapose. ∏ 3. Feche a tampa posterior. •...
- Page 36 ´ • If “S” is still displayed in the frame counter, reload the film. • If you do insert the batteries after loading film, press the shutter button until “1” is displayed in the frame counter. • This camera is designed to be used with negative film only.
- Page 37 ˝ • Sollte weiterhin “S” im Bildzählwerk angezeigt werden, müssen Sie den Film noch einmal einlegen. • Wenn Sie die Batterien einsetzen, nachdem ein Film eingelegt wurde, drücken Sie den Auslöser, bis “1” im Bildzählwerk angezeigt wird. • Diese Kamera ist nur für den Gebrauch mit Negativfilm vorgesehen.
-
Page 38: Holding The Camera
c Holding the Camera ´ To take sharp pictures, hold the camera firmly so that it does not move. • Hold the camera in both hands. • Rest your elbows lightly against your body. • Look through the viewfinder so that the camera is touching your forehead. -
Page 39: C Halten Der Kamera
c Halten der Kamera ˝ Halten Sie die Kamera ruhig, um ein Verwackeln der Aufnahmen zu vermeiden. • Halten Sie die Kamera mit beiden Händen. • Der bzw. die Ellbogen sollten möglichst am Körper anliegen. • Blicken Sie so durch den Sucher, daß die Kamera die Stirn berührt. - Page 40 ´ • When holding the camera, take care not to block the lens, light metering window or flash with your fingers or hair. Ï • Quand vous prenez en main l’appareil, ayez soin de ne pas obstruer l’objectif, la fenêtre de posemètre ou le flash avec vos doigts ou vos cheveux.
- Page 41 ˝ • Achten Sie beim Fotografieren darauf, daß das Objektiv, die Meßzelle für automatische Belichtung und der Blitz nicht von Haaren oder Fingern verdeckt werden. ˆ • Tenere la macchina fotografica facendo attenzione che i capelli e le dita non ostruiscano l’obiettivo, l’apertura per la misurazione della luce o il flash.
-
Page 42: Viewfinder
v Viewfinder ´ A Picture Frame Compose the picture inside this frame. Green Indicator (when the shutter button is pressed halfway) Lights up: Ready for shooting/Self-timer operates Not lit: Flash not charged or battery power is low. v Viseur Ï A Cadre de photo Cadrez la photo à... -
Page 43: V Sucher
v Sucher ˝ A Bildrahmen Der Bildausschnitt innerhalb dieses Rahmens wird abgelichtet. Grüne Anzeigelampe (bei halb angedrücktem Auslöser) Leuchtet: aufnahmebereit/Selbstauslöser läuft Aus: Blitz nicht geladen oder Batteriespannung zu niedrig. v Mirino ˆ A Riquadro dell’immagine Comporre l’immagine all’interno di questo riquadro. Spia verde (quando il pulsante di scatto è... -
Page 44: Shutter Button Action
b Shutter Button Action ´ This camera has a two-step shutter button. Press it halfway to measure the exposure and the green indicator will light up. Then press it fully to release the shutter. Be sure to press the shutter button slowly and gently. b Déclencheur Ï... -
Page 45: B Auslöserfunktionen
b Auslöserfunktionen ˝ Der Auslöser dieser Kamera ist zweistufig. Zur Belichtungsmessung drücken Sie den Auslöser halb an, so daß die grüne Anzeigelampe leuchtet. Zum Fotografieren drücken Sie den Auslöser dann ganz durch. Drücken Sie den Auslöser langsam und ruckfrei durch. b Funzionamento del pulsante di scatto ˆ... - Page 46 ´ • Check that the lens cover is fully open before pressing the shutter button. The shutter does not operate unless the lens cover is fully open. • There is a very short interval between the shutter button being pressed and the shutter operating. As a general guide, it is best to hold the camera still until you hear the film start to wind forward.
- Page 47 ˝ • Vergewissern Sie sich vor Betätigen des Auslösers, daß der Objektivdeckel geöffnet ist. Der Verschluß arbeitet nur, wenn der Objektivdeckel vollständig offen ist. • Der Verschluß wird nach der Auslöserbetätigung nach einer kurzen Verzögerung ausgelöst. Es empfiehlt sich daher im allgemeinen, die Kamera ruhig zu halten, bis der Film hörbar weitertransportiert wird.
-
Page 48: Taking Pictures (Fully Automatic)
n Taking Pictures (Fully Automatic) ´ Opening the lens cover turns the camera on and sets the mode to fully automatic (Auto Flash). Stand at least 1.5 m (4.9 ft.) from the subject to be taken. 1. Compose the picture. 2. -
Page 49: Scatto Di Fotografie (Modalità Completamente Automatica)
n Fotografieren (vollautomatisch) ˝ Beim Öffnen der Objektivabdeckung wird die Kamera eingeschaltet und auf vollautomatischen Betrieb (Blitzautomatik) eingestellt. Halten Sie eine Aufnahmeentfernung von mindestens 1,5 m ein. 1. Wählen Sie den Bildausschnitt. 2. Drücken Sie den Auslöser halb an, und vergewissern Sie sich, daß... - Page 50 ´ 3. Press the shutter button fully. • In low light conditions, the flash operates automatically. • When the camera is not being used, always close the lens cover to protect the lens against dirt and dust. Ï 3. Appuyez complètement sur le déclencheur. •...
- Page 51 ˝ 3. Drücken Sie den Auslöser schließlich ganz durch. • Bei schwachem Licht wird der Blitz automatisch gezündet. • Schließen Sie auch bei vorübergehenden Aufnahmepausen die Objektivabdeckung, um das Objektiv vor Schmutz und Staub zu schützen. ˆ 3. Premere a fondo il pulsante di scatto. •...
-
Page 52: Removing The Film
m Removing the Film ´ The film rewinds automatically when the last frame is exposed. The number shown in the frame counter decreases during rewinding. Check that the frame counter has returned to “S”, and that the motor has stopped, then remove the film. m Rembobinage du film Ï... -
Page 53: M Entnehmen Des Films
m Entnehmen des Films ˝ Der Film wird nach der letzten Aufnahme automatisch zurückgespult. Die im Bildzählwerk gezeigte Nummer nimmt während des Rückspulvorgangs ab. Wenn “S” im Bildzählwerk gezeigt wird und der Motor zum Stillstand gekommen ist, können Sie den Film aus der Kamera nehmen. - Page 54 ´ 1. Check that the frame counter has returned to “S”. 2. Open the back cover. 3. Remove the film. Ï 1. Vérifiez que le compteur de vues est revenu sur “S”. 2. Ouvrez le dos. 3. Retirez le film. Í...
- Page 55 ˝ 1. Sehen Sie nach, ob das Bildzählwerk “S” anzeigt. 2. Öffnen Sie die Rückwand. 3. Entnehmen Sie den Film. ˆ 1. Controllare che il contapose sia tornato ad “S”. 2. Aprire il dorso. 3. Estrarre la pellicola. ∏ 1. Certifique-se de que o contador de exposições retornou a “S”.
- Page 56 ´ Removing the film in mid-roll • Press the film rewind button • Exposures taken after those indicated on the film roll may be cut off. Ï Rembobinage en cours de film • Appuyer sur la touche de rembobinage du film •...
- Page 57 ˝ Entnehmen des Films vor seinem Ende • Drücken Sie die Rückspultaste • Aufnahmen mit einer Bildzahl, die höher ist als die für den Film angegebene Anzahl an Aufnahmen, werden unter Umständen nicht entwickelt. ˆ Rimozione della pellicola a metà rullino •...
- Page 58 ´ • If, while rewinding the film, the batteries run out, and you must replace them, press the film rewind button . The film will start to rewind again. • Use the projection on the strap fixture. Ï • Si vous devez remplacer les piles pendant le rembobinage du film, appuyez ensuite sur la touche de rembobinage du film •...
- Page 59 ˝ • Sollten beim Zurückspulen die Batterien leer werden, drücken Sie nach dem Auswechseln der Batterien die Rückspultaste zurückgespult. • Verwenden Sie zum Betätigen der Tasten den Vorsprung an der Riemenschnalle. ˆ • Se le batterie si scaricano durante il riavvolgimento della pellicola ed è...
-
Page 60: Changing The Shooting Mode
, Changing the Shooting Mode ´ The flash can be made to fire or can be turned off. Choose the mode suitable for the subject or place you are shooting. Turn the mode dial. q Power OFF w Flash AUTO with red-eye reduction t Self-timer e Flash ON , Changement de mode de prise de vue Ï... -
Page 61: Ändern Der Aufnahmebetriebsart
, Ändern der Aufnahmebetriebsart ˝ Sie können den Blitz bei Bedarf dauerhaft zu- oder ganz abschalten. Wählen Sie die Aufnahmebetriebsart, die für den jeweiligen Aufnahmegegenstand bzw. -ort am besten geeignet ist. Stellen Sie das Betriebsartenrad auf die gewünschte Betriebsart. q Kamera AUS w Blitzautomatik mit Funktion zur Reduzierung des “Rote-Augen”... -
Page 62: Flash Auto With Red-Eye Reduction Mode
´ q Flash AUTO with Red-eye Reduction Mode In low light conditions, the red-eye reduction lamp lights and then the flash fires. Turn the mode dial to q Flash AUTOmatique avec mode anti-yeux rouges Ï Lorsque l’éclairement est insuffisant, la lampe-pilote anti-yeux rouges s’allume et le flash se déclenche. -
Page 63: Modalità Di Flash Automatico Con Riduzione Occhi Rossi
˝ q Blitzautomatik mit Funktion zur Reduzierung des “Rote-Augen” Effekts Bei schwachem Licht leuchtet die Lampe für “Rote-Augen” Effektreduzierung, bevor der Blitz gezündet wird. Stellen Sie das Betriebsartenrad auf q Modalità di flash automatico con riduzione ˆ occhi rossi In condizioni di illuminazione scarsa, la spia di riduzione occhi rossi si illumina e quindi il flash entra in funzione. -
Page 64: Red-Eye Reduction Function
´ Red-eye Reduction Function People in photographs taken with a flash in low light conditions often appear to have glowing red eyes. This phenomenon is called “red-eye” and occurs when the light of the flash is reflected off the subject’s retina. When using conditions, light the red-eye reduction lamp before using the flash. -
Page 65: Funktion Zur Reduzierung Des "Rote-Augen" Effekts
Funktion zur Reduzierung des “Rote-Augen” Effekts ˝ Wenn Personen in dunkler Umgebung mit Blitzlicht fotografiert werden, erscheinen die Augen oft als grellrote Punkte auf dem Bild. Dieses Phänomen wird “Rote-Augen” Effekt genannt und beruht auf Blitzlicht, das durch die weit geöffneten Pupillen in die Augen eintritt und von der Netzhaut reflektiert wird. - Page 66 ´ • To reduce the likelihood of red-eye when taking pictures of people in low light conditions, press the shutter button halfway. Press the button fully to release the shutter about one second after the green indicator lights. • If you press the shutter button fully before the green indicator lights up, the shutter will release, but the red-eye reduction function will not operate.
- Page 67 • Um beim Fotografieren von Personen in schwachem Licht zu ˝ verhüten, daß deren Augen als grellrote Punkte abgelichtet werden, drücken Sie den Auslöser zunächst ungefähr halb an. Etwa eine Sekunde nach Aufleuchten der grünen Anzeigelampe drücken Sie den Auslöser dann ganz durch, um die Aufnahme zu machen. •...
- Page 68 ´ Important guidelines for using the red-eye reduction function 1. This function is not effective unless the subject looks directly at the red-eye reduction lamp while it is lit. Be sure to tell your subject to look straight at the lamp. 2.
- Page 69 ˝ Wichtige Hinweise zum fotografieren mit Funktion zur Reduzierung des “Rote-Augen” Effekts 1. Diese Funktion liefert nur dann gute Ergebnisse, wenn die fotografierten Personen in das Licht der leuchtenden Lampe blicken. Bitten Sie die Personen daher, ihr Augenmerk direkt auf die Lampe zu richten.
-
Page 70: Flash On Mode
´ w Flash ON Mode In this mode, the flash operates regardless of the lighting conditions. Use this mode to soften the contrast when a backlit subject is taken in daylight. Turn the mode dial to w Mode de flash forcé Ï... -
Page 71: W "Blitz Ein" Betriebsart
˝ w “Blitz EIN” Betriebsart Der Blitz wird ohne Berücksichtigung des Umlichts bei jeder Aufnahme mit ausgelöst. Verwenden Sie diese Betriebsart, um die Konturen eines Aufnahmegegenstands bei Gegenlicht weicher erscheinen zu lassen. Stellen Sie das Betriebsartenrad auf w Modalità di flash attivato ˆ... - Page 72 ´ Flash Distance Range (with color print film) ISO 100 1.5 to 3.4 m (4.9 to 11.2 ft.) • In conditions where the red-eye effect is likely to occur (low light conditions etc.), the red-eye reduction feature is activated when the shutter button is pressed halfway.
- Page 73 ˝ Blitzreichweite (mit Farbnegativfilm) ISO 100 1,5 bis 3,4 m • In Situationen, in denen ein Auftreten des “Rote-Augen” Effekts wahrscheinlich ist (z.B. bei schwachem Licht), wird die Funktion zur Reduzierung des “Rote-Augen” Effekts aktiviert, wenn Sie den Auslöser halb andrücken. ˆ...
-
Page 74: Flash Off Mode
´ e Flash OFF Mode Use this mode in locations where flash photography is prohibited or when you want to take pictures using only the available light. Turn the mode dial to e Mode de flash débrayé Ï Utilisez ce mode dans les lieux où la photographie au flash est interdite ou quand vous voulez photographier en utilisant uniquement la lumière ambiante. -
Page 75: E "Blitz Aus" Betriebsart
˝ e “Blitz AUS” Betriebsart Verwenden Sie diese Betriebsart an Orten, wo Blitzaufnahmen verboten sind, oder wenn Aufnahmen nur mit dem zur Verfügung stehenden Umlicht gemacht werden sollen. Stellen Sie das Betriebsartenrad auf e Modalità di flash disattivato ˆ Usare questa modalità in luoghi in cui è proibito scattare fotografie con il flash o con il flash quando si desidera fotografare utilizzando soltanto la luce disponibile. -
Page 76: Self-Timer Mode
´ r Self-timer Mode You can use the self-timer mode to include yourself in pictures by delaying the shutter release. Place the camera on a steady surface, or mount it in a tripod when using the self-timer mode. 1. Turn the mode dial to 2. -
Page 77: R Selbstauslöser-Betriebsart
˝ r Selbstauslöser-Betriebsart Mit dem Selbstauslöser können Sie die Verschlußauslösung verzögern, um auch selbst mit ins Bild zu kommen. Stellen Sie die Kamera hierzu auf eine stabile Unterlage oder ein Stativ. 1. Stellen Sie das Betriebsartenrad auf 2. Wählen Sie den Bildausschnitt. r Modalità... - Page 78 ´ 3. Press the shutter button. The green indicator lamp lights and the self-timer starts. • The red-eye reduction/self-timer lamp starts flashing and the shutter is released after approximately 10 seconds. Ï 3. Pressez le déclencheur. Le témoin vert s’allume et le retardateur commence.
- Page 79 ˝ 3. Drücken Sie die Auslöser. Die grüne Anzeigelampe leuchtet, und der Selbstauslöser läuft an. • Die Lampe für “Rote-Augen” Effektreduzierung/Selbstauslöser beginnt zu blinken, und der Verschluß wird 10 Sekunden später ausgelöst. ˆ 3. Premere il pulsante di scatto. La spia verde si ilumina e l’autoscatto inizia a funzionare.
- Page 80 ´ To cancel the self-timer • Turn the mode dial to a different setting. • For the last 2 seconds before the picture is taken, the red-eye reduction/self-timer lamp blinks rapidly. When the red-eye reduction function is operating, it lights continuously for the last 2 seconds before the picture is taken.
- Page 81 ˝ Zum Abschalten der Selbsauslöserfunktion • Stellen Sie das Betriebsartenrad auf eine andere Betriebsart. • Die letzten 2 Sekunden vor Auslösen des Verschlusses blinkt die Lampe für “Rote-Augen” Effektreduzierung/Selbstauslöser. Bei Aufnahmen mit Funktion zur Reduzierung des “Rote-Augen” Effekts leuchtet die Lampe in diesem Zeitraum kontinuierlich. ˆ...
-
Page 82: Imprinting The Date And Time
. Imprinting the Date and Time ´ Press the MODE button to select the date and time to be imprinted on the photograph. Each time the button is pressed, the selection changes as shown above. . Impression de la date et l’heure Ï... -
Page 83: Datum/Uhrzeit-Einblendung
. Datum/Uhrzeit-Einblendung ˝ Wählen Sie mit der MODE-Taste das Datum/Uhrzeit-Format, das in die Aufnahme eingeblendet werden soll. Das Format wechselt bei wiederholtem Drücken der Taste nach dem oben dargestellten Schema. . Sovrimpressione della data e dell’ora ˆ Premere il tasto MODE per selezionare la data e l’ora da sovrimporre alla fotografia. - Page 84 ´ • Use the projection on the strap fixture to press the buttons. • When the shutter is released, the imprinting confirmation mark q flashes to indicate that the date or time has been imprinted. • If the background of the imprinting position is bright or includes an orange or white subject, the figures imprinted may be difficult to see.
- Page 85 ˝ • Verwenden Sie zum Betätigen der Tasten den Vorsprung an der Riemenschnalle. • Bei der Verschlußauslösung blinkt das Einblendzeichen q zur Bestätigung, daß die Aufnahme mit Datum/Uhrzeit- Einblendung gemacht wurde. • Wenn an der Einblendstelle im Bild ein orangefarbener oder weißer Gegenstand abgelichtet wurde, sind die Zeichen auf dem Bild unter Umständen nur schwer zu erkennen.
-
Page 86: Setting The Date
⁄0 Setting the Date ´ The camera has a built-in automatic calendar that runs until the year 2049, so there is no need to set the date each time pictures are taken. However, the procedure below describes how to correct the date when you are traveling overseas or have replaced the battery. -
Page 87: Einstellen Von Datum
⁄0 Einstellen von Datum ˝ Die Kamera ist mit einer eingebauten automatischen Kalenderfunktion versehen, die bis zum Jahr 2049 vorprogrammiert ist. Das Datum braucht daher vor Gebrauch nicht jedesmal wieder neu eingestellt zu werden. Dieser Abschnitt beschreibt, wie Sie das Datum neu einstellen, wenn Sie ins Ausland reisen oder die Batterie ausgewechselt haben. - Page 88 ´ 2. Press the SELECT button. • Press until the digit to be corrected blinks. 3. Press the SET button. • Correct the digit. 4. Press the SELECT button until all digits stop blinking. • When all the digits are lit, no longer blinking, the setting is complete.
- Page 89 MODE SELECT ˝ 2. Drücken Sie die SELECT-Taste. • Drücken Sie die Taste, bis die zu korrigierenden Anzeigestellen auf dem Display blinken. 3. Drücken Sie die SET-Taste. • Stellen Sie den richtigen Wert ein. 4. Drücken Sie abschließend die SELECT-Taste, bis keine der Anzeigestellen mehr blinkt.
- Page 90 ´ • The automatic calendar will not work correctly if only the date has been set. Always set the time as well. • Pressing the SET button once moves to the next digit. Hold the SET button down to move through the digits in succession.
- Page 91 ˝ • Wenn Sie lediglich das Datum einstellen, kann die automatische Kalenderfunktion nicht einwandfrei arbeiten. Stellen Sie daher unbedingt auch die aktuelle Uhrzeit ein. • Kurzes Antippen der SET-Taste bewirkt Weiterschaltung um “1”. Zum übergangslosen Weiterschalten können Sie die Taste auch gedrückt halten. •...
-
Page 92: Setting The Time
⁄1 Setting the Time ´ The camera has a built-in automatic calendar that runs until the year 2049, so there is no need to set the time each time pictures are taken. However, the procedure below describes how to correct the time when you are traveling overseas or have replaced the battery. -
Page 93: Einstellen Von Uhrzeit
⁄1 Einstellen von Uhrzeit ˝ Die Kamera ist mit einer eingebauten automatischen Kalenderfunktion versehen, die bis zum Jahr 2049 vorprogrammiert ist. Die Uhrzeit braucht daher vor Gebrauch nicht jedesmal wieder neu eingestellt zu werden. Dieser Abschnitt beschreibt, wie Sie die Uhrzeit neu einstellen, wenn Sie ins Ausland reisen oder die Batterie ausgewechselt haben. - Page 94 ´ 2. Press the SELECT button. • Press until the digit to be corrected blinks. 3. Press the SET button. • Correct the digit. 4. Press the SELECT button until all digits stop blinking. • When all the digits are lit, no longer blinking, the setting is complete.
- Page 95 ˝ 2. Drücken Sie die SELECT-Taste. • Drücken Sie die Taste, bis die zu korrigierenden Anzeigestellen auf dem Display blinken. 3. Drücken Sie die SET-Taste. • Stellen Sie den richtigen Wert ein. 4. Drücken Sie abschließend die SELECT-Taste, bis keine der Anzeigestellen mehr blinkt. •...
- Page 96 ´ • Pressing the SET button once moves to the next digit. Hold the SET button down to move through the digits in succession. • Use the projection on the strap fixture to press the buttons. Ï • Une seule pression sur la touche SET déplace le réglage au chiffre suivant.
- Page 97 ˝ • Kurzes Antippen der SET-Taste bewirkt Weiterschaltung um “1”. Zum übergangslosen Weiterschalten können Sie die Taste auch gedrückt halten. • Verwenden Sie zum Betätigen der Tasten den Vorsprung an der Riemenschnalle. ˆ • Premere una volta il tasto SET per spostarsi alla cifra successiva.
-
Page 98: Replacing The Date Battery
´ Replacing the Date Battery When the digits imprinted on photographs become faint regardless of the background, replace the date battery. One CR2025 lithium battery is used to maintain the date. Ï Remplacement de la pile du dateur Quand les chiffres imprimés sur les photos deviennent illisibles quel que soit l’arrière-plan, remplacez la pile du dateur. -
Page 99: Auswechseln Der Datum/Uhrzeit-Batterie
˝ Auswechseln der Datum/Uhrzeit-Batterie Wenn eingeblendete Zeichen sich auch auf dunklem Hintergrund nur schwach abheben, müssen Sie die Datum/Uhrzeit-Batterie durch eine neue ersetzen. Die Datum/Uhrzeit-Funktion wird von einer CR2025-Lithiumbatterie mit Strom versorgt. ˆ Sostituzione della pila per il datario Quando le cifre sovrimpresse sulle fotografie risultano indistinte indipendentemente dallo sfondo, sostituire la pila per il datario. - Page 100 ´ 1. Open the back cover and flip up the date battery cover. 2. Remove the battery and insert a new battery with the positive (+) terminal upwards. 3. Close the date battery cover, then close the back cover. 4. Readjust to the correct date/time. Ï...
- Page 101 ˝ 1. Öffnen Sie die Rückwand, und klappen Sie den Deckel des Datumbatteriefachs auf. 2. Entnehmen Sie die alte Batterie, und legen Sie dann die frische mit dem Pluspol (+) nach oben ein. 3. Klappen Sie den Deckel des Datumbatteriefachs zu, um danach die Rückwand wieder zu schließen.
- Page 102 ´ • When you replace the date battery, the date shown on the date display changes. Set the correct date and time. • Ensure that the battery is kept out of the reach of small children. Ï • Lorsque vous remplacez la pile de l’horodateur, la date figurant sur l’affichage change.
- Page 103 ˝ • Beim Auswechseln der Datum/Uhrzeit-Batterie wird die Datum/Uhrzeit-Anzeige rückgesetzt. Stellen Sie Datum und Uhrzeit neu ein. • Achten Sie darauf, daß die Batterie nicht in Kinderhände gerät! ˆ • Quando si sostituisce la batteria per la data, la data indicata sul display della data cambia.
-
Page 104: Troubleshooting
´ Troubleshooting In case of trouble check the table below before taking you camera to be repaired. Problem Green indicator does not light up. The shutter does not release. The camera does not work even after new batteries have been installed. The photographs are blurred. -
Page 105: Avant De S'adresser Au S.a.v
Ï Avant de s’adresser au S.A.V. En cas de problème, vérifiez dans le tableau ci-dessous avant d’amener votre appareil à réparer Problème Le témoin vert ne s’allume pas. L’obturateur ne se déclenche pas. L’appareil ne fonctionne pas, même après la mise en place de piles neuves. -
Page 106: Localización De Averías
Í Localización de averías En el caso de que ocurra alguna avería, revise la tabla de abajo antes de llevar su cámara al servicio. Problema El indicador verde no se enciende. El obturador no se libera. La cámara no funciona incluso después de haber instalado las pilas nuevas. -
Page 107: Im Problemfall
˝ Im Problemfall Wenn beim Gebrauch ein Problem auftritt, gehen Sie bitte die folgende Tabelle durch, bevor Sie einen Defekt annehmen. Problem Die grüne Anzeigelampe leuchtet nicht. Der Verschluß wird nicht ausgelöst. Die Kamera funktioniert nach dem Einlegen frischer Batterien nicht. Die Aufnahmen sind verschwommen. -
Page 108: Diagnostica
ˆ Diagnostica In caso di problemi controllare i punti seguenti prima di richiedere la riparazione dell’apparecchio. Problema La spia verde non si illumina. L’otturatore non scatta. La macchina fotografica non funziona neppure dopo che sono state inserite delle batterie nuove. Le fotografie sono sfocate. -
Page 109: Localização E Solução De Problemas
∏ Localização e Solução de Problemas No caso de problemas, verifique a tabela abaixo antes de levar a sua máquina para reparação. Problema O indicador verde não acende. O obturador não é disparado. A máquina não funciona mesmo após a instalação de pilhas novas. -
Page 110: Specifications
No data imprinted; r Month/Day/Year; t Day/Month/Year Imprinting Color: Orange Power Supply: One lithium battery (CR2025) • All data are based on Canon’s Standard Test Method. • Subject to change without notice. ISO 400: 1.5–6.8m (4.9–22.3ft.) 125 (W) × 73 (H) × 50.2 (D) mm 4-29/32 ×... -
Page 111: Spécifications
Couleur d’impression: orange Alimentation: une pile au lithium (CR2025) • Toutes les données sont basées sur la méthode de test standard Canon. • Sous réserve de modifications sans préavis Env. 1/45 f/4,5 à env. 1/180 f/11 (env. IL 10–16) 4-29/32 ×... -
Page 112: Especificaciones
Color de impresión: Anaranjado. Fuente de alimentación: Una pila de litio (CR2025). • Todos los datos se basan en el Método de Pruebas Estándar de Canon. • Sujetos a cambios sin previo aviso. aprox. 1/45 f/4,5 – aprox. 1/180 f/11 (aprox. EV10–16) ISO 400: 1,5–6,8m (4,9 –... -
Page 113: Technische Daten
˝ Technische Daten Typ: vollautomatische 35-mm-Kamera mit Fixfokus-Objektiv und Objektivverschluß Bildformat: 24 × 36 mm Objektiv: Canon 35 mm f/4,5 Aufnahmeentfernung: 1,5 m bis unendlich Verschluß: mit kombinierbaren Programmen Sucher: umgekehrter galiläischer Sucher Filmeinfädelung: automatisch (mit automatischer Vorspulung) Filmtransport: automatisch, Rückspulung vor dem Filmende möglich Bildzählwerk: aufwärtszählend beim Filmtransport, abwärtszählend beim... -
Page 114: Caratteristiche Tecniche
Nessun dato sovrimpresso; r Mese. giorno. anno; t Giorno. mese. anno Colore dei caratteri sovrimpressi: Arancione Alimentazione: Una pila al litio (CR2025) • Tutti i dati sono basati sul metodo di prova secondo le norme Canon. • Caratteristiche tecniche soggette a modifiche senza preavviso. -
Page 115: Especificações
Cor de Impressão: Laranja Alimentação: Uma pilha de lítio (CR2025) • Todos os dados são baseados no Método de Teste Padrão da Canon. • As especificações estão sujeitas a modificações sem aviso prévio. aprox. 1/100 f/4.5 – aprox. 1/180 f/11 (aprox. EV10–16) aprox.