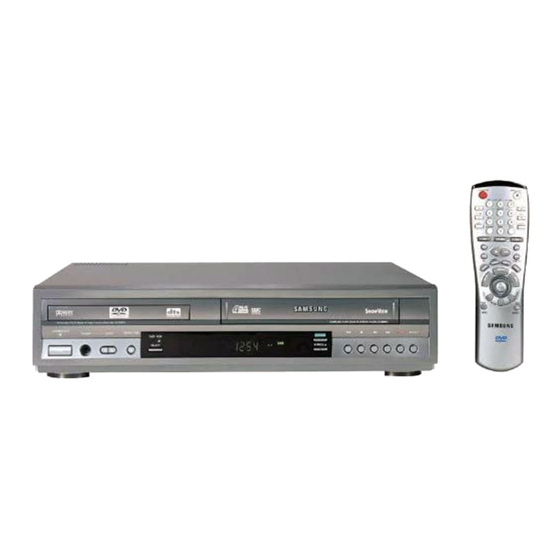
Samsung SV-DVD1E Service Manual
Dvd-vcr combination
Hide thumbs
Also See for SV-DVD1E:
- Service manual (90 pages) ,
- Instruction manual (38 pages) ,
- Specifications (3 pages)
Table of Contents
Advertisement
Quick Links
All manuals and user guides at all-guides.com
ELECTRONICS
© Samsung Electronics Co., Ltd. DEC. 2000
Printed in Korea
AC68-01451A
DVD-VCR COMBINATION
SV-DVD1E
SERVICE
For mechanical disassembly and adjustment, refer to the "Mechanical Manual" (DX-9R
DVD-VCR COMBINATION
STANDBY/ON
PHONES
LEVEL
OPEN/CLOSE
REC
EJECT
DVD VCR
COPY
SELECT
PROG
Manual
AC68-00001A).
CONTENTS
Advertisement
Table of Contents

Related Manuals for Samsung SV-DVD1E


Summary of Contents for Samsung SV-DVD1E
-
Page 1: Table Of Contents
6. Exploded View and Parts List 7. Electrical Parts List STANDBY/ON PHONES LEVEL OPEN/CLOSE EJECT DVD VCR COPY SELECT PROG 8. Block Diagram 9. PCB Diagrams 10. Wiring Diagram 11. Schematic Diagrams © Samsung Electronics Co., Ltd. DEC. 2000 Printed in Korea AC68-01451A... -
Page 2: Precautions
Fig. 1-1 AC Leakage Test 10. Never defeat any of the B+ voltage interlocks. Do not apply AC power to the unit (or any of its assemblies) unless all solid-state heat sinks are correctly installed. Samsung Electronics... - Page 3 Use replacement components that have the same ratings, especially for flame resistance and dielectric strength specifications. A replacement part that does not have the same safety characteristics as the original might create shock, fire or other hazards. Samsung Electronics...
- Page 4 ♦ Be sure to put on a wrist strap grounded to the sheet. ♦ Be sure to lay a conductive sheet made of copper etc. Which is grounded to the table. Samsung Electronics...
- Page 5 SW3 on Deck PCB to “ON”. (See Fig 1-3) 4) Disassemble the Deck PCB. Note : If the assembly and disassembly are not done in correct sequence, the Pick-up may be damaged. FLAT-CABLE TO DVD MAIN PCB (DCN1) Fig. 1-3 Samsung Electronics...
-
Page 6: Product Specifications
Above 43dB (standard recording) Resolution Above 240 lines (standard recording) Audio S/N Above 68dB (Hi-Fi), 39dB (Mono) Audio frequency characteristics 20Hz - 20KHz (Hi-Fi) Disc DVD, CD (12cm), CD (8cm), VIDEO-CD (12cm) Audio S/N 115dB Audio dynamic range 105dB Samsung Electronics... - Page 7 All manuals and user guides at all-guides.com Product Specifications MEMO Samsung Electronics...
-
Page 8: Disassembly And Reassembly
3-1-2 Bottom Cover Removal Œ REMOVE 7 SCREWS ´ RELEASE 3 HOOKS (Bottom View) Fig. 3-3 Ass’y Front Panel Removal 3-1-4 Function-Timer PCB Removal Fig. 3-2 Bottom Cover Removal Œ RELEASE 6 HOOKS Fig. 3-4 Function-Timer PCB Removal Samsung Electronics... - Page 9 3-1-6 VCR Main PCB Removal Œ REMOVE 3 SCREWS When installing the ass'y full deck on the Main PCB, be sure to align the assembly point of mode switch. MODE SWITCH ASSEMBLY POINT Fig. 3-6 VCR Main PCB Removal Samsung Electronics...
- Page 10 All manuals and user guides at all-guides.com Disassembly and Reassembly 3-2 Circuit Board Locations Fig. 3-7 Circuit Board Locations Samsung Electronics...
- Page 11 5) Push the Hook ” in the direction of arrow “A” and lift up the Ass’y P/U Deck ’ in direction of arrow “B”. ˆ 1 SCREW Œ SLED+/SLED- ´ TM+/TM- ¨ CN2 Ø DECK PCB ˇ CN3 ’ ASS'Y P/U DECK ∏ 1 SCREW "B" <Assembly Point> "A" ” HOOK Fig. 3-8 PCB Deck Ass’y and Ass’y P/U Deck Removal Samsung Electronics...
- Page 12 3) Pull the Tray Disc ¨ to disassemble , while simultaneously pushing 2 Stoppers ˆ (left, right) in the direction arrow “C”, “D”. ˆ STOPPER "C" "A" "D" ¨ TRAY DISC "B" ˇ SLIDER HOUSING ˆ STOPPER Œ SCREW DRIVER ´ EMERGENCY HOLE Fig. 3-9 Tray Disc Removal Samsung Electronics...
- Page 13 All manuals and user guides at all-guides.com Disassembly and Reassembly 3-3-3 Slider Housing Removal 1) Push the Slider Housing Œ in the direction arrow “A”. 2) Lift up the Slider Housing Œ. Œ SLIDER HOUSING "A" Assembly PUSH Fig. 3-10 Slider Housing Removal Samsung Electronics...
- Page 14 ˝ CLAMPER ASS'Y Œ BELT ˇ 1 SCREW ¨ PULLEY GEAR ´ 1 SCREW Ø GEAR TRAY ∏ GEAR HOUSING "B" "B" "B" "B" ” 4 HOOKS <Bottom Side> ’ MOTOR LOAD ASS'Y Fig. 3-11 Housing Ass’y Removal Samsung Electronics...
- Page 15 All manuals and user guides at all-guides.com Disassembly and Reassembly 3-3-5 Sub Chassis Removal 1) Remove the 4 Screws Œ. 2) Lift up the Ass’y Brkt Deck ´. Œ 4 SCREWS ´ ASSY-BRAK DECK Fig. 3-12 Sub Chassis Removal Samsung Electronics...
- Page 16 All manuals and user guides at all-guides.com Disassembly and Reassembly 3-3-5 Sub Chassis Removal 1) Remove the 4 Screws Œ. 2) Lift up the Ass’y Brkt Deck ´. Œ 4 SCREWS ´ ASSY-BRAK DECK Fig. 3-12 Sub Chassis Removal Samsung Electronics...
- Page 17 7) Remove 3 Spring Spindle ’ and Motor Spindle Ass’y ˝. ˝ MOTOR SPINDLE Ø PICK-UP ASS'Y ˆ SHAFT PICK-UP ¨ 2 SCREW ’ SPRING SPINDLE Œ WASHER ´ GEAR FEED B ∏ 1 SCREW ” 2 SCREWS ˇ GEAR FEED A Fig. 3-13 Ass’y Brkt Deck Removal Samsung Electronics...
- Page 18 All manuals and user guides at all-guides.com Disassembly and Reassembly MEMO Samsung Electronics 3-10...
- Page 19 TRK- TRK+ SHUTTLE X-Point (Tracking Center) VOLUME PROG Adjustment ; "5" SVHS LAST PR MUTE 3D SOUND A.DUB TV/VCR TV VIEW FRAME/STEP Head Switching Adjustment ; "SPEED" NVRAM Option Setting ; "MENU" MARK REPEAT INDEX MODE Fig. 4-1 Samsung Electronics...
-
Page 20: Alignment And Adjustment
All manuals and user guides at all-guides.com Alignment and Adjustments 4-1-2 SW710 (TEST) location for adjustment mode setting TEST (SW710) BUTTON Fig. 4-2 Function-Timer PCB (Top View) Samsung Electronics... - Page 21 2) Press the “SW710 (TEST)” button on F/Timer PCB 6) Turn the Power off. to set the adjustment mode. (See Fig. 4-2) 3) Press the “5” button of remote control then adjustment is operated automatically. (See Fig. 4-1) Samsung Electronics...
- Page 22 2, 5, 6, 7, 8, 9, 10, 12, 13, 14, 15, 18, 22, 24, 29, 30, 31, 36, 43, 44, 49, 53, 54, 55 Portugal 2, 5, 6, 7, 8, 9, 10, 12, 13, 14, 15, 18, 22, 36, 43, 44, 48, 49, 53, 54, 55 Samsung Electronics...
-
Page 23: Troubleshooting
All manuals and user guides at all-guides.com 5. Troubleshooting Samsung Electronics... - Page 24 All manuals and user guides at all-guides.com Troubleshooting Samsung Electronics...
- Page 25 All manuals and user guides at all-guides.com Troubleshooting Samsung Electronics...
- Page 26 All manuals and user guides at all-guides.com Troubleshooting Samsung Electronics...
- Page 27 All manuals and user guides at all-guides.com Troubleshooting Samsung Electronics...
- Page 28 All manuals and user guides at all-guides.com Troubleshooting Samsung Electronics...
- Page 29 All manuals and user guides at all-guides.com Troubleshooting Samsung Electronics...
- Page 30 All manuals and user guides at all-guides.com Troubleshooting Samsung Electronics...
- Page 31 All manuals and user guides at all-guides.com Troubleshooting Samsung Electronics...
- Page 32 All manuals and user guides at all-guides.com Troubleshooting 5-10 Samsung Electronics...
- Page 33 All manuals and user guides at all-guides.com Troubleshooting Samsung Electronics 5-11...
- Page 34 All manuals and user guides at all-guides.com Troubleshooting 5-12 Samsung Electronics...
- Page 35 All manuals and user guides at all-guides.com Troubleshooting Samsung Electronics 5-13...
- Page 36 All manuals and user guides at all-guides.com Troubleshooting 5-14 Samsung Electronics...
- Page 37 All manuals and user guides at all-guides.com Troubleshooting Samsung Electronics 5-15...
- Page 38 All manuals and user guides at all-guides.com Troubleshooting 5-16 Samsung Electronics...
- Page 39 All manuals and user guides at all-guides.com Troubleshooting Samsung Electronics 5-17...
- Page 40 All manuals and user guides at all-guides.com Troubleshooting 5-18 Samsung Electronics...
- Page 41 All manuals and user guides at all-guides.com Troubleshooting Samsung Electronics 5-19...
- Page 42 All manuals and user guides at all-guides.com Troubleshooting MEMO 5-20 Samsung Electronics...
-
Page 43: Exploded View And Parts List
6-4 DVD Mechanical Parts - - - - - - - - - - - - - - - - - - - - - - - - - - - - - - - - - - - - - 6-8 Samsung Electronics... -
Page 44: Cabinet Assembly
All manuals and user guides at all-guides.com Exploded View and Parts List 6-1 Cabinet Assembly Samsung Electronics... - Page 45 AC60-10063A SCREW-TAPTITE;BH,+,-,M3,L12,ZPC3,SWRCH18 Refer to table 6-1 below POWER CORD;KKP-419C,H03VVH2-F,VDE/KEMA-K Refer to table 6-1 below ASSY PCB-VCR MAIN;DVS-30,FREE,2SCART,RCA AC92-00918A ASSY OPT PCB-SMPS;SV-DVD1E,SMPS Refer to table 6-2 below ASSY PCB-DVD MAIN;SV-DVD1E,MAIN PCB AC92-00789A ASSY OPT PCB-TIMER;SV-DVD1,TIMER 3711-003460 CONNECTOR-HEADER;NOWALL,20P,1R,1.5mm,STR CN3A1B 3809-001111 CABLE-FLAT;30V,80C,130mm,7P,1.25mm,UL289 CN602B 3809-001149 CABLE-FLAT;30V,80C,120MM,5P,1.25MM,UL289...
-
Page 46: Vcr Mechanical Parts (Top Side)
All manuals and user guides at all-guides.com Exploded View and Parts List 6-2 VCR Mechanical Parts (Top Side) Samsung Electronics... - Page 47 LEVER-TENSION ASSY;-,X-9(TS),-,-,-,X-9 K248 AC61-60554A SPRING-TENSION LEVER;-,ES,SUS304-WPB,OD3 K250 AC63-12029A BAND-BRAKE ASSY;-,X-9(TS),-,-,-,X-9 K330 AC66-30550A LEVER-S.BRAKE ASSY;-,POM+SUS,-,-,-,X-9 K340 AC66-30549A LEVER-T.BRAKE ASSY;-,POM+SUS,-,-,-,X-9 K350 AC61-60564A SPRING-BRAKE;-,TENSION,SWP-A,0.25,3,-,X- K490 AC61-21010B HOLDER-CASS ASSY;-,SECC+POM+SUS,-,-,SEIN K502 AC61-60561A SPRING-FL.LEVER-LR;-,ES,SUS304 WPB,PI2.7 K530 AC66-30546A LEVER-FL.ARM ASS’Y;-,SECC+POM+SUS,-,-,-, K546 AC61-50658A GUIDE-CASS. DOOR;-,POM M90-44,-,-,NTR,-, Samsung Electronics...
-
Page 48: Vcr Mechanical Parts (Bottom Side)
All manuals and user guides at all-guides.com Exploded View and Parts List 6-3 VCR Mechanical Parts (Bottom Side) Samsung Electronics... - Page 49 B488 AC66-30543A LEVER-S LOAD ASSY;-,-,-,-,-,X-9 B500 AC66-30542A LEVER-T LOAD ASSY;-,-,-,-,-,X-9 B560 AC31-12017A MOTOR-CAPSTAN;DMVCMC07C,-,X-9 B570 AC60-10514A SCREW-CAPSTAN;-,PH,+,M2.6,L6,- G542 AC66-60051A BELT-PULLEY;-,5CM-70,2 * 2,-,71.3,-,X-9 K200 AC61-21012A HOLDER-CLUTCH ASSY;-,-,-,-,-,X-9 K221 AC66-20581A GEAR-CENTER ASSY;-,POM,M=O.5,-,HIGHT T., K222 AC60-30306A WASHER-SLIT;-,-,ID2.1,OD5.0,T0.5,-,POLYS K225 AC66-30547A LEVER-UP DOWN ASSY;-,POM+SUS,-,-,-,X-9 Samsung Electronics...
-
Page 50: Dvd Mechanical Parts
Exploded View and Parts List 6-4 DVD Mechanical Parts H107 H103 H102 H100 H108 H105 H104 H109 S.N.A. H110 H106 H220 H200 H203 H202 H202 S.N.A. H206 H207 H205 H204 H208 H210 S.N.A. H240 H241 S.N.A. : Service Not Available Samsung Electronics... - Page 51 AH61-50327A SHAFT-P/U;DP,SUS420J2,OD3,L84.7,S/FINISH H204 AH66-00075A GEAR-FEED A;-,POM M90-44,-,-,-,-,-,-,-,- H205 AH66-00076A GEAR-FEED B;-,POM M90-44,-,-,-,-,-,-,-,- H206 AC60-30306A WASHER-SLIT;-,-,ID2.1,OD5.0,T0.5,-,POLYS H207 AH31-00017A MOTOR-SPINDLE ASSY;-,DP-5,-,- H208 AH61-00403A SPRING-SPINDLE;-,SWPB,-,CS,PI4.9,PI0.7,- H210 AH31-00016A MOTOR-FEED ASSY;-,DP-5,-,- H220 AJ97-00014A ASSY-PICK-UP;SOH-D2A,-,- H240 AH92-00609A ASSY PCB-DECK;DVD-811/XAA,VALINO DECK 2L H241 3809-001208 CABLE-FLAT;30V,80C,300mm,40P,1.25mm,UL28 Samsung Electronics...
- Page 52 All manuals and user guides at all-guides.com Exploded View and Parts List MEMO 6-10 Samsung Electronics...
-
Page 53: Electrical Parts List
2203-001579 C-CERAMIC,CHIP;15nF,10%,50V,NP0,TP,2012 R695 2001-000429 R-CARBON;1KOHM,5%,1/8W,AA,TP,1.8X3.2MM CN01 3708-001364 CONNECTOR-FPC/FC/PIC;35P,1.25MM,STRAIGHT S601 0603-001011 PHOTO-TR;NPN,35V,6V,50mA,75mW,BK CN1P1 3711-000596 CONNECTOR-HEADER;BOX,10P,1R,2mm,STRAIGHT S602 0603-001011 PHOTO-TR;NPN,35V,6V,50mA,75mW,BK CN1P2 AC39-00055A CBF HARNESS;SV-DVD1E,-,-,10P,80,-,-,5264 SW601 AC34-20100A SWITCH-MODE;-,-,X-9,- CN601 AC39-20817S LEAD CONNECTOR-ASSY;DP,SMH200-02,YBH200- SW602 AC34-20100B SWITCH-REC;-,-,X-9,- CN602 3708-001163 CONNECTOR-FPC/FC/PIC;5P,1.25mm,STRAIGHT, W007 2701-000002 INDUCTOR-AXIAL;100uH,10%,4.2x9.8mm CN603 3710-001146 CONNECTOR-SOCKET;20P,1R,1.5mm,ANGLE,SN... - Page 54 2007-000468 R-CHIP;1KOHM,5%,1/10W,DA,TP,2012 C3A13 2203-000323 C-CERAMIC,CHIP;12nF,10%,50V,X7R,TP,2012, R312 2007-000241 R-CHIP;1.5KOHM,5%,1/10W,DA,TP,2012 C3A14 2203-001105 C-CERAMIC,CHIP;6.8nF,10%,50V,X7R,TP,2012 R313 2007-000572 R-CHIP;220OHM,5%,1/10W,DA,TP,2012 C3A15 2203-001388 C-CERAMIC,CHIP;10nF,5%,50V,X7R,TP,2012 R314 2007-001118 R-CHIP;680OHM,5%,1/10W,DA,TP,2012 C3A16 2401-003122 C-AL;4.7uF,20%,50V,LL,TP,4X7,1.5 R315 2007-000518 R-CHIP;2.7KOHM,5%,1/10W,DA,TP,2012 C3A17 2401-000407 C-AL;10uF,20%,16V,GP,TP,3.5x5,2.5 R316 2001-000221 R-CARBON;1.2KOHM,5%,1/8W,AA,TP,1.8X3.2M C3A18 2203-001592 C-CERAMIC,CHIP;1nF,5%,50V,X7R,TP,2012 R317 2007-000766 R-CHIP;330OHM,5%,1/10W,DA,TP,2012 Samsung Electronics...
- Page 55 AR29 2007-000468 R-CHIP;1KOHM,5%,1/10W,DA,TP,2012 C402 2202-002037 C-CERAMIC,MLC-AXIAL;100nF,80-20%,50V,Y5V 2007-000468 R-CHIP;1KOHM,5%,1/10W,DA,TP,2012 C403 2401-003107 C-AL;47uF,20%,16V,GP,TP,5x7,5 AR30 2007-000468 R-CHIP;1KOHM,5%,1/10W,DA,TP,2012 C404 2401-001085 C-AL;330nF,20%,50V,GP,-,5x9,2mm AR31 2001-000429 R-CARBON;1KOHM,5%,1/8W,AA,TP,1.8X3.2MM C405 2401-003046 C-AL;47uF,20%,50V,WT,TP,6.3x11,2.5 AR32 2007-000221 R-CHIP;1.2KOHM,5%,1/10W,DA,TP,2012 C407 2401-003107 C-AL;47uF,20%,16V,GP,TP,5x7,5 AR33 2007-000221 R-CHIP;1.2KOHM,5%,1/10W,DA,TP,2012 C408 2202-002037 C-CERAMIC,MLC-AXIAL;100nF,80-20%,50V,Y5V AR35 2007-000300 R-CHIP;10KOHM,5%,1/10W,DA,TP,2012 Samsung Electronics...
- Page 56 C-AL;1uF,20%,50V,GP,TP,3x5,5 C526 2401-001507 C-AL;47uF,20%,16V,GP,TP,6.3x5,5 C802 2401-000463 C-AL;10uF,20%,35V,GP,-,5x5,2mm C527 2203-000192 C-CERAMIC,CHIP;100nF,+80-20%,50V,Y5V,TP, C803 2401-000463 C-AL;10uF,20%,35V,GP,-,5x5,2mm C530 2401-000598 C-AL;1uF,20%,50V,GP,TP,4x7,5 C804 2203-000239 C-CERAMIC,CHIP;0.1nF,5%,50V,NP0,TP,2012 IC501 1204-001479 IC-AUDIO PROCESSOR;LA72634AM,QFP,64P,400 C805 2401-000463 C-AL;10uF,20%,35V,GP,-,5x5,2mm L502 2701-000002 INDUCTOR-AXIAL;100uH,10%,4.2x9.8mm C806 2401-000463 C-AL;10uF,20%,35V,GP,-,5x5,2mm L503 2701-000002 INDUCTOR-AXIAL;100uH,10%,4.2x9.8mm C807 2401-000463 C-AL;10uF,20%,35V,GP,-,5x5,2mm Samsung Electronics...
- Page 57 2401-002144 C-AL;47uF,20%,16V,GP,TP,5x11,5 L804 2701-000145 INDUCTOR-AXIAL;1uH,5%,2.4x3.4mm VIC1 1201-001419 IC-VIDEO AMP;7660,SSOP,16P,173MIL,3,6DB, L805 2701-000181 INDUCTOR-AXIAL;33uH,5%,2.4x3.4mm VIC2 1201-001419 IC-VIDEO AMP;7660,SSOP,16P,173MIL,3,6DB, L806 2701-000181 INDUCTOR-AXIAL;33uH,5%,2.4x3.4mm 2701-000145 INDUCTOR-AXIAL;1uH,5%,2.4x3.4mm L807 2701-000181 INDUCTOR-AXIAL;33uH,5%,2.4x3.4mm VL112 3301-000353 CORE-FERRITE BEAD;AB,120ohm,2x1.25x0.9mm L808 2701-000181 INDUCTOR-AXIAL;33uH,5%,2.4x3.4mm 2701-000145 INDUCTOR-AXIAL;1uH,5%,2.4x3.4mm L809 2701-000181 INDUCTOR-AXIAL;33uH,5%,2.4x3.4mm 2701-000145 INDUCTOR-AXIAL;1uH,5%,2.4x3.4mm Samsung Electronics...
- Page 58 C-FILM,PEF;100nF,5%,50V,TP,10X9X4.3X5,5m ZD802 0403-001211 DIODE-ZENER;MTZJ12B,11.44-12.03V,500MW,D 2301-000129 C-FILM,PEF;100nF,5%,50V,TP,10X9X4.3X5,5m CN01 3711-000178 CONNECTOR-HEADER;1WALL,2P,1R,3.96mm,STRA A2/NICAM PARTS CN04 AC39-00041A LEAD CONNECTOR-ASSY;001-003008,-,-,8P,11 C4N01 2203-000151 C-CERAMIC,CHIP;1.5nF,5%,50V,NP0,TP,2012 CN12 AC39-00055A CBF HARNESS;SV-DVD1E,-,-,10P,80,-,-,5264 C4N02 2401-000407 C-AL;10uF,20%,16V,GP,TP,3.5x5,2.5 CN13 3711-000596 CONNECTOR-HEADER;BOX,10P,1R,2mm,STRAIGHT C4N03 2203-000595 C-CERAMIC,CHIP;0.22nF,5%,50V,NP0,TP,2012 0402-001196 DIODE-RECTIFIER;1T5,600V,1A,TS-1,TP C4N04 2401-000665 C-AL;2.2uF,20%,50V,GP,TP,3.5x5,5 0402-001196 DIODE-RECTIFIER;1T5,600V,1A,TS-1,TP C4N05 2203-000260 C-CERAMIC,CHIP;10nF,10%,50V,X7R,TP,2012...
- Page 59 RC25 2203-005148 C-CERAMIC,CHIP;100nF,10%,16V,X7R,TP,1608 MC12 2203-000257 C-CERAMIC,CHIP;10nF,10%,50V,X7R,TP,1608 RC26 2203-005148 C-CERAMIC,CHIP;100nF,10%,16V,X7R,TP,1608 MC13 2203-000257 C-CERAMIC,CHIP;10nF,10%,50V,X7R,TP,1608 RC27 2203-005148 C-CERAMIC,CHIP;100nF,10%,16V,X7R,TP,1608 MC14 2203-000257 C-CERAMIC,CHIP;10nF,10%,50V,X7R,TP,1608 RC29 2401-000414 C-AL;10uF,20%,16V,GP,TP,4x7,5 MC15 2203-000257 C-CERAMIC,CHIP;10nF,10%,50V,X7R,TP,1608 2203-005148 C-CERAMIC,CHIP;100nF,10%,16V,X7R,TP,1608 MC16 2203-000257 C-CERAMIC,CHIP;10nF,10%,50V,X7R,TP,1608 RC30 2203-005148 C-CERAMIC,CHIP;100nF,10%,16V,X7R,TP,1608 MC17 2203-000257 C-CERAMIC,CHIP;10nF,10%,50V,X7R,TP,1608 RC31 2203-000236 C-CERAMIC,CHIP;0.1nF,5%,50V,NP0,TP,1608 Samsung Electronics...
- Page 60 2007-000093 R-CHIP;20Kohm,5%,1/16W,DA,TP,1608 SC24 2203-000491 C-CERAMIC,CHIP;2.2nF,10%,50V,X7R,TP,1608 SR26 2007-000092 R-CHIP;15Kohm,5%,1/16W,DA,TP,1608 SC25 2203-000372 C-CERAMIC,CHIP;15nF,10%,50V,X7R,TP,1608, SR27 2007-000092 R-CHIP;15Kohm,5%,1/16W,DA,TP,1608 SC26 2203-000372 C-CERAMIC,CHIP;15nF,10%,50V,X7R,TP,1608, SR29 2007-000124 R-CHIP;2.2Kohm,5%,1/16W,DA,TP,1608 SC27 2203-000257 C-CERAMIC,CHIP;10nF,10%,50V,X7R,TP,1608 SR30 2007-000124 R-CHIP;2.2Kohm,5%,1/16W,DA,TP,1608 SC28 2203-000257 C-CERAMIC,CHIP;10nF,10%,50V,X7R,TP,1608 SR31 2007-000124 R-CHIP;2.2Kohm,5%,1/16W,DA,TP,1608 SC29 2203-000257 C-CERAMIC,CHIP;10nF,10%,50V,X7R,TP,1608 SR32 2007-000124 R-CHIP;2.2Kohm,5%,1/16W,DA,TP,1608 Samsung Electronics...
- Page 61 C-CERAMIC,CHIP;10nF,10%,50V,X7R,TP,1608 2007-000113 R-CHIP;33ohm,5%,1/16W,DA,TP,1608 ZC56 2203-000257 C-CERAMIC,CHIP;10nF,10%,50V,X7R,TP,1608 ZR68 2007-000078 R-CHIP;1Kohm,5%,1/16W,DA,TP,1608 ZC58 2203-000440 C-CERAMIC,CHIP;1nF,10%,50V,X7R,TP,1608,- ZR69 2007-000070 R-CHIP;0ohm,5%,1/16W,DA,TP,1608 ZC59 2203-005148 C-CERAMIC,CHIP;100nF,10%,16V,X7R,TP,1608 ZR70 2007-000070 R-CHIP;0ohm,5%,1/16W,DA,TP,1608 2203-000626 C-CERAMIC,CHIP;0.022nF,5%,50V,NP0,TP,160 ZR72 2011-000816 R-NETWORK;100ohm,5%,63mW,L,CHIP,8P,TP ZC60 2203-000681 C-CERAMIC,CHIP;0.027nF,5%,50V,NP0,TP,160 ZR73 2007-000078 R-CHIP;1Kohm,5%,1/16W,DA,TP,1608 ZC62 2203-000681 C-CERAMIC,CHIP;0.027nF,5%,50V,NP0,TP,160 ZR74 2007-000074 R-CHIP;100ohm,5%,1/16W,DA,TP,1608 Samsung Electronics...
- Page 62 R-CARBON;33KOHM,5%,1/8W,AA,TP,1.8X3.2MM R719 2001-000734 R-CARBON;4.7KOHM,5%,1/8W,AA,TP,1.8X3.2M R728 2001-000660 R-CARBON;33KOHM,5%,1/8W,AA,TP,1.8X3.2MM R729 2001-000333 R-CARBON;12OHM,5%,1/4W,AA,TP,2.4X6.4MM RM701 AC59-60060A MODULE-REMOCON;GP1U281R,SHARP,38KHZ,-,-, SW701 3404-001008 SWITCH-TACT;15V,20mA,160gf,6x7.9x3.5mm,S SW702 3404-001008 SWITCH-TACT;15V,20mA,160gf,6x7.9x3.5mm,S SW703 3404-001008 SWITCH-TACT;15V,20mA,160gf,6x7.9x3.5mm,S SW704 3404-001008 SWITCH-TACT;15V,20mA,160gf,6x7.9x3.5mm,S SW705 3404-001008 SWITCH-TACT;15V,20mA,160gf,6x7.9x3.5mm,S SW706 3404-001008 SWITCH-TACT;15V,20mA,160gf,6x7.9x3.5mm,S SW707 3404-001008 SWITCH-TACT;15V,20mA,160gf,6x7.9x3.5mm,S SW708 3404-001008 SWITCH-TACT;15V,20mA,160gf,6x7.9x3.5mm,S Samsung Electronics 7-10...
-
Page 63: Block Diagram
All manuals and user guides at all-guides.com 8. Block Diagram Samsung Electronics... - Page 64 All manuals and user guides at all-guides.com Block Diagram MEMO Samsung Electronics...
-
Page 65: Pcb Diagrams
9-5 DVD Deck - - - - - - - - - - - - - - - - - - - - - - - - - - - - - - - - - - - - - - - - - - - - - - - 9-5 Samsung Electronics... - Page 66 All manuals and user guides at all-guides.com PCB Diagrams 9-1 S.M.P.S. Samsung Electronics...
- Page 67 All manuals and user guides at all-guides.com PCB Diagrams 9-2 VCR Main Samsung Electronics...
- Page 68 All manuals and user guides at all-guides.com PCB Diagrams 9-3 DVD Main Samsung Electronics...
- Page 69 All manuals and user guides at all-guides.com PCB Diagrams 9-4 Function-Timer 9-5 DVD Deck Samsung Electronics...
- Page 70 All manuals and user guides at all-guides.com PCB Diagrams MEMO Samsung Electronics...
-
Page 71: Wiring Diagram
All manuals and user guides at all-guides.com 10. Wiring Diagram Samsung Electronics 10-1... - Page 72 All manuals and user guides at all-guides.com Wiring Diagram MEMO Samsung Electronics 10-2...
-
Page 73: Schematic Diagrams
11-16 DVD Deck - - - - - - - - - - - - - - - - - - - - - - - - - - - - - - - - - - - - - - - - - - - - 11-18 Samsung Electronics... -
Page 74: Block Identification Of Main Pcb
All manuals and user guides at all-guides.com Schematic Diagrams ♦ Block Identification of Main PCB VCR MAIN PCB <Conductor Side> <Component Side> DVD MAIN PCB <Component Side> Samsung Electronics 11-2... - Page 75 All manuals and user guides at all-guides.com Schematic Diagrams 11-1 S.M.P.S. Samsung Electronics 11-3...
-
Page 76: Power Drive
All manuals and user guides at all-guides.com Schematic Diagrams 11-2 Power Drive Samsung Electronics 11-4... -
Page 77: Function-Timer
All manuals and user guides at all-guides.com Schematic Diagrams 11-3 Function-Timer Samsung Electronics 11-5... -
Page 78: System Control/Servo
All manuals and user guides at all-guides.com Schematic Diagrams 11-4 System Control/Servo Samsung Electronics 11-6... -
Page 79: A/V
All manuals and user guides at all-guides.com Schematic Diagrams 11-5 A/V Samsung Electronics 11-7... - Page 80 All manuals and user guides at all-guides.com Schematic Diagrams 11-6 TM-Blcok (FRANCE, SWITZERLAND Only) Samsung Electronics 11-8...
-
Page 81: Digital Audio
All manuals and user guides at all-guides.com Schematic Diagrams 11-7 Digital Audio Samsung Electronics 11-9... -
Page 82: Hi-Fi
All manuals and user guides at all-guides.com Schematic Diagrams 11-8 Hi-Fi Samsung Electronics 11-10... -
Page 83: Osd
All manuals and user guides at all-guides.com Schematic Diagrams 11-9 OSD Samsung Electronics 11-11... -
Page 84: Input-Output
All manuals and user guides at all-guides.com Schematic Diagrams 11-10 Input-Output Samsung Electronics 11-12... -
Page 85: A2/Nicam
All manuals and user guides at all-guides.com Schematic Diagrams 11-11 A2/NICAM Samsung Electronics 11-13... -
Page 86: Secam (Option)
All manuals and user guides at all-guides.com Schematic Diagrams 11-12 SECAM (OPTION) Samsung Electronics 11-14... -
Page 87: Dvd Main-Micom
All manuals and user guides at all-guides.com Schematic Diagrams 11-13 DVD Main-Micom Samsung Electronics 11-15... -
Page 88: Servo
All manuals and user guides at all-guides.com Schematic Diagrams 11-14 Servo Samsung Electronics 11-16... -
Page 89: Av Decoder
All manuals and user guides at all-guides.com Schematic Diagrams 11-15 AV Decoder Samsung Electronics 11-17... -
Page 90: Dvd Deck
All manuals and user guides at all-guides.com Schematic Diagrams 11-16 DVD Deck Samsung Electronics 11-18...