Table of Contents
Advertisement
Quick Links
Advertisement
Table of Contents

Related Manuals for Zanussi ZCG61281XA


Summary of Contents for Zanussi ZCG61281XA
- Page 1 User Manual GETTING STARTED? EASY. ZCG61281XA EN User Manual Cooker...
-
Page 2: Safety Information
VISIT OUR WEBSITE TO: Get usage advice, brochures, trouble shooter, service and repair information: www.zanussi.com/support SAFETY INFORMATION Before the installation and use of the appliance, carefully read the supplied instructions. The manufacturer is not responsible for any injuries or damage that are the result of incorrect installation or usage. - Page 3 Do not install the appliance behind a decorative door in order • to avoid overheating. Do not install the appliance on a platform. • Do not operate the appliance by means of an external timer or • separate remote-control system. WARNING: Unattended cooking on a hob with fat or oil can be •...
-
Page 4: Safety Instructions
suitable or hob guards incorporated in the appliance. The use of inappropriate guards can cause accidents. SAFETY INSTRUCTIONS INSTALLATION • Connect the mains plug to the mains socket only at the end of the installation. Make sure that WARNING! Only a qualified person there is access to the mains plug after the must install this appliance. -
Page 5: Care And Cleaning
CAUTION! The use of a gas cooking WARNING! Risk of damage to the appliance results in the production of appliance. heat, moisture and products of combustion in the room in which it is • To prevent damage or discoloration to the installed. -
Page 6: Internal Lighting
• Fat and food remaining in the appliance can to signal information about the operational cause fire. status of the appliance. They are not intended to • Clean regularly the appliance to prevent the be used in other applications and are not deterioration of the surface material. - Page 7 Dimension TECHNICAL DATA Voltage 220 - 240 V Frequency 50 - 60 Hz Appliance class Minimum distances Dimension Dimension Height Width Depth OTHER TECHNICAL DATA Appliance category: II2H3+ Gas original: G30/G31 (3+) 30/37 mbar Gas replacement: G20 (2H) 20 mbar BYPASS DIAMETERS BURNER Ø...
- Page 8 INJECTOR MARK BURNER NORMAL POWER kW REDUCED POWER kW 1/100 mm Auxiliary 0.95 0.35 Oven 0.90 104o Grill 108o GAS BURNERS FOR LPG G30 28-30 mbar NORMAL POWER REDUCED POW- INJECTOR MARK NOMINAL GAS BURNER ER kW 1/100 mm FLOW g/h Rapid 0.72 Semi-rapid...
- Page 9 • it is not twisted or tighten, • it does not get in touch with sharp edges or corners, • it's conditions can be easily checked. When checking the flexible pipe make sure: • it does not show cracks, cuts, marks of burnings on the two ends and on its full length, •...
- Page 10 ADJUSTING THE MINIMUM GAS LEVEL ON THE HOB BURNER 1. Disconnect the appliance from the electricity. 2. Remove the knob for the hob. If there is no access to the bypass screw dismount the control panel before adjustment start. 3. With a thin and flat screwdriver adjust the bypass screw A.
-
Page 11: Electrical Installation
5. Release the burner injector D with a 7 mm 7. Screw on slowly the bypass screw till the flame socket spanner and replace it with a different becomes minimum and stable. one. 8. Put the knob for the oven functions back. 9. -
Page 12: Product Description
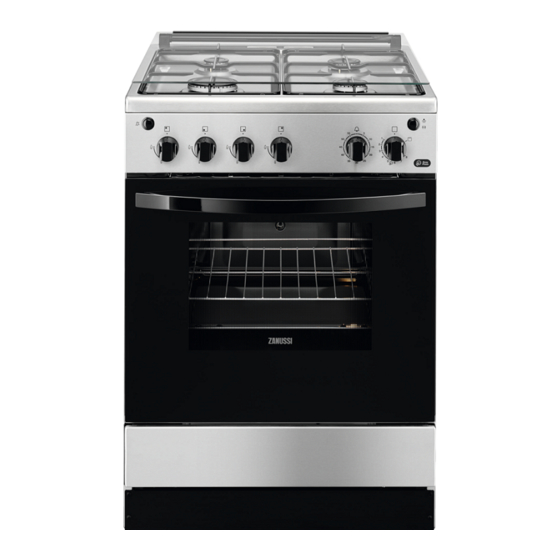
This appliance is supplied with a main plug and a main cable. WARNING! The power cable must not touch the part of the appliance shaded in the illustration. PRODUCT DESCRIPTION GENERAL OVERVIEW Button for the spark generator Knobs for the hob Knob for the Minute Minder Knob for the oven functions Button for the lamp and turnspit... -
Page 13: Before First Use
ACCESSORIES For roasting larger joints of meat and poultry. • Grill deflector • Wire shelf To protect the knobs when you use the grill. For cookware, cake tins, roasts. • Storage drawer • Baking tray The storage drawer is below the oven cavity. For cakes and biscuits. -
Page 14: Burner Overview
A. Burner cap If the burner accidentally goes out, B. Burner crown turn the knob to the off position and try C. Ignition candle to light the burner again after minimum D. Thermocouple 1 minute. TURNING THE BURNER OFF The spark generator can start To put the flame out, turn the knob to the off automatically when you switch on the position... -
Page 15: Hob - Care And Cleaning
Diameter of cookware Diameter of cookware Burner Burner (mm) (mm) Auxiliary 120 - 180 Rapid 160 - 220/260 Semi - rapid 140 - 220/240 1) When a single pot is used on the hob. HOB - CARE AND CLEANING components well clean to prevent difficult lighting WARNING! Refer to Safety chapters. -
Page 16: Oven Functions
OVEN FUNCTIONS Oven function Application Off position The oven is off. Pizza setting To make pizza. Heat settings Range of temperature levels adjustment for the oven . 1 - 8 Grilling To grill flat food in the middle of the grill. To make toast. Oven lamp To illuminate the oven interior. -
Page 17: Oven - Clock Functions
3. Turn the knob for the oven functions to set the Do not put the meat directly on the necessary heat setting. tray or pan. Control the flame trough the holes in the bottom of the oven. CAUTION! Do not put the meat on the TURNING OFF THE OVEN BURNER highest shelf level. - Page 18 A. Support hook Put the shelf on the correct shelf position. Make B. Forks sure it does not touch the back wall of the oven. C. Spit Tray: D. Handle Do not push the baking tray all the way 1. Open the oven door. to the back wall of the cavity.
-
Page 19: Oven - Hints And Tips
11. Press the button for oven lamp and turnspit. remove the turnspit and the roasting pan from the 12. Make sure that turnspit rotates. oven. 13. Close the oven door. When meat is ready press the turnspit button. Turn off the grill. Install the turnspit handle. Carefully OVEN - HINTS AND TIPS change the temperature setting if an unequal WARNING! Refer to Safety chapters. - Page 20 Thermo- Preheating Shelf po- Food stat posi- Time (min) Accessories time (min) sition tion Pastry stripes 30 - 40 baking tray Burgers Grill - wire shelf and tray on 70 - 80 level 2 Toast Grill - 3 - 4 wire shelf 1) Turn over after 40 min.
-
Page 21: Oven - Care And Cleaning
Thermo- Food / Dish (IEC Preheating Shelf po- stat posi- Time (min) Accessories 60350-1) time (min) sition tion Meringue 35 - 45 baking tray 1) Turn over after 1/2 - 2/3 of the cooking time. PIZZA SETTING When you cook pizza, for best results turn the knob for the oven functions to the Pizza position. - Page 22 6. Turn the two fasteners by 90° and remove them from their seats. 3. Close the oven door halfway to the first opening position. Then pull forward and remove the door from its seat. 90° 7. First lift carefully and then remove the glass panel.
-
Page 23: Removing The Drawer
2. Slowly lift the drawer. 3. Pull the drawer out fully. To install the drawer, do the above steps in the opposite sequence. REPLACING THE LAMP Put a cloth on the bottom of the interior of the appliance. It prevents damage to the lamp glass cover and the cavity. - Page 24 Problem Possible cause Remedy There is no spark when you try The fuse is blown. Make sure that the fuse is the to activate the spark generator. cause of the malfunction. If the fuse is blown again and again, contact a qualified electrician. There is no spark when you try Burner cap and crown are Place the burner cap and...
-
Page 25: Energy Efficiency
......... Product number (PNC) ......... Serial number (S.N.) ......... ENERGY EFFICIENCY PRODUCT INFORMATION FOR HOB ACCORDING TO EU 66/2014 Model identifi- ZCG61281XA cation Type of hob Hob inside Freestanding Cooker Number of gas burners Energy efficien- Left rear - Auxiliary... -
Page 26: Environmental Concerns
Volume 51 l Type of oven Oven inside Freestanding Cooker Mass 39.0 kg EN 15181 Measuring method of the energy Use metal dishes to improve energy saving. consumption of gas fired ovens. When possible, do not preheat the oven before you put the food inside. - Page 28 WWW.ZANUSSI.COM/SHOP...