TSC TX200 Series User Manual
Hide thumbs
Also See for TX200 Series:
- User manual (73 pages) ,
- Service manual (44 pages) ,
- Programming manual (434 pages)

Related Manuals for TSC TX200 Series


Summary of Contents for TSC TX200 Series
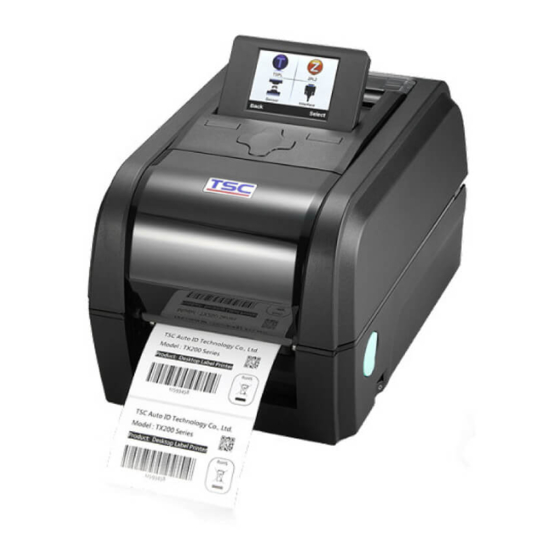
- Page 1 TX200 Series Thermal Transfer Direct Thermal Desktop Barcode Printers Series Lists: User Manual TX200 / TX300 / TX600...
- Page 2 All other trademarks are the property of their respective owners. Information in this document is subject to change without notice and does not represent a commitment on the part of TSC Auto ID Technology Co. No part of this manual may be reproduced or transmitted in any form or by any means, for any purpose other than the purchaser’s personal use, without the...
-
Page 3: Table Of Contents
Table of Contents 1. Introduction ........................................1 1.1 Product Specification ....................................2 1.1.1 Printer Optional Features ..................................3 1.2 General Specification ....................................4 1.3 Print Specification ......................................4 1.4 Ribbon Specification ....................................5 1.5 Media Specification ......................................5 2. Operation Overview ......................................6 2.1 Unpacking and Inspection ....................................6 2.2 Printer Overview ......................................7 2.2.1 Front View ......................................7 2.2.2 Interior View ......................................8... - Page 4 5. TSC Console ........................................20 5.1 Start TSC Console ..................................... 20 5.2 Setup Ethernet Interface .................................... 22 5.3 Set WiFi and Add to TSC Console Interface .............................. 24 5.4 Initialize the Printer WiFi Setting ................................27 5.5 Printer Function ......................................28 5.6 Setting Post-Print Action ....................................
- Page 5 6.8 Diagnostic ........................................42 6.9 Advanced ........................................43 6.10 Service ........................................44 7. TroubleShooting ......................................45 8. Maintenance ........................................48 9. Angency Complicance and Approvals ................................50 10. Revise History ....................................... 53...
-
Page 6: Introduction
The printers use a large 300 meter ribbon supply on a one inch core that saves both time and money. The TX200 series features a user-friendly spring-loaded center-biased clamshell design for easy drop-in media loading of 5-inch rolls of media. -
Page 7: Product Specification
1.1 Product Specification 203 dpi 300 dpi 600 dpi Product standard feature models models models Thermal transfer/ or direct thermal LED icon panel with 1 button 3.5” TFT LCD with 6 buttons 32-bit RISC high performance processor Gap transmissive sensor (Fixed, center of offset 4 to right or 7 mm to left from center) Black mark reflective sensor (Position adjustable) See-through ribbon end sensor Ribbon encoder sensor... -
Page 8: Printer Optional Features
1.1.1 Printer Optional Features The printer offers the following optional features. User Dealer Factory Product option feature option option option Peel-off kit Note: This peel-off module is supported for the thermal/ plain label only. Regular cutter (full cut guillotine cutter) Media thickness: 0.06 ~ 0.19 mm Media type: receipt and label liner w/o glue Note: Except for the linerless cutter, all regular/heavy duty/care label cutters DO NOT cut... -
Page 9: General Specification
1.2 General Specification General Specifications 200 dpi & 300 dpi 600 dpi model model Physical dimensions 226 mm(W) x 198 mm(H) x 332 mm(D) 226 mm(W) x 200 mm(H) x 332 mm(D) Weight 3.75 kg (8.27 lbs) 4.08 kg ( 8.99 lbs) Mechanism Clamshell with Double-walled plastic Power... -
Page 10: Ribbon Specification
1.4 Ribbon Specification Ribbon Specifications Ribbon outside diameter Max. 67 mm OD Ribbon length 300 meter 1“ (25.4 mm) ID core Ribbon core inside diameter Ribbon width 40 mm ~ 110 mm Ribbon wound type Ink coated outside wound 1.5 Media Specification Media Specifications 203 dpi models 300 dpi models... -
Page 11: Operation Overview
2. Operation Overview 2.1 Unpacking and Inspection This printer has been specially packaged to withstand damage during shipping. Please carefully inspect the packaging and printer upon receiving the bar code printer. Please retain the packaging materials in case you need to reship the printer. Unpacking the printer, the following items are included in the carton. -
Page 12: Printer Overview
2.2 Printer Overview 2.2.1 Front View LED indicators Feed/ Pause button Paper exit chute Top cover open lever Power switch... -
Page 13: Interior View
2.2.2 Interior View Ribbon rewind gear Gap sensor (transmitter) Media holder Platen roller Ribbon access cover Ribbon rewind hub Print head Ribbon supply hub Media cover Media holder locking switch Media guides Black mark sensor/ Gap sensor (receiver) Media guide adjustment button Caution: Keep fingers and other body parts away from the printer cover. -
Page 14: Rear View
2.2.3 Rear View External label entrance chute Power jack socket RS-232C interface Ethernet interface * Micro SD card socket USB interface USB host Centronics interface Caution: Keep fingers and other body parts away from the external label entrance chute. Note: The interface picture here is for reference only. Please refer to the product specification for the interfaces availability. -
Page 15: Setup
3. Setup 3.1 Setting up the Printer Place the printer on flat surface. Make sure the printer is power off. Connect the printer to the computer with the provided USB cable. Plug in the power cord. Note: Please switch OFF the printer before plugging in the power cord to printer power jack. -
Page 16: Loading The Ribbon
3.2 Loading the Ribbon Open the printer’s top cover Open the ribbon access cover and the media cover. Insert the rewind spindle into the paper core. - Page 17 Install the paper core right side onto the rewind hub first then align the notches on the left side and mount onto the spokes. Insert the ribbon spindle into the ribbon core. Install the ribbon right side onto the supply hub first then align the notches on the left side and mount onto the spokes.
- Page 18 Stick the ribbon onto the ribbon rewind paper core. Turn the ribbon rewind gear until the ribbon plastic leader is thoroughly wound. Close the ribbon access cover and the top cover. Loading path for ribbon...
-
Page 19: Loading The Media
3.3 Loading the Media Open the printer top Separate the media holders to cover by pulling the the label roll width. tabs. Place the paper, printing side face up, through the media Place the roll between sensor and place the label the holders. - Page 20 3.4 Loading the Media in Peel-off Mode (Option) Move the media guides to fit Please refer to section the label width by pushing 3.3 to install the media the media guide adjustment and get calibration. button. Pull the label through Open the peel-off cover.
-
Page 21: Loading The Media In Cutter Mode (Option)
3.4 Loading the Media in Cutter Mode (Option) Lead the paper through the Please refer to section cutter paper opening. 3.3 to install the media . Open the peel-off cover. Feed the liner into peel-off cover slot. Move the media guides to fit the label width by Use software to set the pushing the media... -
Page 22: Led And Button Functions
4. LED and Button Functions 4.1 LED Indication and Key Status Status Indication Indication Printer is ready Other errors Blinking Pause Out of paper Erasing memory Blinking Paper jam Blinking Downloading file Out of ribbon Blinking Need to clear print head Blinking Ribbon near end Print head open... -
Page 23: Regular Button Function
4.2 Regular Button Function Feed labels When the printer is ready, press the button to feed one label to the beginning of next label. Pause the printing job When the printer is printing, press the button to pause a printing job. When the printer is paused, the LED will be green blinking. Press the button again to continue the printing job. -
Page 24: Power-On Utilities
4.3 Power-on Utilities Power-on Utilities provides the basic functions and can be activated by below procedures: Turn off the power > Hold the Feed button > Open the power > Release the button depending on the the color of the LED. Sequences of the settings: Green Green... -
Page 25: Tsc Console
5. TSC Console TSC Console is a management tool combining the Printer Management, Diagnostic Tool, CommTool and Printer Webpage settings, which enables you to adjust printer’s settings/status; change printers’ settings; download graphics, deploy fonts, graphics, label templates or upgrade the firmware to the group of printers, and send additional commands to printers at the same time ※... - Page 26 Select the current interface of the printer. The printer will be added to TSC Console’s interface. Select the printer and set the settings. For more information, please refer to TSC Console User Manual.
-
Page 27: Setup Ethernet Interface
5.2 Setup Ethernet Interface Use USB or COM to establish the interface on TSC Console. Double click to enter the Printer Configuration Page > Click Ethernet tab > Check the IP Address. - Page 28 Choose Network > Key in the IP Address > Click Discover to establish the Ehternet interface. The notification will pop up > Click OK to close the window > The Ethernert interface will be shown on TSC Console.
-
Page 29: Set Wifi And Add To Tsc Console Interface
5.3 Set WiFi and Add to TSC Console Interface Use USB or COM Port to set up the interface. (refer to chp.5.1) Double click to enter the printer configuration page. Click Get to receive printer’s information. ... - Page 30 For WPA-Personal Fill-in the SSID. Select the Encryption option to WPA-Personal. III. Fill-in the Key. Select DHCP to ON. (For OFF option, please fill-in the IP Address, Subnet Mask and Gateway) After setting, click the Set button. Note: Before setting, the entered field will be shown in yellow for reminding.
- Page 31 After clicking Set button, it'll pop-up the window tip as below shown. IP address will be shown in the “IP address” field and the Wi-Fi logo and IP address will be displayed on the LCD control panel. Note: IP address should be shown within about 5~15 seconds after printer turn on.
-
Page 32: Initialize The Printer Wifi Setting
5.4 Initialize the Printer WiFi Setting Return to the main page of TSC Console. Click Functions to expand the page. Click Wi-Fi Default to initialize the printer Wi-Fi module setting to factory default setting. -
Page 33: Printer Function
5.5 Printer Function Printer Function could be found in Printer Configuration. “Printer Function” will be shown on the left side of the window. Functions Description Calibrate Sensor Detect media types and the size of the label RTC Setup Synchronize printer with Real Time Clock on PC Factory Default Initialize the printer to default settings Reset Printer... -
Page 34: Setting Post-Print Action
When the printer is equipped with other opton kits, ex: cutter, peeler, rewinder, please select the mode after finishing the calibration. Follow below procedure to set the post action for the printing: Refer Chp 5.1 to Connect the printer with TSC Console > Double click the printer >... -
Page 35: Lce Menu Function
6. LCE Menu Function 6.1 Enter the Menu Press the “Menu” button to enter the main menu. Use the “Cross” button to select the item on main menu. The selected item will turn red. Press the “Feed” button to enter the setting list. Note: This LCD function is optional for TX200 and TX300 series. - Page 36 6.2 Main Menu Overview There are 8 categories on the menu. Users can easily set the settings of the printer without connecting the computer. Please refer to following sections for more details. File Manager : To check and manage printer’s TSPL : To set up the printer settings for TSPL memory storage.
-
Page 37: Tspl
6.3 TSPL TSPL category can set up the printer settings for TSPL. Speed Density None Direction Batch Mode Print mode Peeler Mode Offset Cutter Mode TSPL Shift X Cutter Batch Shift Y Reference X Reference Y Code Page Country... - Page 38 Item Description Default Speed Set the print speed. Density Set the printing darkness. Set the printout direction. Setting Value: 0 and 1. Direction Direction 0: Direction 1: Set the print mode. There are 5 modes in total: None: Next label top of form is aligned to the print head burn line location. (Tear Off Mode) Batch Mode: Once finishing the printing process, label will be fed to the tear plate location.
-
Page 39: Zpl2
6.4 ZPL2 Darkness Print Speed This “ZPL2” category can set up the printer settings for ZPL2. Tear Off Tear Off Print Mode Peeler Off Print Width Cutter List Fonts List Images List Formats List Setup Control Prefix Format Prefix Feed Delimiter Char Menu ZPL2... - Page 40 Item Description Default Density Set the printing darkness. Available setting range: 0 to 30. 6 (203dpi) Print Speed Set the print speed. 4 (300dpi) 3 (600dpi) Tear Off Adjust media stop location. Available setting value range: -120~120 dots. 0 dot Set the print mode.
- Page 41 Set the action of the media when turning on the printer. Feed: Printer will advance one label. Media Power Up Calibration: Printer will make calibration. No Motion Length: Printer determine length and feed label. No Motion: Printer will not move media. Set the action of the media when closing the print head.
-
Page 42: Sensor
6.5 Sensor This option is used to calibrate the selected sensor. We recommend calibrate the sensor before printing when changing the media. Black Mark Auto Calibration Continuous Preprint Manual Calibration Standard Black Mark Menu Sensor Auto Continuous Threshold Detect Fixed Maximum Length Advanced Item... -
Page 43: Interface
6.6 Interface Interface can set the printer interface settings. Serial Ethernet Menu Interface Wi-Fi Bluetooth... -
Page 44: Serial Comm
6.6.1 Serial Comm Serial comm can set the printer RS-232 settings. 1200 bps 2400 bps 4800 bps 9600 bps Baud Rate 19200 bps 38400 bps 57600 bps 115200 bps None Menu Interface Serial Parity Even Data Bits Stop Bit(s) Item Description Default Baud Rate... -
Page 45: Ehernet
6.6.2 Ehernet Ethernet configures internal Ethernet configuration and checks the printer’s Ethernet module status, and reset the Ethernet module. Status Menu Interface Ethernet Config Item Description Default Status Check the Ethernet IP address and MAC setting status. DHCP: On or OFF the DHCP (Dynamic Host Configuration Protocol) network protocol. Config. -
Page 46: File Manager
6.7 File Manager File Manager is used to check the printer available memory, show the files list, delete the files or run the files that saved in the printer DRAM/Flash/Card memory. DRAM Menu File Manager FLASH... -
Page 47: Diagnostic
6.8 Diagnostic Print Config. Dump Mode Menu Diagnostic Print Head Diag Gap Display Diag Black Mark Sensor Diag Ribbon End Diag Media Item Description Print current printer configuration to the label. The configuration printout contains print head test pattern, which is useful Print Config. -
Page 48: Advanced
6.9 Advanced Display Brightness Menu Advanced Date & Time Language Item Description Display Brightness This item is used to setup the brightness for display. This item is used to setup the date and time on Date & Time display Language This item is used to setup the language on display... -
Page 49: Service
6.10 Service This feature is used to restore printer settings to defaults and checking information for printer. Initialization Menu Service Printer Information Contact us Item Description Initialization This feature is used to restore printer settings to defaults. Printer Information This feature is used to check printer serial number, printed mileage(m), labels(pcs.) and cutting counter. Contact us This feature is used to check the contact information for tech support service... -
Page 50: Troubleshooting
7. TroubleShooting Problem Possible Cause Recovery Procedure * Plug the power cord in printer and outlet. * The power cord is not properly connected. * Switch the printer on. Power indicator does not illuminate * The printer head is open. * Please close the print carriages. - Page 51 * The port specified in the Windows driver is not - Check the baud rate setting. The default baud rate setting of correct. printer is 9600,n,8,1. * If using the Ethernet cable, - Check if the Ethernet RJ-45 connector green LED is lit on. - Check if the Ethernet RJ-45 connector amber LED is blinking.
- Page 52 * Label size is incorrect. The printing position of small label * Use TSC Console to fine tune the parameter of Shift Y. * The parameter Shift Y is incorrect. * If using the software BarTender, please set the vertical offset...
-
Page 53: Maintenance
8. Maintenance This session presents the clean tools and methods to maintain the printer. For Cleaning Depending on the media used, the printer may accumulate residues (media dust, adhesives, etc.) as a by-product of normal printing. To maintain the best printing quality, you should remove these residues by cleaning the printer periodically. Regularly clean the print head and supply sensors once change a new media to keep the printer at the optimized performance and extend printer life. - Page 54 Cleaning Tools Cotton swab Lint-free cloth Brush with soft non-metallic bristles Vacuum cleaner 75% Ethanol (for disinfecting) 99% Isopropyl alcohol (for printhead and platen roller cleaning) Genuine printhead cleaning pen Mild detergent (without chlorine) Cleaning Process: Printer Part Method...
-
Page 55: Angency Complicance And Approvals
9. Angency Complicance and Approvals EN 55022, Class B EN 55024 EN 60950-1 FCC part 15B, Class B AS/NZS CISPR 22, Class B UL 60950-1 EN 60950-1 Wichtige Sicherheits-Hinweise 1. Bitte lesen Sie diese Hinweis sorgfältig durch. 2. Heben Sie diese Anleitung fűr den späteren Gebrauch auf. 3. - Page 56 8. Dieses Gerät kann bis zu einer Auß entemperatur von maximal 40℃ betrieben werden. Battery safety warning: DO NOT throw the battery in fire. DO NOT short circuit the contacts. DO NOT disassemble the battery. DO NOT throw the battery in municipal waste. The symbol of the crossed out wheeled bin indicates that the battery should not be placed in municipal waste.
- Page 57 FCC STATEMENT This equipment has been tested and found to comply with the limits for a Class B digital device, pursuant to part 15 of the FCC Rules. These limits are designed to provide reasonable protection against harmful interference in a residential installation. This equipment generates, uses and can radiate radio frequency energy and, if not installed and used in accordance with the instructions, may cause harmful interference to radio communications.
-
Page 58: Revise History
10. Revise History Date Content Editor...
Need help?
Do you have a question about the TX200 Series and is the answer not in the manual?
Questions and answers