Cosori CO130-AO User Manual
Orginal air fryer toaster oven
Hide thumbs
Also See for CO130-AO:
- User manual ,
- Quick reference manual (8 pages) ,
- User manual (60 pages)

Related Manuals for Cosori CO130-AO


Summary of Contents for Cosori CO130-AO
- Page 1 User Manual Orginal Air Fryer Toaster Oven Model: CO130-AO Questions or Concerns? Mon–Fri, 9:00 am–5:00 pm PST/PDT support@cosori.com | (888) 402-1684...
-
Page 2: Table Of Contents
ENGLISH Table of Contents Cooking with Your Air Fryer Toaster Oven Cooking Functions Quick • Package Contents Reference Chart Specifications Convection Fan • Important Safeguards Automatic Preheat • Key Safety Points • Toast Function (“TOAST”) • General Safety • Bagel Function (“BAGEL”) •... -
Page 3: Contenu De L'emballage
FRANÇAIS Table des matières Tableau de référence des modes • de cuisson Ventilateur à convection Contenu de l’emballage • Caractéristiques techniques Préchauffage automatique • Mode pain grillé (« TOAST ») Mises en garde importantes • Mode bagel (« BAGEL ») Points principaux de sécurité •... - Page 4 CONTACT OUR CHEFS Our helpful, in-house chefs are ready to assist you with any questions you might have! Email: recipes@cosori.com Toll-Free: (888) 402-1684 M-F, 9:00 am–5:00 pm PST/PDT On behalf of all of us at Cosori, Happy cooking! Happy cooking!
-
Page 5: Important Safeguards
IMPORTANT SAFEGUARDS Follow basic safety precautions when using your air fryer toaster oven. Read all instructions. Key Safety Points General Safety • Do not touch hot surfaces. Use handle. • When the oven is not in use, and before START/CANCEL cleaning, press to turn it •... -
Page 6: While Cooking
• Do not place oversized foods or metal • Your oven has a 3-prong grounding plug, and should only be used with 120V, 60Hz utensils (except for Cosori accessories) into your oven. electrical systems in North America. Always plug in to a grounded electrical •... -
Page 7: Getting To Know Your Air Fryer Toaster Oven
GETTING TO KNOW YOUR AIR FRYER TOASTER OVEN Housing TIME/TEMP Knob Fry Basket LED Display Handle Rotisserie Forks Light/Unit Button Door Rotisserie Handle Fan Button Wire Rack Rotisserie Shaft START/CANCEL Button Food Tray Heating Elements FUNCTION Knob Crumb Tray Power Cord... -
Page 8: Display
DISPLAY Timer Icon Light Indicator Time Display Toast/Bagel Darkness Level Indicators Cooking Functions High Fan Speed Indicator Temperature Icon Normal Fan Rotisserie Indicator Speed Indicator Celsius/Fahrenheit Indicators Temperature Display... -
Page 9: Controls
CONTROLS Light/Unit Button TIME/TEMP Knob • Turn the knob to change time/ • Turns the interior light on/off. will temperature. Turn clockwise to increase, show on the display. and counterclockwise to decrease. • The interior light will turn on • Press the knob to switch between automatically when there is 1 minute left controlling time and temperature. -
Page 10: Before First Use
BEFORE FIRST USE Test Run Setting Up 1. Remove all packaging around and inside A test run will help you become familiar with the oven. your oven, make sure it’s working correctly, and clean it of possible residues in the 2. -
Page 11: Cooking With Your Air Fryer Toaster Oven
COOKING WITH YOUR AIR FRYER TOASTER OVEN CAUTION: Top Position • The outer surface of the oven, including the oven door, is hot during and after Position use. Temperature may be over 100°C / 212°F. Do not touch hot surfaces. Use handle. - Page 12 Suggested Accessory Name Range & Position • Cook a variety of meats and poultry Food tray at low • 65°–205°C / Roast • Food will be tender and juicy position 150°–400°F on the inside and well- “ROAST” • 1 min–6 hr roasted on the outside.
-
Page 13: Convection Fan
Convection Fan 2. When preheating is finished, the oven will beep several times and the display will flash. This will repeat every 2 minutes. The fan circulates hot air in the oven for The START/CANCEL button will blink faster and more even cooking. Use the high continuously until pressed again. -
Page 14: Toast Function ("Toast")
Toast Function (“TOAST”) 3. Optionally, customize the darkness level. You can only do this before cooking starts. a. Turn the TIME/TEMP knob to adjust the darkness level between 1–7. The bars underneath the toast icons indicate the darkness level. b. Use 1–2 for a light toast, 3–5 for a medium toast, and 6–7 for a dark toast. -
Page 15: Bagel Function ("Bagel")
Bagel Function (“BAGEL”) 3. Optionally, customize the darkness level. You can only do this before cooking starts. a. Turn the TIME/TEMP knob to adjust the darkness level between 1–7. The bars underneath the toast icons indicate the darkness level. b. Use 1–2 for a light toast, 3–5 for a medium toast, and 6–7 for a dark toast. -
Page 16: Pizza Function ("Pizza")
Pizza Function (“PIZZA”) 5. When preheating is finished, the oven will beep several times, the display will flash, and the START/CANCEL button will blink continuously. 6. Remove any cardboard, plastic, paper, or other flammable materials. Place pizza on a pan, and place the pan on the wire rack. Close the oven door. -
Page 17: Bake Function ("Bake")
Bake Function (“BAKE”) 5. When preheating is finished, the oven will beep several times, the display will flash, and the START/CANCEL button will blink continuously. 6. Place food inside the oven. If using the food tray, insert at low position. Close the oven door. -
Page 18: Roast Function ("Roast")
Roast Function (“ROAST”) 5. When preheating completes, the oven will beep several times, the display will flash, and the START/CANCEL button will blink continuously. 6. Place food inside the oven. If using the food tray, insert at low position. Close the oven door. -
Page 19: Air Fry Function ("Airfry")
Air Fry Function (“AIRFRY”) 4. When preheating completes, the oven will beep several times, the display will flash, and the START/CANCEL button will blink continuously. 5. Place food in the fry basket. a. When air frying fatty foods (such as chicken wings), use the food tray instead to prevent oil dripping. -
Page 20: Broil Function ("Broil")
Broil Function (“BROIL”) 4. When preheating completes, the oven will beep several times, the display will flash, and the START/CANCEL button will blink continuously. 5. Place food on the food tray. a. Optionally, lightly grease the enamel food tray or line with foil to prevent food from sticking. -
Page 21: Cookies Function ("Cookies")
Cookies Function (“COOKIES”) 4. Press START/CANCEL to begin. Preheating will start automatically. The START/CANCEL button will light up, and the display will show “ ”. Note: Pressing START/CANCEL again during preheating will cancel preheating and immediately start cooking. 5. When preheating completes, the oven will beep several times, the display will flash, and the START/CANCEL button will blink continuously. -
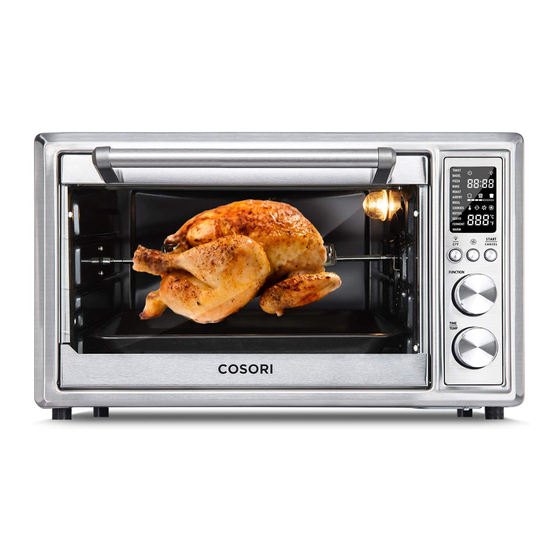
Page 22: Rotisserie Function ("Rotiss")
Rotisserie Function (“ROTISS”) 6. Press START/CANCEL to begin cooking. The button will light up, and the display will show the timer counting down. 7. The oven will stop heating and beep sveral times when finished. Use the rotisserie handle to take out the chicken. This function is used for rotating roasts. -
Page 23: Dehydrate Function ("Dehyd")
Dehydrate Function (“DEHYD”) 4. Optionally, customize the temperature and time. You can do this anytime during cooking. a. Turn the TIME/TEMP knob to adjust the time between 30 min–24 hr. b. Press the TIME/TEMP knob once to control temperature. Turn the knob to adjust the temperature between 38°–80°C / 100°–180°F. -
Page 24: Ferment Function ("Ferment")
Ferment Function (“FERMENT”) 4. Press START/CANCEL to begin fermentation. The button will light up, and the display will show the timer counting down. 5. The oven will stop heating and beep several times when finished. This function is designed to precisely hold low temperatures, providing an ideal environment for proofing bread, rolls, pizza, and dough. -
Page 25: Warm Function ("Warm")
Warm Function (“WARM”) This function is designed to keep food warm at the recommended temperature to prevent bacterial growth (70°C / 160°F or above). Heating Elements: Bottom heating elements cycle on and off Rack Position: Low 1. Place hot food in a heat-safe container. Cover and place on the food tray or wire rack. -
Page 26: Care & Maintenance
CARE & MAINTENANCE Cleaning the Accessories Clean oven accessories (including trays, etc.) and oven interior after every use. Note: After each use, slide out the crumb tray and Note: discard crumbs. • The walls on the inside of the oven have a nonstick coating for easy cleaning. -
Page 27: Troubleshooting
TROUBLESHOOTING Problem Possible Solution The oven will not turn on. Make sure the oven is plugged in. Foods are not completely cooked. Increase cooking temperature or time. Decrease cooking temperature or time. Foods are overcooked or burned. Make sure food items are not too large and are not touching the heating elements. -
Page 28: Warranty Information
WARRANTY INFORMATION TERMS & POLICY Arovast Corporation warrants all products to be of the highest quality in material, craftsmanship, and service for 2 years, effective from the date of purchase to the end of the warranty period. Warranty lengths may vary between product categories. If you have any questions or concerns about your new product, please contact our helpful Customer Support Team. -
Page 29: Customer Support
CUSTOMER SUPPORT Arovast Corporation 1202 N. Miller St., Suite A Anaheim, CA 92806 Email: support.eu@cosori.com *Please have your order invoice and order ID ready before contacting Customer Support. - Page 30 MORE COSORI PRODUCTS If you’re happy with this air fryer toaster oven, the line doesn’t stop here. Check out www.cosori.com for a line of all our beautiful and thoughtfully designed cookware. They might be right at home in your kitchen, too!
- Page 31 NOTES...
- Page 32 CONTACTER NOS CHEFS Nos chefs maison se tiennent prêts à vous aider concernant toute question que vous pourriez avoir! Courriel : recipes@cosori.com Appel sans frais : (888) 402-1684 L-V de 9 h à 17 h (UTC-8/UTC-7) Au nom de nous tous chez Cosori, Bonne cuisine! Bonne cuisine!
-
Page 33: Mises En Garde Importantes
MISES EN GARDE IMPORTANTES Suivez les précautions de sécurité de base lors de l’utilisation de votre four grille-pain avec friteuse à air. Lisez attentivement les instructions. Points principaux de sécurité retirez une plaque, un panier ou une grille contenant de l’huile, de la graisse ou d’autres liquides chauds. -
Page 34: Pendant La Cuisson
• Votre four est équipé d’une prise de courant mise à la terre à 3 broches et ne surdimensionnés ou d’ustensiles en métal (sauf les accessoires Cosori) dans votre doit être utilisé qu’avec des systèmes four. électriques de 120 V, 60 Hz en Amérique du Nord. -
Page 35: Prise En Main De Votre Four Grille-Pain Avec Friteuse À Air
PRISE EN MAIN DE VOTRE FOUR GRILLE-PAIN AVEC FRITEUSE À AIR Boîtier Bouton TIME/ Panier de friture Écran LED TEMP Tournebroche Bouton lumière et unités Poignée Poignée de rôtisserie de mesure Porte Tige de rôtisserie Bouton ventilateur Grille de cuisson Éléments chauffants Bouton START/CANCEL Plaque de cuisson... -
Page 36: Écran
ÉCRAN Icône de minuterie Voyant lumineux Affichage de la durée Grillage Toast/Bagel Témoins de niveau Modes de cuisson Témoin de vitesse élevée du ventilateur Icône de température Témoin de vitesse Témoin de rôtisserie normale du ventilateur Témoins Celsius/ Fahrenheit Affichage de la température... -
Page 37: Commandes
COMMANDES Bouton lumière et unités Bouton TIME/TEMP de mesure • Tournez le bouton pour changer la durée/ la température. Tournez dans le sens horaire • Allume/éteint la lumière intérieure. pour augmenter, et dans le sens antihoraire s’allume sur l’écran. pour diminuer. •... -
Page 38: Avant La Première Utilisation
AVANT LA PREMIÈRE UTILISATION Exécution d’un test Configuration 1. Retirez tous les emballages autour et à Un test vous aidera à vous familiariser avec l’intérieur du four. votre four, à vous assurer qu’il fonctionne correctement et à nettoyer les éventuels 2. -
Page 39: Cuisiner Avec Votre Four Grille-Pain Avec Friteuse À Air
CUISINER AVEC VOTRE FOUR GRILLE- PAIN AVEC FRITEUSE À AIR MISE EN GARDE : Haut du four Centre du • La surface extérieure du four, la porte y compris, est four chaude pendant et après l’utilisation. La température peut être supérieure à 100 °C/212 °F. Ne touchez pas les surfaces chaudes. - Page 40 Position et accessoire Mode Utilisation Étendue suggérés • Cuire une variété de viandes et de volailles Plaque de cuisson au • 65 ° à 205 °C / Rôti • Les aliments seront tendres bas du four 150 ° à 400 °F et juteux à l’intérieur et bien « ROAST »...
-
Page 41: Ventilateur À Convection
• Maintenir les aliments au chaud à la température Plaque de cuisson ou • 60 ° à 100 °C / Réchaud recommandée pour 140 ° à 230 °F grille de cuisson au « WARM » empêcher la croissance bas du four • 1 min à 12 h bactérienne (70 °C/160 °F ou plus) Ventilateur à... -
Page 42: Mode Pain Grillé (" Toast ")
Mode pain grillé (« TOAST ») 3. En option, personnalisez le niveau de grillage. Vous ne pouvez le faire qu’avant de démarrer la cuisson. a. Tournez le bouton TIME/TEMP pour régler le niveau de grillage entre 1 et 7. Les barres sous les icônes de pain grillé indiquent le niveau de grillage. -
Page 43: Mode Bagel (" Bagel ")
Mode bagel (« BAGEL ») 2. Tournez le bouton FUNCTION « BAGEL », qui clignotera sur l’écran. 3. En option, personnalisez le niveau de grillage. Vous ne pouvez le faire qu’avant de démarrer la cuisson. a. Tournez le bouton TIME/TEMP pour régler le niveau de grillage entre 1 et 7. Les barres sous les icônes de pain grillé... -
Page 44: Mode Pizza (" Pizza ")
Mode pizza (« PIZZA ») 4. Appuyez sur START/CANCEL pour démarrer le four. Le préchauffage démarre automatiquement. La touche START/CANCEL s’allume et l’écran affiche « ». Remarque : appuyer à nouveau sur START/CANCEL pendant le préchauffage annule le préchauffage et démarre la cuisson immédiatement. 5. -
Page 45: Mode Cuisson (" Bake ")
Mode cuisson (« BAKE ») Remarque : appuyer à nouveau sur START/ CANCEL pendant le préchauffage annule le préchauffage et démarre la cuisson immédiatement. 5. Lorsque le préchauffage est terminé, le four émet plusieurs signaux sonores, l’écran clignote et la touche START/ CANCEL clignote en continu. 6. -
Page 46: Mode Rôti (" Roast ")
Mode rôti (« ROAST ») Remarque : appuyer à nouveau sur START/CANCEL pendant le préchauffage annule le préchauffage et démarre la cuisson immédiatement. 5. Lorsque le préchauffage est terminé, le four émet plusieurs signaux sonores, l’écran clignote et la touche START/ CANCEL clignote en continu. 6. -
Page 47: Mode Friture À Air (" Airfry ")
Mode friture à air (« AIRFRY ») Remarque : appuyer à nouveau sur START/ CANCEL pendant le préchauffage annule le préchauffage et démarre la cuisson immédiatement. 4. Lorsque le préchauffage est terminé, le four émet plusieurs signaux sonores, l’écran clignote et la touche START/ CANCEL clignote en continu. -
Page 48: Mode Grillage (" Broil ")
Mode grillage (« BROIL ») Remarque : appuyer à nouveau sur START/ CANCEL pendant le préchauffage annule le préchauffage et démarre la cuisson immédiatement. 4. Lorsque le préchauffage est terminé, le four émet plusieurs signaux sonores, l’écran clignote et la touche START/ CANCEL clignote en continu. 5. -
Page 49: Mode Biscuits (" Cookies ")
Mode biscuits (« COOKIES ») 4. Appuyez sur START/CANCEL pour démarrer le four. Le préchauffage démarre automatiquement. La touche START/CANCEL s’allume et l’écran affiche « ». Remarque : appuyer à nouveau sur START/ CANCEL pendant le préchauffage annule le préchauffage et démarre la cuisson immédiatement. 5. -
Page 50: Mode Rôtisserie (" Rotiss ")
Mode rôtisserie (« ROTISS ») 6. Appuyez sur START/CANCEL pour démarrer la cuisson. Le bouton s’allume et l’écran affiche le compte à rebours de la minuterie. 7. Le four cesse de chauffer et émet plusieurs signaux sonores à la fin de la minuterie. -
Page 51: Mode Déshydrateur (" Dehyd ")
Mode déshydrateur (« DEHYD ») 2. Insérez la grille de cuisson ou le panier de friture au centre. Si vous utilisez plusieurs plaques, insérez-les en haut et en bas du four. Fermez la porte du four. 3. Tournez le bouton FUNCTION « DEHYD », qui clignotera sur l’écran. 4. -
Page 52: Mode Fermentation (" Ferment ")
Mode fermentation (« FERMENT ») 4. Appuyez sur START/CANCEL pour démarrer la fermentation. Le bouton s’allume et l’écran affiche le compte à rebours de la minuterie. 5. Le four cesse de chauffer et émet plusieurs signaux sonores à la fin de la minuterie. -
Page 53: Mode Réchaud (" Warm ")
Mode réchaud (« WARM ») 4. Appuyez sur START/CANCEL pour démarrer le réchaud. Le bouton s’allume et l’écran affiche le compte à rebours de la minuterie. 5. Le four cesse de chauffer et émet plusieurs signaux sonores à la fin de la minuterie. -
Page 54: Entretien
ENTRETIEN Nettoyage des accessoires Nettoyez les accessoires du four (y compris les plaques, etc.) et l’intérieur du four après chaque utilisation. Remarque : après chaque utilisation, faites glisser la lèchefrite et jetez les miettes. Remarque : • Les parois intérieures du four ont un 1. -
Page 55: Dépannage
DÉPANNAGE Problème Solution possible Le four ne s’allume pas. Assurez-vous que le four est branché. Les aliments ne sont pas Augmentez la température ou la durée de cuisson. complètement cuits. Diminuez la température ou la durée de cuisson. Les aliments sont trop cuits ou Assurez-vous que les aliments ne sont pas trop brûlés. -
Page 56: Informations Relativesà La Garantie
INFORMATIONS RELATIVES À LA GARANTIE MODALITÉS ET POLITIQUE Arovast Corporation garantit la haute qualité des matériaux, de la main-d’œuvre et du service associés à tous ses produits pendant deux ans, à partir de la date d’achat et jusqu’à la fin de la validité de la période de garantie. La durée de garantie est susceptible de varier selon la catégorie des produits. -
Page 57: Service À La Clientèle
SERVICE À LA CLIENTÈLE Arovast Corporation 1202 N. Miller St., Suite A Anaheim, CA 92806 ÉTATS-UNIS Courriel : support.eu@cosori.com *Veuillez avoir votre facture et votre numéro de commande à portée de main avant d’entrer en contact avec le service client. - Page 58 PLUS DE PRODUITS COSORI Si ce four grille-pain avec friteuse à air vous donne satisfaction, l’histoire ne s’arrête pas là. Rendez-vous sur www.cosori.com pour découvrir tous nos ustensiles de cuisine, beaux et parfaitement conçus. Nul doute qu’ils seraient parfaits dans votre cuisine!
- Page 59 Questions or Concerns? | ¿Preguntas o dudas? support@cosori.com | (888) 402-1684 Mon–Fri, 9:00 am–5:00 pm PST/PDT JJ0320GY-M1_0320CO130-AO_ca...
Need help?
Do you have a question about the CO130-AO and is the answer not in the manual?
Questions and answers