
Related Manuals for Bolva 65CBL-01


Summary of Contents for Bolva 65CBL-01
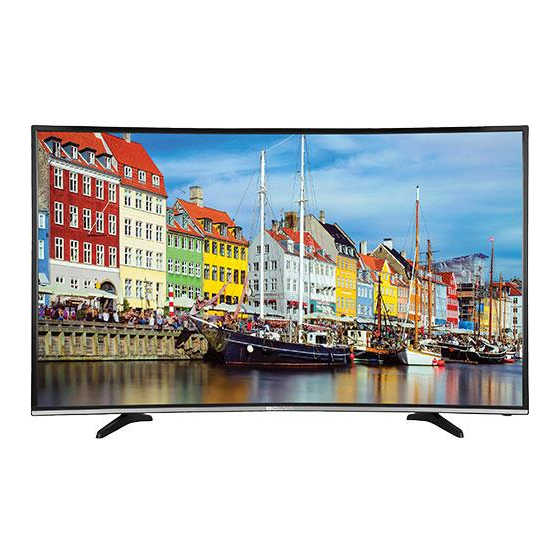
- Page 1 65CBL-01 USER’S MANUAL 65” 4K ULTRA HD TELEVISION For technical assistance or troubleshooting please call 1-866-594-5445...
-
Page 2: Important Safety Instructions
Important Safety Instructions 1. Read these instructions. 2. Keep these instructions. 3. Heed all warnings. 4. Follow all instructions. 5. Do not use this apparatus near water. 6. Clean only with dry cloth. 7. Do not block any ventilation openings. Install in accordance with the manufacturer’s instructions. 8. - Page 3 Safety Instructions Please read these instructions carefully. This product complies with all applicable US federal safety requirements, as well as those of the Canadian Standards Association. 1. Cleaning Always unplug the TV before cleaning. Do not use liquid or aerosol cleaners. Use a soft, slightly damp cloth to clean.
- Page 4 Safety Instructions 9. Outdoor Antenna Grounding If an outside antenna or cable system is connected to the TV be sure the antenna or cable system is grounded so as to provide some protection against voltage surges and built up static charges. Article 810 of the National Electri- cal Code (U.S.
- Page 5 Safety Instructions 15. Replacement Parts When replacement parts are required, be sure that only an authorized service technician has used replacement parts specified by the manufacturer or have the same characteristics as the original part. Unauthorized substitutions may result in fire, electric shock, or other hazards and void any warranty. 16.
-
Page 6: Table Of Contents
Table of Contents Important Safety Instructions ............................1 Table of Contents ................................5 Introduction ..................................6 Installing the Base .................................7 Remote Control Battery Install .................................8 Overview ..................................9 TV Overview Front & Side Panel ..............................11 Rear Panel .................................12 Installation Connect a digital cable box, satellite recei ver, or DVD player with an HDMI cable ............13 Connect a digital cable box, satellite recei ver, or DVD player with a Component connection ........14... -
Page 7: Introduction
Introduction What’s In The Box l l i you up and running with the best possible connection type for your devices. Enjoy! The package includes the following items. Save the carton & packing for future shipping • Remote Control • AAA Batteries (2) •... -
Page 8: Installing The Base
Installing the Base Place the TV face down on a soft cloth or cushion. Position base as shown. Insert 4 screws (provided) through the holes in the bottom of the base into the post holes and tighten securely. Do not over-tighten. -
Page 9: Remote Control
Remote Control Battery Install Your remote control handset is powered by two (2) AAA type batteries • Turn the remote over and remove • Place two (2) “AAA” batteries into • Replace the cover battery cover. the battery compartment with the “+” and “-“... -
Page 10: Overview
Remote Control Overview... - Page 11 Remote Control Overview Button Function 1. POWER Turn the display ON or OFF (Standby). 2. DISPLAY Provides program information for program being viewed. PLAY/PAUSE (USB) PREVIOUS (USB) NEXT (USB) STOP (USB) 7. REP REPEAT (USB) 8. CH.LIST Press to display a list of channels saved in the TV tuner memory. 9.
-
Page 12: Tv Overview
TV Overview Front & Rear Panel IR Receiver A soft light illuminates when the television power is on. Source Select Component HDMI1 HDMI2 HDMI3 HDMI4 Media 1. STANDBY/POWER - Press the POWER button to turn the TV ON/ OFF (power). The screen image will appear within a few seconds, and the LED will turn on. -
Page 13: Rear Panel
TV Overview Rear Panel Wall Mounting NOTE: You must remove the pedestal before wall mounting. It is recommended that you consult a professional before mounting this TV a wall. Use VESA 600x300 wall mount hardware. 1. OPTICAL OUT - Connect to an AV Receiver for high quality digital audio. 2. -
Page 14: Installation
Installation Connection to HDMI Input Digital Cable / Satellite Set Top Box Optional HDMI cable ( not included ) Cable / Satellite set top box Coaxial / RF Cable (not included) How to connect • On the back of your device, connect the HDMI cable from HDMI out on device to HDMI in on the panel. How to Use •... -
Page 15: Connect A Digital Cable Box, Satellite Recei Ver, Or Dvd Player With A Component Connection
Connection to Component Installation YPbPr Input Connecting a device with a Component connection. Optional Component cables (not included) Digital set top box, gaming console or DVD Source Select How to Connect • Match and insert the green (Y), blue (Pb), and red (Pr) cables into the device and TV. -
Page 16: Connect A Digital Cable Box, Satellite Recei Ver, Or Dvd Player With Composite Cables (Yellow, Red, & White)
Installation Connection to Composite Input Connecting a device with a Composite connection. Audio Video Cable (not included) Digital set top box, gaming console or DVD How to Connect • Match and insert the yellow, red, and white A / V cables into the Source Select device and TV. -
Page 17: Connecting The Power And Basic Cable Connection
Connection to Antenna & Installation Cable / Satellite Box We recommend using a high quality roof top antenna, digital cable, or satellite box for the best display and performance. Note: Reception quality is determined by your location, geographical terrain, distance from the local broadcast transmitter, and strength of antenna. -
Page 18: Connection To A Home Theater System
Connection to a Home Installation Theater System Connection to a Home Theater Audio System Optional digital cable (not included) Connecting to a Home Theater System Digital audio can deliver optimal 2 - channel stereo or 5.1 surround sound with Five discrete full range channels plus a separate channel for a subwoofer. Sound Mode Standard Connect an optional digital cable directly to the television’s OPTICAL OUT... -
Page 19: Tv Setup
TV Setup Initial Setup Wizard IMPORTANT NOTE: If your TV is connected to a Cable or Satellite set top box DO NOT run the “Channel Auto Scan” in STEP 3. Initial Setup Wizard After connecting your TV antenna or cable wire, turn the television ON. The quick Setup Wizard will display on-screen to help guide you through the 3 steps listed below: NOTE: the Setup Wizard only appears when turning on the TV for the first time. - Page 20 TV Setup Initial Setup Wizard IMPORTANT NOTE: If your TV is connected to a Cable or Satellite set top box DO NOT run the “Channel Auto Scan” in STEP 3. STEP 3: Setting Air/Cable and Channel Auto Scan Note: Your type of television connection will determine if you should complete the Channel Auto Scan part of this step.
-
Page 21: Picture Setting
Menu Adjustments Picture Setting The Picture menu offers options to enhance and refine the picture displayed on your TV based on ambient room light and personal preferences. Adjustment options include contrast, brightness, color, sharpness and color temperature. How to Navigate: Press the MENU button on the remote control. -
Page 22: Audio Settings
Menu Adjustments Audio Settings The Audio menu offers options to make sound enhancements while listening through the built-in speakers or to select digital audio options when connected to a Dolby Digital receiver though an optical digital output. How to Navigate: Press the MENU button on the remote control. -
Page 23: Date & Time Settings
Menu Adjustments Date & Time Settings The Time menu includes adjustment of settings for your local time zone and daylight savings time. The clock will adjust automatically after the initial Channel Auto Scan of available broadcast channels in your area. How to Navigate: Press the MENU button on the remote control. -
Page 24: Setup Settings
Menu Adjustments Setup Settings In the Setup menu you may change the initial set up of preferences that include settings for language, menu display, computer monitoring, closed captions, enhancement of black detail in the picture and resetting your TV back to its factory default status. -
Page 25: Closed Captions
Menu Adjustments Closed Captions The Setup menu includes adjustments for activating the Closed Caption text feature for display on-screen and customiz- ing CC display types and font styles. How to Navigate: Press the MENU button on the remote control. Navigate using arrow buttons to select Setup. -
Page 26: Cec Settings
Menu Adjustments CEC Settings The CEC menu includes options for controlling functions of compatible external devices connected via the HDMI input. Please refer to the instruction manual of your connected device to confirm if CEC control is possible. How to Navigate: Press the MENU button on the remote control. -
Page 27: Parental Control
Menu Adjustments USA Parental Control In the Lock menu, you may block television and movie programming based on TV ratings and Motion Picture Association guidelines. To gain access and select your preferences within the Parental menu make certain your input is set to TV. How to Navigate: Press the MENU button on the remote control. - Page 28 Menu Adjustments Canadian Parental Control In the Lock menu, you may block television and movie programming based on Canadian TV and movie rating guidelines. To gain access and select your preferences within the Parental menu make certain your input is set to TV. How to Navigate: Press the MENU button on the remote control.
- Page 29 Next Next Return Return Next Return Return Next Return Next...
-
Page 30: Favorite
TV Provider Changes & TV Settings Channel Auto Scan After Initial Setup To make changes your TV provider or re-scan for available broadcast channels in your area, select the Channel Menu. Note: For Cable or Satellite users with a set-top box, there is no need to run Channel Auto Scan. Connect your cable satellite set top box to one of the available inputs on the TV for viewing. -
Page 31: Zoom Modes
Aspect Modes The ASPECT function offers several viewing display options on the 16:9 screen. Press the ASPECT button to cycle through the following widescreen settings. NOTE: The ASPECT function is not available for digital broadcasts. Press ASPECT to cycle through the following widescreen settings. -
Page 32: Usb Modes
MEDIA. Source Select MEDIA in the Component HDMI1 HDMI2 HDMI3 HDMI4 Media... -
Page 33: Mhl Setting
MHL Setting Connecting an MHL-enabled device You can connect a MHL-enabled device, such as certain models of smartphones & tablets, and view the device’s screen on the TV. Connecting a MHL-enabled device to the HDMI4 (MHL) input requires a special MHL cable. (Not included) To connect an MHL-enabled device: 1. - Page 34 UHD LED 65” Diagonal 16:9 480p/720p/1080i/1080p/2160p 3840x2160 4000:1 178° 178° 16.7M 220 W 2 x 10W 57.4” (W) x 33.3” (H) x 5.6” (D) 53.3 lbs Weight (may vary 10%) Composite Video Y Pb Pr HDMI HDMI with MHL CABLE-ANTENNA Optical AUDIO out...
-
Page 35: Troubleshooting
Troubleshooting Check for a possible solution to a symptom before contacting a customer service representative. Cannot receive certain • Perform Channel Scan to add channels into the TV tuner memory. channels through the See page 18-19. antenna • Readjust your antenna and retry Auto Channel Scan. •...
Need help?
Do you have a question about the 65CBL-01 and is the answer not in the manual?
Questions and answers