Panasonic CQ-C1300U Operating Instructions Manual
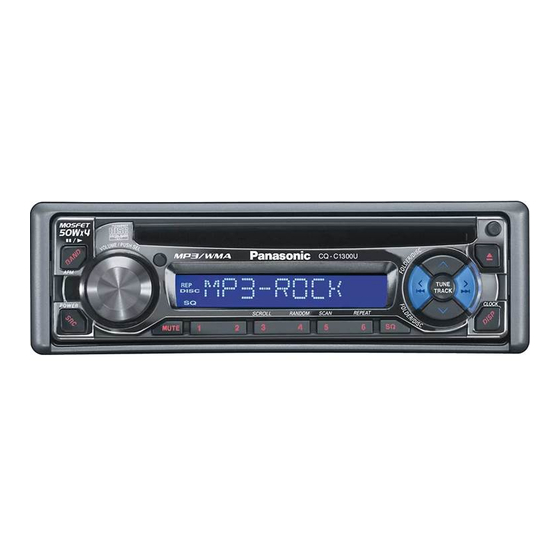
Removable full front panel mp3 wma cd player/receiver with cd changer control
Hide thumbs
Also See for CQ-C1300U:
- Operating instructions manual (59 pages) ,
- Operating instructions (3 pages) ,
- Service manual (103 pages)
Table of Contents
Advertisement
Removable Full Front Panel MP3 WMA CD Player/Receiver with CD Changer Control
≥ Please read these instructions carefully before using this product and save this manual for future use.
≥ Prière de lire ces instructions attentivement avant d'utiliser Ie produit et garder ce manuel pour l'utilisation ultérieure.
≥ Lea con atención estas instrucciones antes de utilizar el producto y guarde este manual para poderlo consultar en el futuro.
Operating Instructions
Operating Instructions
Manuel d'instructions
Manuel d'instructions
Manual de instrucciones
Manual de instrucciones
CQ-C1300U
Advertisement
Table of Contents

Related Manuals for Panasonic CQ-C1300U


Summary of Contents for Panasonic CQ-C1300U
- Page 1 ≥ Prière de lire ces instructions attentivement avant d’utiliser Ie produit et garder ce manuel pour l’utilisation ultérieure. ≥ Lea con atención estas instrucciones antes de utilizar el producto y guarde este manual para poderlo consultar en el futuro. CQ-C1300U Operating Instructions Operating Instructions Manuel d’instructions...
-
Page 2: Safety Information
≥ Mounting collar 1 and trim plate 7 are mounted on the main unit at shipment (page 38). Panasonic welcomes you to our ever growing family of electronic product owners. We know that this product will bring you many hours of enjoyment. Our reputation is built on precise electronic and mechanical engineering, manufactured with carefully selected components and assembled by people who take pride in their work. -
Page 3: Features
A as indicated. Install the battery on the battery holder. Insert the battery holder back into its original position. Battery Notes ≥ Battery type: Panasonic lithium battery (CR2025) ≥ Battery life: Approximately 6 months under CD changer Stereo power (CX-DP880U, amplifi... -
Page 4: Table Of Contents
CD Changer Control ... 26 CD changer mode, display change, disc selection, track selection, fast forward/fast reverse, random play, disc random play, scan play, disc scan play, repeat play, disc repeat play, direct disc selection CQ-C1300U Audio Settings... 28 Volume, bass/treble, balance/fader Troubleshooting... 30... -
Page 5: General
Press [DISP] (display) to change to regular mode. Scrolling Note: ≥ To display the demonstration again, press and hold [SRC] (source) for more than 4 seconds when turning power on. CQ-C1300U [SOURCE] (Power/source) [MUTE] [SQ] [DISP] (Display) (Sound Quality) Radio (page 18) -
Page 6: Radio
Band Press [BAND]. Tuning [$]: Higher frequency [%]: Lower frequency Press and hold [%] or [$] for more than 0.5 seconds, then release. Seeking will start. CQ-C1300U [%] [$] (TUNE) [SOURCE] [1] to [6] (Preset station) [BAND] (Auto preset [DISP]... -
Page 7: Before Disc Playback
(page 24) and “Notes on Discs” (page 36). ∫ CD-DA Track Disc Eject Press [<] (eject) and take the disc. CQ-C1300U CD Player Do not watch the scroll display while driving. [<] (Eject) [BAND] (;/1:... -
Page 8: Mp3/Wma Player
TAG OFF: The fi le name is displayed. [#]: Previous folder File Selection [9]: Next fi le [:]: Beginning of the current fi le For the previous fi le, press twice. CQ-C1300U [:]/[9] (6/5) (File/fast forward/fast reverse) [SOURCE] [0] to [9] (File/folder number) -
Page 9: Mp3/Wma
Microsoft noise from the speaker damage, but also Corporation in the United damage your hearing. States and/or other countries. CQ-C1300U Recording MP3/WMA Files on a CD-Media MP3 (ID3 tag) ≥ You are recommended to minimize the chances ≥ Album title of making a disc that contains both CD-DA fi... -
Page 10: Cd Changer Control
[4] (RANDOM) [5] (SCAN) [6] (REPEAT) (Source) Display Change CD changer functions are designed for optional Panasonic CD changer unit. Press [DISP] (display). ≥ Connect the CD changer, and load a magazine (CDs). ≥ You cannot connect 2 CD changers using the dual CD changer selector (CA-CD55U, option). -
Page 11: Audio Settings
You can adjust the sound balance among the front, rear, right and left speakers. Default: BAL (balance) CNT (center) FAD (fader) CNT (center) Setting range: 15 levels each CQ-C1300U Press [VOLUME] (SEL: select). (Press [VOL "] or [VOL #] on the remote control unit.) (Push.) -
Page 12: Troubleshooting
Some operations are Some operations are not executable not executable. in particular modes such as menu mode. CQ-C1300U Caution: ≥ Do not use the unit if it malfunctions or if Noise there is something wrong. ≥ Do not use the unit in abnormal condition,... - Page 13 The microcontroller in the unit operates abnormally due to noise or other factors. Note: ≥ Refer to the section on “Notes on MP3/WMA” (page 24). CQ-C1300U q Remote Control Unit Possible solution Problem Insert a disc correctly. No response to...
- Page 14 If the suggestions in the charts do not solve the Check the disc. problem, we recommend that you take it to your (The changer automatically switches nearest authorized Panasonic Servicenter. The to the next disc.) product should be serviced only by a qualifi ed technician.
-
Page 15: Notes On Discs
Do not attach any seals or labels to your discs. Do not write anything on the disc label with a pointed pen or hard-point pen. CQ-C1300U Anti-Theft System This unit is equipped with a removable face plate. Removing this face plate makes the unit totally inoperable. -
Page 16: Installation Guide
Before you begin installation, look for the items which are packed with your unit. (5 mm‡k16 mm) ≥ Warranty Card... Fill this out promptly. ≥ Panasonic Servicenter List for Service (5 mm‡) ≥ Installation Hardware... Needed for in-dash Thickness Min. - Page 17 Antenna (RADIO), accessory (ACC), or ignition (IGN). The antenna lead is a thick, black wire with a metal plug at the end. CQ-C1300U Equipment Connect All Leads Connect any optional equipment such as an Now that you have identifi ed all the wires in the amplifi...
- Page 18 4 Tapping screw 2 Hex. nut 3 Rear support strap 5 Mounting bolt 1 Mounting collar CQ-C1300U Remove the Unit Switch off the power of the unit. Insert mounting collar 1 into the dashboard, and bend the mounting tabs out with a screwdriver.
-
Page 19: Wiring Diagram
Fuse (mini auto fuse type, 15 A) ≥ If the fuse (rear panel) blows frequently, they may be something wrong with the unit or wiring connection. Consult your nearest Panasonic Servicenter for service. (White) (White/black stripe) Front speaker lead... -
Page 20: Specifi Cations
(option) control power lead (Blue/white stripe) Remove the vinyl cap. Stereo power amplifi er (option) (bridged connection) CQ-C1300U Specifi cations (continued) Power supply: Current consumption: Maximum power output: 50 Wk4 (at 1 kHz) CD changer Tone adjustment range: Bass: d12 dB at 100 Hz... - Page 21 Panasonic Consumer Electronics Company, Division of Matsushita Electric Corporation of America One Panasonic Way, Secaucus, New Jersey 07094 http://www.panasonic.com Panasonic Sales Company. Division of Matsushita Electric of Puerto Rico, Inc. (“PSC”) Ave. 65 de Infanteria, Km. 9.5 San Gabriel Industrial Park, Carolina, Puerto Rico 00985 http://www.panasonic.com...