Table of Contents
Advertisement
Quick Links
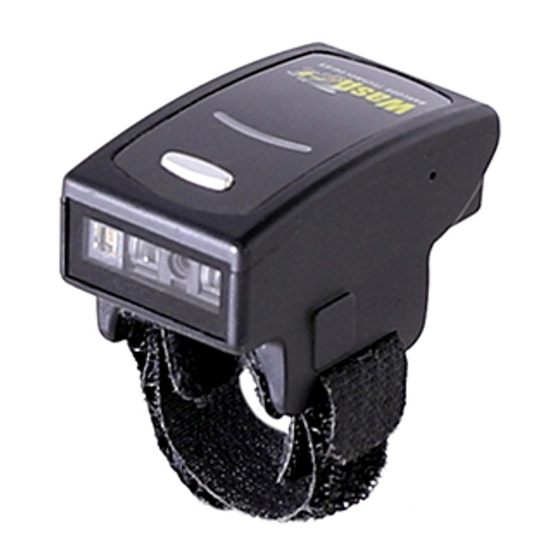
Wasp WRS100SBR
1D Ring Barcode Scanner
Wasp Barcode Technologies
1400 10th Street
Plano, Texas USA 75074
(214) 547-4100 | www.waspbarcode.com
©2013-2018 Wasp Barcode Technologies
Quick Guide
For full user's manual, please contact your local distributor.
Wasp WRS100SBR 1D Ring Barcode Scanner Quick Guide (Rev 1)
P/N: 8012-0066001
Advertisement
Table of Contents

Related Manuals for Wasp WRS100SBR


Summary of Contents for Wasp WRS100SBR
- Page 1 Wasp Barcode Technologies 1400 10th Street Plano, Texas USA 75074 (214) 547-4100 | www.waspbarcode.com ©2013-2018 Wasp Barcode Technologies Quick Guide For full user’s manual, please contact your local distributor. Wasp WRS100SBR 1D Ring Barcode Scanner Quick Guide (Rev 1) P/N: 8012-0066001...
- Page 2 FCC WARNING STATEMENT WARNING AND CAUTION This device complies with Part 15 of the FCC Rules. Operation is subject to the 1. Take any metals into contact with the terminals in connectors. following two conditions: (1) this device may not cause harmful interference, and (2) 2.
-
Page 3: Beeper Indication
BEEPER INDICATION INTRODUCTION Single beep Good read Micro USB port LED Indicator Single short beep The scanner reads a Code39 of (with Protective Cover) ASCII in configuration procedure Function Button Two beeps i. Wireless connection ii. The scanner successfully reads Restart Button a configuration barcode (insert pin into the hole) -
Page 4: Charging The Battery
OUT OF THE BOX CHARGING THE BATTERY Host Scanner USB A Micro USB Wasp WRS100SBR 1. Flip open the micro USB port on the scanner. Wireless Ring USB Charger Cable 2. Insert the micro USB connector into the port on the Barcode Scanner scanner and USB A connector into a USB port on the host PC. -
Page 5: Step 1 - Getting Started
STEP 1 - GETTING STARTED 1. Pull open the long end and insert your index finger 3. Clench your fist and use your thumb to tap the through the loop. touch-activated trigger button. A gentle touch on the button will work; there is no need to press with force. -
Page 6: Step 3 - Interface Selection
STEP 3 - INTERFACE SELECTION ATTENTION 1. If either your hand or the Velcro strap is soaking wet, the Laser Scan one of below configuration barcodes to determine your beam may automatically light up without touch trigger. The scanner interface: can still work well in this condition but it will waste battery power, . -
Page 7: Getting Connected
BT - HID BT - HID SMARTPHONE/TABLET TOUCH KEYBOARD GETTING CONNECTED Please follow below instruction to toggle touch keyboard 1. Scan [Disconnect] to delete previous pairing record. Alternatively, on smartphone/tablet. you may long-press the function button for 5 seconds until the the scanner emit two beeps. -
Page 8: Numeric Bar Codes
BT - HID NUMERIC BARCODES POWER OFF TIMEOUT The period of inactivity before auto power-off. Variable Timeout . B030$ SET MINUTE (Range: 00 ~ 60) . B029$ SET SECOND (Range: 00 ~ 60) The default timeout is 00 minute and 30 seconds. For example, to set the timeout as 5 minutes 30 seconds: 1. - Page 9 GENERAL SETTINGS ILLUMINATION PREFERENCE . A001$ . F059$ LASER ALWAYS ON DEFAULT LED ON AFTER 1 SEC . P023$ . F049$ LASER ALWAYS ON ABORT LED AUTO-ADAPTIVE . A007$ . F048$ CHECK LASER ALWAYS ON VERSION LED ALWAYS ON BEEPER .
- Page 10 KEYBOARD LAYOUT . C010$ . C009$ JAPAN ENGLISH (106 key) (USA) . C018$ . C025$ ENGLISH CANADIAN (UK) (FRENCH) . C012$ . C034$ CANADIAN FRENCH (TRADITIONAL) . C029$ . C011$ GERMAN NORWEGIAN . C026$ . C014$ SWEDISH ITALIAN . C031$ .
- Page 11 KEYBOARD LAYOUT . C030$ . C017$ CZECH BELGIAN (QWERTY) (AZERTY) . C022$ . C028$ CZECH DUTCH (QWERTZ) . C027$ . C021$ HUNGARIAN DANISH (QWERTZ) . C024$ . C032$ HUNGARIAN SLOVAK (101 KEY) . C033$ . C016$ SWISS BRAZILIAN (GERMAN) (PORTUGUESE) .
-
Page 12: Gs1 Databar Expanded
ENABLE SYMBOLOGIES . G010$ . A002$ ENABLE CODE 93 ALL CODE . N017$ . K010$ CODE 32 IATA . L010$ . L014$ UK PLESSEY TELEPEN . L001$ . N032$ GS1 DATABAR . N010$ . N001$ INDUSTRIAL GS1 DATABAR 2 OF 5 LIMITED . -
Page 13: Memory Mode
TERMINATOR MEMORY MODE . D012$ . C035$ MEMORY MODE . D011$ After scanning the above barcode, the scanner will be able to collect barcode data off-line. The barcode data will be stored in the format of: < Date >, < Time >, < Barcode Data > < CR > . -
Page 14: Date And Time Setup
MEMORY MODE DATE & TIME SETUP MEMORY MODE DATA FORMAT . R011$ . R006$ SET DATE DATA FORMAT The default Data Format is <Date>, <Time>, <Barcode Data> only Example: To set Date to 2017-08-01 (Year-Month-Day): below are all items available for display and their codes: 1. -
Page 15: Date Format
MEMORY MODE DATE FORMAT MEMORY MODE TIME FORMAT . R008$ . R009$ DATE FORMAT TIME FORMAT The default Date Format is DD/MM/YYYY (Code = 09), below The default Time Format is HH:MM:SS (Code = 01), below is full list of available formats and their setup codes: are available formats and their setup codes: Code Format... - Page 16 HOW TO REMOVE VELCRO STRAP 1. Pull open the long end. 3. Pull open the short end on the other side. 2. Pull out the long end through the slot. 4. Remove the whole Velcro strap from the scanner by pulling the long end.
- Page 17 HOW TO INSTALL VELCRO STRAP 1. Insert the short end through the slot, with Velcro side 3. Insert the long end through the other slot, with Velcro facing upwards. side facing upwards. 2. Attach the short end to the long end to close. 4.
-
Page 18: Test Barcodes
TEST BARCODES TROUBLESHOOTING Q: Your Bluetooth is unable to detect the scanner. Code 39 A: (1) Make sure your Bluetooth is 4.0 or later version that supports BLE. (2) Restart your Bluetooth or Host device and try again, following the instruction on page 11. (3) Make sure the scanner is in BT-HID mode (see page 10).
Need help?
Do you have a question about the WRS100SBR and is the answer not in the manual?
Questions and answers