
Related Manuals for Colzer PD123A


Summary of Contents for Colzer PD123A
- Page 1 COLZER Dehumidifier User Manual Model No.: PD123A,PD223A Please read this User Manual before operating and keep safe for future reference.
- Page 2 BEFORE FIRST USE: To prevent any internal damage, it is very important to keep refrigeration products (like this dehumidifier) upright throughout their journey. Please leave it standing upright and outside the box 24 HOURS before plugging it in.
- Page 3 Welcome Thanks for choosing us! COLZER is dedicated to keeping people healthy, comfortable and more enjoyable by offering quality appliances range from dehumidifiers, air purifiers, humidifiers to refrigerators, wine coolers, ice makers, and more. From breathing easier in your office to upgrading your kitchen appliances, we hope you trust COLZER to help you every step of the way.
-
Page 4: Table Of Contents
CONTENTS SAFETY INFORMATION ..................................1 PARTS IDENTIFICATION ..................................2 CONTROL PANEL IDENTIFICATIONS ............................. 3 1. Understand the Top Control Panel ............................3 1) Understand the Control Buttons ..........................3 2) Understand the LCD Display ............................4 2. Understand the Front Display ..............................5 OPERATION INSTRUACTIONS ................................ -
Page 5: Safety Information
『SAFETY INFORMATION』 To prevent injury to the user or other people and property damage, the following instructions must be followed when using the dehumidifier. 1. Install the dehumidifier properly on a floor, table, or shelf that is level and strong enough to support it when the water bucket is full. -
Page 6: Parts Identification
『PARTS IDENTIFICATION』 NOTE: DO OBSTRUCT THE AIR INLET AND/OR OUTLET. -
Page 7: Control Panel Identifications
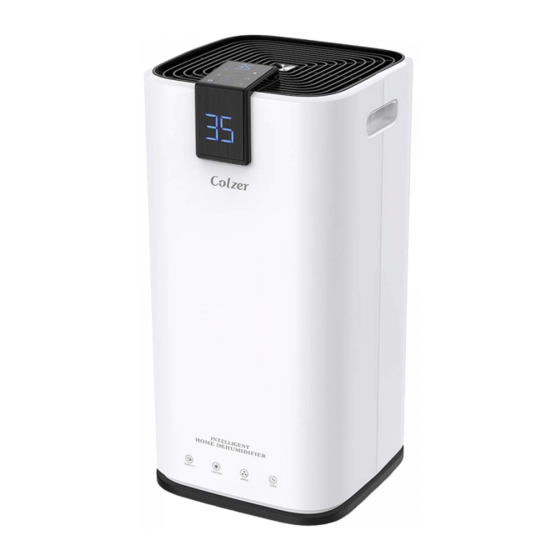
『CONTROL PANEL IDENTIFICATIONS』 1. Understand the Top Control Panel The top control panel features a digital display and 6 buttons. 1) Understand the Control Buttons POWER Button: Press to turn the dehumidifier ON or OFF. Mode Button: Press to switch the working mode between DH (DEHUMIDIFY) mode and DRY (Laundry Dry) mode. -
Page 8: Understand The Lcd Display
HUMIDITY Button: Press the HUMIDITY button repeatedly to adjust the set-point of humidity level between 30%-80% (in 5% increments) during normal DEHUMIDIFY (DH) mode. The digital number on the display will flash when changes are being made. NOTE: The HUMIDITY button will be disabled in the DRY-CLOTHES (DRY) mode. SPEED Button: Press the SPEED button to set the fan speed to FAST or SLOW in the normal DEHUMIDIFY (DH) mode. -
Page 9: Understand The Front Display
DH: The “DH” icon will light up when the normal DEHUMIDIFY mode has been selected. 2. Understand the Front Display The front display displays the same content, like humidity readout or error codes, as the digital display on the top control panel. So you can read the room humidity level on the front display easily, in a visible distance. -
Page 10: Turn The Dehumidifier On
Uncoil the power cord and plug it firmly into a properly grounded 110-120 volt AC outlet. After plugged in, the control panel will be light up for 1-2 seconds and then goes off, which is the normal self-diagnose process and does not require any user intervention. 3. -
Page 11: Dry (Laundry Dry) Mode
the digital number turns to statically display the actual room humidity, during which time the setting will be automatically registered. · Let the Dehumidifier Run. The dehumidifier will automatically stop when the room humidity reaches the target RH% or when the water bucket is full. ★... -
Page 12: Drain Collected Water
Note: · For the AUTO ON setting, please turn on the dehumidifier to select a desired humidity level. Otherwise, the humidity maintained will be the same as the previous setting. · You can only set AUTO ON timer when the dehumidifier is off or set AUTO OFF timer when the dehumidifier is on, but not be able to set both AUTO ON and AUTO OFF timer at the same time. -
Page 13: Continuous Drain By Gravity
· Gently remove the water bucket from the dehumidifier by gripping both top and bottom sides and pulling outward; · Open the drain outlet lid on the bucket cover and then empty the bucket; · Replace the water bucket to the dehumidifier. The dehumidifier will auto eliminate the E7 error and resume operation in 1-3 minutes after the water bucket been replaced properly. -
Page 14: Smart Functions
since there is one end slightly smaller than another end. - Be sure to run the water hose sloping downward to let the water flow out smoothly. No kinks or bent. - Do not submerge the other end of the hose into the water. - It is recommended to use a short hose. -
Page 15: Maintenance
『MAINTENANCE』 To avoid possible electric shock, ensure to turn the dehumidifier off and disconnect the plug from the power source before performing any cleaning or maintenance. 1. Clean the Vent and Case · Use water and mild detergent. Do not use bleach or abrasives. ·... -
Page 16: When Not Using Dehumidifier For Long Periods Of Time
4. When Not Using dehumidifier for Long Periods of Time · Operate the dehumidifier on high fan mode for half a day, and then wait 1 day before emptying the reservoir. · Clean the main dehumidifier, water reservoir, and air filter. Ensure the whole dehumidifier is clean and dry. -
Page 17: Specification
『SPECIFICATION』 Model PD123A PD223A Power Source 110-120V, 60Hz 110-120V, 60Hz 30 Pints/Day 70 Pints/Day Humidity Removal (95°F, 90%) 28 Pints/Day 51 Pints/Day Humidity Removal (86°F, 80%) 13 Pints/Day 30 Pints/Day Humidity Removal (80°F, 60%) 18 Pints/Day Humidity Removal (65°F, 60%) -
Page 18: Trouble Shooting
· Pressing any button on the control panel to eliminate the alarm. · Turn off the dehumidifier and unplug it to check if any obstructions. · Restart the dehumidifier 10 minutes later.. If the ERROR message does not disappear after the restart, immediately contact COLZER customer service at service@colzer.com. 2. Reset Please try the below steps to reset the dehumidifier if necessary: 1) Turn the dehumidifier off;... - Page 19 Problem Possible Causes Solutions Dehumidifier The power cord is unplugged. Plug it in. can not turn on The fuse is blown or circuit breaker is tripped. Check the fuse or the circuit breaker. The water bucket is full or not in the proper Make sure the water bucket is empty and has position.
-
Page 20: Warranty
These are our general terms for warranty service, but we always urge our customers to reach out to us with any issue, regardless of warranty terms. If you have an issue with a COLZER product, please contact us at service@colzer.com, and we will do our best to resolve it for you.
Need help?
Do you have a question about the PD123A and is the answer not in the manual?
Questions and answers