
Related Manuals for Hubble Nursery Pal Cloud


Summary of Contents for Hubble Nursery Pal Cloud
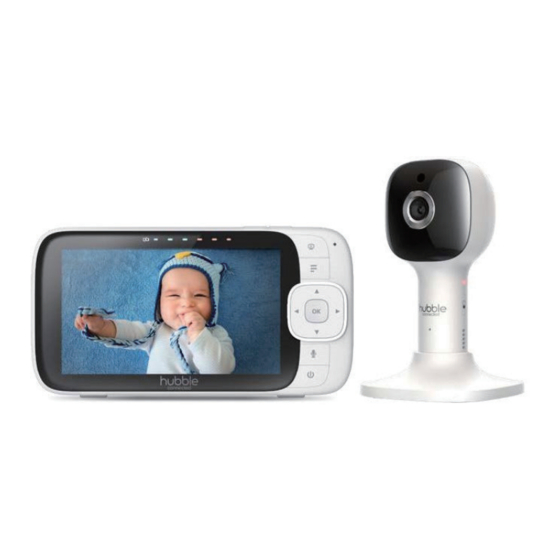
- Page 1 USER’S GUIDE 5" Smart HD Baby Monitor with Night Light Nursery Pal Cloud , Nursery Pal Cloud Twin The features described in this user’s guide are subject to modifications without prior notice.
- Page 2 Please keep your original dated sales receipt for your records. For warranty service of your Hubble product, you will need to provide a copy of your dated sales receipt to confirm warranty status. Registration is not required for warranty coverage.
- Page 3 Overview of the Parent Unit 1. Display (LCD screen) 9. Navigation button 2. Parent Unit ON/OFF and Move Up/Down/Right/Left menu Charging LED options. Red when the parent unit is Move the image upward/ Charging. downward/left/right. 3. Audio Level LEDs (Green, Amber, 10.
- Page 4 Parent Unit menu icons Signal Level (4 Levels) Night Vision Mode (Video also changes to Black/White). Talk Mode On. Indicates the screen off timer is set. Volume Level Control (8 Levels). No Baby Unit detected. Battery Level Indication (4 Levels). Zoom Level Control (1X, 1.2X, 1.5X, 2X).
- Page 5 Overview of Your Baby Unit Light Sensor Power/Link indicatior Camera Lens PAIR button Infrared LEDs (x 8, for night Night Light vision) Speaker High Sense Microphone 10. Power Socket Magnetic mount 11. Temperature Sensor Important guidelines for installing your Digital Video Baby Monitor •...
-
Page 6: Table Of Contents
Table of contents 1. Safety Instructions ................8 2. Getting Started ................... 10 2.1 Connecting the Power Supply of the Baby Unit ......10 2.2 Fixing magnetic mount on the wall ..........10 2.3 Connecting the Power Supply of the Parent Unit......11 2.4 Desktop Stand of the Parent Unit ............11 2.5 Registration (Pairing) ................12 3. - Page 7 5.4.1 Power ON and Connect the Camera ........20 5.4.2 Download HubbleClub by Hubble Connected App ..... 20 5.4.3 Sign up with Hubble on your smart device ......21 5.4.4 Add the Camera to your account ........22 6. Disposal of the Device (environment) ..........25 7.
-
Page 8: Safety Instructions
1. Safety Instructions WARNING: Strangulation Hazard: Children have STRANGLED on cords. Keep this cord out of the reach of children (more than 3ft (1m) away). Never use extension cords with AC Adaptors. Only use the AC Adaptors provided. Safety Instructions... - Page 9 ® Wi-Fi CAMERA UNIT SET UP & USE: • Choose a location for the Baby Unit that will provide the best view of your baby in his/her crib. • Place the Baby Unit on a flat surface, such as a dresser, bureau or shelf, or mount the Baby Unit on a wall securely using the keyhole slots in the underside of the stand.
-
Page 10: Getting Started
2. Getting Started 2.1 Connecting the Power Supply of the Baby Unit • Insert the DC plug of the power adaptor into the DC socket on the back of the Baby Unit. • Connect the other end of the power adaptor to mains power. -
Page 11: Connecting The Power Supply Of The Parent Unit
2.3 Connecting the Power Supply of the Parent Unit. • Connect the small plug of the power adaptor to the parent unit and the other end to the mains power. Only use the included adaptor (5VDC/1000mA). • Press and hold the POWER button 0 to turn ON. -
Page 12: Registration (Pairing)
2.5 Registration (Pairing) The Baby Unit is pre-registered to your Parent Unit. You do not need to register it again unless the Baby Unit loses its link with the Parent Unit. To re-register your Baby Unit, or register a new Baby Unit, follow the procedure below: Press the button to access the menu. -
Page 13: Using The Baby Monitor
3. Using the Baby Monitor 3.1 Setting Up Place the Baby Unit in a convenient location (e.g. on a table) and point the camera lens towards the area you want to monitor. Adjust the angle of the Baby Unit's camera until you are satisfied with the image shown on the Parent Unit. Note: Do not place the Baby Unit within the baby’s reach! If there is inter-ference with the picture or sound, try moving the units to different locations, and... -
Page 14: Parent Unit Menu Options
You can playback audio content - Lullabies, Soothing Sounds and Audio Books on the Baby Unit. The audio content can be downloaded and stored in the Baby Unit via HubbleClub by Hubble Connected App. You have 10 preloaded lullabies/soothing sounds and 8 audio books in the Baby Unit. -
Page 15: Audio Book Playback
Personal Recording Playback The unit allows playback of a personal audio recording to soothe your baby, before playback, please record a personal audio recording via HubbleClub by Hubble Connected App. Press the button then Scroll Left/Right to select option in the menu. -
Page 16: Camera Control
4.6 Camera Control 4.6.1 Add (pair) a camera Press the button to access the menu. Press the < LEFT button or > RIGHT button until is highlighted, the - (delete) / + (add) / (view) / (scan) menu options will display. Press the + UP button or - DOWN button to select + (add), and press button to confirm. -
Page 17: Delete A Camera
4.6.3 Delete a camera Press the button to access the menu. Press the < LEFT button or > RIGHT button until is highlighted, the - (delete) / + (add) / (view) / (scan) menu will display. Press the + UP button or - DOWN button to select - (delete), and press the button to confirm. -
Page 18: Power Save Mode
4.8 Power Save mode Press the button to access the menu. Press the < LEFT button or > RIGHT button until V is highlighted. Press the + UP button or - DOWN button to select auto video off after 5 mins, 15 mins or 30 mins (screen timer active when in battery mode only). -
Page 19: Wi-Fi® Internet Viewing
Wi-Fi Router Access your View your Camera from any Camera locally Camera compatible device remotely Hubble Service When a user tries to access the Camera, our Hubble server authenticates the user’s identity and permits access to the Camera. Wi-Fi® Internet Viewing... -
Page 20: Setup
• Connect the power adaptor to mains power and insert the plug into the power socket on the back of the Camera Unit, the unit turns on. 5.4.2 Download HubbleClub by Hubble Connected App • Scan the QR code with your smart device and download... -
Page 21: Sign Up With Hubble On Your Smart Device
• Follow the steps to enter your account information and sign up with Hubble (fig.3-6). fig.3 fig.4 fig.5 fig.6 Note: If you already have a HubbleClub by Hubble Connected App account, please tap Log in with Hubble to go to the next steps. Wi-Fi® Internet Viewing... -
Page 22: Add The Camera To Your Account
5.4.4 Add the Camera to your account • Log in your Hubble Account by entering “User Name” and “Password” (fig.7). • Tap Add Your Device on the screen of your device to add new Camera (fig.8) fig.7 fig.8 • To select your device for setting up by tapping Baby Moniotor (fig.9). - Page 23 • The following setup instructions will appear on the screen, select your Wi-Fi network and enter “Password” (fig.11). • Power on your camera and wait for the LED to flash Red on the camera. Press and hold the PAIR button on the side of Camera, you will hear a voice prompt “Ready for Pairing”...
- Page 24 • Tap Continue, it will take a few minutes for the Camera to connect to the Wi-Fi® network before showing the connection status (fig.16). • The Camera has been successfully connected, name your Camera (fig.17). • Tap Finish to complete the camera setup with Hubble. fig.16 fig.17 Note: If connection fails, please tap Retry and repeat the steps starting from 5.4.4.
-
Page 25: Disposal Of The Device (Environment)
6. Disposal of the Device (environment) At the end of the product life cycle, you should not dispose of this product with normal household waste. Take this product to a collection point for the recycling of electrical and electronic equipment. The symbol on the product, user’s guide and/or box indicates this. -
Page 26: Help
8. Help Display No display • Try recharging the battery pack. • Reset the Units. Unplug both the Units' electrical power, then plug them back in. • Is the Unit switched on? • Press and hold the ON/OFF button 0 on the Parent Unit for 3 seconds to switch it ON. - Page 27 • Make sure that the Baby and Parent Units are not near other electrical equipment, such as a television, computer or cordless/mobile telephone. Move the Baby Unit or Parent Unit 3 feet away from other electrical equipment. • Use of other 2.4 GHz products, such as wireless networks (Wi-Fi® routers), Bluetooth™...
- Page 28 Troubleshooting for Wi-Fi ® Internet Viewing Category Problem Solution Description / Error Cannot find my There are more than one Hubble product model at App. Check if you download correct “Add Camera” App “HubbleClub By Hubble Connected” Account I am unable to...
- Page 29 Connectivity I get a message: We Please try again in a few Issues are having problems minutes.This could be because accessing your of any issue with your internet camera. This could be connection. due to lack of internet If the problem remains, please connection.
- Page 30 ‘Ready for pairing’. and the setup fails. When the Camera LED is off, this indicates that it is in setup mode. Add camera in HubbleClub by Hubble Connected App. Connectivity Even though I am Please check your wireless router Issues accessing my Camera settings.
- Page 31 Camera When I try to view Please upgrade your firmware. This the Camera, I get a takes around 5 minutes. We push prompt for Camera upgrades from time to time to firmware upgrade. improve the Camera features. What should I do? General Which platforms Minimum requirement:...
- Page 32 Android™ device. – Select Search – Type in “HubbleClub by Hubble Connected” – The results will show the Hubble – Select to install it iOS Device: – Open the App Store – Select Search – Type in “HubbleClub by Hubble Connected”...
-
Page 33: General Information
• Damage caused by or resulting from contact with foreign substances, including, but not limited, to liquid, water, rain, humidity, perspiration, sand, dirt, and/or food; • Damage caused by or resulting from the use of Non-Hubble Smart Nursery branded or certified Products or Accessories or other peripheral equipment;... - Page 34 DURATION OF THIS LIMITED WARRANTY. REPAIR OR REPLACEMENT IS YOUR SOLE AND EXCLUSIVE REMEDY AGAINST HUBBLE AND Hubble Smart Nursery. IN NO EVENT SHALL HUBBLE OR Hubble Smart Nursery’s LIABILITY TO REPAIR OR REPLACE YOUR PRODUCT OR ACCESSORY EXCEED THE ORIGINAL PURCHASE PRICE OF THE PRODUCT AND ACCESSORY AND HUBBLE AND Hubble Smart Nursery’s TOTAL LIABILITY...
- Page 35 What will HUBBLE do? HUBBLE or its authorized distributor at its sole discretion will, at no charge, repair or replace any Products or Accessories that do not conform to this Warranty. In the event that replacement is necessary to remedy a defect...
- Page 36 HUBBLE or representations made by any agent, employee or staff of HUBBLE, that may have been made in connection with your purchase of any Product and/or Accessory. FCC and IC regulations (FCC Part 15)
-
Page 37: Technical Specifications
10. Technical Specifications BABY UNIT Frequency 2400 MHz to 2483.5 MHz Image sensor color CMOS 2M Pixels IR LED 8 pcs Operating F - 104 Temperature Power Adaptor: Input: 100-240V AC, 50/60Hz, 300mA; Output: 5.0V DC, 1000mA Technical Specifications... - Page 38 PARENT UNIT Frequency 2400 MHz to 2483.5 MHz Display 5” diagonal TFT LCD Display Colors 16.7M color LCD Operating F - 104 Temperature Brightness Control 8 steps Volume Control 8 steps Power Adaptor: Input: 100-240V AC, 50/60Hz, 300mA; Output: 5.0V DC, 1000mA WARNING Use only with provided power supply.
- Page 39 Manufactured, distributed and sold by Hubble Baby (HK) Limited. Apple logo is trademark of Apple Inc., registered in the U.S. and other countries. App Store is a service mark of Apple Inc. Google Play and Android are trademarks of Google Inc. Wi-Fi is a trademark of the Wi-Fi Alliance.
Need help?
Do you have a question about the Nursery Pal Cloud and is the answer not in the manual?
Questions and answers