Table of Contents
Advertisement
Quick Links
Advertisement
Table of Contents

Related Manuals for Datecs LP-50H


Summary of Contents for Datecs LP-50H
- Page 1 1 DATECS Service Manual LINE THERMAL PRINTER LP/EP-50H MODEL...
- Page 2 THE INFORMATION IN THIS DOCUMENT CANNOT BE REPRODUCED IN ANY MECHANICAL, ELECTRICAL OR ELECTRONIC WAY AND UNDER ANY CIRCUMSTANCES WITHOUT THE WRITTEN CONSENT FROM DATECS LTD. VERSION 01 / 2004...
-
Page 3: Table Of Contents
CONTENTS INTRODUCTION ..................... 5 FEATURES ....................5 SPECIFICATIONS ..................6 DISASSEMBLY AND REASSEMBLY ............7 Disassembly Procedure ................7 Reassembly Procedure ................11 SERVICE PARTS LIST ................12 Parts List for Mechanism ................12 Disassemble Drawing................13 BLOCK SCHEME ..................14 MAIN BOARD ................... - Page 4 1 DATECS LP/EP-50H 1 DATECS Contact Information Headquarters: DATECS Ltd. Bulgaria, 1784 Sofia 115A Tzarigradsko shosse tel.: +359 2 8165 500, +359 2 8165 501, +359 2 8165 506 fax: +359 2 8165 510 www.datecs.bg e-mail: sales@datecs.bg...
-
Page 5: Introduction
Service Manual INTRODUCTION This manual describes the disassembly, reassembly, and maintenance procedures of the line thermal printer LP-50H. 1. FEATURES his small line thermal printer is designed for various types of data communication terminals and measuring instrument terminals. Its abundant built-in features allow you to widely use this printer for different applications. -
Page 6: Specifications
1 DATECS LP/EP-50H 2. SPECIFICATIONS LP- 50H EP-50H Printing system Line thermal dot printing Printing width 48 mm (384 dots/line) Dot density 8 dots/mm (Width, Length) Paper feed pitch 0.125 mm Printing speed up to 50 mm/s Character size 12×29 Bold, 8×12, 10×16, 12×20, 14×24, 12×24, 9×16,... -
Page 7: Disassembly And Reassembly
Service Manual 3. DISASSEMBLY AND REASSEMBLY In case of maintenance work, observe the following: CAUTION If the printer functions properly, do not disassemble, reassemble, or adjust it. Particularly, do not loosen each setscrew unless required. After inspecting the printer, be sure to confirm that it is free from error. Never try to print without setting the printing paper in the printer. - Page 8 1 DATECS LP/EP-50H 2. Removing the Screws from the Bottom of the Main Body Turn over the printer body. Remove two M3 × 10 (BT) screws. Then, turn back the printer body to its original position. Do this, holding its upper and bottom covers.
- Page 9 Service Manual 5. Detaching the Upper Cover Lift the upper cover from the rear of the printer body. When this is done, lift it gently. Disconnect all the connectors. Holding up the upper cover, disconnect all the connectors rom the control board. Hold the base of the connector to disconnect it.
- Page 10 1 DATECS LP/EP-50H 8. Detaching the Printer Mechanism Remove four M2.6 × 8 (BT) screws used to secure the printer mechanism. Remove two screws each from the front and back. Pull out the printer mechanism. Pull it out gently to the paper holder side (front) without pulling a cable.
-
Page 11: Reassembly Procedure
Service Manual 3.2 Reassembly Procedure Reassemble the disassembled parts in the reverse order of the disassembly procedure described in 3.1. CAUTION: 1. Route the cables very carefully so that they will not be caught. The flat cable should be located on the board side. Take care that the NPE sensor will not be cabled above the DIP switch. -
Page 12: Service Parts List
1 DATECS LP/EP-50H 4. SERVICE PARTS LIST 4.1 Parts List for M r Mechanism Ref.No. Parts No. Description Q’ty 1-01 27ADJ AC Adapter 27AD with JPN Cord, $ = 140 1-02 27ADU AC Adapter 27AD with USA Cord, $ = 140... -
Page 13: Disassemble Drawing
Service Manual 4.2 Disassemble Drawing... -
Page 14: Block Scheme
1 DATECS LP/EP-50H 5. BLOCK SCHEME... -
Page 15: Main Board
Service Manual MAIN BOARD 6.1. Electrical Diagram 6.2. PCB 6.3. List of parts... -
Page 16: Electrical Diagram
1 DATECS LP/EP-50H 6.1. Electrical Diagram... -
Page 17: Pcb
Service Manual 6.2 PCB Top View... -
Page 18: Bottom View
1 DATECS LP/EP-50H Bottom View... -
Page 19: Top Layer
Service Manual Top Layer... -
Page 20: Bottom Layer
1 DATECS LP/EP-50H Bottom Layer... -
Page 21: List Of Parts
Service Manual 6.3. List of parts Name Description 1 Description 2 Battery 3.6V Buzzer Buzzer Electrolitic Capacitor 1000uF/16V Chip Capacitor 0805 100n Chip Capacitor 0805 Chip Capacitor 0805 Chip Capacitor 0805 100n Chip Capacitor 0805 Chip Capacitor 0805 100n Chip Capacitor 0805 Electrolitic Capacitor 3300uF/10V Chip Capacitor 0805... - Page 22 1 DATECS LP/EP-50H Connector CB97-40-2H100 Connector Molex 5267-03AX Connector Molex 53047-10 Connector Molex 52045-28 Connector Molex 53047-06 Connector Molex 53047-04 Diode LL4148 Shottky Diode 1N5822 Diode LL4148 Diode LL4148 Diode LL4148 Jumper 5 pin/DIP Jumper 3 pin/DIP Choke Coil Large/DIP...
- Page 23 Service Manual Chip resistor 0805 Chip resistor 0805 Chip resistor 0805 Chip resistor 0805 470Ω Chip resistor 0805 470Ω Chip resistor 0805 Chip resistor 0805 Chip resistor 0805 100k Chip resistor 0805 Chip resistor 0805 Chip resistor 0805 Chip resistor 0805 Chip resistor 0805 Chip resistor 0805 Chip resistor 0805...
-
Page 24: Interface
1 DATECS LP/EP-50H INTERFACE PARALLEL 7.1.1 Electrical Diagram 7.1.2 PCB 7.1.3 List of parts... -
Page 25: Electrical Diagram
Service Manual 6.1.1 Electrical Diagram... -
Page 26: Pcb
1 DATECS LP/EP-50H 7.1. 2 PCB Top View... -
Page 27: Bottom View
Service Manual Bottom View... -
Page 28: Top Layer
1 DATECS LP/EP-50H Top Layer... -
Page 29: Bottom Layer
Service Manual Bottom Layer... -
Page 30: List Of Parts
1 DATECS LP/EP-50H 7.1.3 List of parts Name Description 1 Description 2 Chip Capacitor 0805 470p Chip Capacitor 0805 100n Chip Capacitor 0805 470p Chip Capacitor 0805 Chip Capacitor 0805 100n Chip Capacitor 0805 100n Chip Capacitor 0805 100n Chip Capacitor 0805... -
Page 31: Rs232
Service Manual RS232 7.2.1 Electrical Diagram 7.2.2 PCB 7.2.3 List of parts... -
Page 32: Electrical Diagram
1 DATECS LP/EP-50H 7.2.1 Electrical Diagram... -
Page 33: Pcb
Service Manual 7.2.2 PCB Top View... -
Page 34: Bottom View
1 DATECS LP/EP-50H Bottom View... -
Page 35: Top Layer
Service Manual Top Layer... -
Page 36: Bottom Layer
1 DATECS LP/EP-50H Bottom Layer... -
Page 37: List Of Parts
Service Manual 7.2.3 List of parts Name Description 1 Description 2 Chip Capacitor 0805 Chip Capacitor 0805 Chip Capacitor 0805 Chip Capacitor 0805 Chip Capacitor 0805 Connector MOJ LP50 Power Connector Serial 9 pin F 90gr Connector 6P6C (E5364 BLACK) Connector 6P6C (E5364 BLACK) Connector... - Page 38 1 DATECS LP/EP-50H 8. DOWNLOAD SOFTWARE To enter firmware download mode: - Press <LF> button and then switch the printer on. Hold the button down for at least 5 seconds. A specific 4-tone sound is heard and "Flash programming mode" is printed.
-
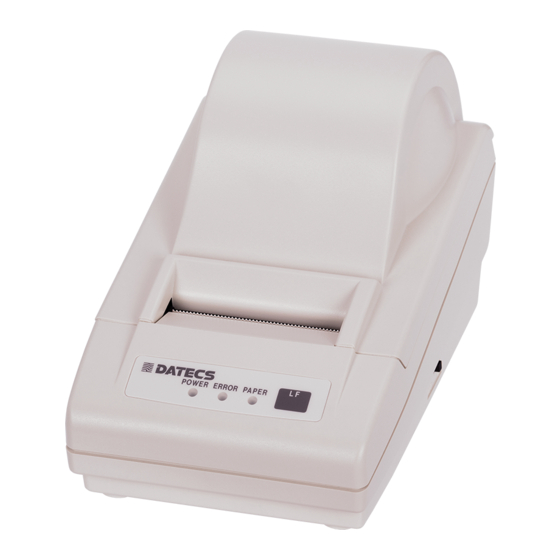
Page 39: Outline Drawing
Service Manual 9. OUTLINE DRAWING... -
Page 40: Wall Moun Un Unting Holes Layout Drawing
10. WALL MOUN UN UNTING HOLES LAYOUT DRAWING...
Need help?
Do you have a question about the LP-50H and is the answer not in the manual?
Questions and answers