
Related Manuals for Nokia RM-407


Summary of Contents for Nokia RM-407
- Page 1 E71 User Guide 4444444 Issue 1 Cyan Cyan Magenta Magenta Yellow Yellow Black Black...
- Page 2 Nokia Corporation. Other product and company names mentioned herein may be trademarks or tradenames of their respective owners. Reproduction, transfer, distribution, or storage of part or all of the contents in this document in any form without the prior written permission of Nokia is prohibited.
- Page 3 Reverse engineering of any software in the Nokia device is prohibited to the extent permitted by applicable law. Insofar as this user guide contains any limitations on Nokia's representations, warranties, damages and liabilities, such limitations shall likewise limit any representations, warranties, damages and liabilities of Nokia's licensors.
-
Page 4: Table Of Contents
New from Eseries........24 Battery removing............8 Access tasks quickly............24 E71 in brief...........9 Home screen..............24 One-touch keys..............25 Key features..............9 Nokia Calendar for Eseries..........26 Keys and parts...............10 Nokia Contacts for Eseries..........28 Set up your device........12 Multitasking..............29 Insert the SIM card and battery........12 Phone............30 Charge the battery............13... - Page 5 Speech................43 Nokia Wireless Keyboard..........79 E-mail messages............44 Media............80 Text messages...............46 Multimedia messages...........48 Camera................80 Instant messaging............51 Nokia Podcasting............83 Special message types..........54 Music player..............84 Cell broadcast..............54 Share online..............87 Messaging settings............55 Recorder.................87 Gallery................88 Internet............59 RealPlayer..............89 Web................59 Flash player..............90 Browse the intranet .............61 Radio................91 Download!..............61 Personalisation..........93...
- Page 6 Settings............116 General settings............116 Telephone settings.............119 Connection settings............120 Application settings............126 Shortcuts..........127 General shortcuts............127 Glossary............129 Troubleshooting........133 Enhancements..........136 Battery and charger information.....137 Battery and charger information......137 Nokia battery authentication guidelines....138 Care and maintenance......139 Cyan Cyan Cyan Cyan Magenta Magenta Magenta Magenta Yellow Yellow...
-
Page 7: Safety
Safety Read these simple guidelines. Not following them may WATER-RESISTANCE be dangerous or illegal. Read the complete user guide Your device is not water-resistant. Keep it for further information. dry. SWITCH ON SAFELY Do not switch the device on when wireless About your device phone use is prohibited or when it may cause interference or danger. -
Page 8: Network Services
For instance, some networks may not support third-party sites through your device. Third-party sites all language-dependent characters and services. are not affiliated with Nokia, and Nokia does not endorse or assume liability for them. If you choose to Your service provider may have requested that certain access such sites, you should take precautions for features be disabled or not activated in your device. -
Page 9: E71 In Brief
E71 in brief Model number: Nokia E71-3 (RM-407). Add new business applications to your Hereinafter referred to as Nokia E71. Eseries device with Download!. Find points of interest with Maps. Key features Your new Eseries device helps you manage your Switch from business to personal mode to business and personal information. -
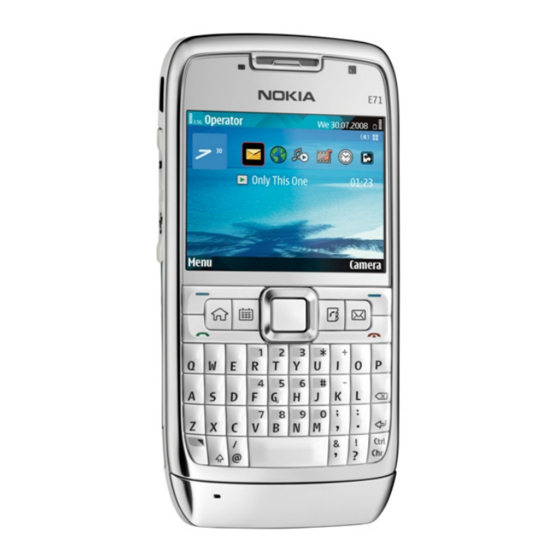
Page 10: Keys And Parts
— End key. Press the end key to reject a call, end Keys and parts active calls and held calls, and with a long keypress, end data connections. — Backspace key — Enter key — Home key — Contacts key —... - Page 11 the function key and the chr key to enter ctrl, and then press the desired key, for example c. Cyan Cyan Cyan Cyan Magenta Magenta Magenta Magenta Yellow Yellow Yellow Yellow Black Black Black Black...
-
Page 12: Set Up Your Device
Set up your device Set up your E71 following these instructions. Insert the SIM card and battery 1. Press the release buttons and lift the back cover off. 3. Insert the SIM card. Make sure that the contact area on the card is facing the connectors on the device and that the bevelled corner is facing the top of the device. -
Page 13: Charge The Battery
Tip: If you have old compatible Nokia chargers, you can use them with the Nokia E71 by 5. Close the back cover. attaching the CA-44 charger adapter to the old charger. -
Page 14: Eject The Memory Card
4. Close the cover. Attach the wrist strap Eject the memory card Thread the wrist strap as shown, and tighten it. Important: Do not remove the memory card in the middle of an operation when the card is being accessed. Removing the card in the middle of an Antennas operation may damage the memory card as well as the device, and data stored on the card may be corrupted. -
Page 15: Get Started
Nokia device. See "Transfer content between change the country later and the new devices", p. 18. country is located on a different time zone. -
Page 16: Settings Wizard
Video sharing — Configure video sharing settings. Settings wizard If you are not able to use Settings wizard, visit the Nokia phone settings web site. Select Menu Tools Sett. wizard. Settings wizard configures your device for settings based on your network operator information. To use... -
Page 17: Transfer
You can transfer content, such as contacts, from a Installations folder. compatible Nokia device to your new Eseries device To open an application, using Bluetooth connectivity or infrared. The type of scroll to it, and press the content that can be transferred depends on the device scroll key. -
Page 18: Display Indicators
Transfer content between Synchronise, retrieve, and devices send data To connect the two devices, follow the instructions on If you have previously transferred data to your device the display. For some device models, the Transfer with the Transfer application, select from the following application is sent to the other device as a message. - Page 19 connection is active. If the icon is , the There are messages waiting to be sent in the Outbox folder in Messaging. connection is on hold. You have one or more missed phone calls. A UMTS packet data connection is available (network service).
-
Page 20: Common Actions In Several Applications
If an application consists of A headset is connected to the device. several tabs (see figure), open a tab by scrolling right The connection to a headset with Bluetooth or left. connectivity has been lost. To save the settings that you have configured in an A hands-free car kit is connected to the device. -
Page 21: Lock The Keys
The files may use large amounts of memory the function key. and prevent you from storing other files. To maintain sufficient memory, use Nokia PC Suite to back up installation files to a compatible PC, then use the file manager to remove the installation files from the device memory. -
Page 22: Write Text
To remove the memory card password, select corrupted file system. Your Nokia device supports the Options Remove password. When you remove the FAT16 and FAT32 file system for memory cards. -
Page 23: Further Information
To erase a character, press the backspace key. To erase To change the writing language, select Options several characters, press and hold the backspace key. Input options Input language. To insert characters that are not shown on the keypad, press the chr key. Further information To copy text, press and hold the shift key, and scroll to highlight the word, phrase, or line of text you want to... -
Page 24: New From Eseries
New from Eseries Your new Eseries device contains new versions of the Navigate in the home screen Calendar and Contacts applications, as well as a new home screen. To access the home screen, press the home key briefly. The home screen consists of: Access tasks quickly application shortcuts (1) To access an application... -
Page 25: One-Touch Keys
To set off the contact search, select Options Contact application and a task. To change these, select Menu search off. Tools Settings General Personalisation One-touch keys. Your network operator may have To check your received messages, scroll to the message assigned applications to the keys, in which case you box in the notification area. -
Page 26: Nokia Calendar For Eseries
To change the default view, select Options Settings Default view. Nokia Calendar for Eseries Select Menu Office Calendar. Create and view scheduled events and appointments, and switch between different calendar views. - Page 27 View calendar information Create meeting, memo, anniversary, or to-do entries In the month view, calendar 1. Enter the subject. entries are marked with a 2. For meeting entries, enter the start and end times, triangle. Anniversary entries or select All-day event.
-
Page 28: Nokia Contacts For Eseries
Week number Week dates. for the group. If you want to make conference calls to the group, define also the following: Nokia Contacts for Conf. service number — Enter the conference call Eseries service number. Conf. service ID — Enter the conference call ID number. -
Page 29: Multitasking
To organise contacts directories, select Options Multitasking Organise contact lists and a directory. Scroll up to move it to the desired place. You can have several applications open at the same time. To switch between active applications, press and Add ringing tones for hold the home key, scroll to an application, and press the scroll key. -
Page 30: Phone
Enter the first letters of the name, scroll When you have an active call and the call waiting function (network service) is activated, press the call to the name, and press the call key. See "Nokia Contacts for Eseries", p. 28. Cyan... -
Page 31: Video Calls
To make a call using the log, press the call key to view Fax calls up to 20 numbers that you last called or attempted to call. Scroll to the desired number or name, and press To make and receive fax calls, connect your device to a compatible computer or fax machine. - Page 32 Make a video call Share a video Warning: Do not hold the device near your ear Note: This function is not available in all countries when the loudspeaker is in use, because the volume or regions. Consult with your local network operator may be extremely loud.
-
Page 33: Net Calls
To accept the invitation and begin the sharing session, telephone. To make or receive a net call, your device select Accept. must be within WLAN coverage, for example. The availability of the net call service may vary according To reject the invitation, select Reject. The voice call to your country or area. - Page 34 Connect to the net call Make net calls service You can make a net call from all applications where you can make a regular voice call. For example in Contacts, Select Menu Communic. Internet tel.. scroll to the desired contact, and select Call Internet call.
-
Page 35: Speed Dialling
If not answered — Divert incoming calls after your Speed dialling device rings for a specified period of time. Select the time you let the device ring before diverting the call Select Menu Tools Settings Phone Call in the Delay time: list. -
Page 36: Bar Net Calls
Call barring and call diverting cannot be active at the To reject net calls from anonymous callers, select same time. Anonymous call barring When calls are barred, calls may be possible to certain official emergency numbers. Send DTMF tones To bar calls, select Voice call barring and from the following options:... -
Page 37: Voice Aid
When you open the Voice mail application for the first To hear information on your missed and received calls, time, you are asked to enter the number of your voice dialled numbers, and frequent calls, select Recent mailbox. calls. To call your voice mail, select Options Call voice To listen to your voice messages, select... - Page 38 Make a call To launch an application using a voice command, press and hold the voice key, and clearly speak the name of A voice tag for a contact is the name or nickname that the application. If the recognised application was not is saved on the contact in Contacts.
-
Page 39: Push To Talk
Log in to PTT service Push to talk If you have set Application start-up on in User settings, PTT automatically logs in to the service when Note: This function is not available in all countries started. If not, you must log in manually. or regions. -
Page 40: Log
Created PTT calls To join a channel, select the channel you want to talk to, and press the voice key. Select Options PTT log Created calls, and a call. To invite a user to a channel, select Options Send To make a PTT call to a contact, select Options Talk invitation. - Page 41 To view the approximate duration of calls to and from Call and send messages from your device, select Call duration. To view the amount of data transferred during packet data connections, select Packet data. To call back a caller, select Recent calls and open Missed...
-
Page 42: Messaging
Messaging Select Menu Communic. Messaging. If not, you may need to define the settings manually; or contact your service provider to configure the In Messaging (network service), you can send and settings. receive text messages, multimedia messages, audio messages, and e-mail messages. You can also receive web service messages, cell broadcast messages, and Messaging folders special messages containing data, and send service... -
Page 43: Organise Messages
To set the language for the message reader, select Language. To download additional languages to your To view the properties of a message, select the device, visit the Nokia web site or use the Download! message and Options Message details. -
Page 44: E-Mail Messages
1. To start entering the e-mail settings, select Start. E-mail messages 2. In Mailbox type, select IMAP4 or POP3, and select Next. Select Menu Messaging Mailbox. Tip: POP3 is a version of the post office To receive and send e-mail, you must have a remote protocol that is used to store and retrieve e- mailbox service. - Page 45 If you have defined several mailboxes, select one of Read and reply to e-mail them as your default mailbox. That mailbox is used every time you start composing a new e-mail message. Important: Exercise caution when opening To define the default mailbox, select Options messages.
-
Page 46: Text Messages
To call the sender of the e-mail message, if the sender To cancel the deleting, select Options Restore. can be found in Contacts, select Options Call. To reply to the sender of the e-mail with an audio Subfolders in your remote e- message or multimedia message, select Options mail... - Page 47 and characters from some language options, take up if you are sure that your message centre is able to more space, and limit the number of characters that convert text messages into these other formats. can be sent in a single message. Contact your service provider.
-
Page 48: Multimedia Messages
To save a message in a different folder, select multimedia message settings. If not, use Settings Options Move to folder. wizard, or contact your service provider for the correct settings. See "Multimedia message settings", p. 55. To add the sender of the message to Contacts, select Options Save to Contacts. - Page 49 6. To preview a multimedia message before sending Create presentations it, select Options Preview. Creating multimedia presentations is not possible if 7. Select Options Send. MMS creation mode setting is set to Restricted. To delete an object from a multimedia message, select To change the setting, select Messaging Options...
- Page 50 presentations. They may appear different in different To save a multimedia object, select Options devices. Objects, the object, and Options Save. View presentations Forward a multimedia message To view a presentation, open the multimedia message from the Inbox folder. Scroll to the presentation, and Open Inbox, scroll to a multimedia notification, and press the scroll key.
-
Page 51: Instant Messaging
4. Select Options Send. Instant messaging Sending options for Note: This function is not available in all countries multimedia messages or regions. Consult with your local network operator for availability of this function. Select New message Multimedia message Select Menu Communic. - Page 52 Options Settings Servers. Ask your service To start a new conversation, select Options provider for the correct settings. To set the server as conversation. You can start a new conversation with the one to which your device automatically logs in, a contact while you are inside an active conversation.
- Page 53 To search for IM groups and group IDs, select To prevent receiving messages from other IM users, groups Options Search. You can search by select Options Block new contacts. Select the IM Group name, Topic, and Members (user ID). user from your IM contacts, or enter the user ID. To add an IM user to the group, select Options member.
-
Page 54: Special Message Types
Show date/ time info — Select to view the Send service commands receiving or sending time of each message in an IM conversation. You can send a service request message (also known as a USSD command) to your service provider and IM alert tone —... -
Page 55: Messaging Settings
To receive messages related to a topic, select Message centre in use — Select a message centre Options Subscribe. to send the message. Character encoding — Select Reduced support Tip: You can set important topics as hot topics. use automatic character conversion to another While the device is in the standby mode, you are encoding system when available. - Page 56 Image size — Select Small Large to scale images Deny report sending — Select to not send in multimedia messages. Select Original delivery reports from your device for received multimedia messages. maintain the original image size. MMS creation mode — Select Restricted to have Message validity...
- Page 57 User settings E-mail to retrieve — Select whether you want to retrieve only the e-mail header information such as To define the user settings for an e-mail account, select sender, subject and date, e-mail, or e-mail with the account, select Options Edit User...
- Page 58 E-mail notifications — Select whether you want to Other settings receive notifications on received e-mail. Select Menu Communic. Messaging Options Settings Other. Service message settings Select from the following: Select Menu Communic. Messaging Save sent messages — Select whether to store Options Settings Service...
-
Page 59: Internet
Internet With your new Eseries device you can browse both the Connection security internet and your company's intranet, and download and install new applications to your device. You can If the security indicator ( ) is displayed during a also use your device as a modem and connect your PC connection, the data transmission between the device to the internet. - Page 60 open a page, scroll to its address, and press the information or services you have accessed are stored scroll key. in the cache. To move on a web page, use the scroll key, which is To empty the cache, select Options Clear privacy shown as a pointer on the page.
-
Page 61: Browse The Intranet
The items are categorised under catalogs and folders and blogs. provided by Nokia or independent service providers. Some items may be chargeable, but you can usually preview them free of charge. Browse the intranet Download! uses your network services to access the most updated content. -
Page 62: Internet Access Points
Download! search Subscrip. confirmation — Define whether you want the subscription confirmation query to be Scroll to the catalogues from which you want to search shown before subscribing to an item. for items, select Mark to select them, and enter the search keywords. - Page 63 Access point name — Enter the name for the After setting up a basic internet access point for packet data (GPRS), select Options Advanced settings, access point. The name is usually provided by your service provider. and define the following advanced settings: User name —...
-
Page 64: Connect Pc To Web
Connection name — Enter a descriptive name Advanced access point for the connection. settings for WLAN Data bearer — Select Wireless LAN. WLAN network name — To enter the service Select Menu Tools Settings Connection set identifier (SSID), that is, the name that Access points. - Page 65 You must have administrator rights to your PC, and the autorun option enabled in the PC. If not, run the setup.exe file from the CD-ROM drive of your PC. Cyan Cyan Cyan Cyan Magenta Magenta Magenta Magenta Yellow Yellow Yellow Yellow Black Black...
-
Page 66: Travelling
Travelling Need directions? Looking for a restaurant? Your Eseries adjustments to GPS satellites made by the United States device has the tools to get you where you want to be. government and is subject to change with the United States Department of Defense civil GPS policy and the Federal Radionavigation Plan. -
Page 67: Positioning Settings
Some maps may be available in your device or memory card. You can also use the Nokia Map Loader PC software to download maps. To install Nokia Map Positioning settings Loader to a compatible PC, go to www.maps.nokia.com. - Page 68 When you use Maps for the first time, you may need to Move on a map select a cellular or a WLAN access point for downloading maps. To change the access point later, The map coverage varies by country and region. select Options Settings...
- Page 69 yellow. When the device receives enough data from the If you search for locations without an internet satellite to establish a GPS connection, the bar turns connection, the search results are limited to a radius of green. The more green bars, the stronger the GPS 50 km (31 miles).
- Page 70 is exceeded, navigation stops and is resumed once the To start navigating by car, select a location, press the speed is back within limits. scroll key, and select Drive to. When you use car navigation for the first time, you are asked to select the There is no voice guidance available for pedestrian language of the voice guidance and download the navigation.
-
Page 71: Gps Data
To view the details of an event, including possible GPS data rerouting options, select the event and Options Open. To update the traffic information, select Update traffic Note: This function is not available in all countries info. or regions. Consult with your local network operator for availability of this function. -
Page 72: Landmarks
To remove the destination set for your trip, select Create a landmark Navigation Options Stop navigation. To create a landmark, select Options To save your current position as a landmark, select landmark. Select Current position to make a network Navigation or Position, and Options Save... - Page 73 Landmark categories You can see the landmark categories in two views: one lists categories that already contain landmarks, and the other lists all the categories your device has. To view the landmarks that a category contains, scroll to the category, and press the scroll key. To create a new category, select Options Edit...
-
Page 74: Nokia Office Tools
Nokia Office Tools Nokia Office Tools support mobile business and enable To add boldface, italics, or underlining to your text or effective communication with work teams. change the font colour, press and hold the shift key and use the scroll key to select the text. Then select Options Text. -
Page 75: Calculator
Tip: If you temporarily do not want to see the File manager notes during phone calls, select Show note during call No. This way you do not have to With File manager, you can manage the contents and remove the links between notes and contact properties of files and folders on your device memory cards. -
Page 76: Converter
2003 documents (*.doc, *.xls, and *.ppt) with and select OK. Scroll to the next Unit field, and Quickoffice. If you have the editor version of select the unit to which to convert. Quickoffice, you can also edit files. 3. Scroll to the first Amount field, and enter the value All file formats or features are not supported. -
Page 77: Zip Manager
printer as the default printer, select Options Zip manager Printing options Printers, scroll to the printer and select Options Set as default. Select Menu Office Zip. Before you print, make sure your device is properly With Zip manager, you can create new archive files to connected to the printer. -
Page 78: Clock
Print range — Select All pages in range, Current Alarm clock page, or Defined pages as the page range. Open the alarm clock tab. Number of copies — Select the number of copies to print. To set an alarm, select Options alarm. -
Page 79: Notes
To change the time or date, select Time or Date. To change the clock shown on the home screen, select Wireless keyboards are available as separate enhancements. To set up the Nokia Wireless Keyboard Clock type Analogue or Digital. or other compatible wireless keyboard supporting the... -
Page 80: Media
Media Your device contains a variety of media applications for The toolbar provides you with shortcuts to different both business and leisure time use. items and settings before and after capturing an image or recording a video. Scroll to a toolbar item and press the scroll key. - Page 81 To activate the toolbar when it is hidden, scroll left. The on the display, and the other images are available in toolbar is visible for 5 seconds. Gallery. To send the image, select Options Send. Scenes To send the image to a caller during an active call, select Options Send to caller.
- Page 82 3. To pause recording at any time, select Pause. Select Default image name — Define the default name Continue to resume recording. for the captured images. Extended digital zoom — On (continuous) 4. To stop recording, select Stop. The video clip is allows the zoom increments to be smooth and automatically saved in Gallery.
-
Page 83: Nokia Podcasting
PCs. Contents of the directories change. Select the desired With the Nokia Podcasting application, you can search, directory folder to update it (network service). The discover, subscribe, and download podcasts over the colour of the folder changes, when the update is air;... -
Page 84: Music Player
folder to subscribe to any of the links to add to your Music player podcasts. Warning: Listen to music at a moderate level. Search podcasts Continuous exposure to high volume may damage your Search helps you find podcasts by keyword or title. hearing. - Page 85 Menu Media Music store. In the Nokia Music Store (network service) you can To fast forward or rewind, press and hold the scroll key search, browse, and purchase music to download to to the right or left. your device. To purchase music, you need to register To go to the next item, scroll right.
- Page 86 Windows Media Player, click the Sync tab, select or down to increase or decrease its value. You hear your Nokia Handset > Set Up Sync..., and check the frequency adjustment immediately in the playback. Sync this device automatically check box.
-
Page 87: Share Online
With Recorder, you can record up to 60 minutes of a Share online voice memo, save the voice recording as a sound clip, and play the sound clip. Recorder supports the AMR file format. Note: This function is not available in all countries You can also press the voice key to open the Recorder or regions. -
Page 88: Gallery
To change the default location of saved recordings, memory card, Copy to memory card, Copy to phone select Options Settings Memory in use. mem., or Move to phone mem.. To define the recording quality, select Options To download files into Gallery using the browser, select Settings Recording quality. -
Page 89: Realplayer
Manage image files Play video clips and stream links To view detailed information about the image, select Options View details. To send the image, select Options Send, and the Warning: Do not hold the device near your ear method for sending. when the loudspeaker is in use, because the volume may be extremely loud. -
Page 90: Flash Player
To view the video clip in full-screen size, select RealPlayer settings Options Play in full screen. Full screen increases the size of the video to cover the maximum video area You may receive RealPlayer settings in a message from your service provider. possible while the aspect ratio is maintained. -
Page 91: Radio
To organise your flash files, select Options To adjust the volume, use the volume keys. Organise. To switch from headset use to listening to the radio through the loudspeaker, select Options Activate loudspeaker. Radio To return to the home screen and leave the FM radio playing in the background, select Options Play in... - Page 92 Saved stations To open the list of your saved stations, select Options Stations. To listen to a saved station, select Options Station Listen. To view available visual content for a station with the Visual Radio service, select Options Station Start visual service.
-
Page 93: Personalisation
Personalisation You can personalise your device by adjusting the or from restarting the GPS or FM radio, so comply with various tones, background images, and screen savers, any applicable safety requirements when establishing for example. and using these features. To delete a profile that you created, select Options Delete profile. -
Page 94: Customise Profiles
Warning tones — Set the warning tones on or off. Customise profiles This setting also affects the tones of some games and Java applications. Select Options Personalise, and define the Alert for — You can set the device to ring only upon following: calls from phone numbers that belong to a selected Ringing tone... -
Page 95: Change The Display Theme
To enable three-dimensional sound effects for ringing Change the display tones, select 3-D ringing tone effects On. Not all ringing tones support 3–D effects. theme To change the 3–D effect that is applied to the ringing tone, select Sound trajectory and the desired effect. -
Page 96: Connectivity
Nokia PC Suite internet, a corporate intranet, or to another device or computer. You can install Nokia PC Suite from the CD-ROM or from the web. Nokia PC Suite can be used with Windows Fast downloading 2000, Windows XP, and Windows Vista. With Nokia PC... -
Page 97: Infrared
To use Nokia PC Suite with your device, install Nokia PC 3. Switch on infrared on the other device and wait a Suite on your PC, connect the data cable, and select few seconds until the infrared connection is Suite. - Page 98 Your device and the name you A Bluetooth connection is disconnected automatically entered can now be seen by other users with after sending or receiving data. Only Nokia PC Suite and devices using Bluetooth technology. some enhancements such as headsets may maintain a 4.
-
Page 99: Sim Access Profile
have a fixed passcode. You need the passcode only To allow a paired device to connect automatically to when you connect the devices for the first time. After your device, select Set as authorised. Connections pairing, it is possible to authorise the connection. between your device and the other device can be made Pairing and authorising the connection makes without your knowledge. -
Page 100: Wireless Lan
For more information about car kit devices and To end the remote SIM access connection from your compatibility with your device, see the Nokia web site device, select Menu Connectivity Bluetooth and your car kit user guide. - Page 101 To use WLAN, you must create an internet access point See WLAN availability in a WLAN. Use the access point for applications that need to connect to the internet. A WLAN connection is To have your device show WLAN availability, select Menu Tools Settings...
-
Page 102: Modem
To start a search for available WLANs, scroll to the row showing the status, press You need an appropriate data communications the scroll key, and select software on your computer, such as Nokia PC Suite. Search for WLAN. To set For more information, see the Nokia PC Suite guide. -
Page 103: Connection Manager
Menu Connectivity Bluetooth and select listed with their network mode (infrastructure or ad- Bluetooth hoc), signal strength, and network encryption indicators, and whether your device has an active If you use a cable to connect your device to a computer, connection with the network. -
Page 104: Security And Data Management
Security and data management Manage the data and software on your device, and take To change the lock code, select Menu Tools care of the security of the device and its contents. Settings General Security Phone and SIM card Lock code. -
Page 105: Encryption
To remove the memory card password, select Encrypt and save key — Encrypt the memory card Options Remove password. When you remove the and save the key manually in the default folder. For password, the data on the memory card is not security, store the key to a safe place outside the protected against unauthorised use. -
Page 106: Certificate Manager
With the fixed dialling service, you can restrict calls different types of certificates: authority certificates, from your device to certain phone numbers. Not all SIM personal certificates, trusted site certificates, and cards support the fixed dialling service. Contact your device certificates. During a secure connection, a server service provider for more information. -
Page 107: Security Modules
Certificate not valid yet — The period of validity Depending on the certificate, a list of applications that can use the certificate is displayed: has not yet begun for the selected certificate. Certificate corrupted — The certificate cannot be Symbian installation —... -
Page 108: Back Up Data
— Select the preferred connection type. You can also connect your device to a compatible computer and use Nokia PC Suite to back up data. Access point — Select the access point to use for the connection, or create a new access point. You... -
Page 109: Application Manager
Network authentication — Select whether to use browsing, or sent to you in a multimedia message, as an e-mail attachment, or with Bluetooth. http authentication. This setting is available only if you have selected internet as the bearer type. During the installation, the device checks the integrity Network user name —... - Page 110 installing a software package, use this list to find out applications with validated certificates. This setting which software package may be the cause of the applies only to Symbian operating system problem. The information in this list may also help you applications (.sis or .sisx files).
-
Page 111: Activation Keys
Ask first time — Require the Java application to ask up both the activation keys and the content, use the backup feature of Nokia PC Suite.Other transfer for initial confirmation to use the functionality. Always allowed — Allow the Java application to... -
Page 112: Data Synchronisation
To access these files, open the Create a synchronisation group rights folder. profile There is a Nokia PC Suite synchronisation profile available in your device. You do not need to edit it if you synchronise your device with a computer using Nokia PC Suite. -
Page 113: Mobile Vpn
Server ID — Enter the server ID of the remote server. This setting is only available if you select 1.2 as the The Nokia mobile virtual private network (VPN) client SyncML version. creates a secure connection to compatible corporate Data bearer —... - Page 114 VPN policy servers from which you can install and address of the private network. Proxy port number — Enter the proxy port update VPN policies. A policy server refers to a Nokia Security Service Manager (NSSM), which is not number. necessarily required.
-
Page 115: Barcode Reader
you select the VPN access point from a list of connections when a connection is established. 1. In the application in which you want to create a VPN connection, select a VPN access point as the access point. 2. If you are using legacy authentication, enter your VPN user name and passcode or password. -
Page 116: Settings
Settings Select Menu Tools Settings. Factory settings — Restore the original settings of the device. You can define and modify various settings of your Positioning — Define the positioning method and device. Modifying these settings affects the operation server for GPS-based applications. of your device across several applications. - Page 117 Standby mode settings To set the device to vibrate when you receive a call, select Tones Vibrating alert. To select whether to use the home screen, select To set the volume level of the device keypad tones, Standby mode Home screen.
- Page 118 To select which application and task is opened when Enhancement settings you press a One-touch key, select the key and Options Open. Select Menu Tools Settings General Enhancement. To restore the preset applications and tasks, select Restore defaults. Common enhancement settings With most enhancements, you can do the following: Date and time settings To determine which profile is activated when you...
-
Page 119: Telephone Settings
Phone and SIM card — Adjust the security settings current code and then the new code twice. The new code can be 4-255 characters long. Both alphabets and for your device and SIM card. Certificate management — Manage your security digits can be used, and both uppercase and lowercase certificates. -
Page 120: Connection Settings
Call settings To select the network mode, select Network mode Dual mode, UMTS, or GSM. In the dual mode, the To display your phone number to the person you are device switches automatically between networks. calling, select Call Send my caller ID Yes. - Page 121 Packet data — Determine when packet data Packet data (GPRS) settings connections are used, and enter the access point if you use your device as a modem for a computer. Select Menu Tools Settings Connection Packet data. Wireless LAN — Determine if the device displays an indicator when a WLAN is available, and how often Your device supports packet data connections, such as the device searches for networks.
- Page 122 To select the interval for your device to scan for WLAN security settings available WLANs and update the indicator, select Scan networks. This setting is not available unless you Select Menu Tools Settings Connection Access points Options New access point, or select Show WLAN availability Yes.
- Page 123 WEP encryption — Select the desired WEP EAP plug-in settings — If you select WPA/WPA2 encryption key length. EAP, select which EAP plug-ins defined in your WEP key format — Select whether you want to device to use with the access point. enter the WEP key data in ASCII Hexadecimal...
- Page 124 Profile name — Enter a name for the SIP profile. in before other plug-ins when connecting to the Service profile — Select IETF Nokia 3GPP. network with the access point, or Options Lower Default access point — Select the access point to...
- Page 125 Select from the following: Configuration settings Proxy server address — Enter the host name or IP Select Menu Tools Settings Connection address of the proxy server in use. Configurations. Realm — Enter the proxy server realm. You can receive messages from your service provider User name Password —...
-
Page 126: Application Settings
name manually. To enable connections to an operator-provided access point, create an empty access point. To remove access points from the list, select Options Remove. Application settings Select Menu Tools Settings Applications. Select an application from the list to adjust its settings. Cyan Cyan Cyan... -
Page 127: Shortcuts
Shortcuts Here are some of the available keyboard shortcuts in speed dialling at Menu Tools your device. Shortcuts can make the use of the Settings Phone Call applications more efficient. Speed dialling General shortcuts Zoom in the page. General shortcuts Zoom out the page. - Page 128 Scroll left in the zoomed image. Scroll right in the zoomed image. Scroll up in the zoomed image. Scroll down in the zoomed image. Rotate clockwise. Rotate counterclockwise. Switch between the full screen size and normal view. Cyan Cyan Cyan Cyan Magenta Magenta...
-
Page 129: Glossary
EGPRS and data transfer speed, contact your service provider. Domain name service. An internet service that translates domain names such as www.nokia.com into IP addresses such as 192.100.124.195. Domain names are easier to remember Cyan Cyan... - Page 130 GPRS General packet radio service. GPRS HTTP Hypertext transfer protocol. A enables wireless access for mobile document transfer protocol used in the phones to data networks (network web. service). GPRS uses packet data HTTPS HTTP over a secure connection. technology where information is sent in short bursts of data over the mobile IMAP4 Internet mail access protocol, version...
- Page 131 browse the web faster than previously POP3 Post office protocol, version 3. A possible while simultaneously common mail protocol that can be speaking on the phone. used for accessing your remote mailbox. UPIN PIN code used in UMTS network. PUK and PIN Unblocking Key.
- Page 132 Wi-Fi Protected Access. Security method for WLAN. WPA2 Wi-Fi Protected Access 2. Security method for WLAN. Cyan Cyan Cyan Cyan Magenta Magenta Magenta Magenta Yellow Yellow Yellow Yellow Black Black Black Black...
-
Page 133: Troubleshooting
Troubleshooting To see frequently asked questions about your device, Q: Why can’t I find my friend’s device while visit the product support pages at the Nokia web site. using Bluetooth connectivity? Q: What is my lock, PIN, or PUK code? - Page 134 Q: How do I switch WLAN off on my Nokia Q: Why do I have problems with the security device? mode? A: The WLAN on your Nokia device switches off when A: Check that you have configured the security mode you are not trying to connect, not connected to another correctly, and that it is the same that the network uses.
- Page 135 Q: How can I end the data connection when Set the device to use a packet data connection only if you start an application or action that needs it. the device starts a data connection again and Select Menu Tools Settings Connection again?
-
Page 136: Enhancements
Enhancements Warning: Use only batteries, chargers, and enhancements approved by Nokia for use with this particular model. The use of any other types may invalidate any approval or warranty, and may be dangerous. For availability of approved enhancements, please check with your dealer. When you disconnect the power cord of any enhancement, grasp and pull the plug, not the cord. -
Page 137: Battery And Charger Information
Do not short-circuit the battery. Accidental short- battery. Use only Nokia approved batteries, and circuiting can occur when a metallic object such as a recharge your battery only with Nokia approved coin, clip, or pen causes direct connection of the chargers designated for this device. -
Page 138: Nokia Battery Authentication Guidelines
Nokia battery, purchase it from an authorised Nokia dealer, and If you cannot confirm that your Nokia battery with the inspect the hologram label using the following steps: hologram on the label is an authentic Nokia battery, Successful completion of the steps is not a total please do not use the battery. -
Page 139: Care And Maintenance
Care and maintenance Your device is a product of superior design and Do not use harsh chemicals, cleaning solvents, or craftsmanship and should be treated with care. The strong detergents to clean the device. following suggestions will help you protect your Do not paint the device. -
Page 140: Disposal
More detailed information is available from the product retailer, local waste authorities, national producer responsibility organizations, or your local Nokia representative. For the product Eco-Declaration or instructions for returning your obsolete product, go to country-specific information at www.nokia.com. -
Page 141: Additional Safety Information
Additional safety information Small children Medical devices Your device and its enhancements may contain small Operation of any radio transmitting equipment, parts. Keep them out of the reach of small children. including wireless phones, may interfere with the functionality of inadequately protected medical devices. -
Page 142: Vehicles
Not carry the wireless device in a breast pocket. warranty that may apply to the device. Check regularly that all wireless device equipment in your vehicle is Hold the wireless device to the ear opposite the mounted and operating properly. Do not store or carry medical device to minimise the potential for flammable liquids, gases, or explosive materials in the interference. -
Page 143: Emergency Calls
Areas with a potentially explosive atmosphere are Change your profile from offline or flight profile often, but not always, clearly marked. They include mode to an active profile. below deck on boats, chemical transfer or storage 2. Press the end key as many times as needed to clear facilities and areas where the air contains chemicals or the display and ready the device for calls. - Page 144 Additional SAR information may be provided under product information at www.nokia.com. Your mobile device is also designed to meet the requirements for exposure to radio waves established by the Federal Communications Commission (USA) and Industry Canada.
-
Page 145: Index
Index Symbols/Numerics calendar entries creating 27 3-D ringing tones 95 background image 95 viewing 27 802.1x backing up data 108 calendar key 26 security settings 123 barcodes 115 calendar views battery changing 26 charge level 18 call barring 35 charging 13 access points net calls 36 inserting 12... - Page 146 voice dialling 38 WLAN settings 63 purchase history 62 voice mail 36 connectors 10 search settings 62 camera contact groups settings 62 capturing images 80 adding ringing tones 29 subscriptions 61 image settings 82 creating 28 DTMF tones 36 playing videos 82 making conference calls 28 scenes 81 contacts...
- Page 147 settings 51 locking 21 starting a conversation 52 tones 117 fax calls 31 images keys 10 feeds 60 adding to contacts 89 activation keys 111 File manager 75 display background 89 shortcuts 117 files rotating 88 WEP keys 122 downloading 88 sending 89 flash files 90 sharing online 87...
- Page 148 125 configuration messages 125 network mailboxes other settings 58 settings 120 connecting 45 Nokia PC Suite 96 sending sound clips 50 creating 44 service messages 54 Notes 79 making a call 30 notification light 117 text message settings 55...
- Page 149 picture messages screen saver 95, 116 forwarding 48 search modes radio viewing 47 switching 28 listening to 91 PIN code searching saved stations 92 changing 119 available WLANs 103 settings 92 playing security viewing visual content 91 messages 43 Bluetooth 99 RealPlayer recordings 87 device and SIM card 119...
- Page 150 e-mail connection 56 WLAN security 122 synchronising e-mail key 118 Settings wizard 16 applications 113 e-mail retrieval 57 shortcuts 127 e-mail user 57 keys 117 EAP plug-ins 123 signal strength 18 tabs 20 SIM access profile 99 enhancements 118 text GPRS 62, 63, 121 SIM card changing size 116...
- Page 151 USB data cable 96 wallpaper 89 warning tones 117 vibrating alert 117 video connection security 59 playing 82 settings 60 video calls weblogs 60 making a call 32 Welcome application 15 switching to voice call 32 welcome note 116 video clips details 90 keys 122 playing 89...