Table of Contents
Advertisement
Quick Links
Advertisement
Table of Contents

Related Manuals for Yamaha TSX-B72WH


Summary of Contents for Yamaha TSX-B72WH
- Page 1 OWNER'S MANUAL MODE D'EMPLOI MANUAL DE INSTRUCCIONES...
- Page 2 – and, most importantly, without affecting your sensitive hearing. Since hearing damage from loud sounds is often undetectable until it is too late, Yamaha and the Electronic Industries Association’s Consumer Electronics Group recommend you to avoid prolonged exposure from excessive...
- Page 3 FCC requirements. Modifications not expressly approved and “ON”, please try to eliminate the problem by by Yamaha may void your authority, granted by the using one of the following measures: FCC, to use the product.
- Page 4 Using this unit with a higher voltage than specified is dangerous and may cause fire, damage to this unit, and/or personal injury. Yamaha will not be held responsible for any damage resulting from use of this unit with a voltage other than specified.
-
Page 5: Table Of Contents
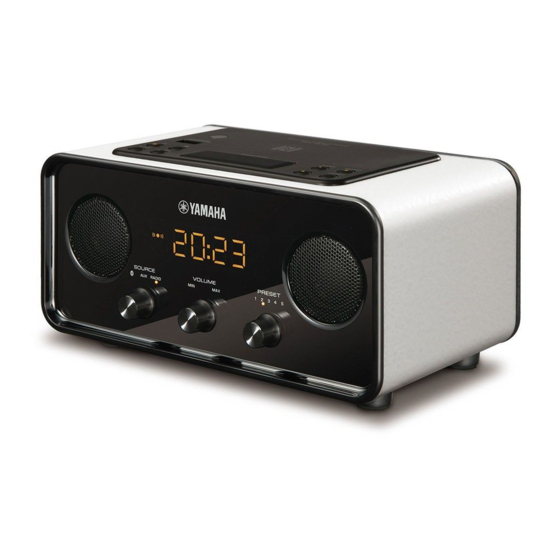
– Firm bass sound and spacious stereo sound from 2.1 ch powered speaker (tweeter × 2, woofer × 1), SR-Bass™ (Yamaha Swing Radiator Bass technology) and DSP in a compact unit. – Easy user-intuitive interface by buttons with Guide LED and knob dials. -
Page 6: Names Of Parts And Their Functions
NAMES OF PARTS AND THEIR FUNCTIONS ■ Front panel 1 Front panel display 4 PRESET: Stores up to five favorite FM (all models) and five AM (U.S.A. and Canada models only) radio 2 SOURCE: Bluetooth, AUX, RADIO stations (☞ P. 8). 3 VOLUME: Volume control ■... - Page 7 NAMES OF PARTS AND THEIR FUNCTIONS 9 ALARM: Alarm on/off (☞ P. 5) E DIMMER: Sets the brightness of the top and front panel 0 SET: Alarm setting (☞ P. 4) A (auto) 3 (brightest) 1 (darkest) NFC mark: Allows easy pairing with NFC back to A technology (☞...
-
Page 8: Basic Functions
OPERATION BASIC FUNCTIONS Adjusting the clock A Set CLOCK to SET. Rear panel B Set the time with TUNING. C Set CLOCK to LOCK. Note Front panel display The time settings are lost approximately one flashes. week after unplugging the unit. Alarm setting This unit can play back radio and/or beep sound at the set time. - Page 9 BASIC FUNCTIONS ■ Switching the alarm on/off Press ALARM. When the alarm is on, the alarm indicator ( ) lights up and alarm time is displayed for a while. Operations during playing back alarm sound At the set time, alarm sound plays back. During playback, operations below are available. ■...
-
Page 10: Using Useful Functions
DTA CONTROLLER With the DTA CONTROLLER application installed on your smartphone or tablet computer, you can use further convenient features of Yamaha desktop audio systems. To download the application, or obtain the latest information on it, access App Store or Google Play via the QR codes listed below. - Page 11 USING USEFUL FUNCTIONS Alarm setting using DTA CONTROLLER Once you have set Weekly Alarm by “DTA CONTROLLER”, you can select the Weekly Alarm mode in the alarm mode select display of this unit. Note 1d (One Day Alarm mode): An alarm that sounds only once at the The Weekly Alarm mode cannot be selected specified time.
-
Page 12: Listening To Radio Stations
LISTENING TO RADIO STATIONS Tuning radio stations A Set SOURCE to RADIO. B Select FM/AM. (U.S.A. and Canada models only) C For automatic tuning, press and hold TUNING. For manual tuning, press (U.S.A. and Canada TUNING repeatedly. models only) Note If you tune to a station manually during FM reception, the sound is monaural. -
Page 13: Charging With The Usb Port
• This unit does not function as memory storage. • Yamaha will not be held responsible for any damage to the portable device or data loss occurred while using this unit. • Disconnect the USB cable immediately after charging completes, since power continues to be supplied to the connected device. -
Page 14: Listening To Music From Your Bluetooth Component
C From the Bluetooth connection list of the other component, Bluetooth indicator choose this unit (TSX-B72 Yamaha). When pairing has been completed, your iPhone/iPad/iPod touch will indicate “Connected”. The Bluetooth indicator on the front panel display of this unit will light. - Page 15 (for details, please read the owner’s manual of the connecting component). This unit is indicated as “TSX-B72 Yamaha” on the connecting component. mark • If you are prompted for a passkey, enter the numerals “0000”. • If the connection fails, move the smartphone slowly on the NFC mark.
- Page 16 When the Bluetooth connection has been established, the Bluetooth indicator will light. Note Yamaha does not guarantee all connections between this unit and Bluetooth component. Pressing (Bluetooth) on the top panel of this unit also establishes connection with the component that was most recently connected via Bluetooth;...
-
Page 17: Troubleshooting
Refer to the table below if the unit does not operate properly. If the problem you are experiencing is not listed below, or if the instruction below does not help, turn off the unit, disconnect the power cable, and contact the nearest authorized Yamaha dealer or service center. General... - Page 18 TROUBLESHOOTING Bluetooth Problem Cause Solution Cannot make this unit The other component does not support Perform pairing operations with a component A2DP. which supports A2DP. paired with the other component. A Bluetooth adaptor, etc. that you want to Use a Bluetooth adaptor, etc. whose password pair with this unit has a password other is “0000”.
-
Page 19: Specifications
2.4 GHz frequency band, a band which can be used without a license. • Bluetooth is a registered trademark of the Bluetooth SIG and is used by Yamaha in accordance with a license agreement. Handling Bluetooth communications • The 2.4 GHz band used by Bluetooth compatible devices is a radio band shared by many types of equipment.