Table of Contents
Advertisement
Quick Links
Advertisement
Table of Contents

Related Manuals for Toshiba TLP-TW90


Summary of Contents for Toshiba TLP-TW90
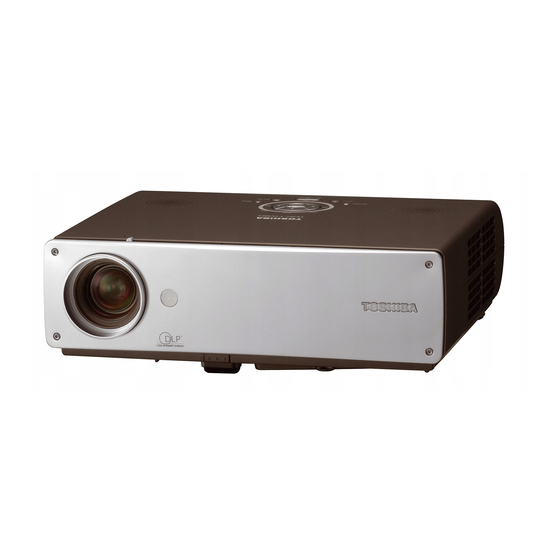
- Page 1 OWNER’S MANUAL DATA PROJECTOR TDP-TW90 (XGA / With PC Card Slot)
-
Page 2: Before Using
WARNING: Changes or modifications made to this equipment, not expressly approved by local power company. blocked by placing the product on USA only Toshiba, or parties authorized by Toshiba, could void the user’s authority to operate For products intended to operate a bed, sofa, rug or other similar the equipment. - Page 3 IMPORTANT SAFETY INSTRUCTIONS (Continued) 5. Heat 8. Power-Cord Protection 10. Lightning storms 12. Do not place the product vertically The product should be situated Power-supply cords should be For added protection for this away from heat sources such as routed so that they are not likely to product during storm, or when it is Do not use the product in the radiators, heat registers, stoves, or...
- Page 4 IMPORTANT SAFETY INSTRUCTIONS (Continued) e) If the product has been dropped or 15. Accessories 19. Replacement Parts 22. Do not use the product in damaged in any way. a closed installation state. Do not place this product on an When replacement parts are f) When the product exhibits a unstable cart, stand, tripod, required, be sure the service...
-
Page 5: Power Supply Cord Selection
POWER SUPPLY CORD SELECTION IMPORTANT SAFETY INSTRUCTIONS (Continued) 25. Do not carry the projector If your line voltage is 220 to 240V, use one of the following types of cable. by having the terminal Plug Plug cover parts or the PC card configuration Plug type Line voltage configuration... -
Page 6: Exemption Clauses
Toshiba Corporation. • Do not reverse the polarity when inserting the battery. • Toshiba bears no responsibility for information being intercepted or leaked due to the use • Do not recharge, heat, disassemble, short-circuit, or burn the battery. of a wireless LAN, or any damages therefor. -
Page 7: Table Of Contents
CONTENTS Automatic demonstration ................45 Before Using Playing a slide show from a thumbnail list ............46 SAFETY PRECAUTIONS .................. 2 Checking the projector status ................48 IMPORTANT SAFETY INSTRUCTIONS ............3 Status display ....................48 POWER SUPPLY CORD SELECTION .............. 9 Installing the applications ................... -
Page 8: Preparations
Preparations Checking the package contents Names of each part on the main unit Please make sure that the following items are included in the box, along with the main unit. If (3) (2) any item is missing, please contact the store immediately where you purchased the product. (10) (11) (12) -
Page 9: Names Of Each Part On The Control Panel And Remote Control
Names of each part on the control panel and remote control Parts on the rear panel Control panel Remote Control Remote control (10) (11) transmitter (10) (14) (20) (13) (12)(11) (12) (13) Name : Main Function (1) Infrared remote sensor : Senses commands from the remote control. -
Page 10: Preparing And Using The Remote Control
Preparing and using the remote control Placement Loading dry-cell batteries Operating the remote Placement Styles into the remote control control As shown in the figures below, this device can be placed in 4 different styles. The factory setting is “floor-mounted front projection.” Set the Projection mode in the q Remove the battery cover. -
Page 11: Connection
Connection How to use the PC card slot Before connection The wireless LAN PC card enables you to connect the projector wirelessly with a personal computer that supports IEEE802.11b based wireless LAN. (Please note that commu- p.34 • Read the owner’s manual of the device you are connecting to the projector. nication between all the computers based on IEEE802.11b and this projector is not •... -
Page 12: Operations
Operations Turning the power on and off Connecting the power cord Notes Insert the power cord connector into the • The start-up screen will disappear after a moment. You can dismiss the start-up screen before this by performing any operation. You can also configure the start-up screen not to AC IN socket of the projector. -
Page 13: Basic Operations
Basic operations Turn on the power. Projector placement angle adjustments Turn on the power by following the instructions in “Turning the power on” p.22 The placement angle and the height of the projected image can be adjusted by the foot adjuster. -
Page 14: Using Handy Features
Using handy features Using auto setting Manual adjustments and settings Remote The menu items of the Set up menu vary depending on the input type, as shown in This function sets up the projector to the optimum state for Control panel Control the table below. -
Page 15: Cutting Off The Picture And Sound Temporarily (Mute)
Using the menus Using handy features (Continued) Cutting off the picture and sound temporarily (Mute) You can call up on-screen menus, and conduct a number of adjustments and settings using the operation buttons on the control panel (main unit side) and remote control. p.16 When you want to project the images of another projector, overhead Remote... -
Page 16: The Image Adjustment Menu
Using the menu (Continued) The image adjustment menu The display setting menu Use this menu to set screen display-related items. Use this menu to adjust image-related items. Items that can be adjusted are marked with “Yes”, and those that cannot are marked with “No”. Description Item Video... -
Page 17: The Default Setting Menu
Using the menu (Continued) The default setting menu Displaying Information (Status display) This menu shows placement status and other settings. This displays information about the input signal, lamp use time, etc. Description Item “Yes”: displayed, “No”: not displayed Projection Sets projection mode in accordance with Placement Style. p.19 Video Item... -
Page 18: Setting Up The Wireless Lan
The coverage of this projector may vary, depending on the computer and the surrounding environment. When tested with a PC manufactured by Toshiba with built-in wireless LAN system, the coverage is approximately 60 m with an unobstructed path between the projector and computer placed indoors. This figure is not guaranteed and should be considered as merely a guideline. -
Page 19: Setup Using The Wireless/Card Menu
Setting up the wireless LAN (Continued) Setup using the Wireless/Card menu How to enter characters Projector settings (Be sure to read this subsection.) Use the numeric keypad on the remote control to enter characters. Enter each charac- ter of interest and press the button to accept it. -
Page 20: Setting Up The Network
Setting up the wireless LAN (Continued) Setting up the network • [SSID] This is an ID code for connecting to specific individuals over a wireless LAN. This may If you select Network in step 2 in “Projector settings” , the following items can be set. p.36 also be called “Network group”... -
Page 21: Computer Settings
Setting up the wireless LAN (Continued) • Subnet mask Computer settings A subnet mask is used to determine what subnet the IP address assigned to a Refer to instruction manuals of your computer or wireless LAN PC card to perform the terminal belongs to. -
Page 22: Projecting Images Stored In A Memory Pc Card
If you set Auto. demo to On, the projector starts a slide show automatically when it • Toshiba recommend that you back up the data on the memory PC card before use. switches to the wireless/card input mode with a memory PC card plugged into the PC card slot. -
Page 23: Automatic Demonstration
Projecting images stored in a memory PC card (Continued) Automatic demonstration • [Interval] You can set the display interval of time (in seconds or minutes) for slide shows to be If you set Auto. demo to On in “Setting slideshow options” , the projector starts p.43 played automatically. -
Page 24: Playing A Slide Show From A Thumbnail List
Projecting images stored in a memory PC card (Continued) Playing a slide show from a thumbnail list Searching for a target file Plugging a memory PC card. • Use the buttons to move the orange frame over the desired file or folder. •... -
Page 25: Checking The Projector Status
Note In the supplied CD-ROM, select the Applications folder, and run setup.exe. Follow the • This product contains a piece of software (hereafter the Software) licensed to TOSHIBA instructions on your computer screen. CORPORATION (hereafter TOSHIBA) by AXE, Inc. (hereafter AXE). The copyright and During the installation, a dialog box may appear with the message “Digital Signature... -
Page 26: Using The Wireless Utility
Using the Wireless Utility Displaying a computer’s screen via the projector Select the screen image you wish the projector to display. Launch the Wireless Utility Select Desktop software application. The computer screen image is transmitted as-is. When the Wireless Utility launches, the Screen Select application window Image transmission mode window appears on Select a running application (e.g. -
Page 27: Displaying A Jpeg Image Saved On A Computer Via The Projector
Using the Wireless Utility (Continued) Displaying a JPEG image saved on a computer via the projector Select the projector to be transmitted. Launch the Wireless Utility software application. The IDs of projectors accessible for The Screen Image transmission mode window appears on the computer’s screen. communication will be listed. -
Page 28: Document Camera Function
(b) A confirmation dialog box opens. Click Yes. Document camera function The computer converts the file. When it finishes a The document camera function is available for the Toshiba LCD data projector TLP-T701/ message appears informing you that a JPEG file T721/T501/T521/T521E. -
Page 29: Converting Files Created With Microsoft Powerpoint
How to use the JPEG Conversion Tool (Continued) ® ® Converting files created with Microsoft PowerPoint Making a presentation with converted JPEG files This process provides presentations without using a computer by converting (1) Copy the folder created by the JPEG Conversion Tool, or its contents, onto a ®... -
Page 30: Setting Up The Projector Using A Web Browser
Top: Returns you to the top page. TOSHIBA Projector Site: The browser will display the home page at http:// Invoke Internet Explorer. multimedia.projector-toshiba.com/map.html, providing Internet Explorer Ver. 5.0 or later is recommended. Enable the Javascript functions. - Page 31 Setting up the projector using a Web browser (Continued) • Features Introduces the functions available in Wireless/Card input mode. Slide Show Wireless Utility Displays the Help page. Updates the settings. Discards what you have entered. Enter single-byte alphanumeric characters in text input fields. •...
-
Page 32: Maintenance
Maintenance About lamp The product’s light source is a mercury lamp that lights at increased internal pressure. Be sure Unplug power cord. to fully understand the following characteristics of the lamp and handle it with extreme care. • The lamp may explode with a loud noise due to impact or deterioration, or fail to light at Wait until lamp is sufficiently cooled. -
Page 33: Lens And Main Unit Cleaning
Others Trouble indications Lamp replacement (Continued) Used Lamps The indicator lights inform you of internal abnormalities. This projector’s lamps contain trace amounts of environmentally harmful inorganic No power mercury. Be careful not to break used lamps, and dispose of them in accordance with ⇒... -
Page 34: Before Calling Service Personnel
Before calling service personnel If you think something is wrong, check the followings before contacting customer service. If This Happens Check Please see “Trouble indications” as well. p.65 • Is the memory PC card inserted correctly? Memory PC card If This Happens Check •... -
Page 35: Specifications
Specifications List of general specifications List of supported signals (RGB signals) Item Specification This projector supports the following RGB signals. Note, however, that depending on the computer model, the screen may show flicker or streaking. Please adjust the projector if Consumption Power 300 W this happens. -
Page 36: List Of Supported Signals (Rgb Signals)
Specifications (Continued) List of supported signals (Y/P signals) CONTROL terminal Pin assignment Signal format fh(kHz) fv(Hz) 480i(525i)@60Hz 15.73 59.94 Pin No. Signal Name Description 480p(525p)@60Hz 31.47 59.94 Receiving data 576i(625i)@50Hz 15.63 50.00 Consent to send 576p(625p)@50Hz 31.25 50.00 Data set ready 720p(750p)@60Hz 45.00 60.00...