Table of Contents
Advertisement
Quick Links
Advertisement
Table of Contents

Related Manuals for Gear4music 129632


Summary of Contents for Gear4music 129632
- Page 1 SDP-1 Digital Piano Owner s Manual...
- Page 3 Precaution Thank you for purchasing this digital instrument. For correct operation and safety, please read the manual carefully and keep it for future reference. Safety Precautions CAUTION RISK OF ELECTRIC SHOCK DO NOT OPEN The lightning flash with arrowhead symbol within an equilateral triangle is intended to alert the user to the presence of uninsulated “dangerous voltage”...
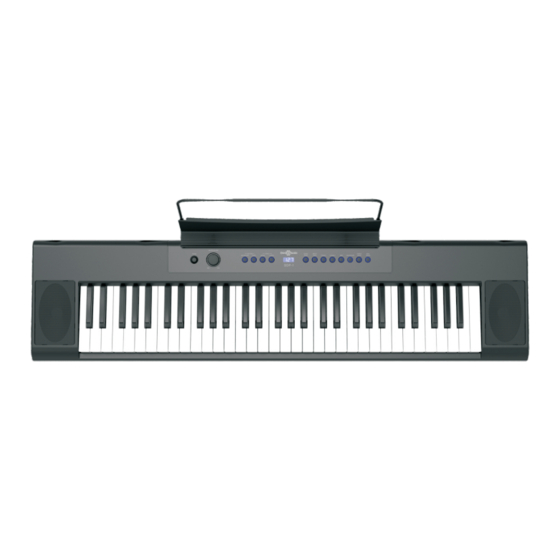
- Page 4 Thank you for choosing the Digital Piano Your portable 61 note piano not only contains leading and innovative technology but it also is developed by and for musicians of all playing levels. Featuring a natural balanced, weighted keyboard action and an advanced acousta ridge tone generation sound technology, that will provide you with a rich performing and playing experience.
-
Page 5: Table Of Contents
Contents Panel Control ................Getting Started ................ Selecting a Voice ..............Demo Songs ................Select the Demo Song ............Stop the Demo Song ............Reverb and Chorus Buttons ........... Layer Mode ................To Adjust the Volume of Main Voice in Layer ...... -
Page 7: Panel Control
Panel Control POWER SUSTAIN Jack MASTER VOLUME LINE OUT(R) Jack LINE OUT(L)(MONO) Jack METRONOME Button TEMPO Button PHONES Jack REVERB Button POWER Jack POWER Jack CHORUS Button LED DISPLAY VOICES Select USB TO HOST Jack... -
Page 8: Getting Started
Getting Started Turn on the power Before playing turn the power on by pressing the POWER switch, the panel LED will light. POWER Auto Power On/Off Press the [METRONOME] and the [TEMPO] buttons together to enter the Function Mode. FUNCTION METRONOME TEMPO Pressing the D#3 piano key allows the user to switch auto Power... - Page 9 NOTE If Default is on, it means the unit will Auto Power Off after 30 minutes if there is no operation, but expect no demo playing. Set the Volume MASTER VOLUME Initially set the [MASTER VOLUME] about half way between the"MIN" and "MAX" settings. You can adjust the volume to accommodate you play.
- Page 10 Sustain Pedal The foot pedal included with your digital piano will cause piano key sounds to decay slowly as if they were being held down. A piano-style pedal may optionally be used. The jack will auto-detect the polarity of the sustain pedal. SUSTAIN NOTE Ensure the piano is turned off before connecting the pedal.
-
Page 11: Selecting A Voice
Selecting a Voice The piano has 8 built-in voices, which include several pianos as well as other instruments. These digitally-sampled musical instrument sounds may be selected one at a time, layered to produce two voices at once. To select a voice (Main voice), press the appropriate Voice Select button on the right side of the front panel. -
Page 12: Demo Songs
Demo Songs There are 8 demo songs in the piano. Each demo song will demonstrate a different voice. Here's how you can select and play the demo songs. Select the Demo Song The demo songs may be played by pressing the [REVERB] and [CHORUS] buttons together simultaneously. -
Page 13: Reverb And Chorus Buttons
Reverb and Chorus Buttons The Reverb and Chorus effects may be applied to some voice individually and will be retained even when the power is turned off. REVERB CHORUS To apply either effect, press either button. The button will light and the effect will be heard when the piano is played. - Page 14 To exit the [REVERB] or [CHORUS] function, press the [REVERB] or [CHORUS] button again. Play the keyboard to hear the new setting with the sound selected.
-
Page 15: Layer Mode
Layer Mode In Layer mode two voices may be played simultaneously, each at selected volumes. To enter Layer mode, press and hold the direct voice select button to select the MAIN sound, then press the button for LAYER sound, and release. Both the button LED will light while layered. -
Page 16: To Adjust The Volume Of The Layer Voice
The volume can be changed in 61 note steps from 0-127 where C6=127 and C1=0. Pressing a key will play C3 of the currently selected voice sound at the volume corresponding to the key value.See the Appendix for the value ranges. To exit the Voice Volume function, press the [METRONOME] and [TEMPO] buttons at the same time again. - Page 17 Press a key will play C3 of the currently selected layered sound at the volume corresponding to the key value. Press the [METRONOME] and the [TEMPO] again to exit Edit mode.
-
Page 18: Metronome
Metronome Press the metronome button to turn the metronome on. FUNCTION When the Metronome button is activated its LED will light and you METRONOME TEMPO will hear the click in the headphones or through the speakers. Metronome Volume Press the [METRONOME] and [TEMPO] buttons together to enter edit mode. Pressing F#2 activates the metronome volume menu. -
Page 19: Tempo
Tempo The tempo of the metronome may range from 20 to 280 beats per minute (BPM). FUNCTION METRONOME TEMPO To change the tempo, press and hold the button for 3 seconds to change the setting. The LED will blink to the current tempo speed. If the Metronome is off, no sound will be heard. -
Page 20: Edit Functions
Edit Functions In Edit Mode the keys on the keyboard are used for selecting the Function to be edited. To enter Edit Mode, press the [Metronome] and [Tempo] buttons at the same time. Function Key Assignments Please refer to pages 14 and 11 for information about the Metronome and Layer functions. -
Page 21: Touch
Pressing any key from C3 and up will play the c3 note but at tune settings proportionately so that its possible tune up by a whole semitone. The user will use his ears to determine the correct tuning setting.LED display will be synchronous display values.See the Appendix for the value ranges. -
Page 22: Eq Adjustment
EQ Adjustment To change the sound of your piano's amplifier you can adjust the EQ to add more Bass or to remove some of the Treble. To Change the Bass Response 1. Press the [METRONOME] and [TEMPO] Buttons together to enter the Function Edit mode. - Page 23 3. The Treble EQ can be changed by pressing white piano keys only from the A1 piano key to D5 piano key. Pressing the F3 Piano Key sets the Treble EQ to its center point EQ Setting. Pressing the A1 Piano Key will reduce the Treble response by -12dB. Pressing the D5 Piano Key therefore increases the Treble response by 12 dB.
-
Page 24: Midi Functions
MIDI Functions MIDI Channels MIDI Out channel values range from 1 to 16. To change the MIDI Out Channel Value: While in the Edit Mode press the the amount of times that correspond to the MIDI Out Channel that you desire. LED display will be synchronous display values. -
Page 25: Midi Panic Key
your computer) without playing the internal sounds of this piano. You may also find other occasions (such as when you are using MIDI sequencing software on your computer) where it is useful to turn Local off. Press the [METRONOME] and the [TEMPO] Buttons together to enter the edit mode. - Page 26 Press the Panic Key ( ) allows the user to activate Panic, which send out general MIDI reset messages such as all note off, etc. Once Panic reset has been completed, Piano will automatically exit Edit mode.
-
Page 27: Factory Reset
Factory Reset Performing a Factory Reset will clear all battery backed memory and restore all functions to their factory defaults, just like they were when you used this piano for the first time. 1. Turn the Power Off. 2. Hold down the [METRONOME] and the [TEMPO] buttons while powering on the piano. FUNCTION METRONOME TEMPO... -
Page 28: Appendix
Appendix MIDI Implementation Chart F u n c t i o n T r a n s m i t t e d R e c o g n i z e d R e m a r k s Basic Default 1-16... - Page 29 Parameter adjusting instructions According to chart shown below, choose corresponding key to set the desired values. Voice Layer Metro. Reverb Chorus Treble Bass Tempo Tune Transpose × × × × × × × × × × × × × × ×...
- Page 30 Layer Metro. Voice Reverb Chorus Treble Bass Tuning Tempo Transpose × × × × × × × × × × × × × × × × × × × × × × × × × × × × × × ×...
- Page 31 Layer Metro. Voice Reverb Chorus Treble Bass Tempo Tuning Transpose × × × × × × × × × × × × × × × × × × × × × × × × × × × Note: X: No value available for this particular Edit Function on this key. Resetting Value: Voice Layer...
-
Page 32: Advanced Function Keyboard Chart
Advanced Functions Keyboard Chart EQ TREBLE EQ TREBLE EQ BASS EQ BASS PANIC PANIC AUTO POWER LOCAL CHANNEL MERTO. TYPE AUTO POWER MERTO. VOL LOCAL CHANNEL LAYER VOL MERTO. TYPE MAIN VOL MERTO. VOL TOUCH HIGH2 LAYER VOL TOUCH HIGH1 MAIN VOL TOUCH NORM2 TOUCH NORM1... -
Page 33: Specifications
Specifications Keyboard: 61 weighted velocity-sensitive keys Display: Multi - Function LED Display Voice: Polyphony: Layer, Transpose,Sustain,Volume, Tune Voice Control: On/off, Level, Time signature Metronome: Pedal Response: Sustain Reverb, Chorus, Bass EQ, Treble EQ Effect: Demo Songs: Channels 1-16, Local On/Off; USB MIDI MIDI &... - Page 36 Kettlestring Lane, Clifton Moor, York, Yo30 4XF, UK...
Need help?
Do you have a question about the 129632 and is the answer not in the manual?
Questions and answers