Table of Contents

Subscribe to Our Youtube Channel
Related Manuals for CDA SK410


Summary of Contents for CDA SK410
- Page 1 SK410 Single Oven Installation, Use and Maintenance Customer Care Department • The Group Ltd. • Harby Road • Langar • Nottinghamshire • NG13 9HY T : 01949 862 012 F : 01949 862 003 E : customer.care@cda.eu W : www.cda.eu www.cda.eu...
- Page 2 Keep the oven door closed whilst grilling. Appliance information: Please enter the details on the appliance rating plate below for reference, to assist CDA Customer Care in the event of a fault with your appliance and to register your appliance for guarantee purposes. Appliance Model...
- Page 3 CE Declarations of Conformity: This oven has been designed, constructed and marketed in compliance with safety requirements of EU Directive 2014/35/EU (Low voltage) and requirements of EU Directive 2014/30/EU (EMC). Parts intended to come into contact with food conform to 1935/2004/ IMPORTANT INFORMATION FOR CORRECT DISPOSAL OF THE PRODUCT IN ACCORDANCE WITH EC DIRECTIVE 2012/19/EU.
- Page 4 Important • Read the user instructions carefully before using the oven for the first time. • Follow the instructions for first use of the oven. • Clean the oven regularly. • Remove spills as soon as they occur. • Always use oven gloves when removing shelves and trays from the oven.
-
Page 5: Before First Use
• Do not attempt to repair the internal workings of your oven. • Do not cover the oven floor with aluminium foil. Before first use First use • The decorative metal finish of this appliance has been coated with a preservative to protect it during transport and storage. - Page 6 Please note: • This oven has been fitted with a cooling fan to achieve maximum efficiency and to maintain low surface temperatures. The cooling fan will switch on automatically when the oven switches on. It is normal for the cooling fan to run for an hour or more after use, depending on the duration, temperature and type of cooking programme used.
-
Page 7: Control Panel
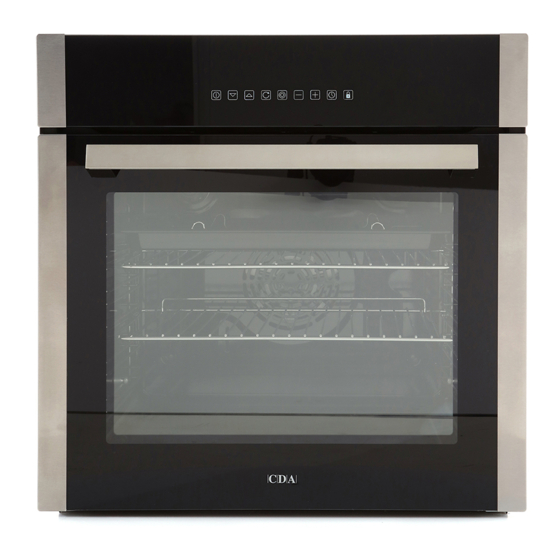
Control panel Fig. 1 Function Selection Indicator On/Off (Power) key Temperature display Function Down key Key Lock symbol Function Up key Thermometer symbol Memory key Minute Minder symbol Booster key Minute symbol “-” key Cooking Time symbol “+” key Finish Time symbol Clock key Clock symbol Key Lock key... -
Page 8: Using The Touch Controls
Using the touch controls The touch controls should be used with the flat of your finger, rather than the fingertip. Fig. 2 Internal shelf positions The shelves and grill pan can be inserted into any one of six different positions. To refer to these they are numbered from “1”... -
Page 9: Oven Controls And Use
Oven controls and use To turn the oven on If the clock display is flashing, either set the clock or wait for approx. 5 seconds until it stops flashing. Touch and hold the “On/Off” key until the oven gives a long beep. The function selection indicator on the display illuminates. - Page 10 While the “Function Selection Indicator” is showing on the display, the cooking functions are selected by using the “Function Down” and “Function Up” keys. Going downward from the standby position, the possible settings are:- Defrost - Shelf position 3, 4 or 5 - Default 50°C Using the fan and mild heat, this oven function circulates the air around the oven cavity, speeding up the natural defrost process.
- Page 11 Half Grill - Grill pan position 1, 2 or 3 - Default 180°C This grill function is the same as the full grill, but only uses the centre of the element so is ideal for grilling a small amount of food. The temperature can be set between 50°C and 250°C in 5°C increments.
- Page 12 Fan Cooking With Lower Heat - Shelf position 3 or 4 - Default 180°C This programme uses the fan element to supplement the heat from the oven base and is ideal for cooking pizzas. The temperature can be set between 50°C and 250°C in 5°C increments.
- Page 13 Conventional Oven - Shelf position 4 or 5 - Default 180°C This function uses the upper and lower heating elements. Natural convection creates a perfect cooking zone in the centre of the oven, ideal for dark fruit cakes and pastries. The temperature can be set between 50°C and 250°C in 5°C increments.
- Page 14 Auto Cut-Off Feature There is an auto cut-off feature on all cooking functions for added safety. Whenever the oven is running it will automatically switch off after a set time, depending on the temperature setting. Selected Temperature Time to Cut-Off (hours) 20 - 120°C 125 - 200°C 205 - 250°C...
- Page 15 Key lock after power outage The key lock can be set to do one of two things after the power to the oven is cut then re-instated: • Key lock automatically unlocks after power outage • Key lock remains activated after power outage To set your chosen preference: •...
-
Page 16: Programming The Oven
Programming the oven Memory Function The memory function can be used to save a setting that you frequently use. To save a setting into memory • Select the oven function and temperature. • While the temperature display is still flashing, touch the “Memory” key briefly but firmly. - Page 17 The minute minder The minute minder can only be used when the oven is on standby (i.e. when no function is active). It can be set for up to 23 hours and 59 minutes. You can then proceed to use the oven as normal. To set the minute minder •...
- Page 18 until the “Cooking Time” symbol lights up. • While the “Cooking Time” symbol is still flashing, use the “+” or “-” keys to scroll the display to the required cooking time. • After approx. 5 seconds the display stops flashing and the cooking starts.
- Page 19 power key. Please note: At the end of the cooking programme, remember to turn off the oven manually. Setting the clock display illumination The display for the clock can be set either to be illuminated all the time or to switch off 20 seconds after the last key is touched. To set this: •...
-
Page 20: Care And Maintenance
Proprietary stainless steel cleaners are available. We recommend the CDA E-Cloth available from the CDA Sales Team for cleaning stainless steel surfaces as this has been designed to prolong the finish of your appliance. - Page 21 Suitable proprietary chemical cleaners may be used after first consulting with the manufacturer’s recommendations and testing a sample on a small area of the oven cavity. Abrasive cleaning agents or scouring pads/cloths should not be used on the cavity surface. Oven door glass As the oven door is triple glazed, the inner glasses may be removed for cleaning both inner glasses and the inside face of the outer glass.
- Page 22 Oven Door Removing the Oven Door The oven door can easily be removed as follows: • Open the door to the full extent (Fig. Fig. 5 • Open the lever “A” completely on the left and right hinges (Fig. 6). •...
- Page 23 Changing the bulb - Lateral lights (Figs 10 & 11) • Remove all shelves and the grill pan from the oven. • Gently unclip the side rack from its lower locating stud and unhook its top to remove it. Note: No tools are required and the stud should not be removed. •...
- Page 24 IMPORTANT • Never use screwdrivers or other utensils to remove the light cover. This could damage the enamel of the oven or the lamp holder. Remove only by hand. • Never replace the bulb with bare hands as contamination from your fingers can cause premature failure.
-
Page 25: Installation
Installation Important If the oven is being installed into a built under oven housing unit ensure that the front rail at the top of the unit is not installed as it could restrict ventilation. Ensure that air can flow freely around the housing area. If the oven is being installed into a fully enclosed built-under oven housing unit it may be necessary to cut a small slot in the top of the plinth fitted under the unit. - Page 26 housing should not be free standing but be secured to the wall and/or adjacent fittings. How to install your oven You will need the following housing area to fit your oven correctly. The oven is designed to fit into a cabinet of 600mm width. The oven can be built in or built under the kitchen units, but you must ensure that it is properly ventilated.
-
Page 27: Electricity Supply To Your Oven
Electricity Supply to DOUBLE POLE SWITCHED FUSE SPUR OUTLET Your Oven Warning! this appliance must be earthed. This appliance must be connected by a competent person, using fixed wiring via a double pole switched fused spur outlet, protected by a 13A fuse. We recommend that the appliance is connected by a qualified electrician, who is a member of the N.I.C.E.I.C. - Page 28 NOTES:...
- Page 29 NOTES:...
- Page 30 NOTES:...
- Page 31 (gas final energy) E & O E. All instructions, dimensions and illustrations are provided for guidance only. CDA reserve the right to change specifications without prior notice.
- Page 32 Group Ltd. • Harby Road • Langar • Nottinghamshire • NG13 9HY T : 01949 862 012 F : 01949 862 003 E : customer.care@cda.eu W : www.cda.eu T : 01949 862 012 F : 01949 862 003 E : customer.care@cda.eu W : www.cda.eu www.cda.eu...
Need help?
Do you have a question about the SK410 and is the answer not in the manual?
Questions and answers