
Related Manuals for Canon CR-1 MARK II


Summary of Contents for Canon CR-1 MARK II
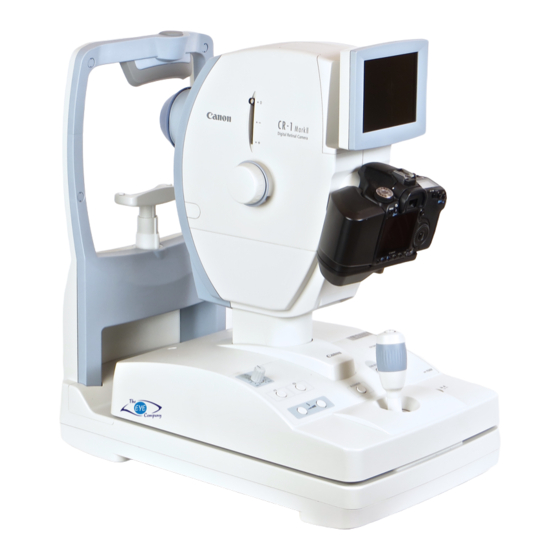
- Page 1 Retinal imaging control software NM (CR-1 Mark II) Operation Manual Before using the instrument, be sure to read this manual thoroughly. Keep the manual where it is easily accessible.
- Page 2 2. Reading of image and storage of data must be performed in accordance with the law of the country where the product is being used. Also, the user is responsible for maintaining the privacy of image data. 3. In no event will Canon be liable for direct or indirect consequential damage arising out of the use of this product.
-
Page 3: Table Of Contents
1. Introduction ...1 1.1 Overview of software ... 1 1.2 Software operating environment ... 2 2. Notes on use...3 2.1 Software ... 3 2.2 Digital camera settings ... 5 2.3 CF cards ... 6 3. Starting up and exiting the software ...7 3.1 Starting up the software and logging in ... - Page 4 Contents 5.3 Study log screens ... 38 5.3.1 Displaying a study log screen ... 38 5.3.2 Changing study ... 39 5.3.3 Study log screen and photography ... 39 5.3.4 Exiting the study log screen ... 40 5.3.4.1 Transferring the study and exiting the study log screen ... 40 5.3.4.2 Exiting the study log screen ...
- Page 5 7. Settings...73 7.1 Settings Menu screen ... 73 7.2 System ... 74 7.2.1 System tab ... 74 7.2.2 Transfer Timing tab ... 75 7.2.3 Specific Character Set tab ... 76 7.3 Device ... 77 7.3.1 Retinal Camera Settings ... 77 7.3.2 EOS Settings ...
- Page 6 Contents 8. Before calling the service technician ...111 8.1 Appearance of the message screen ... 111 8.2 Error ... 112 8.3 Warning ... 116 8.4 Information ... 125 Index ...127...
- Page 7 >. The available shortcut keys are displayed after the option in the menu bar. Notation example: Click the commands from the taskbar in the following order. [Start] > [All Programs] > [Canon Retinal imaging control software NM] > [Canon CR-1 Mark II] [Study] >...
-
Page 9: Introduction
1. Introduction 1.1 Overview of software This software is used when taking retinal images with Canon Digital Retinal Camera CR-1 Mark II, and it enables the images taken to be browsed, operated, processed, stored, sent to DICOM storage server, exported as DICOM or JPEG format file and, output to a printer. -
Page 10: Software Operating Environment
1. Introduction 1.2 Software operating environment For details on the system, contact a Canon representative or distributor. Hardware or software Display Keyboard Mouse Interface Operating system Software Compatible EOS Specifications Core 2 Duo 2 GHz or higher 2 GB or more Screen resolution: XGA (1024 ×... -
Page 11: Notes On Use
2. Notes on use 2.1 Software This software can only be used by users who belong either of the following groups of the User Accounts. Windows XP: Administrators Windows Vista: Users (Standard user) or Administrators Be sure to set the access rights for the saving folder to be used in the following cases. •... - Page 12 2. Notes on use Windows Vista: Also, during the Windows shut down process, do not perform any of the following operations. Windows XP: Standby Windows Vista: Sleep Do not operate the retinal camera while operating this software. The software and camera may fail to operate properly.
-
Page 13: Digital Camera Settings
Windows Vista: 1) Open the Control Panel, and click Hardware and Sound, and click Play 2) Select “Take no action” from the drop-down list for Canon EOS 50D. Windows XP: 1) Select Scanners and Cameras in the Control Panel. -
Page 14: Cf Cards
2. Notes on use Settings based on menu functions The settings for menu items not shown here can be changed as desired. Menu items WB SHIFT/BKT Color space Picture Style Review time Auto power off Date/Time C.Fn I: Exposure 3 ISO expansion C.Fn II: Image 2 High ISO speed noise reduction Shoot w/o card... -
Page 15: Starting Up And Exiting The Software
For details, refer to (2) in 2.1 Software (see page 3). Check that the power of the retinal camera is on, and either double-click the Canon CR-1 Mark II icon on the desktop or from the taskbar click [Start] > [All Programs] > [Canon Retinal imaging control software NM] >... -
Page 16: Exiting The Software
3. Starting up and exiting the software 3.2 Exiting the software When the software is to be exited, exit it on the login screen. The steps taken to return to the log-in screen differ depending on whether the setting screen or the main screen is displayed. -
Page 17: Performing Studies
4. Performing studies 4.1 Displaying the main screen On the login screen, input the User ID and Password, and click [Login]. The main screen is displayed. For details on the main screen, refer to 6. Main screen operations (see page 41). If there is a study with a transfer error If there is a study whose transfer status (see page 31) is a transfer error, the error message screen and Re-Transfer Study(ies) of Failed Transfer screen are displayed. -
Page 18: Inputting The Study
4. Performing studies 4.2 Inputting the study 4.2.1 Methods of inputting the study There are four methods below for inputting the study: 1. Manual input (see page 11) 2. Magnetic card/barcode input (see page 13) 3. List input (see page 16) 4. -
Page 19: Manual Input
4.2.2 Manual input Input the study using the keyboard and mouse. Display the Study Input screen. Click the Study icon, or [Study] > [Study F1] from the menu bar. If a tab other than Manual Input is displayed, click the Manual Input tab. Input the study. - Page 20 4. Performing studies Item name Study Description To re-input previously input study To re-input previously input study, click study information from the Patient History. To search the Patient History, input the search condition, and click [Search history list]. Only those studies matching the conditions are now displayed. Display the main screen.
-
Page 21: Magnetic Card/Barcode Input
Studies can be input from magnetic cards and barcodes. Data and communication settings must be made for the magnetic card/barcode reader that is used. For details, please contact a Canon representative or distributor. This describes the input procedure after the magnetic card/barcode settings (see page 110) have been made. - Page 22 4. Performing studies Input the study from the magnetic card/barcode reader. Use the magnetic card/barcode reader to input the study. A search for the input items is performed on the previously studied patient list, and the search results are input. If the input items were already manually input, they are overwritten by the data from the magnetic card/barcode reader.
- Page 23 Changing information input from the magnetic card/barcode reader The information input from the magnetic card/barcode reader cannot be changed from the Study Input screen. To make revisions, refer to 6.10 Changing the patient information (see page 68). Display the main screen. Click [OK].
-
Page 24: List Input
4. Performing studies 4.2.4 List input Study information is acquired from the study file (ccrhis.his) and input. Open the Study Input screen. Click the Study icon, or click [Study] > [Study F1] from the menu bar. If a tab other than List Input is displayed, click the List Input tab. The List Input screen that was set in 7.5.4 List Input tab (see page 86) is displayed. - Page 25 Input the search conditions. Input the search items. Item name Patient ID Accession No. Patient Name Perform a refined search of the list. Click [OK]. The refined search results are displayed in a list. List Input screen (Refined search results) No.
- Page 26 4. Performing studies Display the main screen. Select the study line in the list, and then click [OK]. The main screen is displayed, and the study information is displayed on it. Refined search using magnetic card/barcode reader If a study is input from a magnetic card/barcode reader while the List Input screen is being displayed, a refined search of the list is conducted based on the search information that was input.
-
Page 27: Worklist Input
4.2.5 Worklist input Acquire the worklist from the worklist server. Display the Study Input screen. Click the Study icon, or click [Study] > [Study F1] from the menu bar. If a tab other than Worklist is displayed, click the Worklist tab. The worklist matching the search conditions set in 7.5.5.3 Setting the search conditions (see page 89) is displayed. - Page 28 4. Performing studies Concerning worklist server searches If Display Worklist Search window has been checked in 7.5.5.3 Setting the search conditions (see page 89), the Worklist search screen is displayed automatically. To display the Worklist search screen manually, click [Search...] on the Study Input screen. The search conditions can be changed on the Worklist search screen.
- Page 29 4. Performing studies Searches using a magnetic card/barcode reader during worklist input If a study is input from a magnetic card/barcode reader while the Worklist Input screen is being displayed, a search of the worklist is performed again based on the current worklist search conditions and study information that was input from the magnetic card/barcode reader, and the search results are displayed in a list.
-
Page 30: Starting A Study Without Opening The Study Input Screen
4. Performing studies 4.3 Starting a study without opening the Study Input screen A study can be started as quick as thought skipping input of study information. Enter the patient information when the study is completed. Display the main screen. Click [Study] >... -
Page 31: Taking Images
4.4 Taking images Input the Study Description. A description consisting of up to 64 characters can be input in Study Description. The identical Study Description is input for all the images which were taken until the study was completed. To input a comment for each image In order to input a comment for each image, refer to 6.2.2 Referencing the image properties (see page 45). - Page 32 4. Performing studies Take the images. Press the shutter release button on the retinal camera. The retinal image is taken. Refer to the image. To operate or print the image, refer to 6. Main screen operations (see page 41). Image -24-...
-
Page 33: Ending A Study And Transferring Images
4.5 Ending a study and transferring images 4.5.1 Ending a study End the study. Click [Study Complete]. The Study Complete screen is displayed. To end the study, click [OK]. To select the storage, follow the steps described below. When [Study Cancel] is selected When [Study Cancel] is clicked, the Study Cancel screen is displayed. - Page 34 4. Performing studies Display the Select the Storage(s) screen. Click [Select Storage...]. When [Select Storage...] is disabled Select “When a study is completed” on the Transfer Timing tab (see page 75) to enable [Select Storage...]. Select the storage. Click the storage. To set two storages, click the storage while pressing the Ctrl key on the keyboard.
-
Page 35: Checking The Transfer Status
4.5.2 Checking the transfer status The transfer status is displayed by the icon at the top right of the main screen. If the transfer is completed properly, the icon display is cleared. Icon displays Icon Status Transfer Transfer Error Position of transfer status icon Description There is a study currently being transferred. -
Page 36: When A Transfer Error Occurs
4. Performing studies 4.5.3 When a transfer error occurs The transfer status is displayed by the icon on the login screen (see page 8) or main screen. It can also be displayed on the Study Logs screen (see page 31). If there is a study whose transfer has failed or an Transfer Error screen which has not appeared even once, the Transfer Error icon will appear on the main screen or login screen. -
Page 37: Logging Off
4.6 Logging off To log off, click the logoff button at the top right of the screen, or select [File] > [Logoff Alt+F4] from the menu bar. The login screen (see page 7) is displayed. Concerning the transfer of images If the current transfer status is a transfer error or if an untransferred image exists, the same operation is performed as when [Transfer All] is executed on the study logs (see page 34). - Page 38 4. Performing studies -30-...
-
Page 39: Operations On Study Logs
5. Operations on study logs The two types of study data below can be viewed through the Study Logs screen. • Temporarily Saved: Study log data that is temporarily saved to the database in the control software • Study Log Files: Study log data that was saved to a specified folder Select the Temporarily Saved tab or Study Log Files tab to display the respective study logs. -
Page 40: Searching For Studies
5. Operations on study logs 5.1.2 Searching for studies Display the Search screen. Click [Search...] on the Study Logs screen (Temporarily Saved tab). Set the search conditions. Display Study Date Item Keyword [Default] Proceed with the search. Click [OK]. The search starts, and its results are displayed on the Study Logs screen. Number of displayed study logs in list The maximum number of study logs that can be displayed in the list is 10,000. -
Page 41: Transferring Studies
5.1.3 Transferring studies 5.1.3.1 Selecting studies for transfer When a study has been selected and [Transfer] clicked, the DICOM information will be updated in accordance with the settings of the 7.7.2 Study Logs tab (see page 99) except for those studies which are in the untransferred transfer status. -
Page 42: Transferring All Studies
5. Operations on study logs 5.1.3.2 Transferring all studies Take the steps below to transfer all the studies whose transfer status is transfer error or untransferred. Transfer the studies in the transfer error status. Click [Transfer All]. If there are studies whose transfer status is transfer error, the Re-Transfer Study(ies) of Failed Transfer screen will appear, in which case click [OK]. -
Page 43: Saving Studies
5.1.4 Saving studies When study log data was temporarily saved in the database of the control software, each study can be saved to a user-selected location. Note: To save a study log data, access rights for the storage directory must be set. For details, refer to (2) in 2.1 Software (see page 3). -
Page 44: Deleting Studies
5. Operations on study logs 5.1.5 Deleting studies Select the study. On the Study Logs screen, select the study. If a multiple number of studies are to be selected, click the studies while pressing the Ctrl key on the keyboard; if a range of studies is to be selected, click the studies while pressing the Shift key on the keyboard. -
Page 45: Study Log File
5.2 Study log file The study logs that were saved to a selected location are displayed on the Study Log Files tab (see page 35). 5.2.1 Displaying study log files list Display the Study Logs screen. Click the Study Logs icon. Select the study log file. -
Page 46: Study Log Screens
5. Operations on study logs 5.3 Study log screens 5.3.1 Displaying a study log screen To display a study log screen, either click the study on the Study Logs screen (Temporarily Saved) (see page 31) or Study Logs screen (Study Log Files) (see page 37) and then click [OK] or double-click the study. -
Page 47: Changing Study
5.3.2 Changing study When [Next Study] or [Previous Study] button is clicked while displaying a study log the next study or previous study is displayed in the listing order displayed in the study logs. Shortcut key operation The same operation can be performed using the space bar (Next Study) and back space key (Previous Study) on the keyboard. -
Page 48: Exiting The Study Log Screen
5. Operations on study logs 5.3.4 Exiting the study log screen 5.3.4.1 Transferring the study and exiting the study log screen Click [Transfer]. The Transfer the study(ies) screen is displayed. Click [OK]. However, if the transfer status is “Transfer,” a Warning screen is displayed, and the study concerned cannot be transferred. -
Page 49: Main Screen Operations
6. Main screen operations 6.1 Main screen 6.1.1 Toolbar Toolbar Toolbar Icon Study Color Photography ready lamp Main and Thumbnails Two-Row Thumbnails Thumbnails Only By Time By R/L Compare Studies Stereo View C/D Ratio Easy PhotoPrint EX or Print Reject Previous Study Next Study Icon name... -
Page 50: Display Information
6. Main screen operations Icon Study Logs Logoff 6.1.2 Display information Study tab Thumbnail image Image toolbar Main image Image toolbar Icon RGB Channels Normal View Contrast/Brightness Reset Contrast/Brightness Loupe Hand Image Property Zoom Out Zoom In Display Mognification Display information Screen area Study tab Thumbnail image... -
Page 51: Menu Bar
6.1.3 Menu bar Menu Change a Password Print Adjustment Print Page Setup File Easy-PhotoPrint EX Save As JPEG Settings Logoff Edit Select All Hide Rejected Images View Hide Study Information Stereo View Change a Patient Patient Information Study F1 Skip Study Input F5 Study Cancel Study Study Complete F12... -
Page 52: Image Display Methods And Properties
6. Main screen operations 6.2 Image display methods and properties 6.2.1 Selecting the display method Click the image display icon. 1) Main and Thumbnails icon The thumbnails are displayed at the top of the screen. When a thumbnail display is clicked, its enlarged image is displayed at the bottom of the screen. -
Page 53: Referencing The Image Properties
Change the sequence in which the images are to be displayed. When displaying the images in the sequence in which they were taken, click the By Time icon; when displaying the images in the sequence of the left and right eyes, click the By R/L icon. Turning display of the study information screen on and off On the menu bar, click [View] >... - Page 54 6. Main screen operations Display the Image Property screen. Click the Image Property icon. Input comments for the image. Input comments in the Image Comments field. A description consisting of up to 4096 characters can be input. Different image comments for different images can be saved. For a study log file, image comments cannot be edited.
- Page 55 6. Main screen operations Exit the Image Property screen. Click [OK]. However, [OK] cannot be clicked if the image comments have not been changed, in which case click [Cancel]. -47-...
-
Page 56: Image Operations
6. Main screen operations 6.3 Image operations 6.3.1 Zooming When the main & thumbnail display has been selected, Zoom In icon and Zoom Out icon can be used. Select the main & thumbnail display. Click the Main and Thumbnails icon. Select the image. -
Page 57: Rgb Channel View
6.3.2 RGB channel view The color components (R, G, B) of the color image can be displayed separately. Select the image. Click the thumbnail image. Display the RGB split images. Click the RGB Channel icon. In addition to the color image, the R (red), G (green), and B (blue) color component images are also displayed. -
Page 58: Contrast/Brightness Adjustment
6. Main screen operations 6.3.3 Contrast/brightness adjustment The contrast and brightness of the main image can be adjusted. Select the image. Click the thumbnail image. Adjust the contrast or brightness. Click the Contrast/Brightness icon. The adjustment cursor is displayed. While the left-mouse button is held down, the contrast value (C) and brightness value (B) are displayed at the top right of the image. -
Page 59: Enlarging An Area Of The Image (Loupe)
6.3.4 Enlarging an area of the image (Loupe) A part of an image can be enlarged for display. Select the image. Click the thumbnail image. Enlarge a part of an image for display. Click the Loupe icon, and then click over the main image with the mouse. To move the enlargement position, move the mouse while holding down the left-mouse button. -
Page 60: Comparing Studies
6. Main screen operations 6.4 Comparing studies A comparison view of studies can be displayed. Open a study to be compared. To compare with a current study, click the Study tab. To compare with a study log, click the Study Logs icon, select from the Temporarily Saved list or Study Log Files list, and click [OK]. -
Page 61: Image Display Icon
6.4.1 Image display icon Icon Icon name Main, Thumbnails, and Study Information Main and Thumbnails Thumbnails and Study Information Thumbnails Only By Time By RL Move/Apply Effects to Both Images Study Logs Menu item Submenu Hide Rejected Images View Hide Study Information 6.4.2 Displayed item setting The displayed items for the study information can be specified. -
Page 62: Measuring C/D Ratio
6. Main screen operations 6.5 Measuring C/D ratio The cup-to-disc ratio of the optic nerve papillary area from the image can be measured. Two methods are available: finding the area ratio and finding line ratio. Note: Photography is not possible on the C/D Ratio screen. 6.5.1 Displaying the C/D ratio enlarge screen Select the image. -
Page 63: Measuring Area Ratio
Button and display item Cup color label [Reset] for Cup Area Vertical Horizontal Line [OK] [Cancel] Mouse cursor 6.5.2 Measuring area ratio Closed curve on the image can be drawn to measure the area ratio of the disc and cup. To measure the line ratio, refer to 6.5.3 Measuring the line ratio (see page 57). - Page 64 6. Main screen operations Draw a cup. Select [Cup] and draw using the same procedure for Disc. Reshape the disc or cup. After drawing is completed, the shape can be adjusted. If the pointer is brought close to the clicked point, the color of the point changes to gray. The point can be dragged to move it to another location.
-
Page 65: Measuring The Line Ratio
6.5.3 Measuring the line ratio The line ratio can be measured by drawing a vertical line or straight line. Display an enlarged screen from the CD ratio screen. Insert a check mark in [Line Ratio], and select a vertical line or straight line. Select [Disc] or [Cup]. -
Page 66: Stereo View
6. Main screen operations 6.6 Stereo view Two images that were taken in the same shooting mode are displayed side by side. Select the images. Select the two thumbnail images by clicking them while holding down the Ctrl key on the keyboard. Open the Stereo View. - Page 67 Image operation icon/button Hand Reduce Enlarge Display Magnification Exit Stereo View. Click [Close]. The Stereo View information below is recorded when the Stereo View screen is closed: • Display image position • Size Name 6.3.5 Moving the displayed area (see page 51) 6.3.1 Zooming (see page 48) -59-...
-
Page 68: Printing Images
6. Main screen operations 6.7 Printing images Images can be printed out using the 7.10 Print (see page 109) settings. The available printing methods are simple printing and Easy-PhotoPrint EX. Before printing the images, set the printing parameters. 6.7.1 Adjusting the printing parameters Printing parameters for images can be adjusted. -
Page 69: Using Simple Printing To Print Images
Save the settings. Click [OK]. 6.7.2 Using simple printing to print images The simple printing function of the control software is used to print images with the printing parameters that were adjusted in 6.7.1 Adjusting the printing parameters (see page 60). Turn on the power of the printer. - Page 70 6. Main screen operations Proceed with the printing. On the File menu bar, click [File] > [Print] in this order. When the Print screen is displayed, click [Print] button. The output of the selected image and Print information to the printer is started. The screen returns to the original window after image output to the printer is completed.
-
Page 71: Using Easy-Photoprint Ex To Print Images
Patient ID Patient Name Printing information If a part of printing information item cannot be laid out in the provided space, ellipsis (...) are shown before the Patient ID and Accession No. and after the Patient Name and Study Date to indicate that information is omitted. - Page 72 6. Main screen operations Open the Easy-PhotoPrint EX screen. On the File menu bar, click [File] > [Easy-PhotoPrint EX] in this order. The selected image is displayed as the printing image. Printing with the Print icon To print using Easy-PhotoPrint EX when clicking the Print icon, add a check mark to the Print with Easy-PhotoPrint EX option in the print settings (see page 109).
- Page 73 6.8 QA Take the steps below to adjust the images. Select the image. Click the thumbnail image. Display the QA (Quality Assurance) screen. Click the QA icon. Set the parameters. If the parameters have been saved, click Parameter Set from the list shown. To set a new parameter, refer to the table below, and set it.
- Page 74 6. Main screen operations Maintenance of the parameter set To save a new parameter set, enter the name in the Parameter Set column using up to 32 characters, and click [Add]. To delete an already saved parameter set, click the name of the Parameter Set, and click [Delete]. In cases where an already saved parameter set has been selected and then changed, click [Update] to overwrite the existing parameter set with the current setting or click [Undo] to return to the saved setting.
-
Page 75: Rejecting Images
6.9 Rejecting images Images set to be rejected are not transferred. All other operations can be performed as usual. Select the image. Click the thumbnail image. Set the image to reject. Click the Reject icon. A red “×” will appear at the bottom right of the thumbnail and main images. When the Reject icon is clicked again, the red “×”... -
Page 76: Changing The Patient Information
6. Main screen operations 6.10 Changing the patient information The patient information input manually or with a magnetic card or barcode reader can be changed. The patient information acquired by the list or worklist input cannot be changed. Display the Patient Info Edit screen. On the menu bar, click [Patient] >... -
Page 77: Saving As Jpeg Files
6.11 Saving as JPEG files The images displayed on the main screen can be saved as JPEG files. 6.11.1 Save as Select the image. Click the thumbnail image. Display the save screen. Click [File] > [Save As...] from the menu bar. The Save As screen is now displayed. -
Page 78: Jpeg Settings
6. Main screen operations 6.11.2 JPEG settings Display the JPEG Settings screen. Click [File] > [JPEG Settings...] from the menu bar. The JPEG Settings screen is displayed. Set the JPEG Quality and Resize settings for the JPEG files. Input item JPEG Quality Resize (with fixed aspect... -
Page 79: Changing The Password
6.12 Changing the password Take the steps below to change the password of the user who is currently logged in. Display the Change a password screen. On the menu bar, click [File] > [Change a Password...] in this order. Input the password. Input no more than 16 characters for the Current Password, New Password and New Password(confirm). -
Page 80: Displaying The Version Information
6. Main screen operations 6.13 Displaying the version information On the menu bar, click [Help] > [Version] in this order. The Version Information screen is displayed. Version Information screen -72-... -
Page 81: Settings
7. Settings 7.1 Settings Menu screen On the login screen, input the User ID and Password with which the Privilege (see page 100) has been set to the Administrator, and click [Settings]. The Settings Menu screen is displayed. To exit the Settings Menu screen, click [Close]. Icon name System Device... -
Page 82: System
7. Settings 7.2 System The System screen is displayed when the System icon is clicked. Click the tabs, and set the parameters. To save the settings and exit the System screen, click [OK]. 7.2.1 System tab Used to perform the settings for the DICOM information. Item SOP Class Modality... -
Page 83: Transfer Timing Tab
Item Station Name Location Institutional Department Name Institution Name 7.2.2 Transfer Timing tab Select the timing at which the images are to be transferred. Item When a study is completed Manual Operation Input no more than 16 characters. The backslash (\) cannot be input. Input no more than 64 characters. -
Page 84: Specific Character Set Tab
7. Settings 7.2.3 Specific Character Set tab Click to set the specific character set used for study input and DICOM communication. The values corresponding to the selected item are used in Specific Character Set (0008,0005). Default Latin-1 Latin-2 Cyrillic Greek Latin-5 Japanese <katakana>... -
Page 85: Device
7.3 Device The Device screen is displayed when the Device icon is clicked. Click the buttons to display the setting screens. To save the settings and exit the Device screen, click [Close]. 7.3.1 Retinal Camera Settings The Retinal Camera screen is displayed when [Retinal Camera] is clicked. Set the COM Port. -
Page 86: Eos Settings
7. Settings Check the connection with the retinal camera. Click [Connection Check...]. If the connections have been made properly, the Result of Retinal Camera Connection screen is displayed. When [OK] is clicked, the Result of Retinal Camera Connection screen is closed. When an Error screen has appeared When an Error screen has appeared, check the following. - Page 87 Perform the EOS settings. Item Model Click Retinal Camera Color only can be selected. Mode Grayscale Select Yes or No. Conversion Image Format Select JPEG or RAW. Select the image size. Image Size The available image sizes vary depending on the image format and ISO speed.
-
Page 88: Study Management
7. Settings 7.4 Study Management The Storage tab of the Study Manager screen is displayed when the Study Management icon is clicked. On this tab, the storage directory of the images and the save period are set. To set the storage directory which the images are to be exported as the DICOM or JPEG format file, refer to 7.6 Storage (see page 92). - Page 89 Check the amount of free space. Click [Check Remaining Capacity...]. The Information screen is displayed, and the amount of free space on the hard disk is displayed. When [OK] is clicked, the Information screen is closed. Concerning the amount of free space required on the hard disk An Error screen will be displayed if there is less than 1 GB of free space on the hard disk containing the folder which has been set for the storage directory.
-
Page 90: Study Input
7. Settings 7.5 Study Input When the Study Input icon is clicked, the Study Input/MPPS Modules screen is displayed. Click the tabs, and set the parameters. To save the settings and exit the screen, click [OK]. 7.5.1 Module Settings tab On this tab, the study input module and study input screen switching settings can be made. -
Page 91: Manual Input Tab
Select the operation of the Study Input screen when a study ends. When “Open Study Input screen when a study is closed” is checked, the screens change as shown below. Assign Accession No. automatically (see page 85) When enabled When disabled 7.5.2 Manual Input tab When entering patient information manually (see page 11) in the Study Input screen, set essential input data, input-disabled data, the method for entering birth date data and the input format. - Page 92 7. Settings Item Input Format (Input item settings) Input Format Note: The check for input format is valid in the Manual Input screen only. No check for input format is made in the Patient Info Edit screen or in the Study Description input section of the Study screen.
- Page 93 Make the setting for the Automatic Accession No. Assignation menu. To use the Automatic Accession No. Assignation menu, insert a check mark for Enable Automatic Accession No. Assignation. When a check mark is inserted, the [Auto Counter Setting...] is enabled, and the automatic numbering setting is enabled.
-
Page 94: Mag Barcode Input Tab
7. Settings 7.5.3 Mag Barcode Input tab Set the input method for the essential items and birth date during input from a magnetic card/barcode. Item Essential Data Birth Date Input 7.5.4 List Input tab This sets the study screen using list input. Select the items to be displayed in the List Input tab on the Study Input screen. - Page 95 Set the display order of the Displayed Items. Items in the Displayed Items are displayed in order from the top of the list starting from the left side. To change the display order, select the item, and click [Up] or [Down]. Set the Model No.
-
Page 96: Worklist Tab
7. Settings 7.5.5 Worklist tab This screen is displayed when the Worklist tab is clicked. 7.5.5.1 Setting the display items Select the items to be displayed on the Worklist tab (see page 19). To add or delete a display item, select the item, and then click Set the display sequence of the Displayed Items. -
Page 97: Setting The Search Conditions
When the Warning screen is displayed Check out the following when the Warning screen is displayed. • Is the network operating properly? • Is the server working properly? 7.5.5.3 Setting the search conditions Take the steps below to set the default values of the Worklist Search screen (see page 20). Click [Search Conditions...]. - Page 98 7. Settings Set the Search Conditions : DICOM Tag Keyword. Set the search tag in the list box on the left. Input the value in the text box on the right. An asterisk (*) can be used as a wild card. Search Conditions : DICOM Tag Keyword AE Title (00400001)
-
Page 99: Mpps Tab
7.5.6 MPPS tab This screen is displayed when the MPPS tab is clicked. Set the communication parameters. Item Server AE Title Host Name Port No. Check the connections with the server. Click [Connection Check...]. If the connections have been made properly, the Information screen is displayed. When [OK] is clicked, the Information screen is closed. -
Page 100: Storage
7. Settings 7.6 Storage Storage Server, Export (DICOM), and Export (JPEG) can be selected as a storage. Click the Storage icon to display the Storage screen. The registered DICOM server storage locations and the export locations for DICOM files and JPEG files are displayed in a list, where entries can be added, edited, and deleted. - Page 101 Select the Storage Type. To output to a DICOM storage server, select Storage Server. To export a DICOM file, select Export (DICOM). To export a JPEG file, select Export (JPEG). Select the settings for the storage. If Storage Server is selected under Storage Type, set the Storage Name, Server AE Title, Host Name, Port No., and SOP Class.
- Page 102 7. Settings Check the connection with the server. (When Storage Server has been selected) When Storage Server has been selected as the Storage Type, click [Connection Check...]. The Information screen is displayed if the connection has been made properly. When [OK] is clicked, the Information screen is closed. When the Warning screen is displayed Check the following points if the Warning screen is displayed.
-
Page 103: Advanced Export Settings (When Export Is Selected For The Storages)
7.6.2 Advanced export settings (when Export is selected for the storages) Click [Details...] on the Create a New Storage screen. The Export Settings screen is displayed. On this screen, the settings are made for creating directories for storing images, file names, and resizing. After the settings are complete, click [OK]. -
Page 104: Setting The Storage Server
7. Settings 7.6.3 Setting the storage server Set the time-out period (second) for transferring to the registered storage server. Click [Storage Server Settings...] on the Storage screen. The Storage Server Settings screen is displayed. Set the items on the screen, and click [OK]. Association Timeout Receive Timeout Input a number from 1 to 600. -
Page 105: Dicom Tag
7.7 DICOM Tag The DICOM Tag screen is displayed when the DICOM Tag icon is clicked. Click the tabs, and set the parameters. To save the settings and exit the DICOM Tag screen, click [OK]. 7.7.1 Study tab On this tab, the DICOM information which is to be saved on the images is set. Item Create Series for Right/Left Eye... -
Page 106: Setting Image Comments
7. Settings Item Set “Scheduled Performing Physician’s Name” to “Performing Physician’s Name” Window Center/ Window Width Save as “Image Comments” [Details...] 7.7.1.1 Setting image comments Take the steps below to set the information to be saved in the DICOM information (Image Comment) of the images. -
Page 107: Study Logs Tab
Select the Enabled Items. To add or delete a display item, select the item, and then click Set the order in which the items are to be saved. The items displayed as the Enabled Items will be saved in sequence from the top. To change the sequence in which the items are saved, select the item, and then click [Up] or [Down]. -
Page 108: User Accounts
7. Settings 7.8 User Accounts The User Accounts screen is displayed when the User Accounts icon is clicked. Manage the information of the login user on this screen. To save the settings and exit the User Accounts screen, click [Close]. 7.8.1 Registering users Up to 20 users can be registered. -
Page 109: Changing The User Information
Concerning the user names The user names are saved as DICOM information (Operator’s Name) on the images. Depending on the settings (see page 97), a user name may also be saved as the Performed Physician’s Name. Register the users. Click [OK]. The users are now registered on the user account list. 7.8.2 Changing the user information The information of registered users can be changed. -
Page 110: Screen
7. Settings 7.9 Screen The Screen screen is displayed when the Screen icon is clicked. Click the tabs, and set the parameters. To save the settings and exit the Screen screen, click [OK]. 7.9.1 Main Image Info. tab On this tab, the image information to be displayed on the main image is set when the main & thumbnail images are displayed (see page 44) on the screen. -
Page 111: Thumbnail Image Info. Tab
7.9.2 Thumbnail Image Info. tab On this tab, the image information to be displayed on the thumbnail images is set. Check the items to be displayed. Displayed Items Retinal Camera Mode Image No. Content Time Thumbnail Image Info. tab Display Description Color is displayed. -
Page 112: Study Info. Tab
7. Settings 7.9.3 Study Info. tab On this tab, study information to be displayed at the right of the main screen is set. The items displayed in Displayed Items appear in the study information at the right of the main screen. -
Page 113: Thumbnail Order Tab
7.9.4 Thumbnail Order tab On this tab, the thumbnail display sequence to be used when the Thumbnails icon was clicked on the main screen is set. When the By Time icon is clicked, the Order by Content Time is applied; when the By Retinal Camera Mode icon is clicked, the Order by Retinal Camera Mode is applied. -
Page 114: Loupe Tab
7. Settings 7.9.5 Loupe tab On this rtab, the display size and magnification rate for the Loupe function of the main image is set. Item Displayed Size Magnification Loupe tab Status The image is displayed in a square with a side equal to 1/3 the vertical length of the main screen. -
Page 115: C/D Ratio Tab
7.9.6 C/D Ratio tab On this tab, the magnification rate in the C/D Ratio screen is set. The rate is used to magnify the image when it is clicked. Item Displayed Size C/D Ratio tab Status Select this option to enlarge the M display size by 1.4x (based on the height of the image). -
Page 116: Stereo View Tab
7. Settings 7.9.7 Stereo View tab On this tab, the magnification rate in the Stereo View screen is set. The rate is used to magnify the image when it is clicked. Item Displayed Size Stereo View tab Status Select this option to enlarge the M display size by 1.4x (based on the height of the image). -
Page 117: Print
7.10 Print The Print screen is displayed when the Print icon is clicked. This sets the print operation that is executed when clicking the Print icon in the main screen. To save the settings and exit the Print screen, click [OK]. Set the print operation for the Print icon. -
Page 118: Study Logs
Clicking the Magnetic Card/Bar Code icon opens the Magnetic Card/Bar Code Setting screen. At this screen, the serial/USB communication settings for the magnetic card/barcode reader that is used and the settings for the magnetic card/barcode data are made. For details, please contact a Canon representative or distributor. Study Logs screen -110-... -
Page 119: Before Calling The Service Technician
Please refer to the message information in the table using the icons, module ids, and message ids. If any messages not shown in the table are displayed, or if the problem cannot be resolved by the remedies listed in the table, please contact your Canon representative or distributor where you purchased this product. -
Page 120: Error
8. Before calling the service technician (Error) 8.2 Error module id message id 00005 00008 00011 10002 10003 3701 4100 10004 4103 4106 4107 Message Specified User ID already exists. Failed in DICOM communications. - a series of operation with SCP Failed in DICOM communications. - Page 121 module id message id 1001 Failed to open a port. 1003 Failed to set a port. Power for the retinal camera is turned off or the 1007 cable is improperly connected. Error occurred during communications with the 1501 retinal camera. Failed to resend the command frame.
- Page 122 Check the magnetic card/barcode reader connection. The magnetic card/barcode reader settings need to be made. Please contact a Canon representative or distoributor. The study progress status could not be saved to the study file. Check if the study file (ccrhis.his) is set to read-only.
- Page 123 module id message id Specified folder does not exist or is not accessible. Specify the folder again. No right to read contents in the folder. 10067 Not Recognized as a directory. No right to write contents in the folder. 8. Before calling the service technician (Error) Message Refer to (2) in 2.1 Software (see page 3), and set the proper access privileges for the storage folder.
-
Page 124: Warning
8. Before calling the service technician (Warning) 8.3 Warning module id message id 1002 10001 1009 1000 1001 10002 1004 1005 1006 1007 10003 11004 Message Invalid image was captured. Failed to acquire Retinal Camera Info. within the specified time. No Validity for Current Study Photography frequency exceeded the limit. - Page 125 Image Comment Settings screen (see page 98). Upgrage the version of the Retinal imaging control software NM (CR-1 Mark II) to the same version as that you used to save the file, or to a newer version. Wait for a few moments, and then take the images.
- Page 126 8. Before calling the service technician (Warning) module id message id 10011 10012 10013 10019 1000 10020 1001 10023 Message Enter User ID/Password. Enter in alphanumeric. Application will be closed. Press Cancel button and log in to the application to view the details of the transfer error.
- Page 127 module id message id Character '\,' line feed, or control character cannot be used for Study Description. Character '\', '=', '^' or control code cannot be used for Last Name. Multi-byte character cannot be used for Last Name. Character '\', '=', '^' or control code cannot be used for First Name.
- Page 128 8. Before calling the service technician (Warning) module id message id 11004 10024 11005 12001 10026 1001 1101 1102 1103 1104 1105 10027 1106 1107 1110 1111 1401 2001 10028 Message Character '\' or line feed code cannot be used for Study Description.
- Page 129 module id message id Wrong Confirmation Password. Enter again. No Essential Data [item] Enter in alphanumeric. [item] 10028 Wrong Old Password. Enter the password again. Wrong Confirmation Password. Enter the password again. New password is the same as the old password. Enter again.
- Page 130 8. Before calling the service technician (Warning) module id message id 10045 10048 Message Specified End Date is earlier than Start Date. Length of acquired worklist item is too long. The following tag number item(s) are cut off. [XXXX] (DICOM TAG Number+DICOM TAG Name) Acquired worklist item format is invalid.
- Page 131 module id message id Entered Model No. is not numeric or the value is out of the range between 1 and 99. Length for storage path for the study file is too long. Shorten to less than 80 bytes. Character '\' or control character cannot be used for Accession No.
- Page 132 8. Before calling the service technician (Warning) module id message id 10050 10053 1000 1001 1002 10063 1003 1004 1005 10065 4097 Message Character '\' or control character cannot be used for Patient ID. A character/characters for Patient ID is/are not supported by Acceptable Character Set or Specific Character Set.
-
Page 133: Information
8.4 Information module id message id Connection to the specified EOS is successfully 10002 10100 established. 10003 No Untransferred Study Free Space in Storage Directory 10004 [** GB] 10027 1109 Association with Storage Server succeeded. 10044 Association with MPPS Server succeeded. 10045 Association with Worklist Server succeeded. - Page 134 8. Before calling the service technician (Information) -126-...
-
Page 135: Index
Index Symbols <- -> 58 Acceptable Character Set 84 Accession No. 10, 11, 14, 17 AE Title 74 Area 55 Area C/D ratio 56 Area Ratio 55 Automatic Accession No. Assignation 85 Birth Date 11, 14 Birth Date Input 83, 86 Brightness 60, 65 By Time 45 C/D ratio 54... - Page 136 Index Parameter Set 65 Password 7, 100 Patient History 12, 15 Patient ID 10, 11, 14, 17 Patient Info Edit screen 68 Patient Name 10, 14, 17 Photography ready lamp 23 Port No. 88, 91, 93 Prefix 11 Print 109 Print information 62 Printing parameters 60 Privilege 100...
- Page 138 CANON INC. Medical Equipment Group 30-2, Shimomaruko 3-chome, Ohta-ku, Tokyo, Japan Telephone: (81)-3-3758-2111 CANON U.S.A., INC. CANON MEDICAL SYSTEMS Eye Care Systems Department 15975 Alton Parkway, Irvine, CA 92618, U.S.A. Telephone: (1)-949-753-4000 CANON EUROPA N.V. Medical Products Division Bovenkerkerweg 59-61, 1185 XB Amstelveen, The Netherlands Telephone: (31)-20-545-8926 CANON (CHINA) CO., LTD.