Table of Contents
Advertisement
Advertisement
Table of Contents

Related Manuals for iHome AutoVac Eclipse iHRV2


Summary of Contents for iHome AutoVac Eclipse iHRV2
- Page 1 Owner’s Guide Model iHRV2...
- Page 2 C O N T E N T S Safety Instructions..........1 Check out our helpful setup videos Product Overview..........2-3 For support content and the latest digital version of this manual scan Setting Up..............4 the QR code below or visit ihomeautovac.com/eclipsevideos How to Use............5-10 Maintenance............11-13 Troubleshooting...........14 FCC Info..............15...
- Page 3 • Do not allow the iHome Autovac to pick up flammable substances such as oil, printer toner and photocopier toner. • Do not allow the iHome Autovac to pick up any burning articles, such as cigarettes, matches, ashes and other articles that may cause fire.
- Page 4 I N T H E B O X Description Quantity iHome Autovac Eclipse Charging Base Power Adapter Dustbin Brush Cleaning Tool Remote Control Boundary Strip User Manual Mop Tank (sold separately for model iHRV1) Mop Pad (sold separately for model iHRV1)
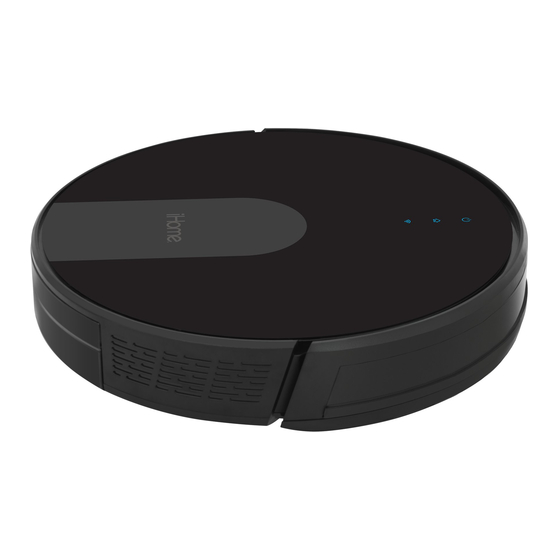
- Page 5 P R O D U C T O V E R V I E W REAR MOP TANK Power Button (sold separately for model iHRV1) Home Button Wi-Fi Indicator Water Injection Port Water Tank Infrared/Bump Dustbin Release Mop Pad Sensor Button DUSTBIN BOTTOM...
- Page 6 S E T T I N G U P T H E C H A R G I N G B A S E Choose a placement near a power outlet and with enough free space in front and on sides (see diagram to the right) Plug the power adapter into the right side of your charging base and the other end into a functioning wall outlet.
- Page 7 1: Download the iHome Clean App The iHome Autovac Eclipse is designed to automatically and Search “iHome Clean” in the App Store or use the QR code below: intelligently clean your home. Multiple sensors are used to avoid obstructions and cliffs. The Autovac will continue to clean until it has determined that the addressable floor area has been covered.
- Page 8 5 seconds to enter network config mode until the Wi-Fi indicator flashes. Re-open the iHome Clean App & wait for the connection to complete NOTE: Ensure that you have a strong Wi-Fi signal in the location of your setup/charging base.
- Page 9 Auto-clean cycle. It’s that easy! Returning to Base - The iHome Autovac Eclipse will detect the infrared signal emitted by the charging base to find its way back. Please note that the infrared signal may be affected by distance, walls, or other obstructions. It may take several minutes for the Eclipse to find its way back to the charging base.
- Page 10 Powermop - recommended after dry dust/debris is vacuumed manually or by your Autovac Eclipse. Attach the water tank as described later in this manual. Choose Powermop in the iHome Clean App or the included remote and the Eclipse will automatically mop the surface and return to the recharge base once complete.
- Page 11 U S I N G T H E R E M O T E C O N T R O L On/Off A remote control is included for your convenience. Recharge It is recommended to point the remote to the Room Cleaning Wi-Fi Settings front of the Eclipse for best results.
- Page 12 3. Remove the Dustbin from the Autovac Eclipse & set aside for later use. 4. Slide the Water Tank into the Autovac Eclipse. 5. Select Powermop in the iHome Clean App or using the remote control and the Eclipse will automatically mop the surface and return to the charging base once complete.
- Page 13 Once a year regular maintenance, as outlined in the following pages, to keep HEPA Filter Every 2 weeks Every 3 months your iHome Autovac Eclipse running at optimal performance. Main Filter Every 2 weeks Twice a year Main Brush Maintenance Main roller and/or side brush errors can occur when something is caught or tangled within the brushes.
- Page 14 M A I N T A I N I N G T H E D U S T B I N Empty your Dustbin and clean your filters regularly to ensure optimal suction power. NEVER attempt to operate the Autovac unless BOTH filters are in place as that will reduce cleaning efficiency and may damage the fan assembly.
- Page 15 M A I N T A I N I N G T H E D U S T B I N Clean dust bin with a dry cloth. re-install both filters by nesting the HEPA filter into the primary filter and placing the entire assembly into the filter compartment with the HEPA filter facing up.
- Page 16 A U T O V A C E C L I P S E T R O U B L E S H O O T PROBLEM SOLUTION Unable to power on • Please charge before use. This is commonly caused due to low battery. Visit the FAQ page and view the “Power”...
- Page 17 F C C S T A T E M E N T This device complies with Part 15 of the FCC Rules. Operation is subject to the following two conditions: (1) This device may not cause harmful interference, and (2) This device must accept any interference received, including interference that may cause undesired operation.
Need help?
Do you have a question about the AutoVac Eclipse iHRV2 and is the answer not in the manual?
Questions and answers