Table of Contents
Advertisement
Quick Links
Advertisement
Table of Contents

Related Manuals for Felder G 200


Summary of Contents for Felder G 200
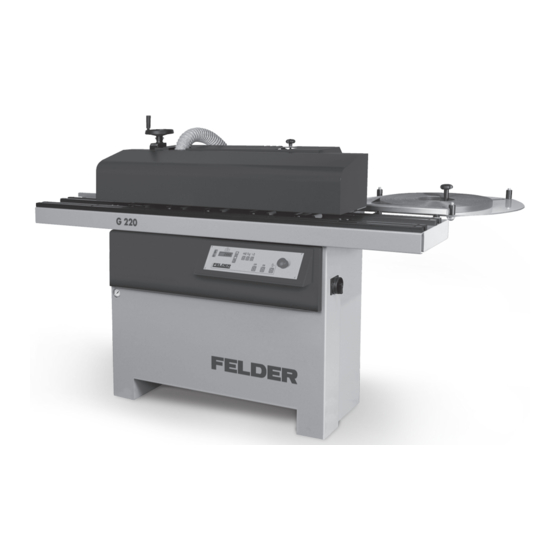
- Page 1 GER = Original operating manual language Other languages = Translation of the original operating manual Edgebander with glue pot G 200 / G 220 Keep this manual handy and in good condition for continual reference! Dok.ID: 016-0-00502 • Englisch • 2021-04-09...
- Page 2 Please note, that depending on the model of the machine, not all described functions are present, or additional functions and buttons are available (e.g. machines with special functions). FELDER A product of the FELDER GROUP! FELDER KG KR-Felder-Straße 1, 6060 Hall in Tirol, AUSTRIA Tel.
-
Page 3: Table Of Contents
Edgebander with glue pot G 200 / G 220 Table of contents Table of Contents 1 General ......................5 1.1 Explanation of symbols ....................5 1.2 Information regarding the manual ..................5 1.3 Liability and warranty .....................6 1.4 Copyright ........................6 1.5 Warranty notice ......................6 1.6 Spare parts ........................6... - Page 4 Edgebander with glue pot G 200 / G 220 Table of Contents 8.Making adjustments and preparations ............24 8.1 Safety instructions ......................24 8.2 Edge tape positioning ....................24 8.3 Edge tape feeding ......................25 8.4 Tailor edge band from coil ....................25 8.5 Edge tape fence ......................26 8.6 Infeed fence ........................26...
-
Page 5: General
Edgebander with glue pot G 200 / G 220 General 1 General 1.1 Explanation of symbols Important technical safety instructions in this manual are these particular cases, special attention must be paid in marked with symbols. order to avoid accidents, injury to persons or material These instructions for work safety must be followed. -
Page 6: Liability And Warranty
Edgebander with glue pot G 200 / G 220 General 1.3 Liability and warranty The contents and instructions in this manual were com- scale. The actual delivery contents are dependent on piled in consideration of current regulations and state of... -
Page 7: Disposal
Edgebander with glue pot G 200 / G 220 General 1.7 Disposal If the machine is to be disposed of, separate the com- jeopardise public health. International environmental ponents into the various materials groups in order to regulations and local disposal laws must always be allow them to be reused or selectively disposed of. -
Page 8: Safety
Edgebander with glue pot G 200 / G 220 Safety 2 Safety At the time of its development and production, the machi- mise safety and ensure the safe and trouble-free operati- ne was built in accordance with prevailing technological on of the machine. -
Page 9: Responsibilities Of The Owner Operator
Edgebander with glue pot G 200 / G 220 Safety 2.4 Responsibilities of the owner operator This manual must be kept in the immediate vicinity of as well as current environmental stipulations that apply to the machine and be accessible at all times to all persons the operational range of the machine. -
Page 10: Personal Safety
Edgebander with glue pot G 200 / G 220 Safety 2.7 Personal safety When working on or with the machine, the following must be strictly observed: Persons with long hair who are not wearing a hairnet are not permitted to work on or with the machine. -
Page 11: Other Risks
Edgebander with glue pot G 200 / G 220 Safety 2.9 Other risks Warning! Risk of injury! Even if the safety measures are complied with, there are still certain associated risks that must be considered when working on the machine: • Be wary of sharp edges to avoid cutting yourself, in... -
Page 12: Declaration Of Conformity
Edgebander with glue pot G 200 / G 220 Declaration of Conformity 3 Declaration of Conformity EC-Declaration of Conformity according to Machine Guidelines 2006/42/EC We hereby declare that the machine indicated below, which corresponds to the design and construction of the model we placed on the market, conforms with the health and safety requirements as stated by the EC. -
Page 13: Specifications
Edgebander with glue pot G 200 / G 220 Technical data 4 Specifications Edge thickness 0,4 – 2 mm Workpiece feed speed 5,5 m/min | 7,0 m/min (Valid from 2020) Speed Spindle moulder unit 9000 min-1 Ø-WIDIA moulder 70 mm... -
Page 14: Electrical Connection
Edgebander with glue pot G 200 / G 220 Technical data 4.4 Electrical connection mains voltage according to specification plate ±10% Safeguarding see circuit plan Power supply cord (H07RN-F) 3x2,5 mm²/ 5x2,5 mm² Triggering characteristic Warning! Danger! Electric current! All electrical repairs must be carried out by a qualified electrician. -
Page 15: Pneumatic Connection
Edgebander with glue pot G 200 / G 220 Technical data 4.6 Pneumatic connection The machine is equipped with a compressed air connec- tion. Always connect the machine to the compressed air unit. Open plate door and with knob adjust the pressure to 6,5 bar. -
Page 16: Assembly
Edgebander with glue pot G 200 / G 220 Assembly 5 Assembly 5.1 Overview & " & " Fig. 3: Overview 1 Fig. 4: Overview 2 Panel belt feeder Height adjustment Workpiece " " Machine frame Top flush trimming adjustment... -
Page 17: Electrical Operation
Edgebander with glue pot G 200 / G 220 Assembly 5.3 Electrical operation " & / ( Fig. 6: Electrical operation Thermoregulator to control the temperature of the glue Heated guide ruler (Option G300) pot with double display Start/Stop buttons for the unit... -
Page 18: Transport, Packaging And Storage
Edgebander with glue pot G 200 / G 220 Transport, packaging and storage 6 Transport, packaging and storage 6.1 Safety instructions Warning! Risk of injury: There is a risk of injury due to falling parts while transporting, loading or unloading the machine. -
Page 19: Transport Inspection
Edgebander with glue pot G 200 / G 220 Transport, packaging and storage 6.3 Transport inspection Upon arrival, inspect the shipment to ensure that it is For all defects that are not discovered upon delivery, be complete and has not suffered any damage. -
Page 20: Setup And Installation
Edgebander with glue pot G 200 / G 220 Setup and installation 7 Setup and installation 7.1 Safety instructions Warning! Risk of injury: Improper assembly and installation can lead to serious bodily injury or equipment damage. For this reason this work may only be carried out by authorised, trained personnel who are familiar with the operation of the machine and in strict observance of all safety instructions. -
Page 21: Space Requirements/ Measurements
The machine can also be bolted to the floor if required. 1800 2040 Fig. 9: Space requirements G 200 The workspace shown in the picture makes it possible for the operator to operate the control elements easily. The workspace for maintenance and cleaning is also pictured. -
Page 22: Dust Extraction
Warning! Risk of injury! The dust extraction hose must be non-flammable and must not conduct electricity! For this reason, only use genuine FELDER dust extraction hoses! Note: As a rule, all units must be vacuumed during use. A time delayed socket is available as an accessory. -
Page 23: Electrical Connection
Only hook up the machine if the two sets of data correspond to each other. Note: The machine‘s circuit box may only be opened with the express consent of the FELDER service team. Vio- lating this stipulation shall render the right to make claims under the warranty null and void. -
Page 24: Making Adjustments And Preparations
Edgebander with glue pot G 200 / G 220 Making adjustments and preparations 8.Making adjustments and preparations 8.1 Safety instructions Warning! Risk of injury: Improper adjustment and working setup can lead to serious bodily injury or material damage. For this reason this work may only be carried out by authorised, trained personnel who are familiar with the operation of the machine and in strict observance of all safety instructions. -
Page 25: Edge Tape Feeding
Edgebander with glue pot G 200 / G 220 Making adjustments and preparations 8.3 Edge tape feeding The function of this unit is to bring the edge tape and the workpiece together (up to the first pressure roller. To clamp a new edge tape you can pivot the roll by using knob. -
Page 26: Edge Tape Fence
Edgebander with glue pot G 200 / G 220 Making adjustments and preparations 8.5 Edge tape fence Pull the tape manually until it reaches the edge guides. The lower guide is adjusted to the height of the worktab- The fence must be adjusted to the width of the edge tape "... -
Page 27: Pneumatic Shears With Trail
Edgebander with glue pot G 200 / G 220 Making adjustments and preparations 8.7 Pneumatic shears with trail " This unit is relevant to dislodge the protrusion of the tape (at the outset and the end). As soon as the workpiece passes the valve, the shear cuts of the protrusion at the beginning. -
Page 28: Height Adjustment Workpiece Feeder
Edgebander with glue pot G 200 / G 220 Making adjustments and preparations 8.8.1 Height adjustment workpiece feeder Before you change the height of the workpiece feeder open handle. The hand wheel adjusts the height of the workpiece thick- ness. You can see the measure on the display. -
Page 29: Processing Of Thin Workpieces
Edgebander with glue pot G 200 / G 220 Making adjustments and preparations 8.8.3 Processing of thin workpieces If the workpiece to be machined is narrower than the drive belt (smaller then width of 72 mm) you must edge tape the workpiece together with a wooden plate of the same type and thickness. -
Page 30: Glue Pot
Edgebander with glue pot G 200 / G 220 Making adjustments and preparations 8.9 Glue pot " ! The glue pot unit has the function to heat the glue to up to working temperature and to spread the hot melting glue on the workpiece to be edged. -
Page 31: Control Of Thermostat
Edgebander with glue pot G 200 / G 220 Making adjustments and preparations 8.10 Control of thermostat The five touch-sensitive membrane keys on the front panel are used to program and operate the display. Depending on the operating mode, the keys may have additional functions "... -
Page 32: Setting The Glue Temperature
Edgebander with glue pot G 200 / G 220 Making adjustments and preparations 8.10.1 Setting the glue temperature Note: The machine has an automatic temperature reduction system: If the machine is idle for 20 minutes the temperature will reduce automatically to the SP2 value specified. -
Page 33: Display Machine Information / Setup
Use the arrow keys to scroll through parameters: " 3. Save changes with >OK< key and exit menu. Display of the maintenance intervals (Countdown) The setting is carried out by FELDER employees on § delivery. The following value appears in the display >LUB<: Reset meter: OFF key - press and hold (approx. -
Page 34: Flush Trimming Unit
Edgebander with glue pot G 200 / G 220 Making adjustments and preparations 8.11 Flush trimming unit 8.11.1 Flush trimming unit This unit is used to trim the edge protrusion on both workpiece sides. It depends on the trimming unit and workpiece thickness to do a sharp, beveled or a round- ed edge. -
Page 35: Option Flush Trimming Unit
Edgebander with glue pot G 200 / G 220 Making adjustments and preparations 8.11.2 Option Flush trimming unit The machine can be equipped with tracing ball bearings or with a tracing roller. Both systems can be adjusted with the screws. Always the same rotations on both "... -
Page 36: Operation
Edgebander with glue pot G 200 / G 220 Operation 9 Operation 9.1 Safety instructions Warning: Risk of injury: Improper operation may lead to severe bodily injury or material damage. For this reason this work may only be carried out by authorised, trained personnel who are familiar with the operati- on of the machine and in strict observance of all safety instructions. -
Page 37: Switching On The Machine
Edgebander with glue pot G 200 / G 220 Operation 9.2 Switching on the machine Warning: Risk of injury due to insufficient preparation! It is only permitted to switch on the machine if, for the work at hand, the required preconditions are fulfilled and any preliminary work is completed. -
Page 38: Handling Of Shaping Tools
Edgebander with glue pot G 200 / G 220 Operation 9.5.3 Handling of shaping tools Shaping tools must be handled with special care. If possible, use special protective containers or hanging arrangements for storage. 9.5.4 Processing phases It is quite simple to obtain good edge banding results;... -
Page 39: Maintenance
Edgebander with glue pot G 200 / G 220 Maintenance 10 Maintenance 10.1 Safety instructions Warning! Risk of injury: Improper maintenance can cause serious injury or damage. For this reason this work may only be carried out by authorised, trained personnel who are familiar with the operation of the machine and in strict observance of all safety instructions. -
Page 40: Lubrication
Edgebander with glue pot G 200 / G 220 Maintenance 10.3.2 Lubrication Generally there is no lubrication necessary, because the bushes and linear guiding are self-lubricating. ball bearings are free of maintenance and the sliding 10.3.3 Exchanging tools Exchanging tools of edge tape cutting unit: 1. - Page 41 Edgebander with glue pot G 200 / G 220 Maintenance Exchanging turn cutter plates flush trimming: • Upper flush trimmer: Loosen the screws, which hold the extraction hood. Pull out extraction hood. The upper shaper is laid open and you can change the whole shaper and also turn cutter plates comfortably.
-
Page 42: Adjustable Rollers On The Table
Edgebander with glue pot G 200 / G 220 Maintenance 10.3.4 Adjustable rollers on the table This model is equipped with small adjustable rollers on the table, besides making more efficient the panel feeding it also assure side pressure. To adjust the side pressure slacken the screws, move the roller with the right tilt. -
Page 43: Replacing Fuses/ Re-Setting Automatic Switches
Edgebander with glue pot G 200 / G 220 Maintenance 10.3.6 Replacing fuses/ Re-setting automatic switches Access the electrical box in the control system panel to replace the fuses. Proceed as follows: • Switch off the main power supply. • Position the main switch on 0/OFF and padlock it. -
Page 44: Replacing The Burnt Glue
Edgebander with glue pot G 200 / G 220 Maintenance 10.3.7 Replacing the burnt glue Warning! Risk of burns and serious injuries! During filling and re-filling, periodic maintenance and whilst cleaning the glue pot, be aware that the glue has an operational temperature of 200°C. -
Page 45: Safety Instructions About The Hot Melt Adhesives
Edgebander with glue pot G 200 / G 220 Maintenance 10.3.8 Safety instructions about the hot melt adhesives Environmentally Harmful Do not smoke unfriendly Excerpt from the safety data sheets Please read the complete data sheet of each hot melt adhesive! -
Page 46: Faults
Edgebander with glue pot G 200 / G 220 Faults 11 Faults 11.1 Safety instructions Warning! Risk of injury: Repairing faults incorrectly can result in personal injury or damage the machine. For this reason this work may only be carried out by authorised, trained personnel who are familiar with the ope- ration of the machine and in strict observance of all safety instructions. - Page 48 © Felder KG KR-FELDER-STR.1 A-6060 Hall in Tirol Tel.: +43 (0) 5223 / 58 50 0 Fax: +43 (0) 5223 / 56 13 0 Email: info@felder.at Internet: www.felder.at...
Need help?
Do you have a question about the G 200 and is the answer not in the manual?
Questions and answers