
Related Manuals for Electrolux EVL8E00X


Summary of Contents for Electrolux EVL8E00X
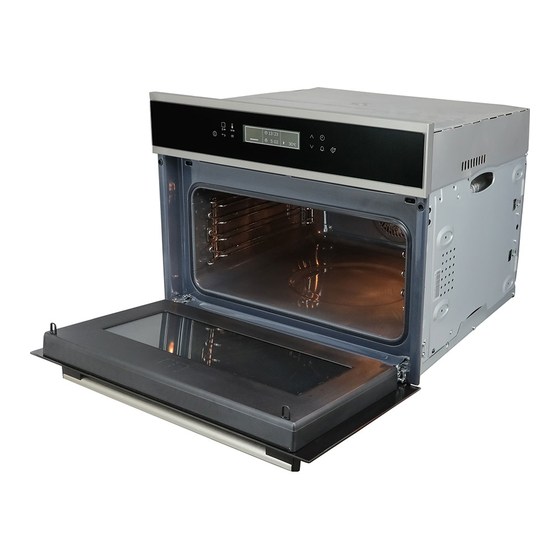
- Page 1 EVL8E00X EVL8E00Z KVLBE00X Microwave combi-oven User Manual Get the most out of your appliance For quick access to manuals, how-to guides, support and more through our photo registration visit electrolux.com/register...
-
Page 2: Table Of Contents
14. ENERGY EFFICIENCY.................. 39 WE’RE THINKING OF YOU Thank you for purchasing an Electrolux appliance. You’ve chosen a product that brings with it decades of professional experience and innovation. Ingenious and stylish, it has been designed with you in mind. So whenever you use it, you can be safe in the knowledge that you’ll get great results every time. -
Page 3: Safety Information
ENGLISH SAFETY INFORMATION Before the installation and use of the appliance, carefully read the supplied instructions. The manufacturer is not responsible for any injuries or damages that are the result of incorrect installation or usage. Always keep the instructions in a safe and accessible location for future reference. - Page 4 Always use oven gloves to remove or put in • accessories or ovenware. Before carrying out any maintenance, disconnect the • appliance from the power supply. Ensure that the appliance is switched off before • replacing the lamp to avoid the possibility of electric shock.
-
Page 5: Safety Instructions
ENGLISH The appliance is intended for heating food and • beverages. Drying of food or clothing and heating of warming pads, slippers, sponges, damp cloth and similar may lead to risk of injury, ignition or fire. If smoke is emitted, switch off or unplug the appliance •... - Page 6 • Do not use multi-plug adapters and • Do not operate the appliance with wet extension cables. hands or when it has contact with • Make sure not to cause damage to water. the mains plug and to the mains •...
- Page 7 ENGLISH close the furniture panel until the • If you use an oven spray, follow the appliance has cooled down safety instruction on it's packaging. completely after use. • Do not clean the catalytic enamel (if applicable) with any kind of detergent. 2.4 Care and cleaning 2.5 Internal lighting WARNING!
-
Page 8: Product Description
3. PRODUCT DESCRIPTION 3.1 General overview Control panel Electronic programmer Heating element Microwave generator Lamp Shelf support, removable Shelf positions 3.2 Accessories Baking tray Wire shelf For cakes and biscuits. For cookware, cake tins, roasts. 4. CONTROL PANEL 4.1 Electronic programmer 9 10 Use the sensor fields to operate the appliance. - Page 9 ENGLISH Sensor Function Comment field ON / OFF To activate and deactivate the appliance. Heating Func‐ Touch the sensor field once to choose a heat‐ tions or Recipes ing function or the menu: Recipes. Touch the sensor field again to switch between the me‐ nus: Heating Functions, Recipes.
-
Page 10: Before First Use
4.2 Display A. Heating function or Microwave function B. Time of day C. Heat-up indicator D. Temperature or power of the microwave E. Duration time or end time of a function Other indicators of the display: Symbol Function Minute Minder The function works. -
Page 11: Daily Use
ENGLISH the language, the display contrast, the 1. Press to set the value. display brightness and the time of the 2. Press to confirm. day. 6. DAILY USE WARNING! Symbol / Menu Description Refer to Safety chapters. item 6.1 Navigating the menus When ON, the dis‐... - Page 12 Symbol / Menu Description Heating func‐ Application item tion Activation / deactiva‐ To roast larger meat tion code: 2468. joints or poultry with DEMO mode bones on one shelf Turbo Grilling position. To make gra‐ Shows the software tins and to brown.
- Page 13 ENGLISH Heating func‐ Application Heating func‐ Application tion tion Use this function to For dishes such as prepare bread and lasagna or potato bread rolls with a gratin. To make gra‐ Bread Baking Au Gratin very good professio‐ tins and to brown. nal-like result in terms of crispiness, 6.5 Setting a heating function...
- Page 14 Each press of adds 30 seconds to If you press or open the the Duration time. door, the function stops. To You can change the start it again, press microwave power (refer to "Setting the Microwave The maximum time of microwave function").
-
Page 15: Clock Functions
ENGLISH 7. CLOCK FUNCTIONS 7.1 Clock functions table 7.2 Setting the clock functions Before you use the Clock func‐ Application functions: Duration, End tion Time, you must set a heating function and temperature To set a countdown Minute first. The oven turns off (max. -
Page 16: Automatic Programmes
7.4 Time Extension 1. When the cooking time ends, a signal sounds. Press any symbol. The function: Time Extension makes the The display shows the message. heating function continue after the end of 2. Press to turn on or to cancel. -
Page 17: Additional Functions
ENGLISH Push the shelf between the guide bars of Wire shelf and baking tray together: the shelf support and make sure that the Push the baking tray between the guide feet point down. bars of the shelf support and the wire shelf on the guide bars above. - Page 18 Press any symbol (except for ) to start Activating the programme the function: Set + Go. The set heating 1. Turn on the oven. function starts. 2. Select the menu: Favourites. When the heating function ends, a signal 3. Press to confirm.
-
Page 19: Hints And Tips
ENGLISH 10.7 Cooling fan surfaces of the oven cool. If you turn off the oven, the cooling fan can continues When the oven operates, the cooling fan to operate until the oven cools down. turns on automatically to keep the 11. - Page 20 11.3 Microwave suitable cookware and materials For the microwave use only suitable cookware and materials. Use below table as a reference. Cookware / Material Microwave function Microwave Combi function Defrost‐ Heating, Cooking Ovenproof glass and porcelain with no metal components, e.g. heat-...
- Page 21 ENGLISH 11.4 Advice for special heating Remove the food packaging and put the food on a plate. Do not cover the food, functions of the oven as it can extend the defrosting time. Use the first shelf position. Keep Warm 11.5 Baking The function allows you to keep food warm.
- Page 22 Baking results Possible cause Remedy The cake is not ready The oven temperature is The next time you bake, set a in the baking time giv‐ too low. slightly higher oven tempera‐ ture. 11.7 Baking on one oven level...
- Page 23 ENGLISH Food Function Tempera‐ Time (min) Shelf posi‐ ture (°C) tion Conventional Bread (rye bread) Cooking first then 160 - 180 30 - 60 Conventional 190 - 210 20 - 35 Cream puffs / Eclairs Cooking Conventional 180 - 200 10 - 20 Swiss Roll Cooking...
- Page 24 Food Function Tempera‐ Time (min) Shelf posi‐ ture (°C) tion Biscuits made with True Fan 150 - 160 15 - 20 sponge mixture Cooking Pastries made with True Fan 80 - 100 120 - 150 egg white, meringues Cooking...
- Page 25 ENGLISH 11.9 Multilevel baking Use the function: True Fan Cooking. Cakes / pastries / breads on baking trays Food Temperature (°C) Time (min) Shelf posi‐ tion Cream puffs / 160 - 180 25 - 45 1 / 3 Eclairs Dry streusel cake 150 - 160 30 - 45 1 / 3...
- Page 26 Food Quantity (kg) Temperature Time (min) Shelf posi‐ (°C) tion Fillet of beef 1 - 1.5 90 - 110 Roast veal 1 - 1.5 120 - 150 Steak 0.2 - 0.3 20 - 40 11.11 Pizza Setting Food Temperature (°C) Time (min)
- Page 27 ENGLISH 11.13 Roasting tables Beef Food Func‐ Quantity Power Tempera‐ Time (min) Shelf po‐ tion (kg) (Watts) ture (°C) sition Pot roast Conven‐ 1 - 1.5 60 - 80 tional Cooking Pork Food Func‐ Quantity Power Tempera‐ Time (min) Shelf po‐ tion (kg) (Watts)
- Page 28 Food Func‐ Quantity Power Tempera‐ Time (min) Shelf tion (kg) (Watts) ture (°C) position Chicken Turbo 1 - 1.5 190 - 210 30 - 45 poulard Grilling Duck Turbo 1.5 - 2 180 - 200 45 - 65 Grilling...
- Page 29 ENGLISH Grill Food Temperature Time (min) Shelf position (°C) 1st side 2nd side Roast beef, 210 - 230 30 - 40 30 - 40 medium Filet of beef, 20 - 30 20 - 30 medium Back of pork 210 - 230 30 - 40 30 - 40 Back of veal...
- Page 30 Frozen Ready Meals Table Food Function Tempera‐ Time (min) Shelf position ture (°C) Conventional as per as per manufac‐ Frozen pizza Cooking manufac‐ turer's instruc‐ turer's in‐ tions structions Conventional 200 - 220 as per manufac‐ Chips (300 - Cooking or Turbo turer's instruc‐...
- Page 31 ENGLISH 11.17 Preserving The jars cannot touch each other. Put approximately 1/2 litre of water into Use only preserve jars of the same the baking tray to give sufficient moisture dimensions available on the market. in the oven. Do not use jars with twist-off and bayonet When the liquid in the jars starts to type lids or metal tins.
- Page 32 Food Temperature (°C) Time (h) Shelf position Mushrooms 50 - 60 6 - 8 Herbs 40 - 50 2 - 3 Plums 60 - 70 8 - 10 Apricots 60 - 70 8 - 10 Apple slices 60 - 70...
- Page 33 ENGLISH Defrosting meat Food Power Time (min) Standing time (Watts) (min) Steak (0.2 kg) 5 - 7 5 - 10 Minced meat (0.5 kg) 10 - 15 5 - 10 Defrosting poultry Food Power Time (min) Standing time (Watts) (min) Chicken (1 kg) 25 - 30 10 - 20...
- Page 34 Reheating Food Power Time (min) Standing time (Watts) (min) Baby food in jars (0.2 kg) 1 - 2 Baby milk (180 ml); Put 0:20 - 0:40 spoon into the bottle Convenience food (0.5 kg) 6 - 9 2 - 5 Frozen ready meals (0.5...
- Page 35 ENGLISH Food Ovenware Pow‐ Tem‐ Time Shelf Standing pera‐ (min) posi‐ time (min) (Watt ture tion (°C) 2 chicken Round glass dish, Ø halves (2 x 26 cm 0.55 kg) Au gratin po‐ Gratin dish tatoes (1 kg) Roast pork Glass dish with strain‐...
-
Page 36: Care And Cleaning
Food Power Quanti‐ Shelf po‐ Time (min) Comments (Watts) ty (kg) sition Sponge 0.475 Bottom 7 - 9 Turn container around cake by 1/4, halfway through the cooking time. Meatloaf 25 - 32 Turn container around by 1/4, halfway through the cooking time. -
Page 37: Troubleshooting
ENGLISH 12.1 Notes on cleaning 2. Pull the front end of the shelf support away from the side wall. Clean the front of the oven with a soft 3. Pull the supports out of the rear cloth with warm water and a mild catch. - Page 38 13.1 What to do if... Problem Possible cause Remedy You cannot activate or op‐ The oven is not connected Check if the oven is cor‐ erate the oven. to an electrical supply or it rectly connected to the is connected incorrectly.
-
Page 39: Energy Efficiency
ENGLISH 13.2 Service data plate is on the front frame of the oven cavity. Do not remove the rating plate If you cannot find a solution to the from the oven cavity. problem yourself, contact your dealer or an Authorised Service Centre. The necessary data for the service centre is on the rating plate. - Page 40 www.electrolux.com/shop...
Need help?
Do you have a question about the EVL8E00X and is the answer not in the manual?
Questions and answers