Table of Contents
Advertisement
Legacy
1
Patient Information
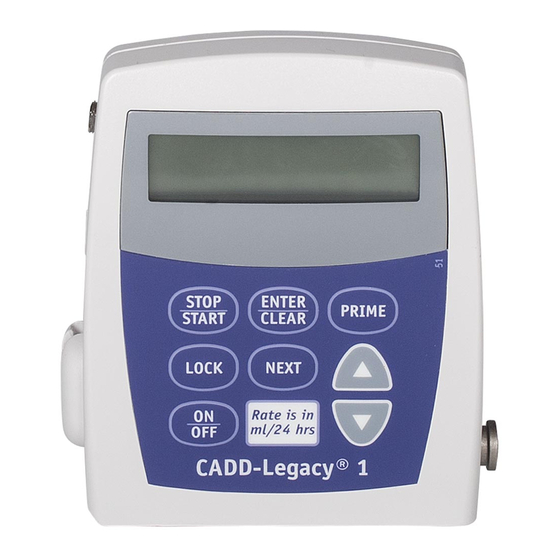
CADD-Legacy
1
®
Ambulatory Infusion Pump
Model 6400
CONTINUOUS DELIVERY
Rate is in
mL/24 hrs
This guide is intended to supplement
instructions on how to operate the pump supplied
by your Clinician. Perform only those procedures for
which you have received training by your Clinician.
Advertisement
Table of Contents

Related Manuals for Smiths Medical CADD-Legacy 1


Summary of Contents for Smiths Medical CADD-Legacy 1
- Page 1 Legacy Patient Information CADD-Legacy ® Ambulatory Infusion Pump Model 6400 CONTINUOUS DELIVERY Rate is in mL/24 hrs This guide is intended to supplement instructions on how to operate the pump supplied by your Clinician. Perform only those procedures for which you have received training by your Clinician.
-
Page 2: Table Of Contents
Table of Contents Introduction ................... Warnings ....................Cautions ....................CADD-Legacy ® 1 Pump (Diagram) ..........Description of the Keys ............... Installing New Batteries ..............Main Screen .................... 10 Starting the Pump ................11 Stopping the Pump ................12 Turning the Pump On/Off ..............12 Removing a Cassette ................ -
Page 3: Introduction
Introduction Your doctor has recommended that you use the CADD‑Legacy ® 1 pump as part of your treatment. The CADD-Legacy ® 1 pump can be carried with you and is designed to deliver medication into your body. Your physician will prescribe your medication specifically for you. Your prescription is programmed into your pump by your clinician according to your physician’s specific orders. -
Page 4: Warnings
Failure to properly follow warnings, cautions, and instructions could result in damage to the pump or death or serious injury. Warnings • If the pump is used to deliver life-sustaining medication, an additional pump must be available. • Use of a syringe with the CADD ® administration set may result in UNDER-DELIVERY of medication. - Page 5 • Prior to starting infusion, inspect the fluid path for kinks, a closed clamp, or other upstream occlusions, and remove all air bubbles to prevent air embolism. • Close the fluid path tubing with the clamp before removing the cassette from the pump to prevent unregulated gravity infusion.
-
Page 6: Cautions
• Do not clean the pump with acetone, other plastic solvents, or abrasive cleaners. • Do not use the pump in the presence of flammable anesthetics or explosive gases. • Use only Smiths Medical accessories as using other brands may adversely affect the operation of the pump. 10011896-001... -
Page 7: Cadd-Legacy ® 1 Pump (Diagram)
CADD‑Legacy ® 1 Pump (Diagram) Display Power Jack Accessory Jack Battery Compartment AC Indicator Light Air Detector Keypad Cassette (the part of the CADD ™ medication cassette reservoir ® or CADD administration set that attaches to the pump) Display Shows information and messages. AC Indicator Light The green indicator light is on when you are using the AC Adapter to power the pump. -
Page 8: Description Of The Keys
Description of the Keys ⁄ Starts and stops the pump and silences alarms. ¤ Resets the reservoir volume screen. ‹ Fills the tubing to remove air bubbles from the fluid path. Œ Used by the clinician. „ Advances you from one screen to the next and silences alarms. -
Page 9: Installing New Batteries
Installing New Batteries If LowBat or Battery Depleted appears on the screen, you should change the batteries. Use two new, AA alkaline batteries such as the DURACELL ® or EVEREADY ® ENERGIZER ® . Dispose of used batteries in an environmentally safe manner, and according to any regulations which may apply. - Page 10 To install new batteries: Stopping 1. Stop the pump by pressing ---- ---- ---- ⁄ and holding 2. When you see 3 sets of dashes STOPPED ⁄ appear, release 3. Push down and hold the arrow button on the battery door while sliding the door off.
- Page 11 WARNING: If a gap is present anywhere between the battery door and the pump housing, the door is not properly latched. If the battery door becomes detached or loose, the batteries will not be properly secured; this could result in loss of power, non‑delivery of medication, and depending on the type of medication being administered, death or serious injury.
-
Page 12: Main Screen
Main Screen The following screen is what you will see on the pump’s display most of the time. It is called the Main Screen and shows the following: Battery Status When running: (for example, LowBat) Mode of pump ResVol 50.0 ml Reservoir Status of Volume... -
Page 13: Starting The Pump
Starting the Pump When you start the pump, it will automatically review the program, and then begin delivering medication. If the pump will not start, a message should appear on the display. Refer to the Messages and Alarms section on page 21. WARNING: Prior to starting infusion, inspect the fluid path for kinks, a closed clamp, or other upstream occlusions, and remove all air bubbles to prevent air embolism. -
Page 14: Stopping The Pump
Stopping the Pump Stopping the pump stops delivery of medication. ⁄ 1. Press and hold Stopping 2. When you see 3 sets of ⁄ dashes appear, release Stopping ---- ---- ---- STOPPED will appear on the main screen. STOPPED Turning the Pump On/Off When the pump is stopped, you may put the pump into a low power state by turning it off. -
Page 15: Removing A Cassette
Removing a Cassette WARNING: Close the fluid path tubing with the clamp before removing the cassette from the pump to prevent unregulated gravity infusion, which could result in death or serious injury. To remove a cassette: ⁄ 1. Press and hold Stopping 2. -
Page 16: Attaching A Cassette
Attaching a Cassette WARNING: • If you are using a CADD ® administration set or CADD ™ medication cassette reservoir that does not have the flow stop feature (catalog number does not start with 21‑73xx): You must use a CADD ® extension set with an integral Anti‑Siphon Valve or a CADD ®... - Page 17 3. Place the pump upright on a firm, flat surface. Press down so the cassette fits tightly against the pump. 4. Insert a coin into the lock, push in, and turn counterclockwise until the line on the lock lines up with the arrow on the side of the pump and you feel the button click into place.
-
Page 18: Resetting The Reservoir Volume
Resetting the Reservoir Volume 1. Begin at the main screen. • Make sure STOPPED appears on the main screen. „ 2. Press to go to the reservoir volume screen. ¤ 3. Press to reset the Reservoir Volume volume to the programmed 100.0 ml volume. -
Page 19: Priming The Tubing Using The Pump
Priming the Tubing Using the Pump When the new cassette is attached, and the reservoir volume has been reset or changed to reflect the new volume, prime the tubing. 1. Make sure the tubing is disconnected from your access site and the tubing clamp is open. -
Page 20: Inserting The Tubing Into The Air Detector
WARNING: Ensure that the entire fluid path is free of all air bubbles before connecting to your catheter to prevent air embolism. Air embolism could result in death or serious injury. Inserting the Tubing into the Air Detector The Air Detector is designed to detect air bubbles in the fluid path. - Page 21 3. To seat the tubing into the groove, gently pull the tubing, until it is under the retention nubs and flat in the groove. Retention nubs 4. Follow your clinician’s instructions for connecting the tubing to your access site. Open all clamps. WARNING: Ensure that the entire fluid path is free of all air bubbles before connecting to your catheter to prevent air embolism.
-
Page 22: What If I Drop Or Hit The Pump
What if I drop or hit the pump? What should I do if I drop the pump in water? If you accidentally drop the pump in water, retrieve it quickly, dry it off with a towel, and call your clinician. What if I drop the pump or hit it against a hard surface? Immediately do the following: •... -
Page 23: Messages And Alarms
Messages and Alarms If there are alarms or special messages you need to be aware of, the pump will beep or sound an alarm. Most alarms can ⁄ „ be silenced by pressing . Look at the screen and follow the steps in this table. When you see and hear: Take this action: There is air in the tubing... - Page 24 Messages and Alarms When you see and hear: Take this action: There may be a kink in the High Pressure tubing or a clamp may be closed. Unkink the tubing or open the clamp and the Tone alarm pump will resume delivery. ⁄...
- Page 25 Messages and Alarms When you see and hear: Take this action: [No message] With no AC adapter attached, the batteries have been Tone alarm removed while the pump is running. The pump is now stopped and unpowered. Install batteries to silence the alarm.
- Page 26 Messages and Alarms When you see and hear: Take this action: The disposable (CADD ® No Disposable, administration set or Clamp Tubing CADD medication cassette ™ reservoir) has been removed Tone alarm or may have become depleted, or the disposable is not aligned with the pump or is damaged, or a malfunction of the pump sensor(s) is...
- Page 27 Messages and Alarms When you see and hear: Take this action: The pump was running when Power lost while power was removed. Stop pump was on the pump before changing the batteries or removing the Tone alarm ⁄ power source. Press „...
- Page 28 Messages and Alarms When you see and hear: Take this action: Fluid is not flowing from the Upstream Occlusion fluid container to the pump. Check for a kink in the tubing or a closed clamp between Tone alarm fluid container and pump. ⁄...
- Page 29 Your Clinician’s Name: ______________________________________________ Phone Number: ______________________________________ Instructions: Pump placement during bathing/showering: ______________ _____________________________________________________ Pump placement during sleep: _____________________________________________________ _____________________________________________________ Storage of medication:_________________________________ _____________________________________________________ 10011896-001...
- Page 30 Notes 10011896-001...
- Page 32 Smiths Medical International Ltd. 1500 Eureka Park, Lower Pemberton Ashford, Kent, TN25 4BF, UK Tel: +44 (0)1233 722100 www.smiths-medical.com CADD, CADD-Legacy, the CADD design mark and Smiths Medical design mark are ® of Smiths Medical. The symbol indicates the trademark is registered trademarks in the U.S.
Need help?
Do you have a question about the CADD-Legacy 1 and is the answer not in the manual?
Questions and answers