
Related Manuals for Huawei LUNA2000-NHS0


Summary of Contents for Huawei LUNA2000-NHS0
- Page 1 LUNA2000-(5-30)-NHS0 Quick Guide Issue: 03 Part Number: 31500EMB Date: 2021-05-30 HUAWEI TECHNOLOGIES CO., LTD.
- Page 2 (DCDC) (BAT+/BAT–) (4) COM port (COM) (5) Battery cascading terminals (6) DC switch (DC SWITCH) (B+/B–) (7) COM port (COM) (8) Fuse (9) Ground point (10) Battery terminals (BAT- /BAT+) Copyright © Huawei Technologies Co., Ltd. 2021. All rights reserved.
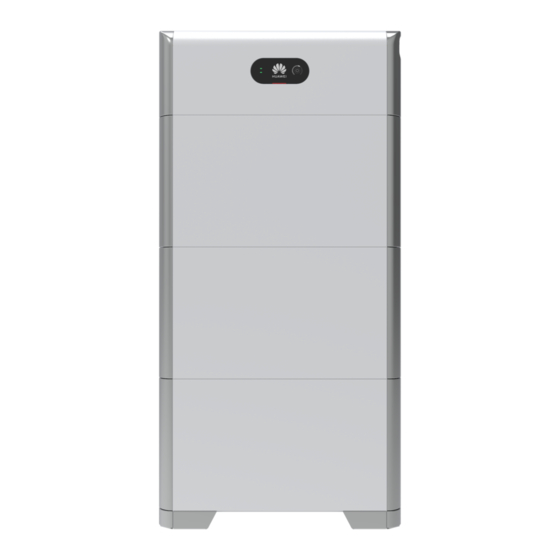
- Page 3 Front view Left view Right view (1) Battery expansion module (2) Boss for alignment (3) Battery cascading terminals (B+/B–) (4) Battery cascading terminals (B+/B–) (5) COM port (COM) (6) Ground point (7) Heat sink (8) Ground point Battery Capacity Description The battery supports power and capacity expansion.
-
Page 4: Installation Environment
Device Installation Installation Requirements Installation Environment Do not use a dropped battery module or a battery module that has been subjected to a strong impact force. Otherwise, safety risks (such as cell leakage and electric shock) may arise. Installation Space INVERTER... - Page 5 Mounting Hole Dimensions DCDC (three PACKs used) Third Battery PACK DCDC (two PACKs used) Second Battery PACK DCDC (one PACK used) First Battery PACK Installing the Floor Support • Avoid drilling holes in the water pipes and cables buried in the wall. The installation position must be far away from water sources such as taps, sewer pipes, and •...
- Page 6 Level Mounting holes for the 15 kWh module Pack mounting holes Mounting holes for the 10 kWh module Wall Baseboard Mounting holes for the 5 kWh module Ground Keep a distance of 10 mm to 15 mm between the support and the wall surface.
- Page 7 Installing Battery Expansion Modules 1. Install the battery expansion modules and power control module on the support. • The following describes how to install the battery expansion modules for a 15 kWh model. The installation of battery expansion modules for 5 kWh and 10 kWh models is the same. •...
-
Page 8: Mounting Hole Dimensions
2. Secure the power control module to the wall. You can adjust the connecting piece vertically to align with the screw holes. 3. Secure the battery expansion modules to the wall by referring to step 2. Wall-mounted Installation Mounting Hole Dimensions DCDC (three PACKs used) Third Battery PACK DCDC (two PACKs used) - Page 9 Installing the Support for Wall-mounted Installation For floor-mounted installation, the base is 50 mm high. If waterproofing requirements cannot be met, the battery can be installed on a wall. The mounting kits need to be purchased separately. For wall- and floor-mounted installation, ensure that the load-bearing capacity meets the requirements (one battery expansion module weighs 50 kg).
- Page 10 Internal Electrical Connections of the Battery Connect cables in accordance with local installation laws and regulations. • • Before connecting cables, ensure that the DC switch on the battery and all the switches connected to the battery are set to OFF. Otherwise, the high voltage of the battery may result in electric shocks.
-
Page 11: Preparing Cables
Connecting Internal Signal Cables Install the internal signal cables described in this section using the three signal cables with a diameter of 5 mm and rubber plugs delivered with the DCDC. Do not use signal cables with a diameter of 7 mm. Terminal of Terminal of battery... - Page 12 • Before connecting cables, ensure that the DC switch on the battery and all the switches connected to the battery are set to OFF. Otherwise, the high voltage of the battery may result in electric shocks. • The DC input power cable and signal cable between the battery and the inverter must be less than or equal to 10 m.
-
Page 13: Installing Dc Input Power Cables
Installing DC Input Power Cables 1. You are advised to connect the battery terminals (BAT+ and BAT–) on the switch side to the inverter and connect the other side to the cascaded battery. 2. The battery terminals use the Staubli MC4 positive and negative metal terminals and DC connectors supplied with the solar inverter. - Page 14 Installing a Signal Cable When laying out a signal cable, separate it from power cables and keep it away from strong • interference sources to prevent communication interruption. • Ensure that the protection layer of the cable is inside the connector, that excess core wires are cut off from the protection layer, that the exposed core wire is totally inserted into the cable hole, and that the cable is connected securely.
- Page 15 COM Port Pin Definitions groove Pins 6 to 10 are close to the groove side. The communications terminals on the inverter side need to be connected to RS485+\RS485-, EN+\EN-, and PE. The communications terminals on the cascading side need to be connected to RS485+\RS485-, EN+\EN-, CANH\CANL, and PE.
- Page 16 Connecting the Communications Terminal to the Inverter Pins 6 to 10 are close to the groove side. Insert the terminals according to the silkscreen number. Click (Optional) Cable Connections in Cascading Scenarios Cascading Networking (1) Communications terminal for cascaded batteries (2) Communications terminal connected to the inverter...
- Page 17 Cascading DC Input Connection Prepare DC connectors and connect DC battery cascading terminals (BAT+ and BAT–) for cascaded batteries. For details, see section 4.4 “Installing DC Input Power Cables”. The positive and negative metal terminals and DC connectors of the Staubli MC4 for cascading need to be purchased. Connecting the Communications Terminal for Cascaded Batteries Pins 6 to 10 are close to the groove side.
- Page 18 Master power distribution panel (1) Self-supporting output Specific load (2) Grid-tied output power distribution panel...
-
Page 19: Verifying The Installation
Number Label Definition Description 12V_OUT+ Used for connecting COM port (COM) OUT+ (Enable+) to the enable signal Battery terminals (BAT-/BAT+) of the battery. 12V_OUT- OUT- (Enable-) RS485A1 Used for connecting to the RS485 signal RS485B1 ports of the battery. Verifying the Installation Installing the Cover After electrical connections are complete, check that cables are correctly and securely connected, install the external protective cover, and secure it using screws. -
Page 20: System Power-On
Verifying the Installation Acceptance Criterion The battery is installed correctly and securely. The cables are routed properly as required by the customer. Cable ties are secured evenly and no burr exists. The ground cable is connected correctly and securely. The battery switch and all switches connected to the battery are OFF. The DC input power cables and signal cables are connected correctly and securely. -
Page 21: Device Commissioning
Type Status (blinking at long intervals: Meaning On for 1s and then Off for 1s; Blinking at short Intervals: On for 0.2s and then Off for 0.2s) Battery system indication Display green Indicates battery level. One bar represents 10%. The first three bars indicate the number of Steady red faulty battery expansion modules. - Page 22 Method 1: Search for FusionSolar on Huawei AppGallery and download the latest installation package. Method 2: Access https://solar.huawei.com using the mobile phone browser and download the latest installation package. Method 3: Scan the following QR code and download the latest installation package.
-
Page 23: Quick Settings
Connecting SmartLogger Log in to the FusionSolar app. Choose My > Device commissioning, and scan the QR code on the SmartLogger or manually connect to the WLAN hotspot of the SmartLogger to connect to the SmartLogger. Log in to the SmartLogger as user installer. Quick Settings Quick SmartLogger configuration is not supported when the language of your phone is set to English. -
Page 24: Maintenance And Upgrade
4.95KTL-JPL1(COM1-12) 4.95KTL-JPL1(COM1-13) 7.2.4 Maintenance and Upgrade Battery Upgrade When the network is connected, the app connection screen, tap > File download in the upper- right corner. Then on the home screen, choose Maintenance > Upgrade device to upgrade the battery version. Storage and Recharging Fuse Replacement If a fuse needs to be replaced, replace it by... - Page 25 Statement System Commissioning(SmartLogger Web) 1. The operating system of Windows 7 or later is supported. 2. The WebUI snapshots are for reference only, and the actual display may vary. Preparations and WebUI Login 7.3.1 1. Connect the network cable between the network port on the PC and the SmartLogger. 2.
- Page 26 7.3.2 Commissioning Through Deployment Wizard Parameter Description 1. Enter https://XX.XX.XX.XX in the address box of the browser (XX.XX.XX.XX is the Language Set this parameter as required. default IP address of the SmartLogger). If User name Select admin. you log in to the WebUI for the first time, a security risk warning is displayed.
-
Page 27: Customer Service Contact
5. The device damage caused by the violation of instructions in this document is not covered under warranty. 6. The cable colors involved in this document are for reference only. Select cables in accordance with local cable specifications. Customer Service Contact Customer Service Contact Information Region Country Hotline Email Japan Japan Japan_ESC@ms.huawei.com 0120258367... - Page 28 Huawei Technologies Co., Ltd. Huawei Industrial Base, Bantian, Longgang Shenzhen 518129 People's Republic of China solar.huawei.com...